


This topic describes how to install and configure Microsoft Azure Service Broker.
Step 1: Set up Azure
In this step, you configure your Azure account to allow the Microsoft Azure Service Broker to create and manage Azure resources.
-
Create an Azure account by following these steps.
-
Create a service principal by following these steps.
Note: The Contributor role needs to be assigned to the service principal.
Step 2: Create a Service Broker Database
Microsoft Azure Service Broker stores information, for example the provisioning information of a service instance, in the database. Follow these steps to create a SQL database on Azure.
Step 3: Install and Configure Microsoft Azure Service Broker
-
Download the product file from Pivotal Network.
-
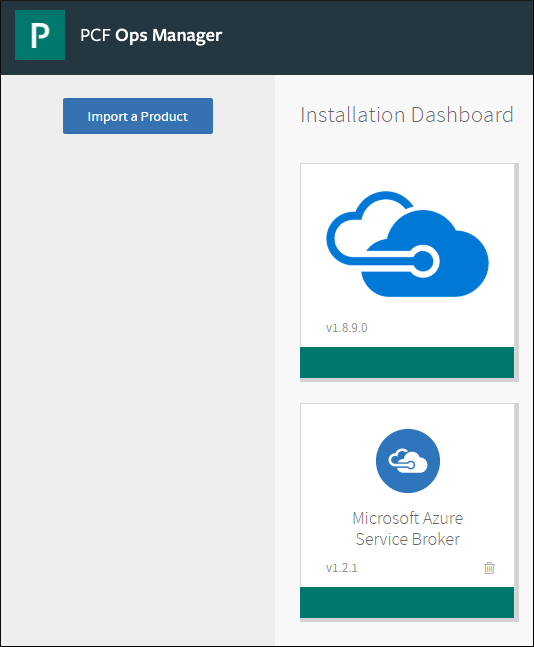
Navigate to the Ops Manager Installation Dashboard and click Import a Product to upload the product file.
-
Click Add next to the uploaded Microsoft Azure Service Broker tile in the Ops Manager Available Products view to add it to your staging area.
-
Click the newly added Microsoft Azure Service Broker tile to configure the sections as described below. After the configuration, return to the Ops Manager Installation Dashboard and click Apply Changes to install Microsoft Azure Service Broker tile.
Azure Config
The setup in Step 1 must be successfully completed before beginning this configuration. You will need the Azure and database parameters from that step to successfully configure the broker.
-
Click Azure Config.
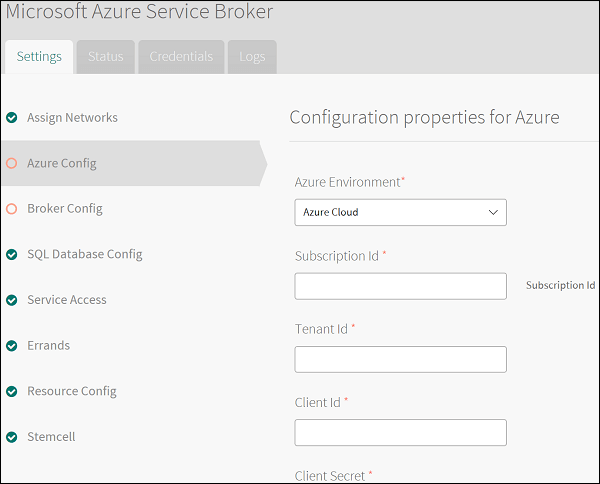
-
For Azure Environment, if you want to create Azure resource in mainland China, select
Azure China Cloud. Otherwise, selectAzure Cloud. -
Enter the Subscription Id from Step 1.
-
Enter the Tenant Id, Client Id and Client Secret from Step 1.
-
Click Save.
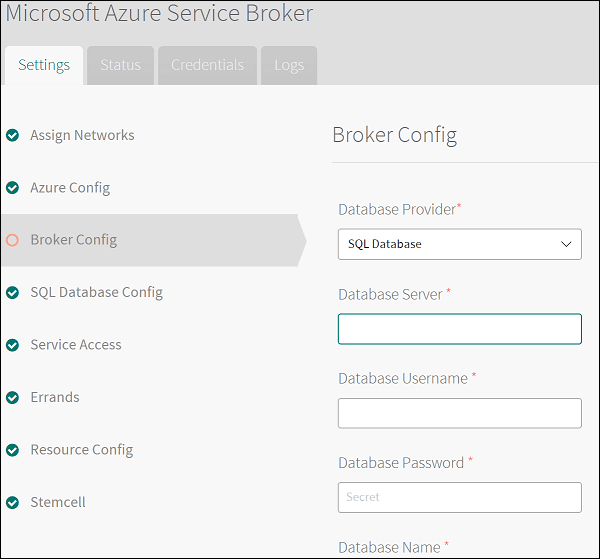
Broker Config
-
Click Broker Config.
-
For Database Provider, select the database type. At the current time, only
SQL Databaseis supported. -
For Database Server, enter the endpoint, for example
SQL-SERVER-NAME.database.windows.net, or the IP address of the SQL database. -
For Database Username and Database Password, enter your database credentials.
-
For Database Name, enter the name of the database where the Microsoft Azure Service Broker can store information.
-
For Database Encryption Key, enter the key to encrypt the sensitive information which are stored in the database. It should be a 32-character fixed-length string. If the key is forgotten, all sensitive information in the database will never be decrypted.
-
Click Save.
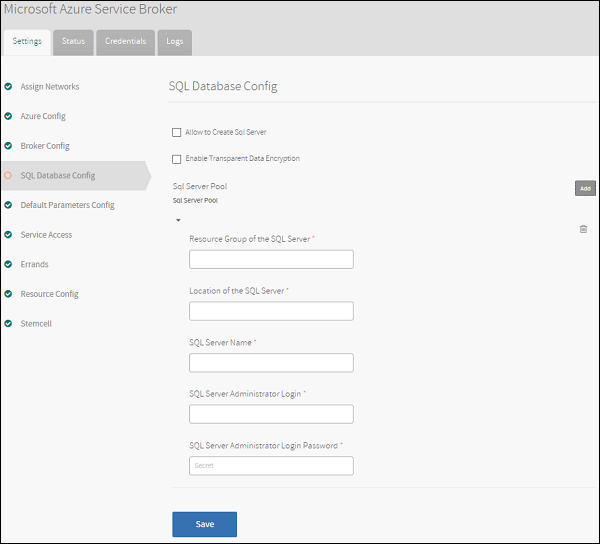
SQL Database Config
-
Click SQL Database Config.
-
For Allow to Create Sql Server, select the checkbox if you want to allow the developers to create the SQL server through the service broker.
-
For Enable Transparent Data Encryption, select the checkbox if you want to create SQL Database with Transparent Data Encryption enabled by default.
-
If you did not select Allow to Create Sql Server, you must create a SQL server on Azure for developers to create databases:
- Click Add.
- Enter values for the following fields: Resource Group of the SQL Server, Location of the SQL Server, SQL Server Name, SQL Server Administrator Login, and SQL Server Administrator Login Password.
-
Click Save.
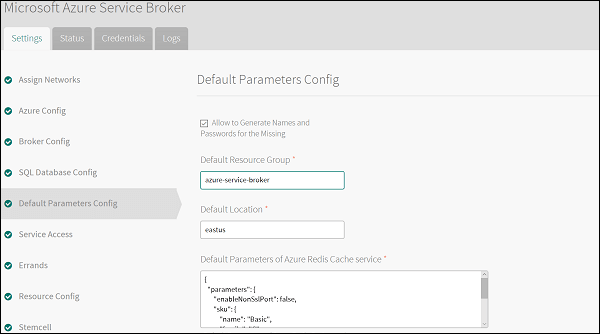
Default Parameters Config
-
Click Default Parameters Config.
-
If
Allow to Generate Names and Passwords for the Missingchecked, the broker can fix those missing names and passwords in the parameters for creating service instances. Checkgenerated-stringin the json examples in Using Azure Service Broker for details. -
Default Resource GroupandDefault Locationcan be set to fix missing resource group and location in the parameters for creating service instances. -
For each service, you can set default parameters for it. The broker can fix those missing parameters in the parameters for creating service instances. Set them with
{}if you don’t require any fixing. The priority of this rule is higher than the rules above. -
Click Save.
Step 4: Confirm Installation
Note: The Microsoft Azure Service Broker installs an app named azure-services-broker in the azure-service-broker-space space of the system org.
-
After Ops Manager finishes the installation, the Microsoft Azure Service Broker appears as a green tile in the Installation Dashboard.
-
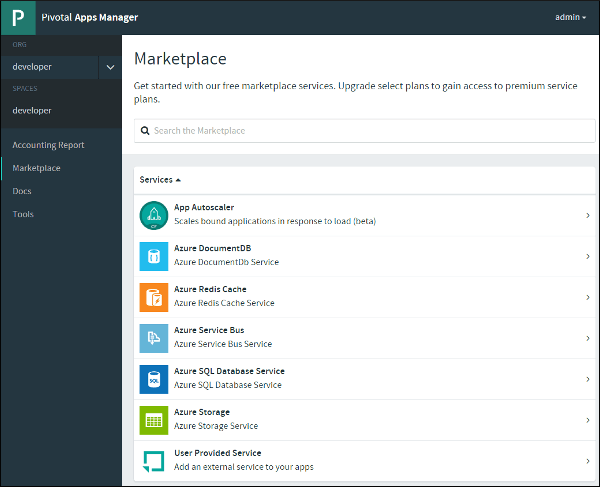
In Apps Manager, the new services are listed in the Marketplace, and are exposed to all orgs and spaces. Users can create instances of these services only by using the Cloud Foundry Command Line Interface (cf CLI) because Apps Manager does not support asynchronous services. See the Using Microsoft Azure Service Broker topic for more information.
Step 5: Confirm Service and Plan Access
The Microsoft Azure Service Broker is installed with all services enabled by default. All services can be listed in the Marketplace.
You can disable or enable any services through the cf CLI using the cf disable-service-access or cf enable-service-access commands.
