


This topic describes how to install the Google Cloud Platform (GCP) Service Broker by configuring your GCP account and importing the product file into VMware Tanzu Operations Manager.
Step 1: Set up a GCP Project
Follow the steps below to create a project and enable necessary APIs.
- In a browser, navigate to https://console.cloud.google.com. If you do not have an account, sign up and use the setup wizard to create an account.
- From the GCP console, click the dropdown to the left of the search bar and select Create Project.
- Enter a project name and click Create.
- A notification appears confirming the creation of your project. Refresh the page.
Step 2: Enable APIs
- Navigate to API Manager > Library.
- Enable the Google Cloud Resource Manager API.
- Enable the Google Identity and Access Management (IAM) API.
- If you want to enable Cloud SQL as a service, enable the Cloud SQL API.
- If you want to enable BigQuery as a service, enable the BigQuery API.
- If you want to enable Cloud Storage as a service, enable the Cloud Storage API.
- If you want to enable Pub/Sub as a service, enable the Cloud Pub/Sub API.
Step 3: Set Up a Root Service Account
Follow the steps below to set up a “root” Service Account.
- From the GCP console, navigate to IAM & Admin > Service accounts and click Create Service Account.
- Enter a Service account name.
- Select the checkbox to Furnish a new Private Key, then click Create.
- Save the automatically downloaded key file to a secure location.
- Navigate to IAM & Admin > IAM and locate your service account.
- From the dropdown on the right, choose Project > Owner and click Save.
Step 4: Create a Service Broker Database
You can use any MySQL database to back the Service Broker. To use GCP Cloud SQL, follow the instructions below:
Note: Pivotal recommends using Cloud SQL if your VMware Tanzu deployment runs on GCP.
- From the GCP console, select SQL, and then click Create instance.
- Set up your database instance with the default settings and click Create.
- After the instance boots, click its name in the list of SQL instances.
- Select Access Control > SSL.
- Click Allow only SSL Connections
- Click Create Client Certificate.
- Enter a name and click Add. A popup appears.
- Download the three certificate files and save them to a secure location.
- Record the connection string given at the bottom of the popup.
- Under Access Control > Authorization, click Add Network.
- Enter
0.0.0.0/0in the Network field and click Done. - Under Access Control > Users, click the three dot icon to open the menu next to the
rootuser, then click Change Password. - Enter a new password for the
rootuser and click OK. - From a terminal window, connect to the host machine using the connection string that you recorded in an earlier step, using the
rootuser and password. - In the terminal window, run the following commands:
CREATE DATABASE servicebroker;CREATE USER 'USERNAME'@'%' IDENTIFIED BY 'TASSWORD';GRANT ALL PRIVILEGES ON servicebroker.* TO 'USERNAME'@'%' WITH GRANT OPTION;
Step 5: Install in Ops Manager
To install the GCP Service Broker tile in Ops Manager, complete the following steps:
-
Download the GCP Service Broker product file from Pivotal Network.
-
From the Ops Manager Installation Dashboard, click Import a Product to upload the product file.
-
Click Add next to the uploaded product description in the Available Products view to add this product to your staging area.
Step 6: Configure in Ops Manager
Click the newly added tile and configure the following sections:
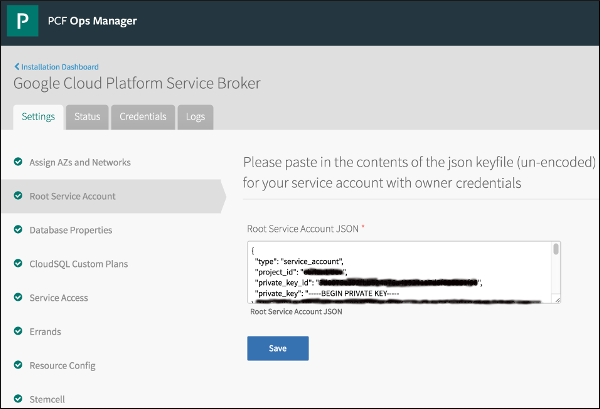
Root Service Account
-
Click Root Service Account.
-
Paste the contents of your service account private key file from Step 1 into the text box.
- Click Save.
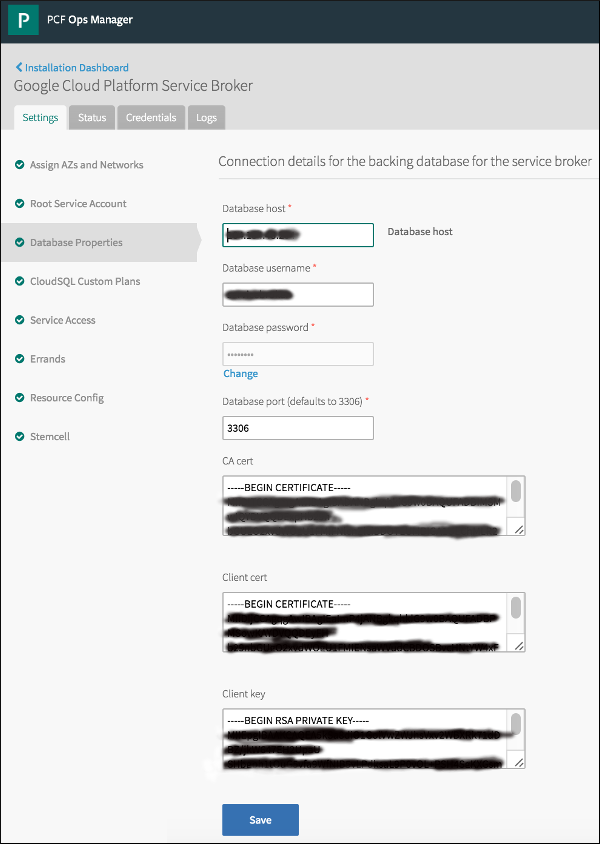
Database Properties
-
Click Database Properties.
-
For hostname, enter the public IP address of your database.
- Enter the username, password, and ssl-certs for your database.
- Ensure your database port is set to
3306. Modify your port configuration if necessary. - Click Save.
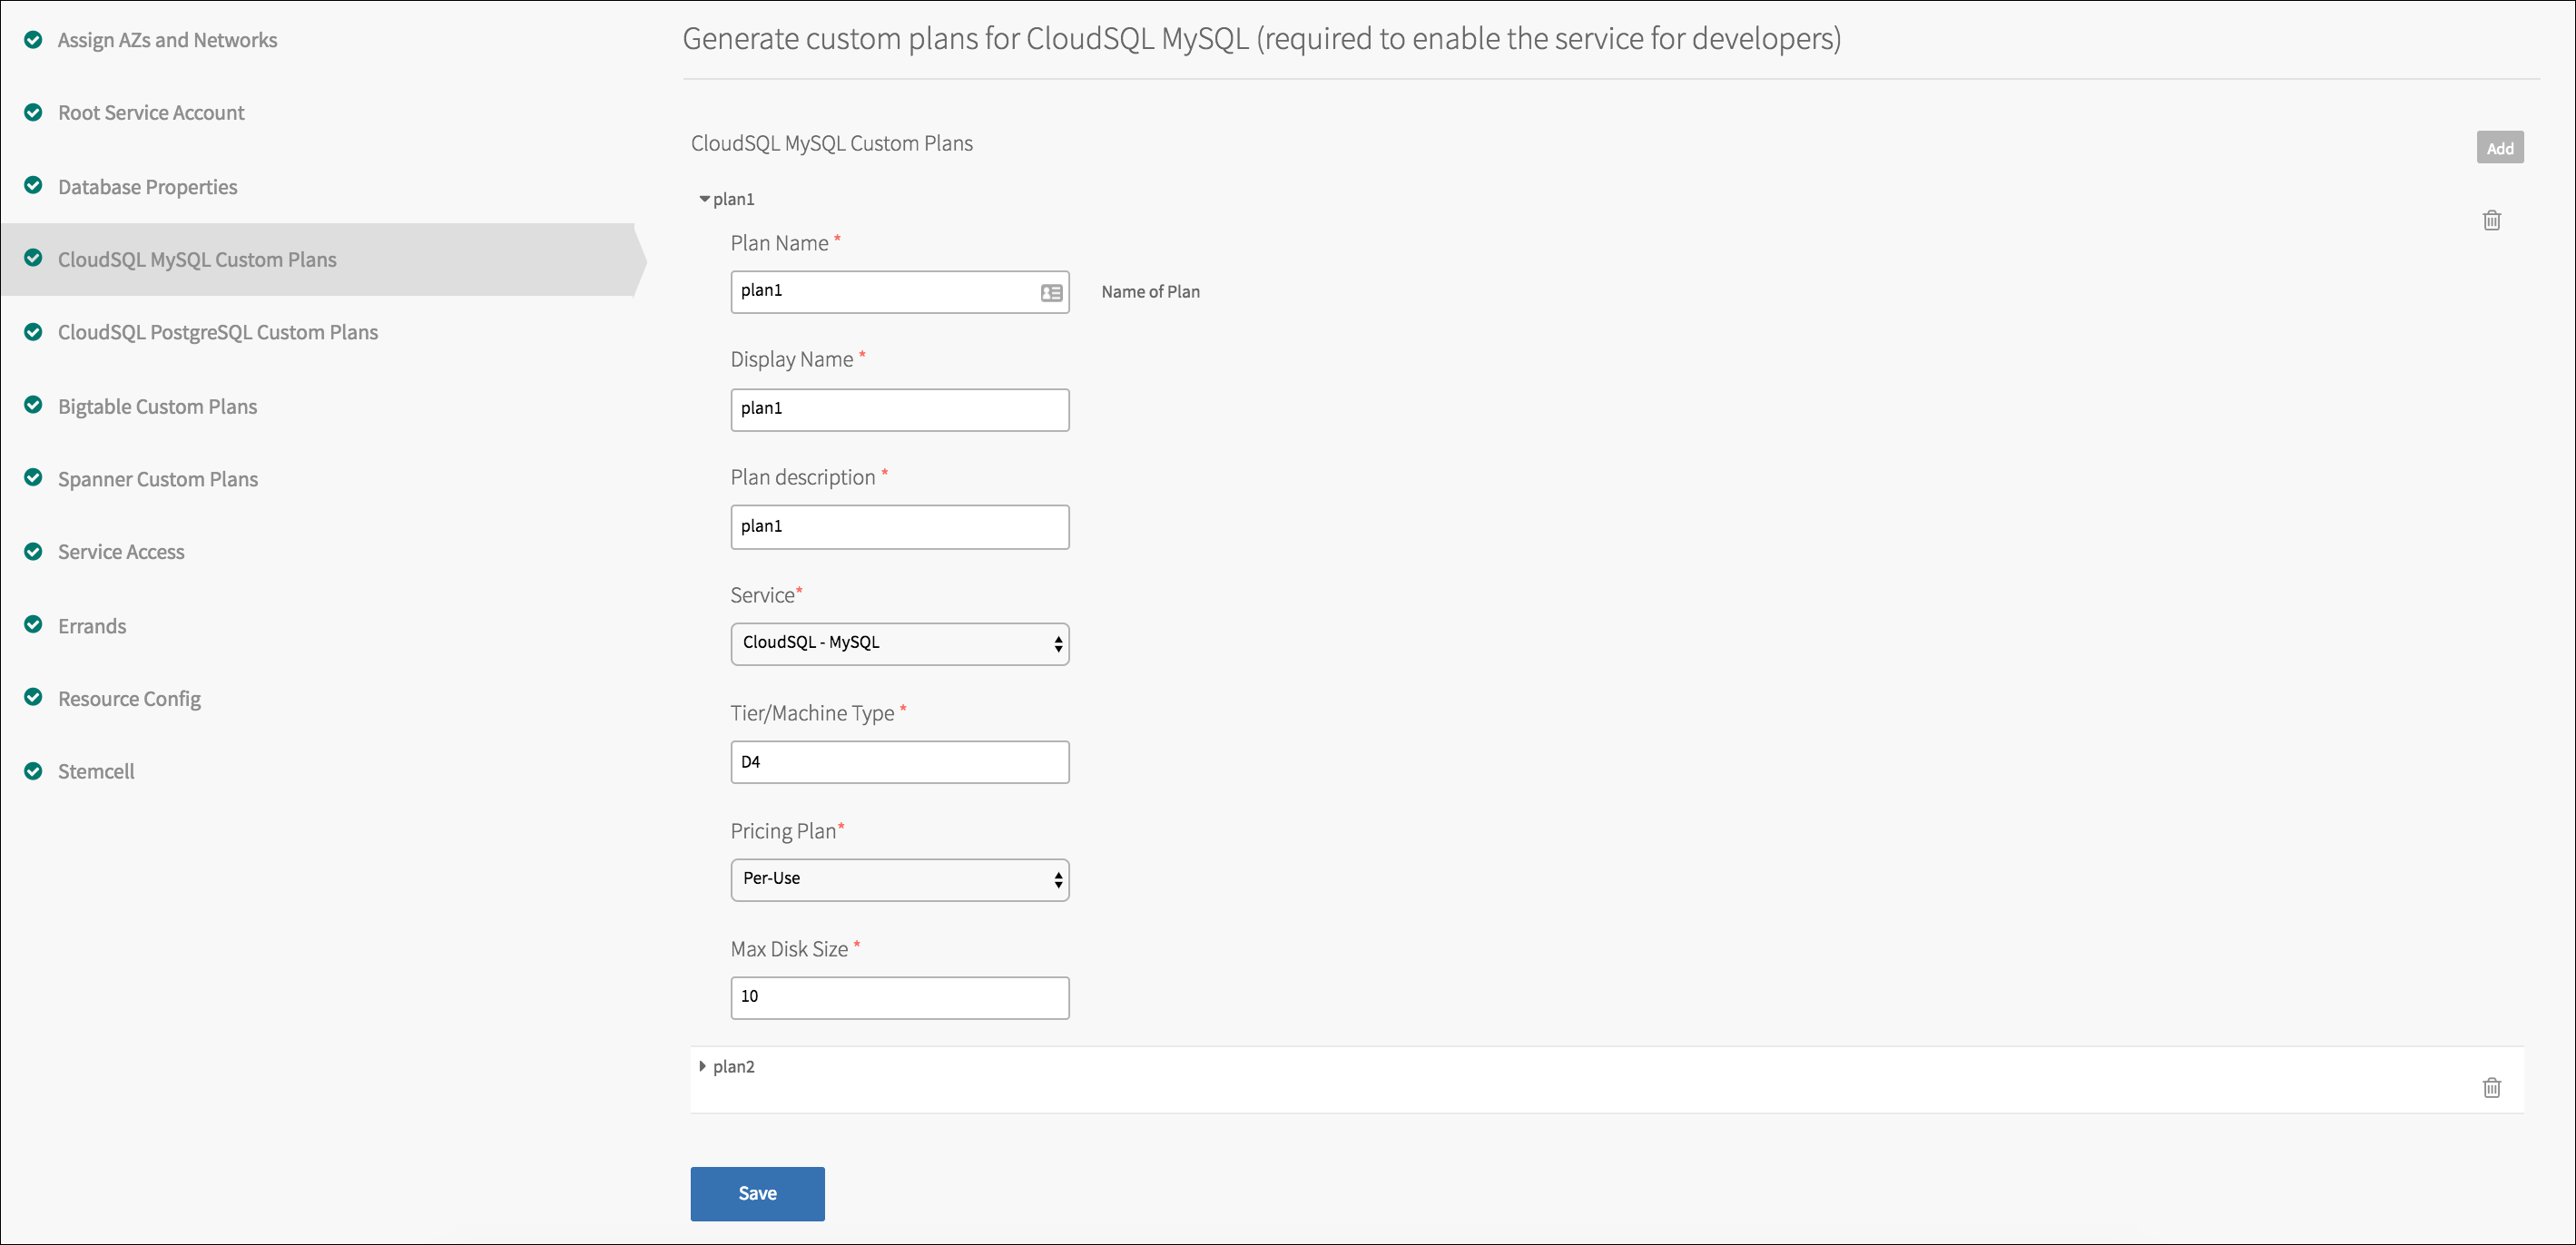
Cloud SQL (MySQL) Custom Plans
If you want to enable Cloud SQL MySQL for your developers, you must configure plans in this section. If you do not want to enable Cloud SQL, ignore this section.
-
Click Cloud SQL MySQL Custom Plans.
-
To create a plan, click Add.
- Enter a plan name, a display name, and a description to display in the database.
- Enter a case-sensitive Tier/Machine Type value (e.g.
D4ordb-n1-standard-2). See Cloud SQL Pricing for details. - (Optional) If you selected a first generation instance type when creating your Cloud SQL database, you can change your pricing plan.
- (Optional) If you selected a second generation instance type when creating your Cloud SQL database, enter a maximum disk size in GB.
- Click Save.
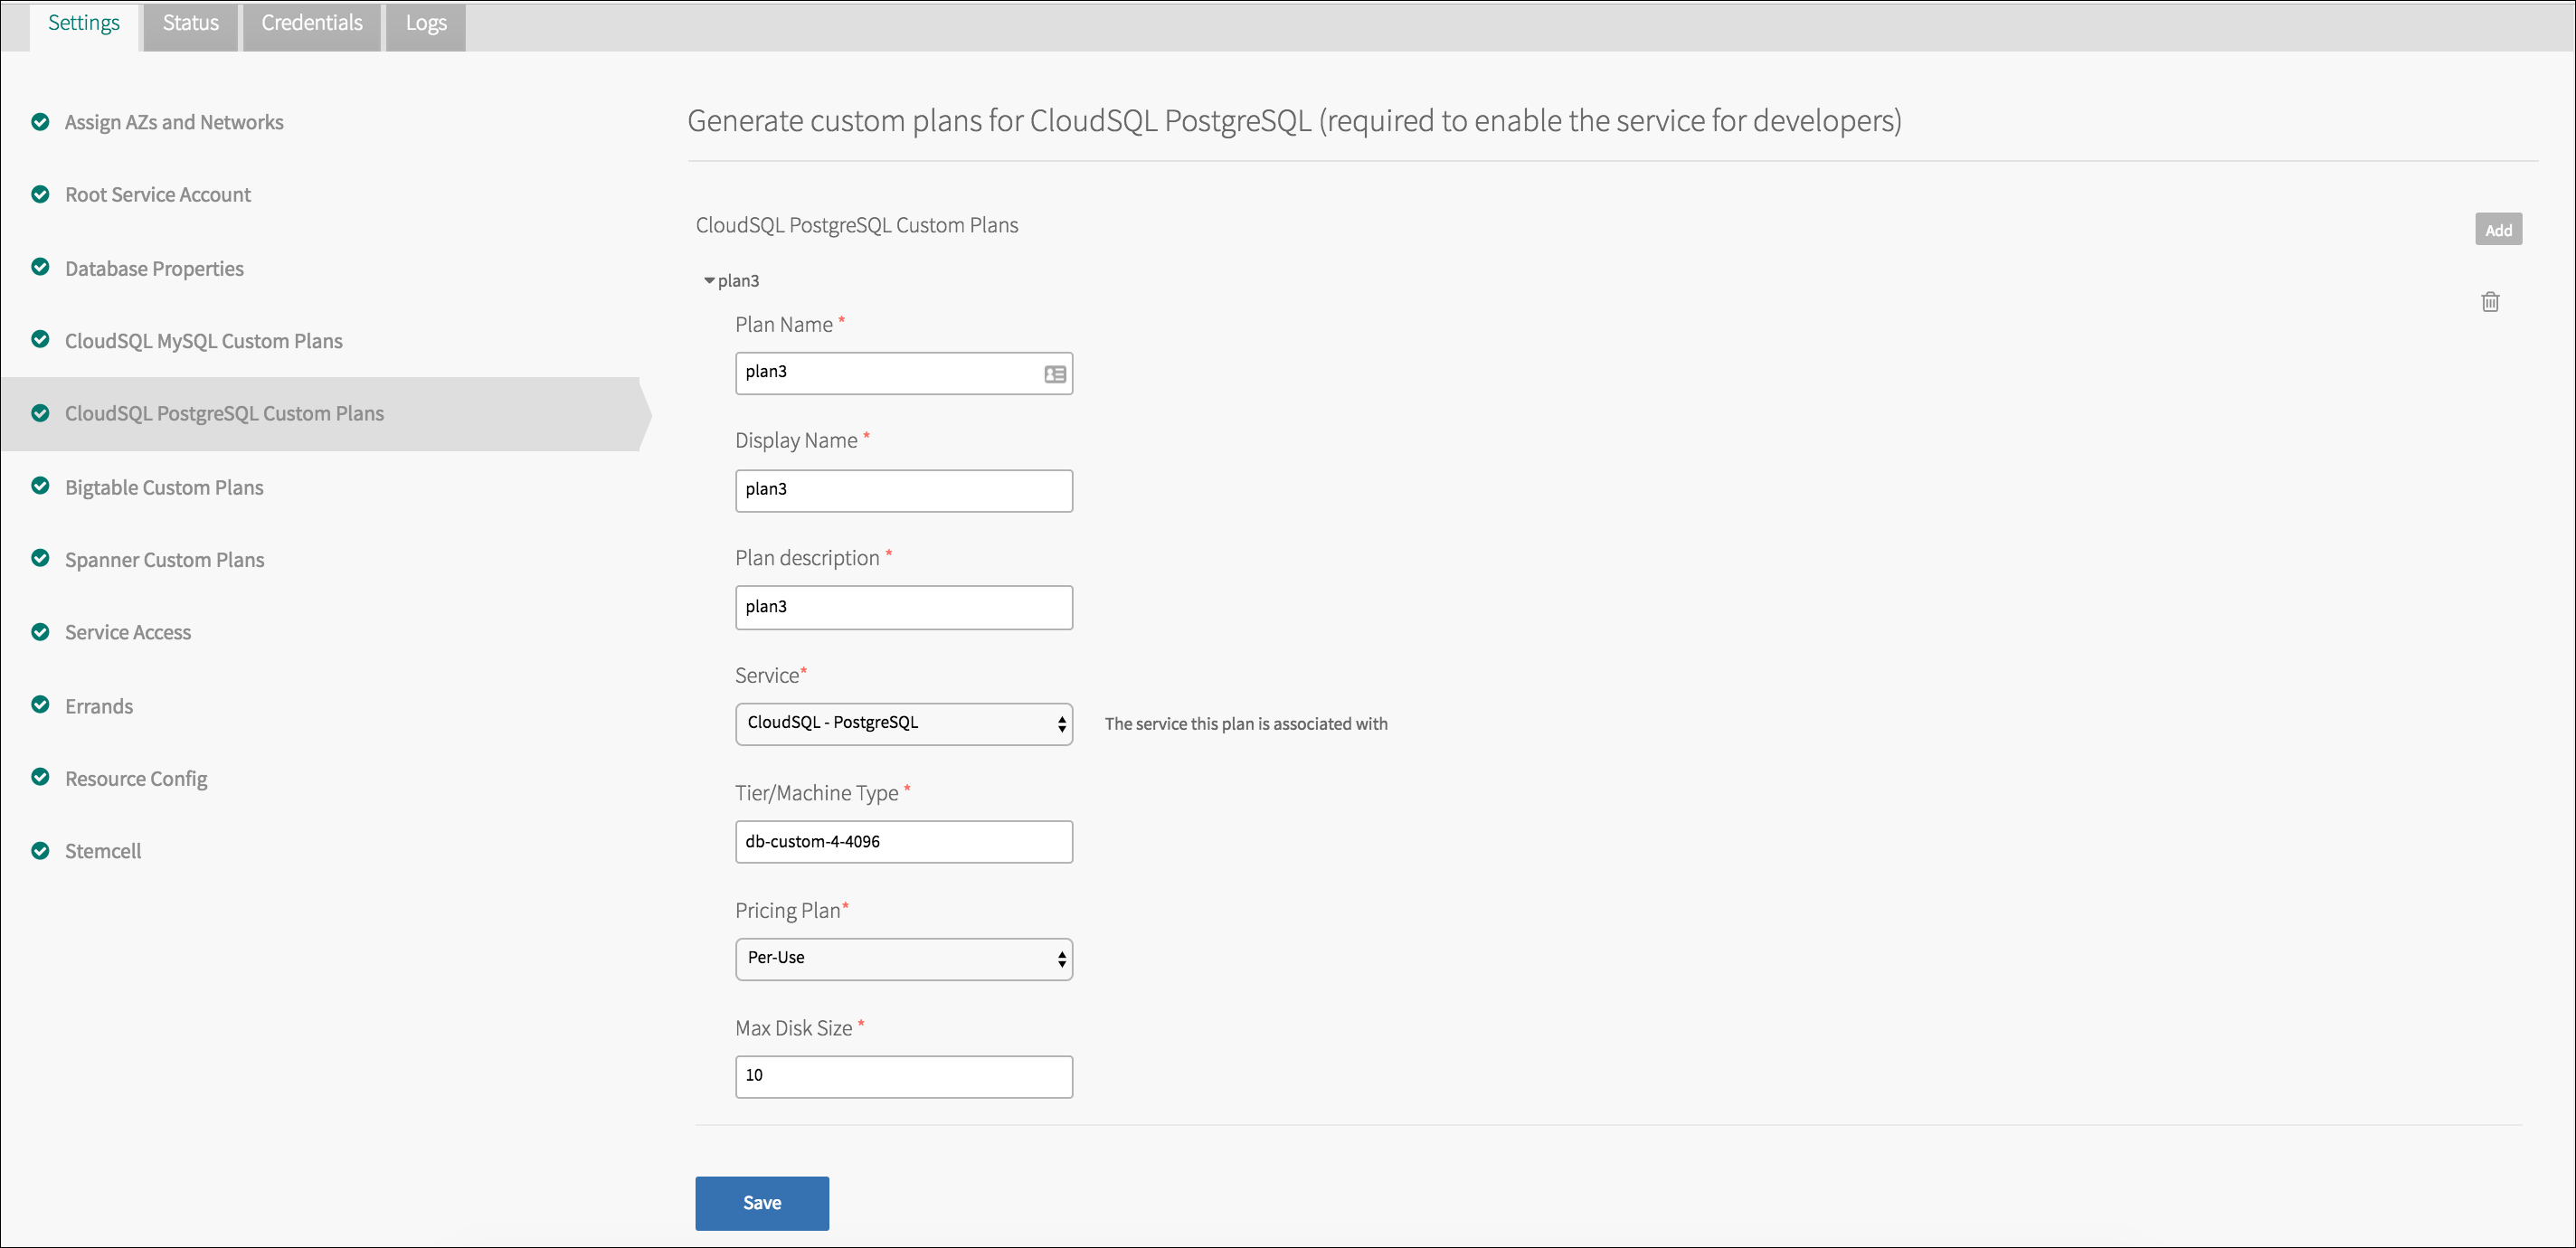
Cloud SQL (PostgreSQL) Custom Plans
If you want to enable Cloud SQL PostgreSQL for your developers, you must configure plans in this section. If you do not want to enable Cloud SQL, ignore this section.
-
Click Cloud SQL PostgreSQL Custom Plans.
-
To create a plan, click Add.
- Enter a plan name, a display name, and a description to display in the database.
- Enter a case-sensitive Tier/Machine Type value of the form “db-custom-<CPUs>-<Memory-MB>”, where <Memory-MB> must be at least 3840. For details, see Cloud SQL Pricing.
- (Optional) Enter a maximum disk size in GB.
- Click Save.
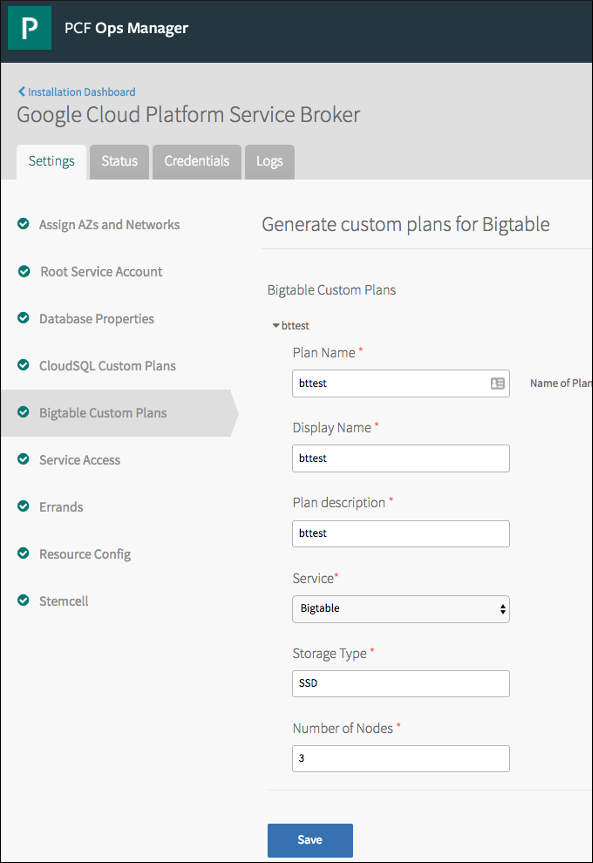
Bigtable Custom Plans
If you want to enable Bigtable for your developers, follow the steps below.
-
Click Bigtable Custom Plans.
-
To create a plan, click Add.
- Enter a Plan Name, a Display Name, and a Description to display in the database.
- For the Storage Type, specify either
SSDorHDD. The default isSSD. For more information, see Bigtable Pricing. - For the Number of Nodes, specify an integer value between
3and30. The default is3. For more information, see Bigtable Pricing. - Click Save.
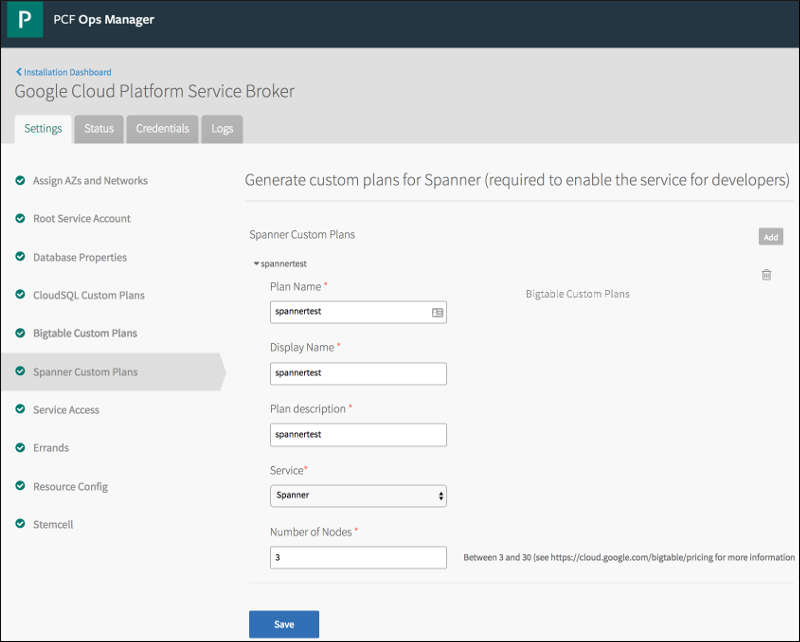
Spanner Custom Plans
If you want to enable Spanner for your developers, follow the steps below.
-
Click Spanner Custom Plans.
-
To create a plan, click Add.
- Enter a Plan Name, a Display Name, and a Description to display in the database.
- For the Number of Nodes, specify a positive integer value. The default is
3. For more information, see Spanner Pricing. - Click Save.
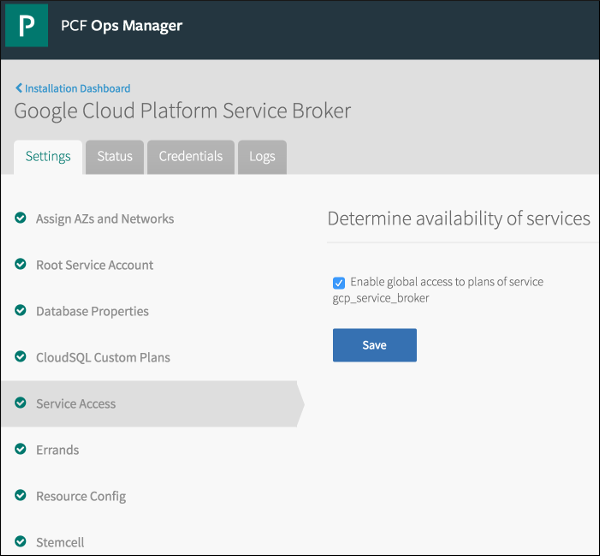
Service Access
By default, all orgs and spaces can access all services and plans used by the GCP Service Broker. Follow the instructions below to disable the default access.
-
Click Service Access.
-
Clear the Enable global access to plans of service gcp_service_broker checkbox.
- Click Save.
Step 7: Confirm Installation
Note: The GCP Service Broker installs an app named gcp-service-broker in the gcp-service-broker-space space of the system org.
-
After Ops Manager finishes the installation, the GCP Service Broker appears as a green tile in the Installation Dashboard.
-
In Apps Manager, all orgs and spaces show the new services in the Services Marketplace. Users can create instances of these services through Apps Manager or by using the Cloud Foundry Command Line Interface (cf CLI). For more information, see Using GCP Service Broker.
Step 8: Confirm Service and Plan Access
The GCP Service Broker installs with all services enabled by default, except for Cloud SQL, which you select to enable or not during configuration.
You can disable or enable any services through the cf CLI using cf disable-service-access or cf enable-service-access.
