


You can use Redis for VMware Tanzu Application Service both through Apps Manager and the Cloud Foundry Command Line Interface (cf CLI). Both methods are outlined in this topic.
You can find an example app has to help you get started with Redis for Tanzu Application Service. Download the example app by clicking this link.
For recommendations regarding Redis for Tanzu Application Service plans and memory allocation, see the On-Demand Service Offering and the Shared-VM Service Offering.
Prerequisites
To use Redis for Tanzu Application Service with your TAS for VMs apps, you must:
- Have an Tanzu Operations Manager installation with Redis for Tanzu Application Service installed and listed in the Marketplace.
For how to verify availability in the Marketplace, see Confirm Service Availability. - Have a Space Developer or Admin account on the TAS for VMs installation.
For more information, see Manage Users and Roles. - Have a local machine with the following installed:
- A browser
- A shell
- The Cloud Foundry Command-Line Interface (cf CLI). See Installing the cf CLI.
- The Linux watch command. See the Linux Information Project website.
- Log in to the org and space containing your app. For instructions, see Log in with the CLI.
Use Redis for Tanzu Application Service in an App
Every app and service is scoped to a space. To use a service, an app must exist in the same space as an instance of the service.
To use Redis for Tanzu Application Service in an app:
-
Use the cf CLI or Apps Manager to log in to the org and space that contains the app.
-
Make sure a Redis for Tanzu Application Service service instance exists in the same space as the app.
-
Bind the app to the Redis for Tanzu Application Service service instance, to enable the app to use Redis.
Confirm service availability
For an app to use a service, the following two things must be true:
- The service must be available in the Marketplace for its space.
- An instance of the service must exist in its space.
You can confirm both of these using the cf CLI as follows:
-
To find out if a Redis service is available in the Marketplace:
-
Run:
cf marketplace -
If the output lists
p.redisin theservicecolumn, on-demand Redis for Tanzu Application Service is available. If the output listsp-redisin theservicecolumn, shared-VM Redis for Tanzu Application Service is available. If it is not available, ask your operator to install it.
For example:$ cf marketplace Getting services from marketplace in org my-org / space my-space as user@example.com... OK service plans description p-redis shared-vm Redis service to provide pre-provisioned instances configured as a datastore, running on a shared VM. p.redis on-demand-cache Redis service to provide on-demand dedicated instances configured as a cache. [...]
-
-
To confirm that a Redis for Tanzu Application Service instance is running in the space:
-
Run:
cf services -
Any
p.redislistings in theservicecolumn are service instances of on-demand Redis for Tanzu Application Service in the space. Anyp-redisin theservicecolumn are service instances of shared-VM Redis for Tanzu Application Service.
For example:$ cf services Getting services in org my-org / space my-space as user@example.com... OK name service plan bound apps last operation my-instance p.redis on-demand-cache create succeeded
-
You can bind your app to an existing instance or create a new instance to bind to your app.
Create a Service Instance
To use a service you must create a service instance of a plan that is available in the Marketplace. To do so, you can use either the cf CLI or Apps Manager.
Create a Service Instance with the cf CLI
You can use the cf CLI to create service instances of available on-demand or shared-VM plans.
On-Demand Service
Unlike pre-provisioned services, on-demand instances are created asynchronously, not immediately. On-demand plans are listed under the p.redis service in the Marketplace.
To create a service instance of the Redis for Tanzu Application Service on-demand plan, run:
cf create-service p.redis CACHE_PLAN SERVICE_NAME
Where:
CACHE_PLANis one of the plans configured by the operator.SERVICE_NAMEis a name for your service.
For example:
$ cf create-service p.redis on-demand-cache od-instance

Creating service my-ondemand-instance in org my-org / space my-space as user@example.com...
OK
As the On-Demand instance can take longer to create, the watch command is helpful as a way to track when your service instance is ready to bind and use.
$ watch cf services

Getting services in org my-org / space my-space as user@example.com...
OK
name          service       plan              bound apps    last operation
od-instance   p.redis       on-demand-cache                 create succeeded
If you get an error, see Troubleshooting Instances. For information on the on-demand cache plans, see On-Demand Service Plans.
Shared-VM Service
Shared-VM service instances have been pre-provisioned by the operator. This means, if an instance is available, the app developer can provision it immediately. These plans are both listed under the p-redis service in the Marketplace.
Note Shared-VM services are designed for testing and development purposes. Shared-VMs should not be used in production environments
To create a service instance of the Redis for Tanzu Application Service shared-VM plan, run:
cf create-service p-redis SERVICE_TYPE SERVICE_NAME
Where:
SERVICE_TYPEisshared-vm.SERVICE_NAMEis a name for your service instance.
For example:
$ cf create-service p-redis shared-vm my-instance

Creating service my-instance in org my-org / space my-space as user@example.com...
OK
Create a Service Instance with Apps Manager
You can use Apps Manager to create service instances of available on-demand or shared-VM plans.
On-Demand Service
To create a service instance of the Redis for Tanzu Application Service on-demand plan using Apps Manager:
-
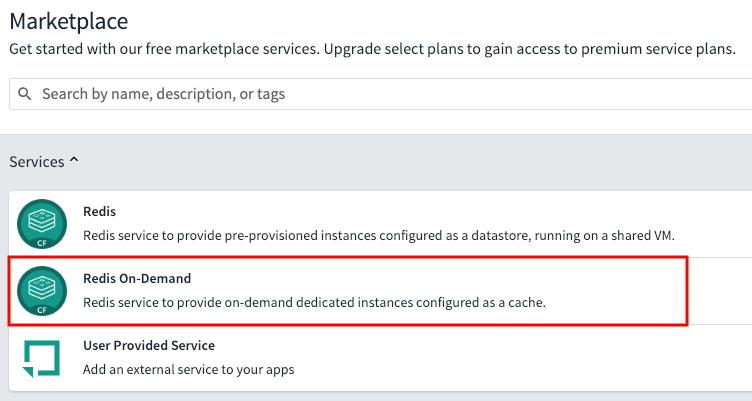
From within Apps Manager, select Marketplace from the left navigation menu.
-
Select Redis On-Demand from the displayed tiles in the Marketplace.
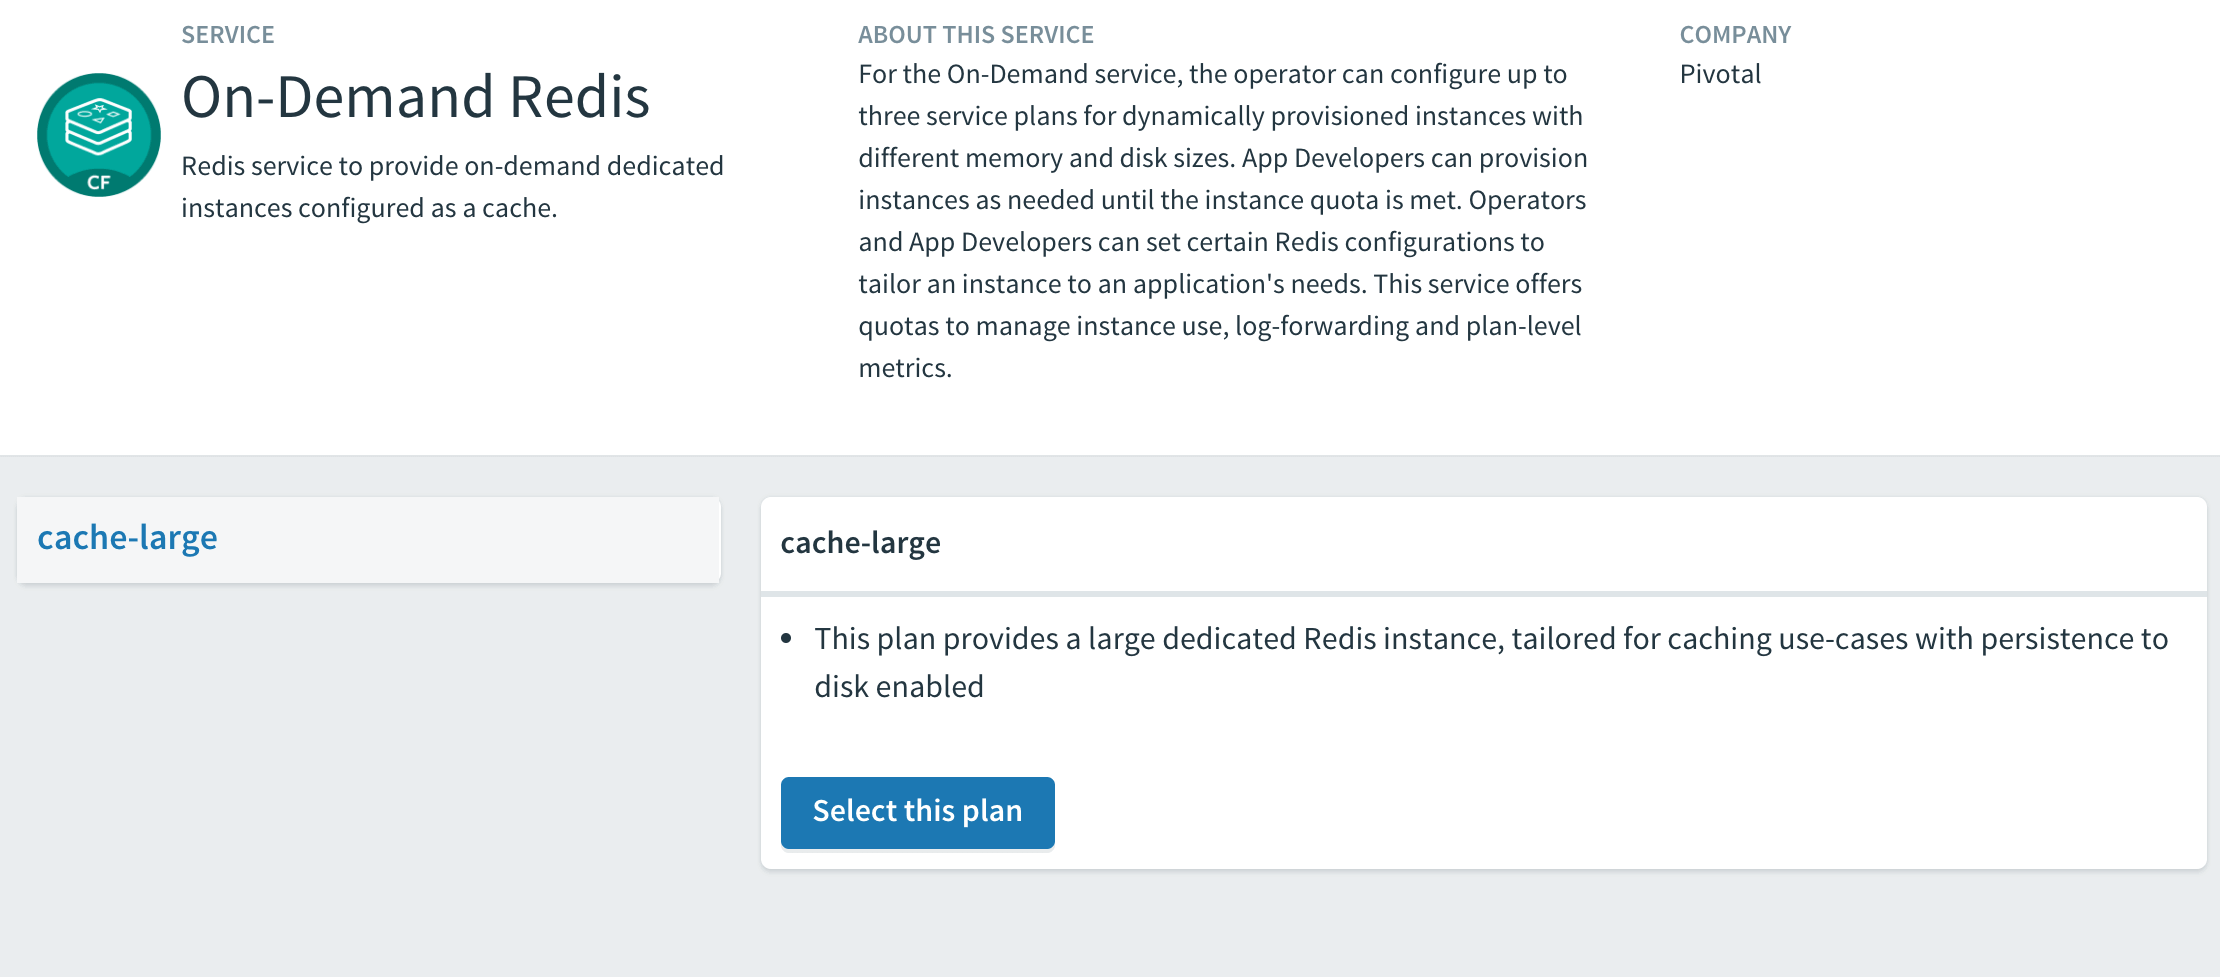
-
Click the appropriate Select this plan button to select the required Redis Service Plan.
-
In the Instance Name field, enter a name that will identify this specific Redis service instance.
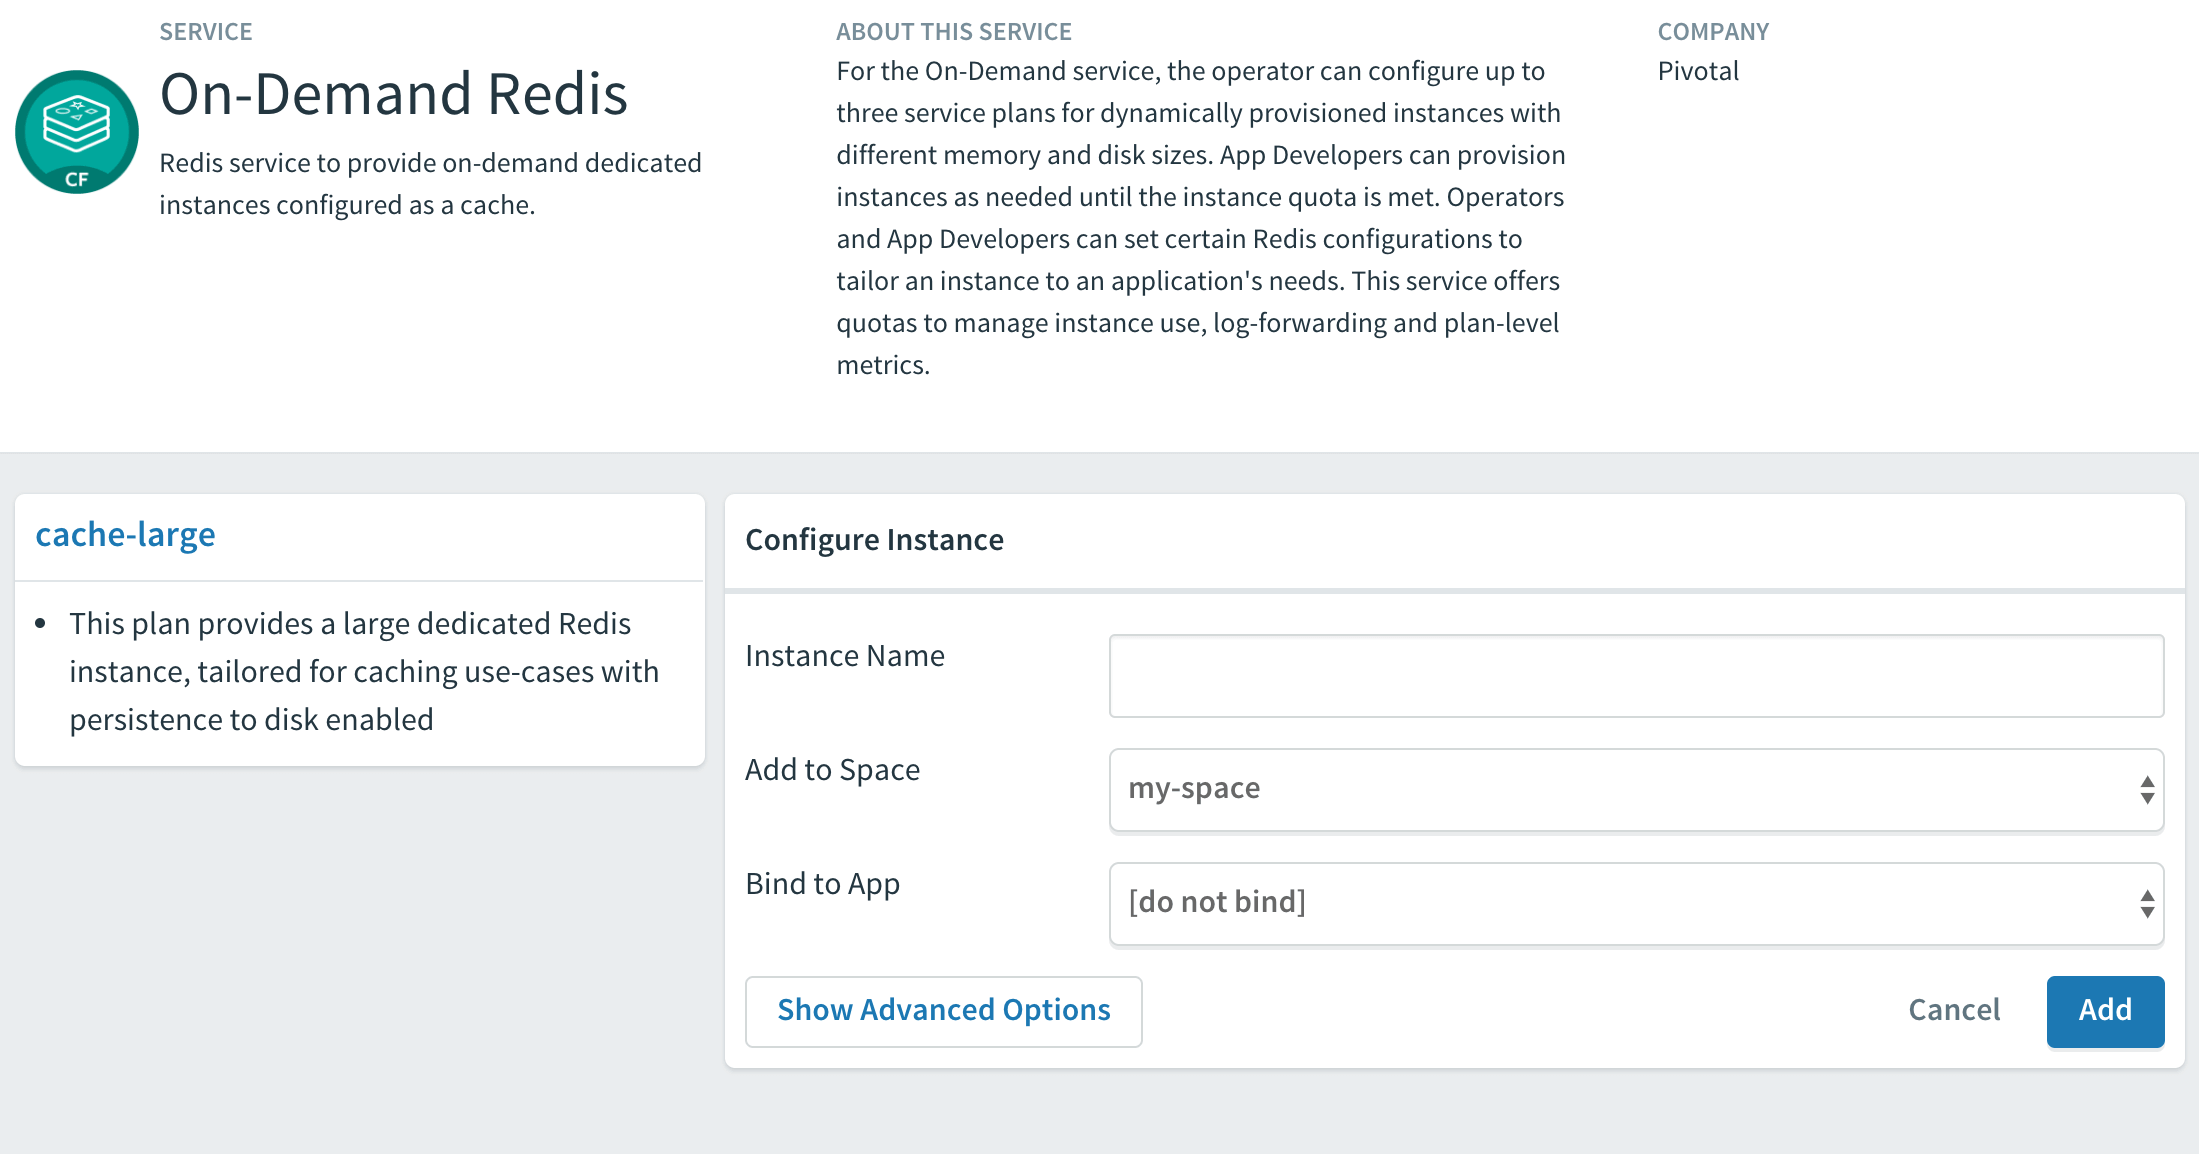
-
From the Add to Space dropdown, select the space where you or other users will deploy the apps that will bind to the service.
- Click the Add button.
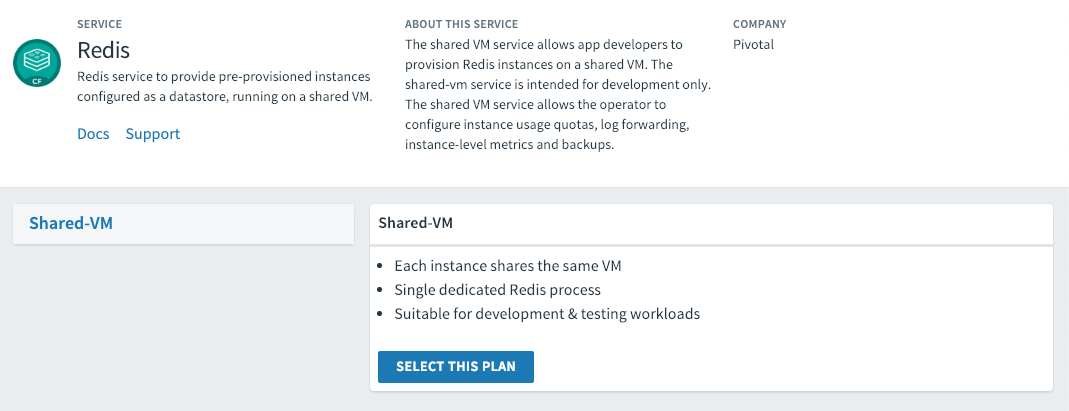
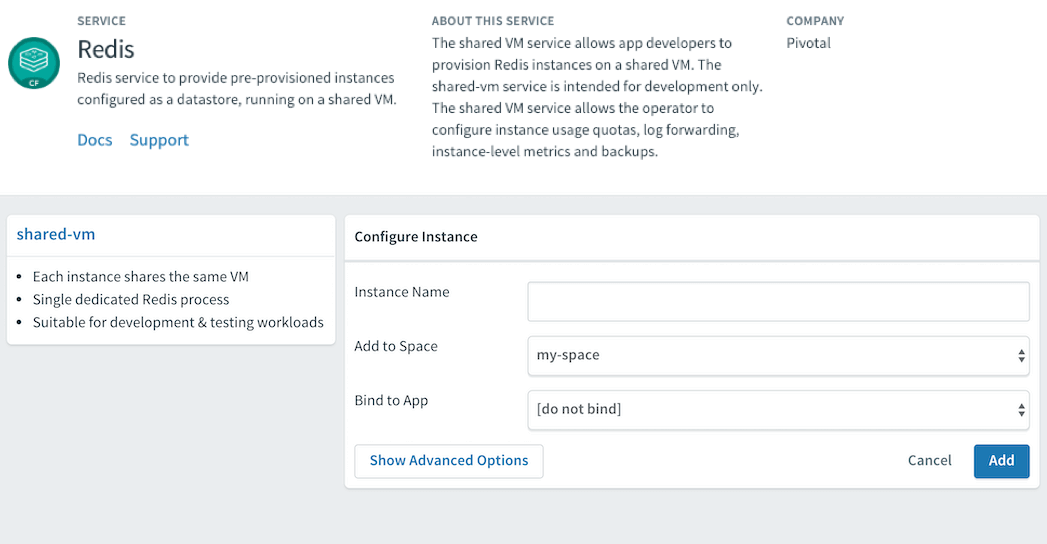
Shared-VM Service
To create a service instance of the Redis for Tanzu Application Service shared-VM plan using Apps Manager:
-
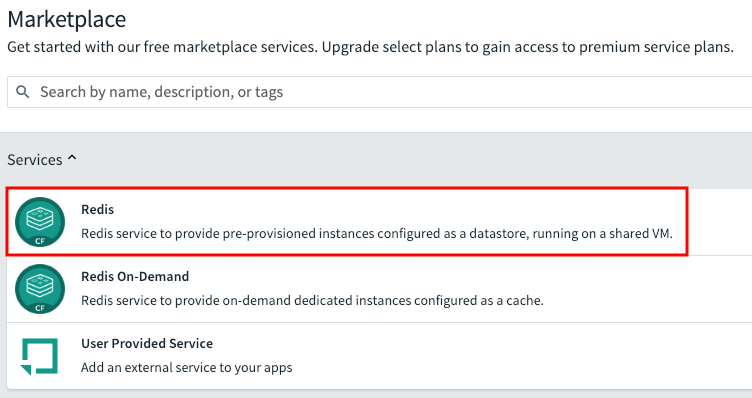
From within Apps Manager, select Marketplace from the left navigation menu.
-
Select Redis from the displayed tiles in the Marketplace.
-
Click on the appropriate Select this plan button to select the required Redis Service Plan.
-
In the Instance Name field, enter a name that will identify this specific Redis service instance.
-
From the Add to Space dropdown, select the space where you or other users will deploy the apps that will bind to the service.
- Click the Add button.
Bind a Service Instance to your App
For an app to use a service, you must bind it to a service instance. You can use either the cf CLI or Apps Manager to do this. Bind the app after you push or re-push it using cf push.
Bind a Service Instance with the cf CLI
To bind an app to a Redis for Tanzu Application Service service instance:
-
View running service instances:
cf servicesFor example:
$ cf services

Getting services in org system / space apps-manager as admin...
OK

name                service         plan        bound apps    last operation
my-instance   p-redis         shared-vm                 create succeeded
-
Bind the service instance to your app by running:
cf bind-service APP-NAME SERVICE-INSTANCEWhere:
APPis the app you want to use the Redis service instance.SERVICE_INSTANCEis the name you supplied when you rancf create-service.
For example:
$ cf bind-service my-app my-instance

Binding service my-instance to my-app in org my-org / space test as user@example.com...
OK
TIP: Use 'cf push' to ensure your env variable changes take effect
Bind a Service Instance with Apps Manager
To bind an app to a Redis for Tanzu Application Service service instance:
- Select the app that you want to bind to the service. A page displays showing the already bound services and instances for this app.
- Click Bind. A list of available services displays.
- Click the Bind button for the Redis service you want to bind to this app.
-
Start or restage your app from the command line, for example:
$ cf restage my-app
Customize an On-Demand Service Instance
The On-Demand Service allows operators and app developers to customize certain configuration variables.
Operators can customize the memory size, org and space access, Redis Client Timeout (default 3600 seconds), Redis TCP Keepalive (default 60 seconds), Redis Max Clients (default 1000), and can enable Lua Scripting.
App developers can customize the following parameters. See the Redis documentation for more detail.
| Property | Default | Options | Description |
|---|---|---|---|
maxmemory-policy |
allkeys-lru |
allkeys-lru, noeviction, volatile-lru, allkeys-random, volatile-ttl, volatile-lfu, allkeys-lfu |
Sets the behavior Redis follows when maxmemory is reached |
notify-keyspace-events |
"" | Set a combination of the following characters (e.g., Elg): K, E, g, $, l, s, h, z, x, e, A |
Sets the keyspace notifications for events that affect the Redis data set |
slowlog-log-slower-than |
10000 | 0-20000 | Sets the threshhold execution time (seconds). Commands that exceed this execution time are added to the slowlog. |
slowlog-max-len |
128 | 1-2024 | Sets the length (count) of the slowlog queue. |
Customize an On-Demand Instance with cf CLI
Note Arbitrary parameters are only supported for on-demand service instances. Shared-VM plans do not support the use of CLI commands with arbitrary parameters to configure service instances.
You can customize an instance in two ways:
-
While creating the instance, run:
cf create-service SERVICE PLAN NAME -c '{"PROPERTY":"SETTING"}' -
After creating the instance, run:
cf update-service NAME -c '{"PROPERTY":"SETTING"}'
For both scenarios, the -c flag requires a valid JSON object containing service-specific configuration parameters, provided either in-line or in a file.
$ cf update-service my-instance -c '{"maxmemory-policy":"noeviction"}'
You can pass through mutliple arbitrary parameters:
$ cf update-service my-instance -c '{"maxmemory-policy":"noeviction", "notify-keyspace-events":"El"}'
If the update is not successful, an error is displayed with a description of what went wrong. Here is an example where a hyphen is added to the noeviction setting.
$ cf update-service my-instance -c '{"maxmemory-policy":"no-eviction", "notify-keyspace-events":"El"}'
Updating service instance my-instance as admin...
FAILED
Server error, status code: 502, error code: 10001, message: Service broker error: invalid value "no-eviction" specified for maxmemory-policy
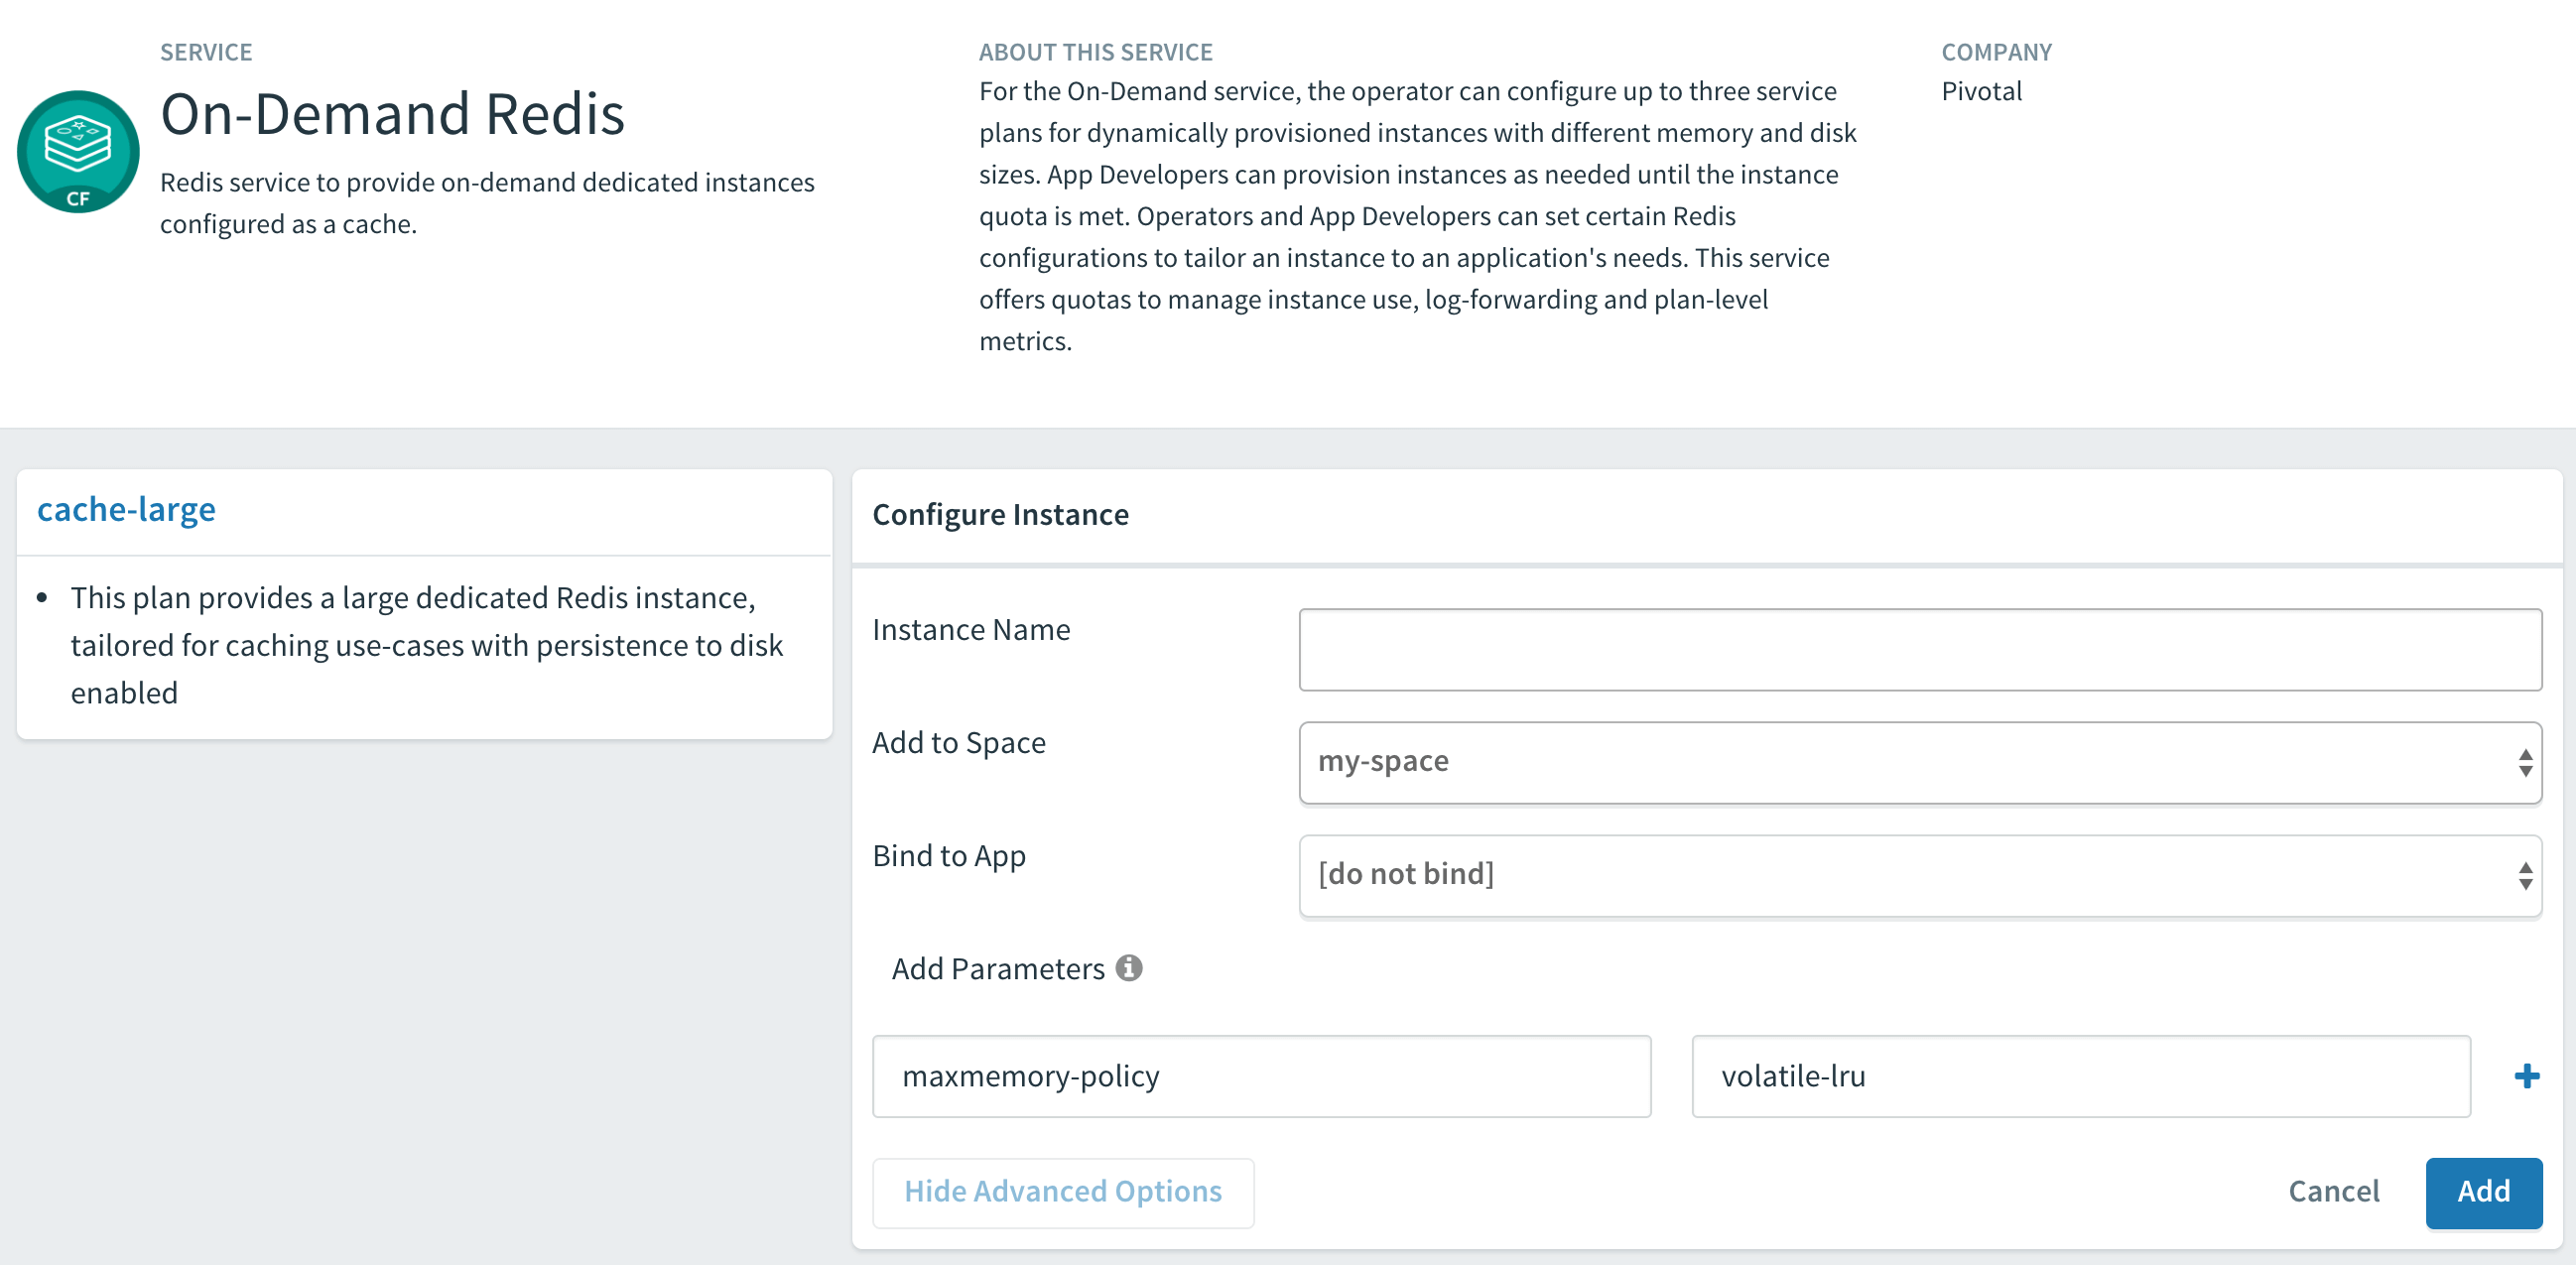
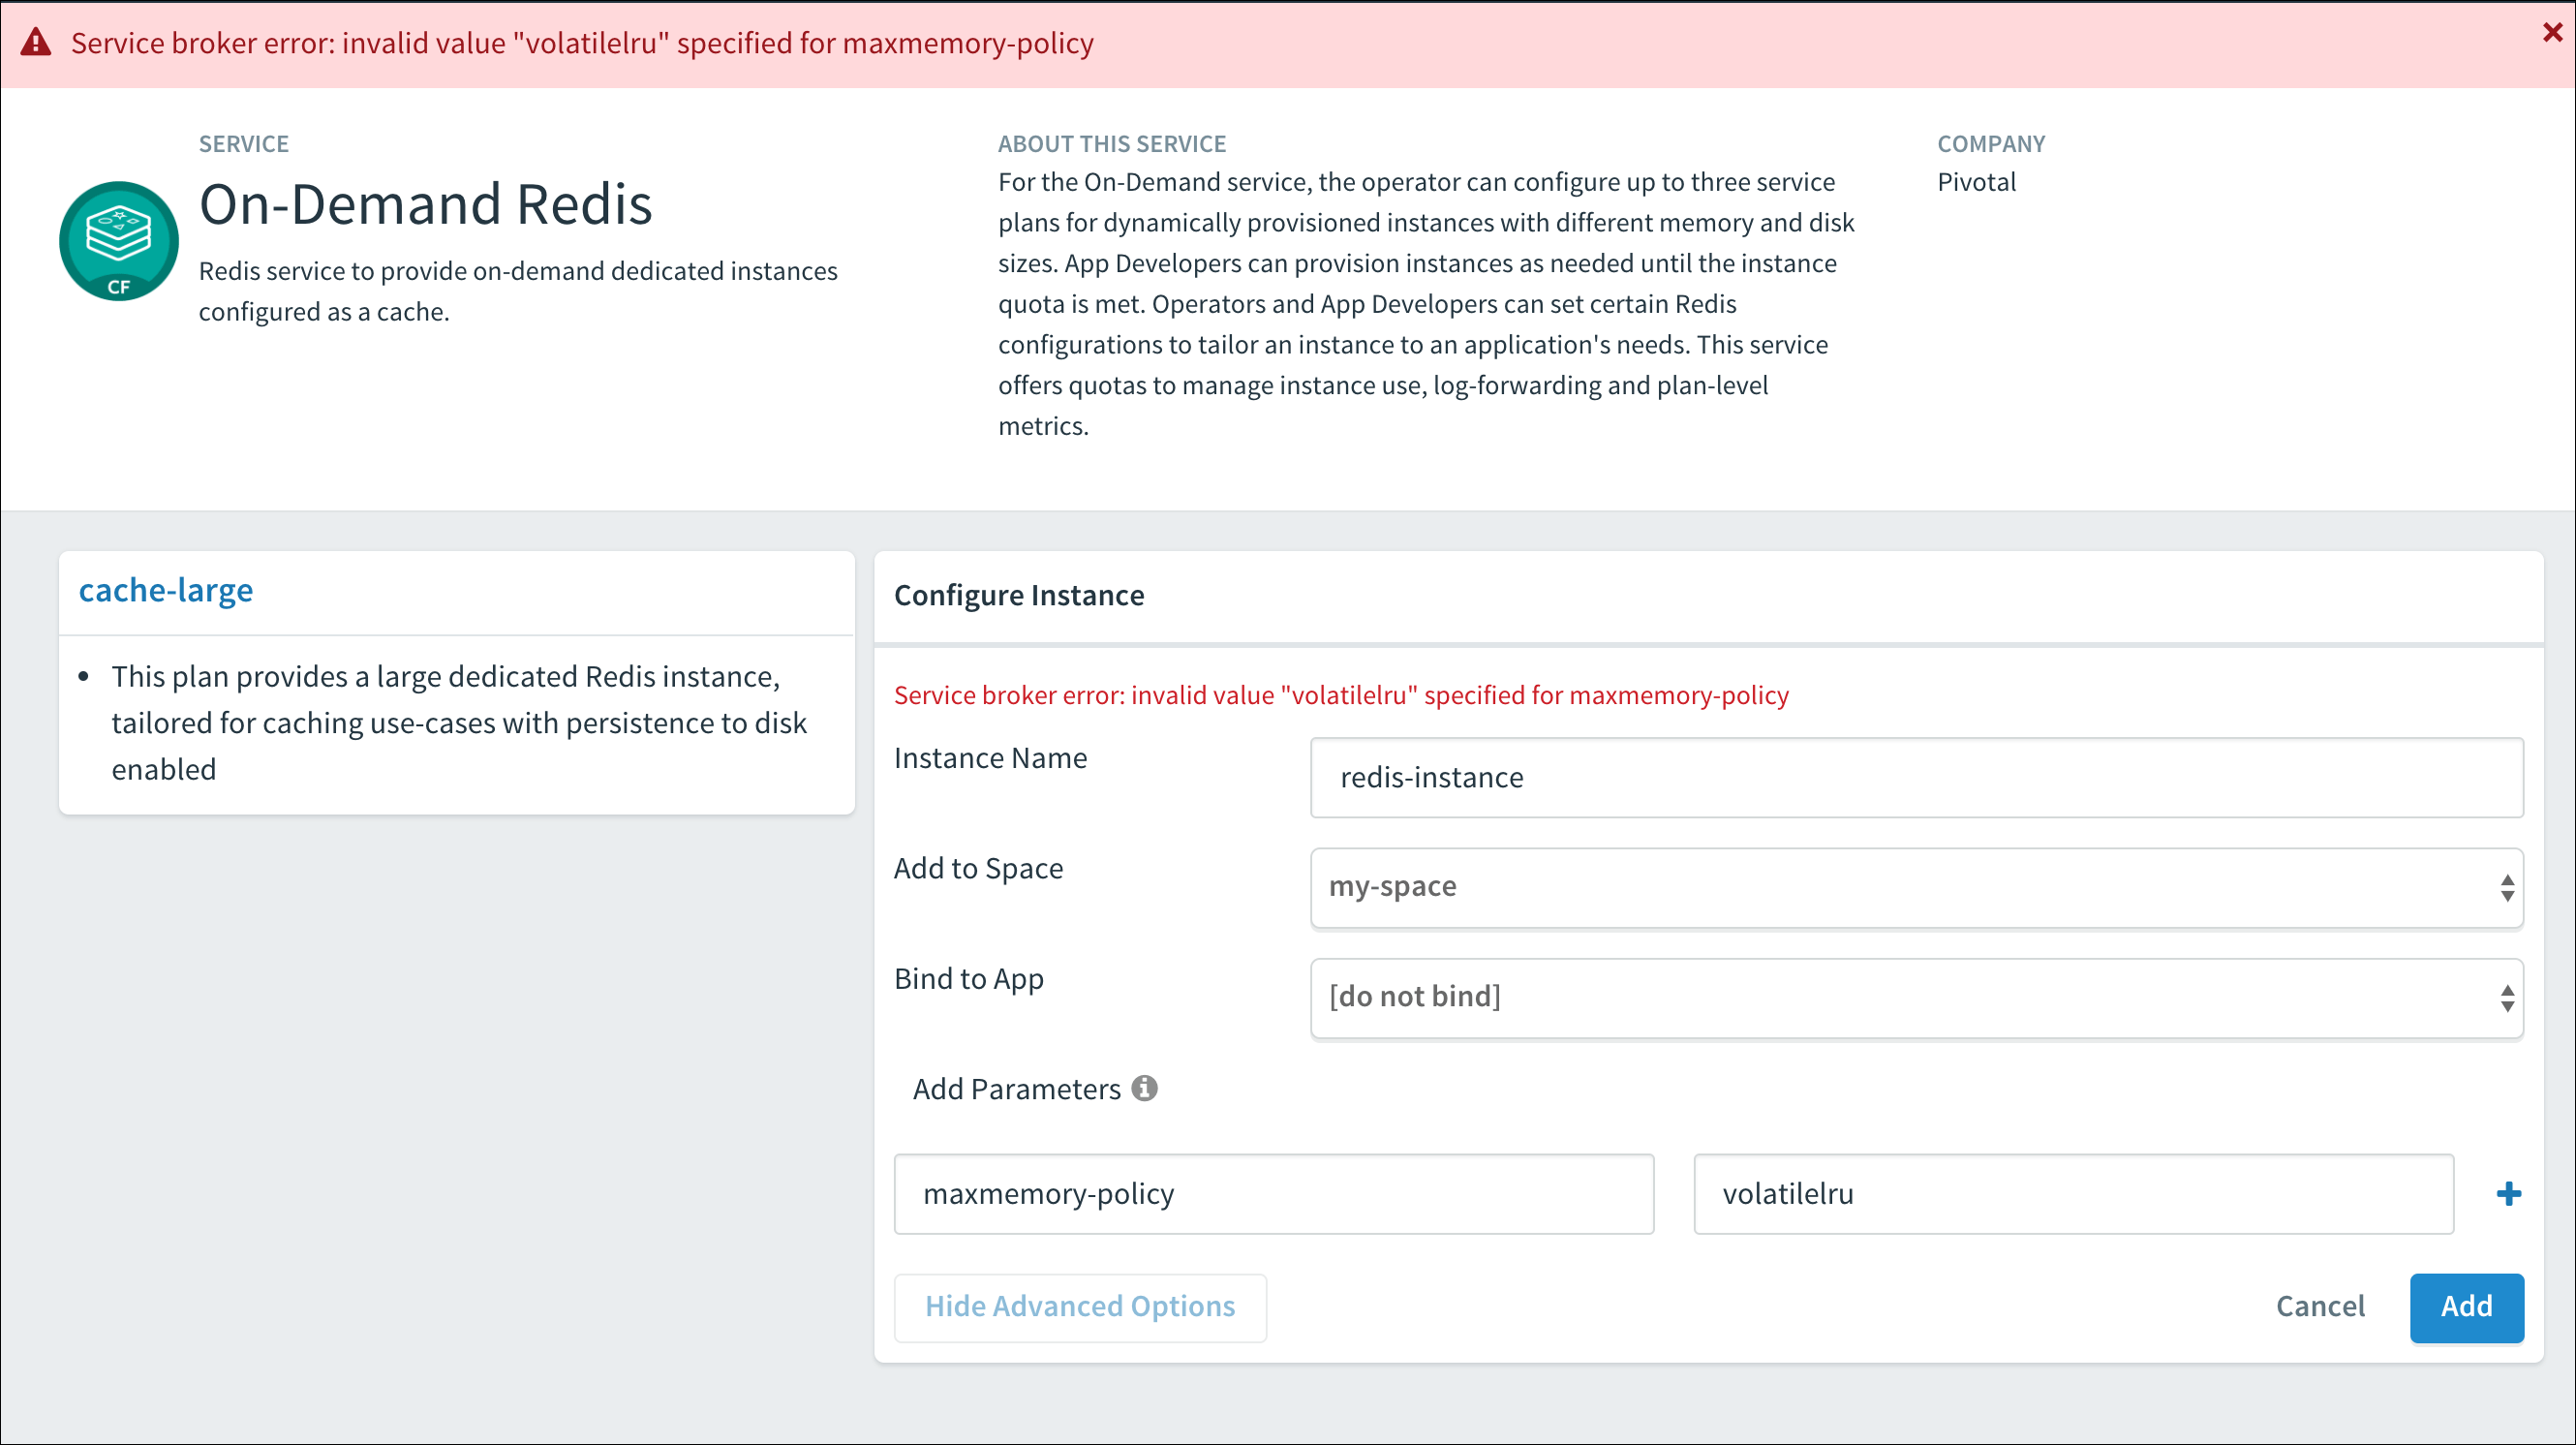
Customize an On-Demand Instance with Apps Manager
You can customize an instance in two ways:
-
While creating the instance, after you select the plan, click advanced settings.
-
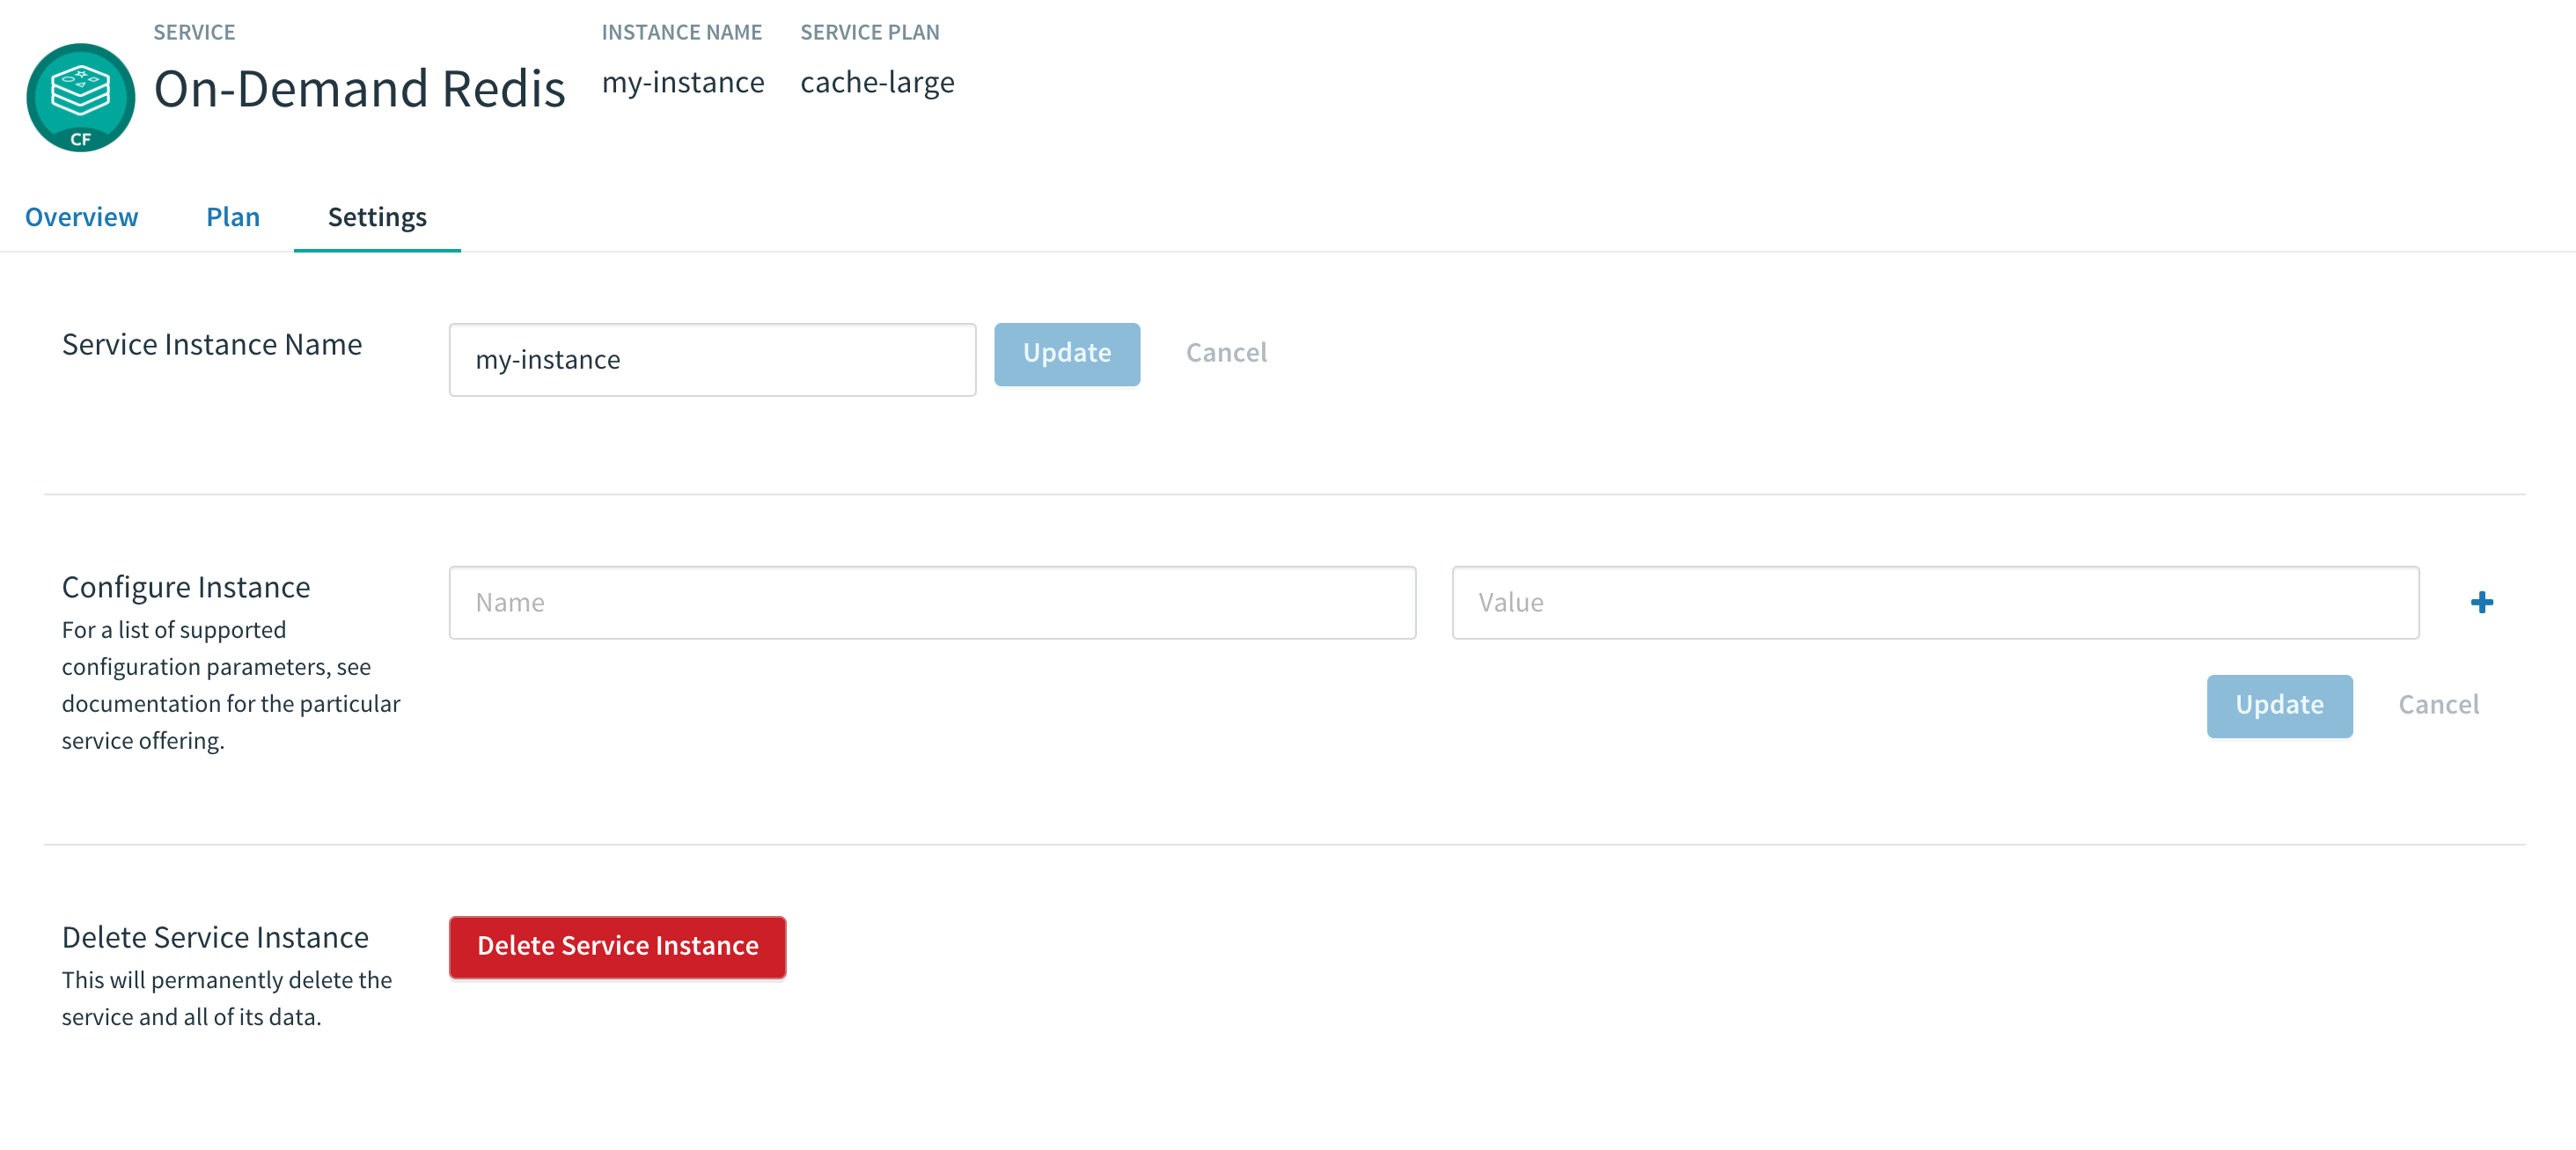
After creating the instance, navigate to the instance Settings page.
In either of the above cases, do the following:
- In the parameters fields enter each property you want to change and its new setting.
Click the + sign to add more parameter fields. - Depending on the page you are on, click either Add or Update.
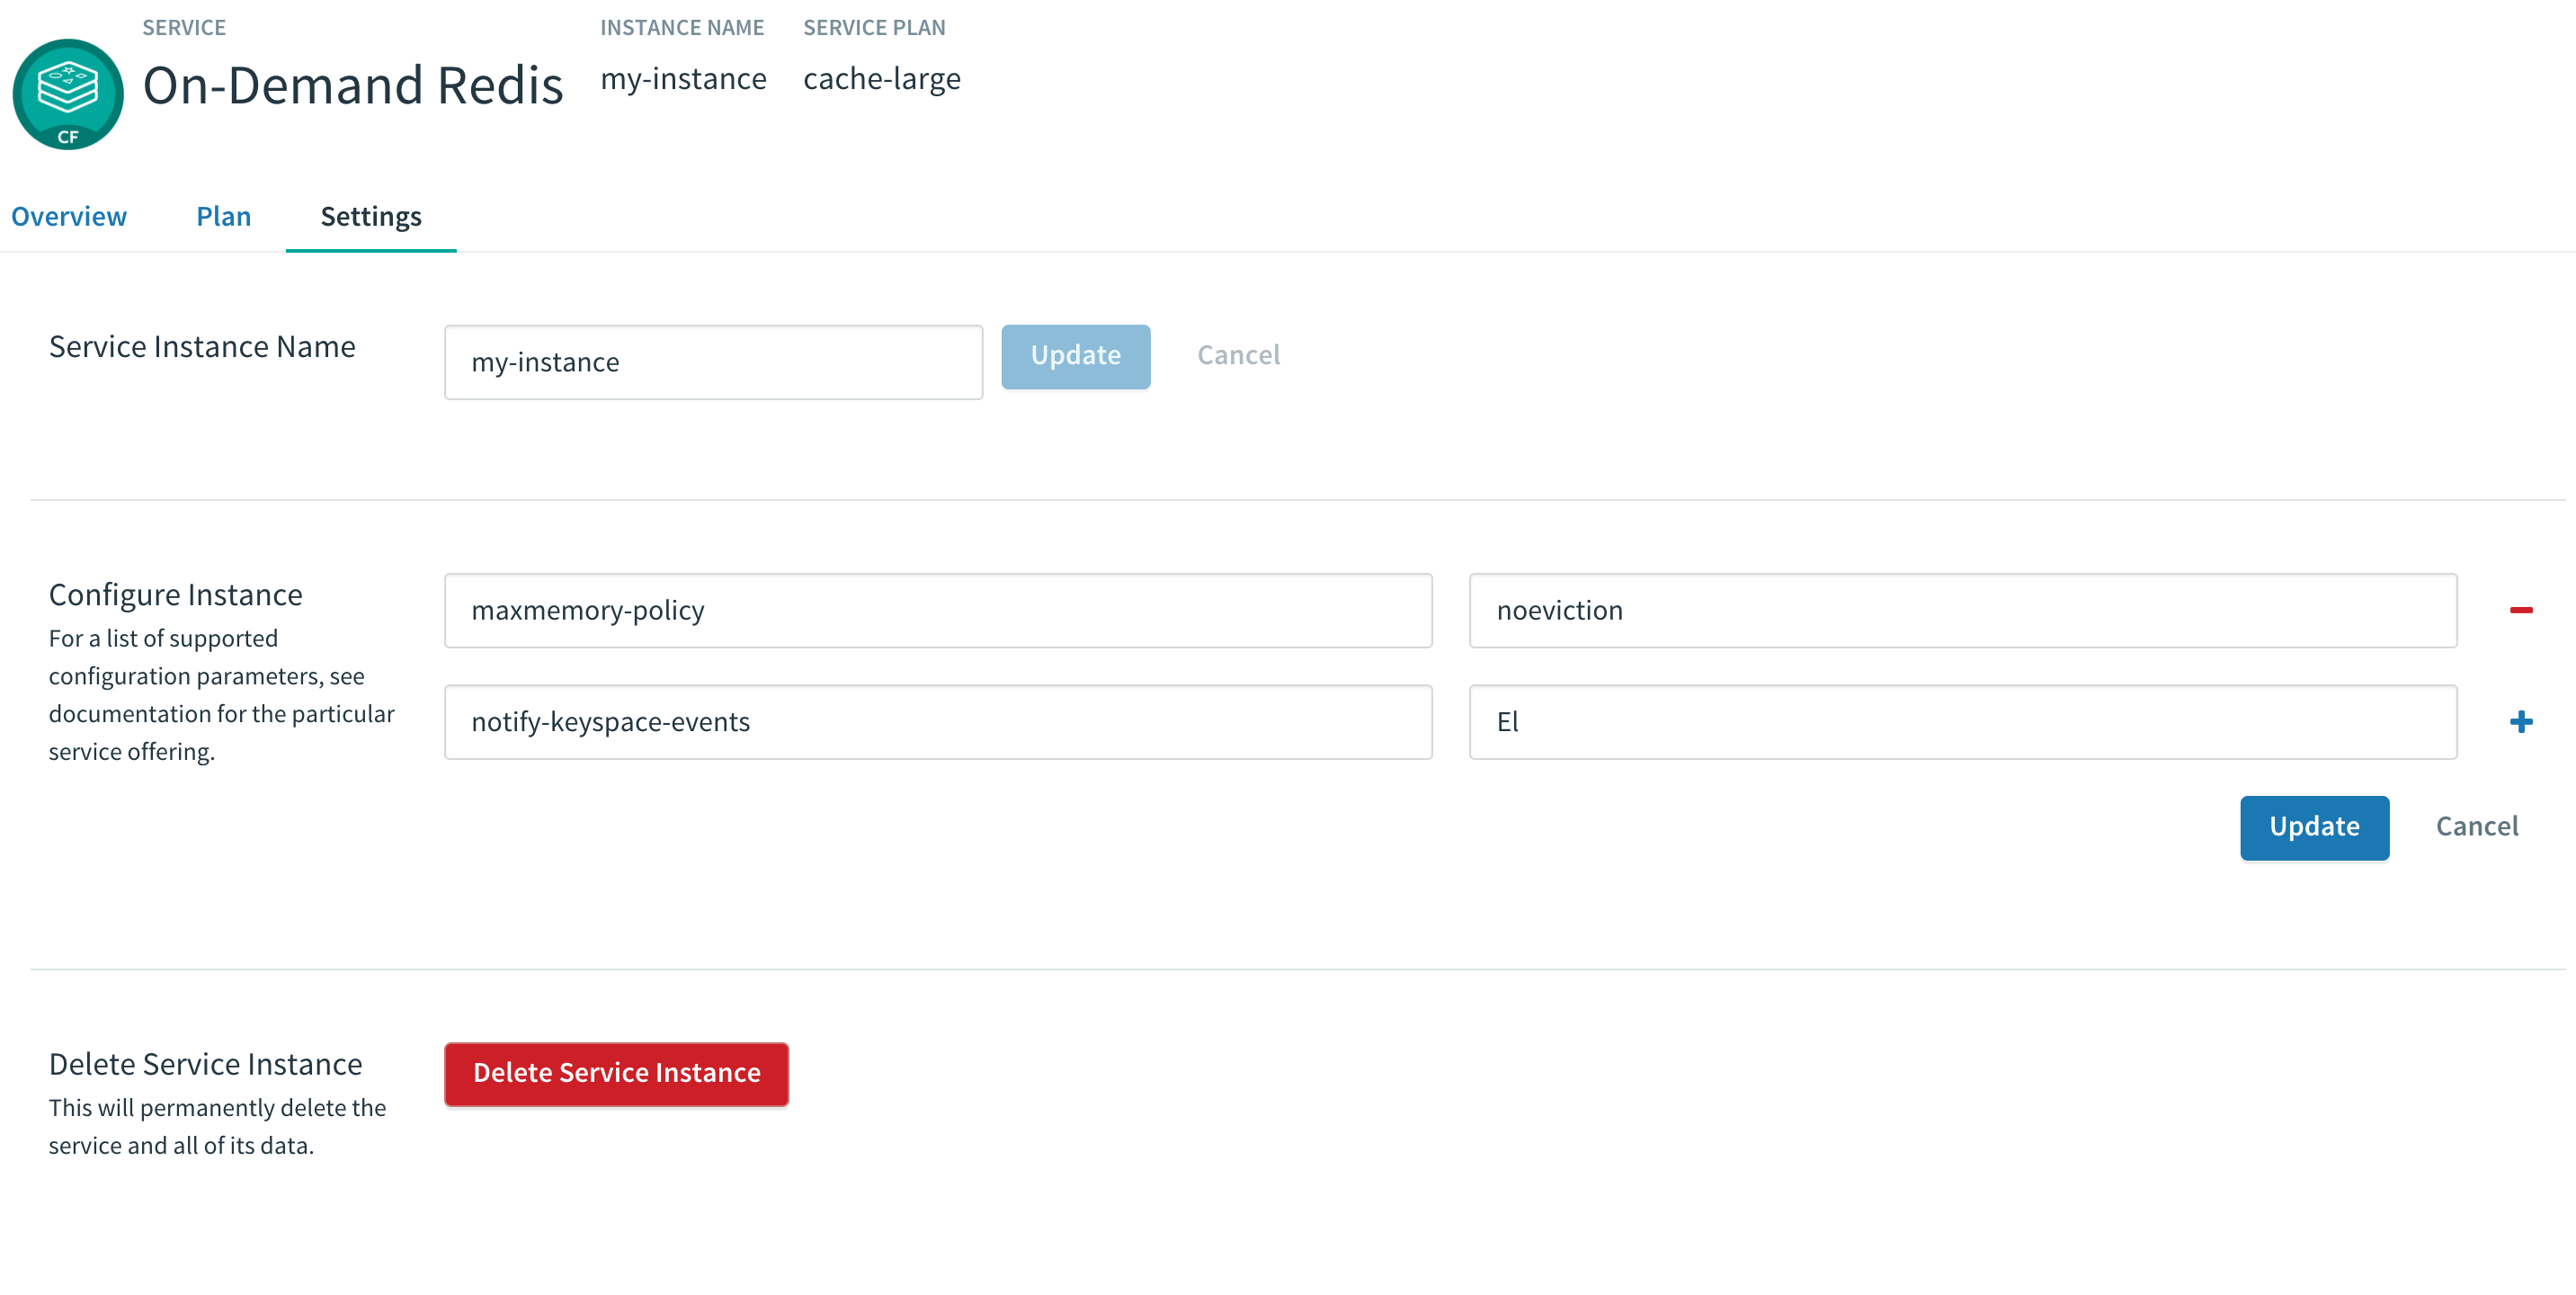
If the update is unsuccessful, Apps Manager displays an error with a description of what went wrong. The following screenshot is an example of an error caused by a missing hyphen in the volatile-lru setting.
Retrieve the Password for a Redis Service Instance
All Redis for Tanzu Application Service instances are password-protected and require authentication. This is enforced with the requirepass directive in the configuration file.
To retrieve the password, do the following:
-
Create a service-key for your Redis service instance by running:
cf create-service-key INSTANCE-NAME SERVICE-KEY-NAMEFor example:
$ cf create-service-key my-instance my-key
Creating service key my-key for service instance my-instance as admin...
OK
-
Retrieve the password using the command by running:
cf service-key INSTANCE-NAME SERVICE-KEY-NAMEFor example of this procedure, where the user is
admin:$ cf service-key my-instance my-key Getting key my-key for service instance my-instance as admin... { "host": "10.0.8.4", # IP or BOSH DNS hostname for ODB instances "password": "admin-password", "port": 6379 }
Redis for Tanzu Application Service data is accessible from apps bound to that instance. Some Redis for Tanzu Application Service users bind the opensource cf-redis-commander app to view instance data. This app is not maintained by the Redis for Tanzu Application Service team, and VMware cannot guarantee its performance or security.
Use the Redis Service in Your App
Environment variables are how Cloud Foundry communicates with a deployed app about its environment. To access the environment variables, bind your app to an instance and run cf env APP_NAME from the cf cli.
To access the Redis service from your app:
-
Run the following command using the name of the app bound to the Redis for Tanzu Application Service instance.
cf env APP_NAME -
In the output, note the connection strings listed in the
VCAP_SERVICES>credentialsobject for the app.
ExampleVCAP_SERVICES:{ "p-redis": [{ "credentials": { "host": "10.0.0.11", "password": "", "port": 6379 }, "label": "p-redis", "name": "redis", "plan": "shared-vm", "provider": null, "syslog_drain_url": null, "tags": [ "pivotal", "redis" ], "volume_mounts": [] }] } You can also search for your service by its
name, given when creating the service instance, or dynamically via thetagsorlabelproperties. -
In your app code, call the Redis service using the connection strings.
Manage Key Eviction for Shared-VM Instances
Shared-VM plans provision Redis instances with a max-memory policy set to no-eviction.
It is up to the app developer to manage eviction of keys. The following are a few options for doing this:
- After setting keys, use EXPIRE to set key expiry, or use SETEX to set key value and expiry at the same time.
- Explicitly delete keys after the app is done using them.
- Add a lua script to delete keys after a specified time period.
Access Redis Metrics for On-Demand Service Instances
To access metrics for Redis for Tanzu Application Service service instances, you can use Loggregator’s Log Cache feature with the Log Cache CLI plug-in. Log Cache is enabled by default.
To access metrics for on-demand service instances:
-
Install the cf CLI plug-in by running:
cf install-plugin -r CF-Community "log-cache" -
To access metrics for a service instance, run:
cf tail SERVICE-INSTANCE-NAMEWhere
SERVICE-INSTANCE-NAMEis the name of your service instance.For example:
  $ cf tail my-instance
  Retrieving logs for service my-instance in org system / space pivotal-services as admin...
  2018-07-03T09:54:14.84+0100 [my-instance] GAUGE info.clients.blocked_clients:0.000000 metric info.clients.client_biggest_input_buf:0.000000 metric ...
For more information about the metrics output, see Redis KPIs.
For more information about how to enable Log Cache and about the cf tail command, see Enable Log Cache.
Sharing a Redis Instance with Another Space
Sharing a service instance allows apps in different spaces to access the same Redis instance. Tile operators must enable this behavior and a cf admin must turn it on. For more information about this feature, see Sharing Service Instances in the Cloud Foundry documentation.
To share a service instance, run:
cf v3-share-service REDIS-SERVICE-INSTANCE -s OTHER-SPACE [-o OTHER-ORG]
Where:
REDIS-SERVICE-INSTANCEis the name of the Redis instance.OTHER-SPACEis the name of the other space you want to share this instance with.OTHER-ORGis the name of another org you want to share this instance with (optional).
Unshare a Redis Service Instance
Caution Redis only has one password and password rotation does not occur on unshare. After unsharing a service, any bound apps continue to have access to the Redis instance until the apps are restaged.
To unshare a service instance, run:
cf v3-unshare-service REDIS-SERVICE-INSTANCE -s OTHER-SPACE [-o OTHER-ORG]
Where:
REDIS-SERVICE-INSTANCEis the name of the Redis instance.OTHER-SPACEis the name of the other space you want to share this instance with.OTHER-ORGis the name of another org you want to share this instance with (optional).
Delete a Redis Instance
When you delete a Redis service instance, all apps that are bound to that service are automatically unbound and any data in the service instance is cleared.
Delete a Redis Service Instance with the cf CLI
To delete a service instance:
-
Run the following command and enter
ywhen prompted to confirm.cf delete-service SERVICE-INSTANCE-NAMEFor example:
$ cf delete-service my-redis-instance

Really delete the service my-redis-instance?> y
Deleting service my-redis-instance in org system / space apps-manager as admin...
OK
-
If you had apps that were bound to this service, you might need to restage or re-push your app for the app changes to take effect. For example:
$ cf restage my-app
Delete a Redis Service Instance with Apps Manager
To delete a service instance:
-
In the service instance Settings page, click Delete Service Instance.
-
If you had apps that were bound to this service, you might need to restage or re-push your app for the app changes to take effect. For example:
$ cf restage my-app
