


This topic tells you how to add an external identity provider to your Single Sign‑On for VMware Tanzu Application Service service plan.
Set up SAML
-
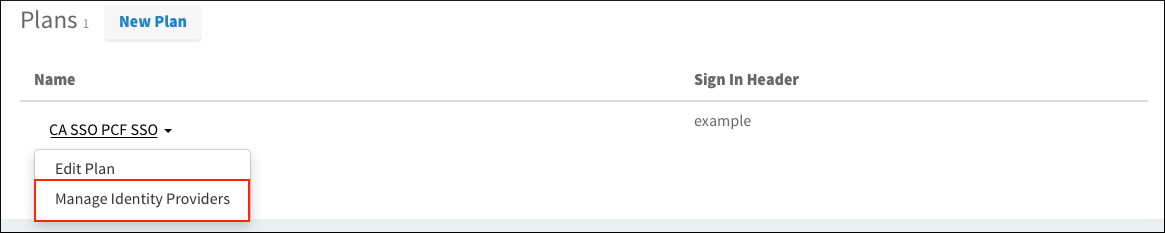
Log in to the SSO Operator Dashboard at
https://p-identity.SYSTEM-DOMAINas a Plan Administrator. -
Select your plan and click Manage Identity Providers on the drop-down menu.
-
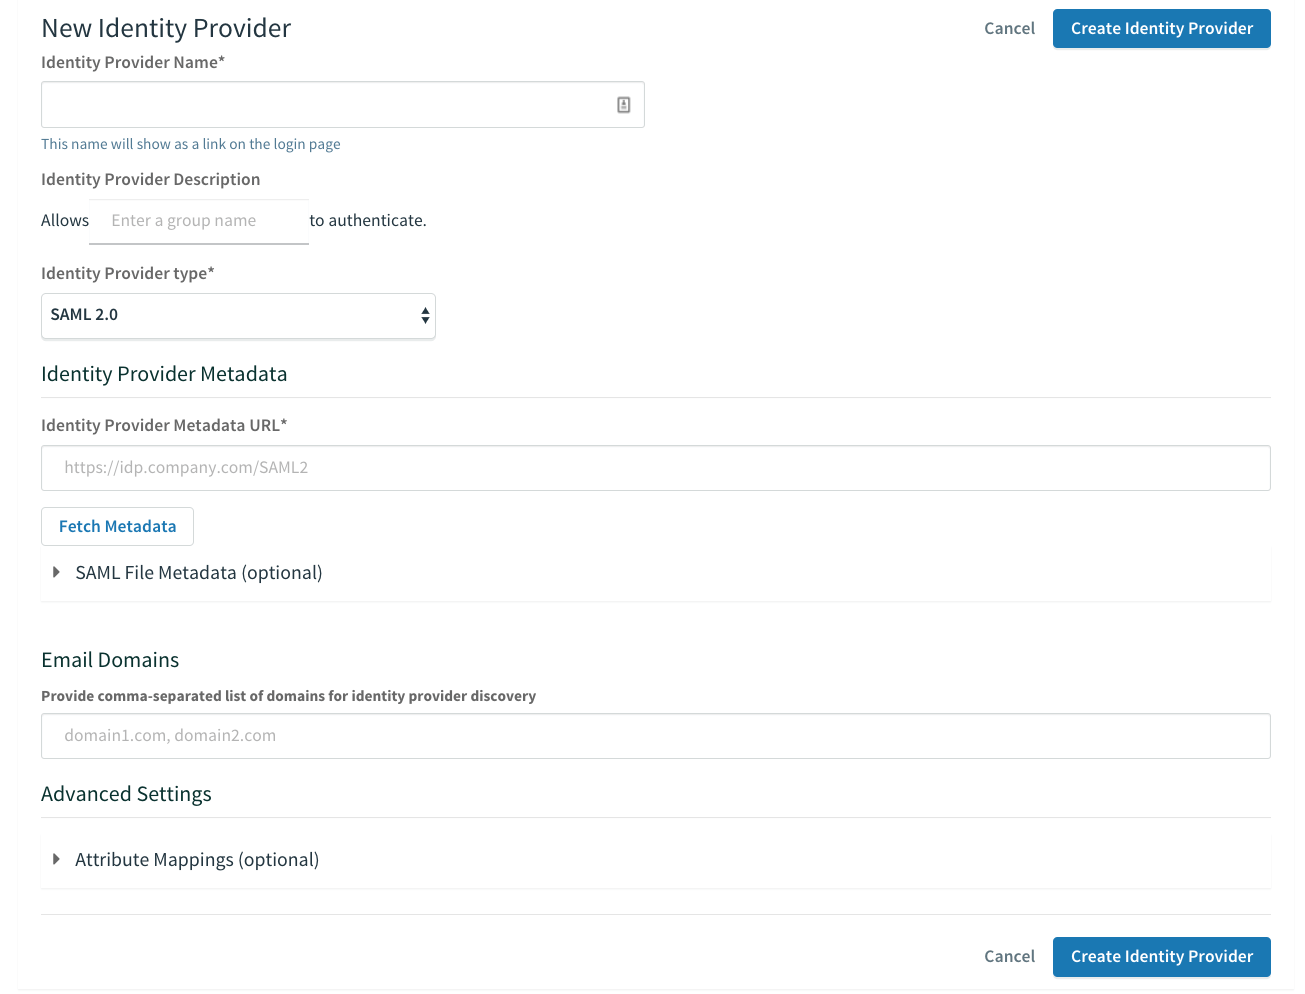
Click New Identity Provider to create a new identity provider.
-
To create a new identity provider, perform the following steps:
- Enter an identity provider name in Identity Provider Name.
- (Optional) Enter a description in Identity Provider Description.
- Click SAML File Metadata (optional), then click Upload Identity Provider Metadata to upload your metadata XML.
- (Optional) Under Advanced SAML Settings, click Attribute Mappings to enter the mappings.
-
Click Create Identity Provider.
-
Click Resource Permissions.
-
Click New Permissions Mapping and perform the following steps:
- Enter a Group Name.
- For Select Permissions, select the permissions that the members of the group from the external identity provider should have access to.
-
Navigate to the identity provider list.
-
Click Group Whitelist and enter the group names from the external identity provider that should be propagated in the ID token.
