


This topic tells you how to set up Active Directory Federation Services (AD FS) as your identity provider by configuring SAML integration.
Overview
To set up AD FS as your identity provider through SAML integration:
- Overview
- Set up SAML in <%= vars.product_short %>
- Set up SAML in AD FS
- Create Claim Rules
- (Optional) Deactivate CRL Checks
- Set up Groups in SAML from AD FS
- Create Custom Value Groups
Set up SAML in Single Sign‑On
To set up SAML in Single Sign‑On, follow the steps in Configure SAML Settings.
Set up SAML in AD FS
To set up SAML in AD FS:
-
Open the AD FS Management console.
-
Click Add Relying Party Trust… in the Actions pane.
-
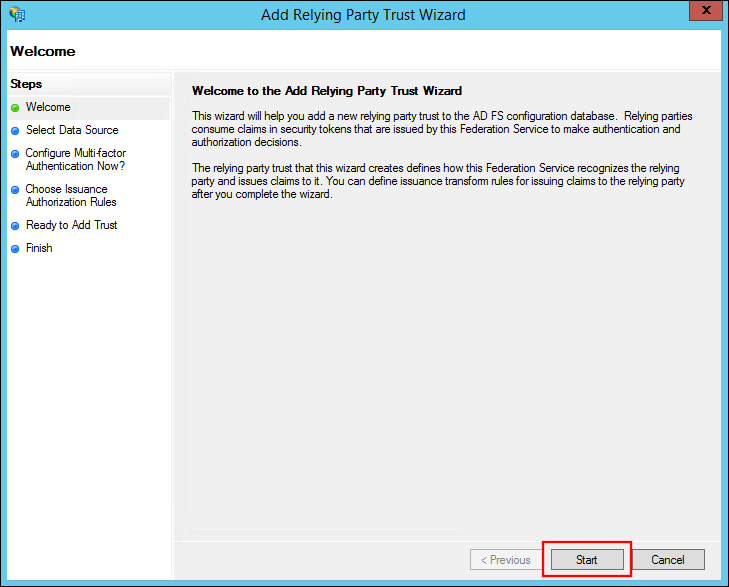
On the Welcome step, click Start.
-
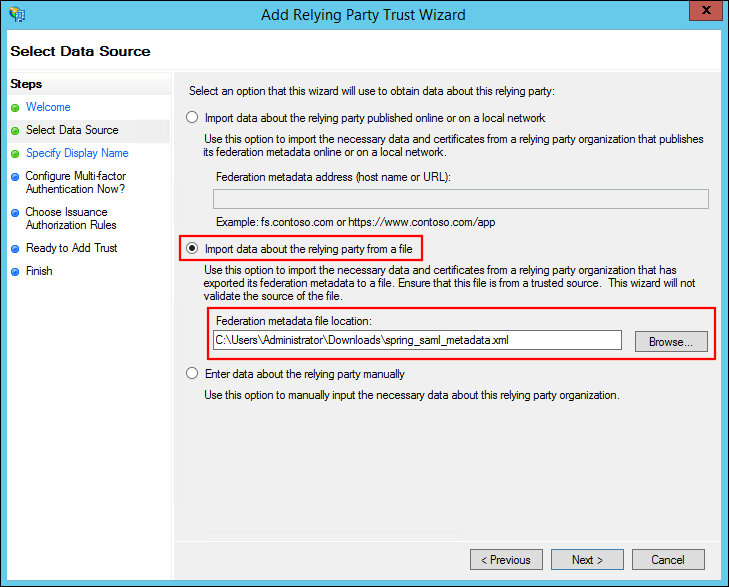
Select Import data about the relying party from a file, enter the path to the downloaded service provider metadata, and click Next.
-
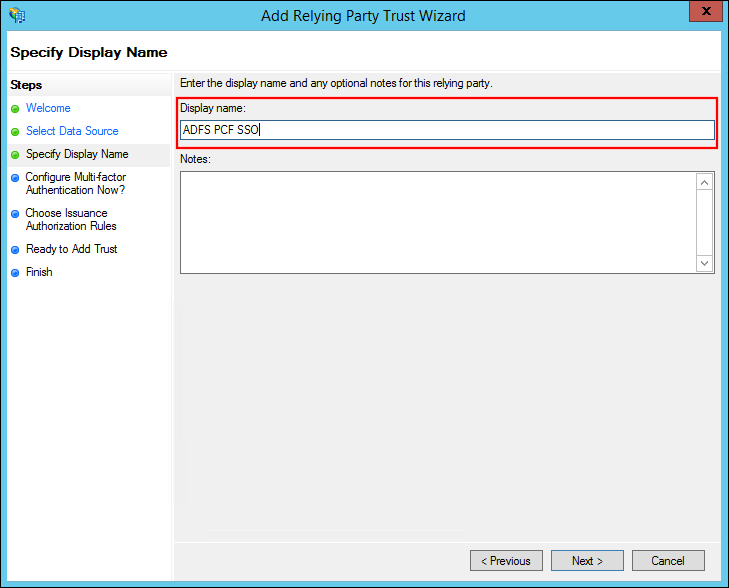
Enter a name for Display name and click Next.
-
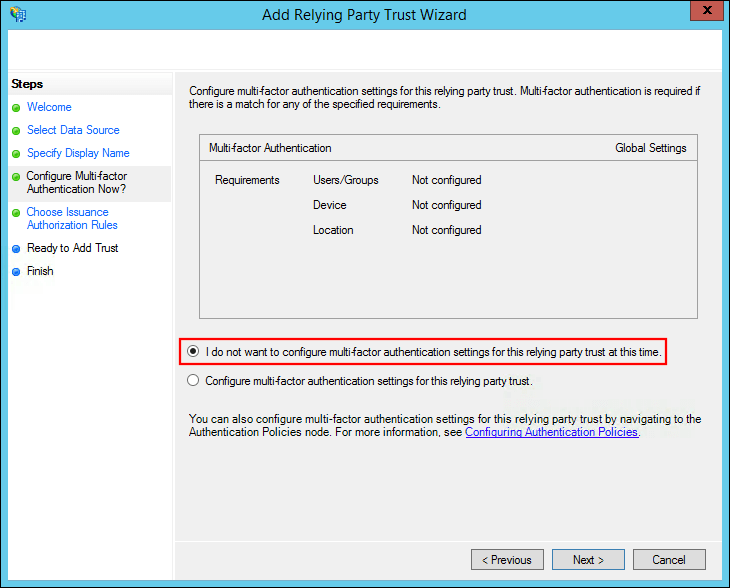
Leave the default multi-factor authentication selection and click Next.
-
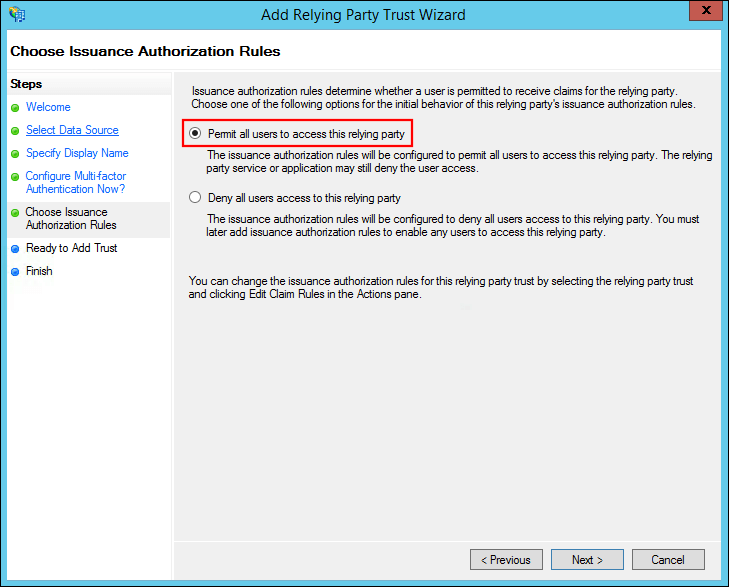
Select Permit all users to access this relying party and click Next.
-
Review your settings and click Next.
-
Click Close to finish the wizard.
-
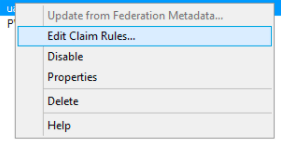
The claim rule editor should open by default. If it does not, select your Relying Party Trust and click Edit Claim Rules… in the Actions pane.
Create Claim Rules
To create two claim rules:
-
Click Add Rule.
-
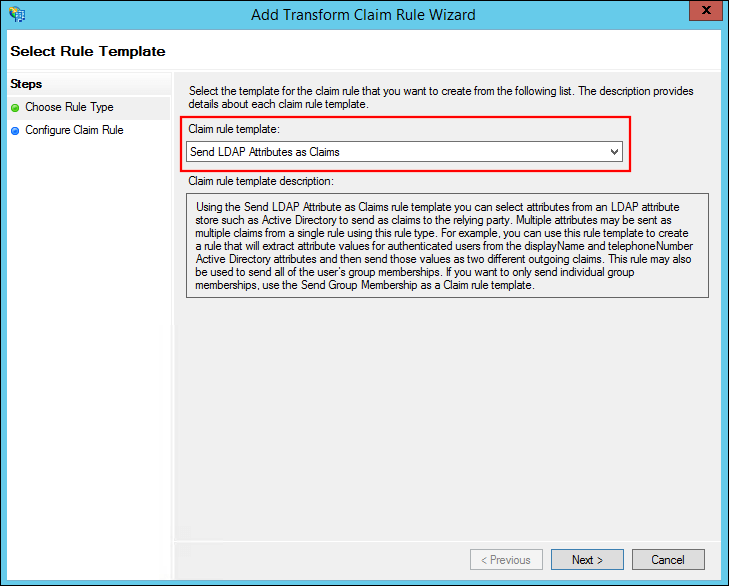
Select Send LDAP Attributes as Claims for Claim rule template and click Next.
-
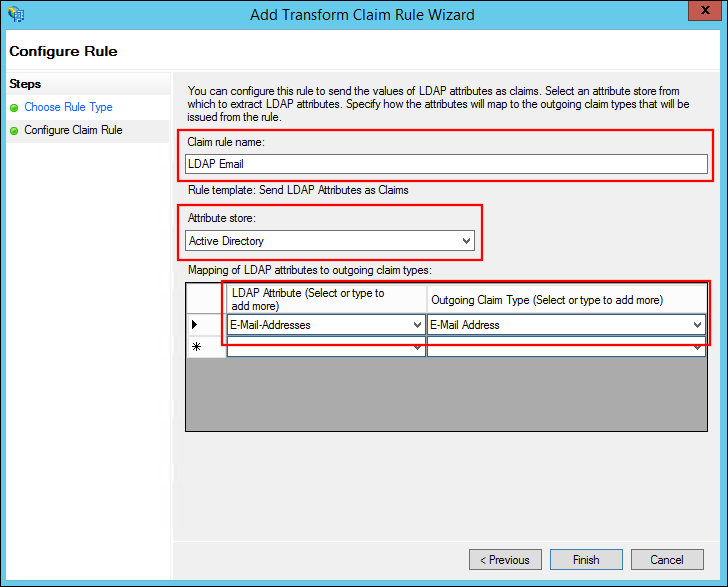
Enter a Claim rule name.
-
Select Active Directory for Attribute store.
-
Select E-Mail-Addresses for LDAP Attribute and select E-mail Address for Outgoing Claim Type.
-
Click Finish.
-
Click Add Rule.
-
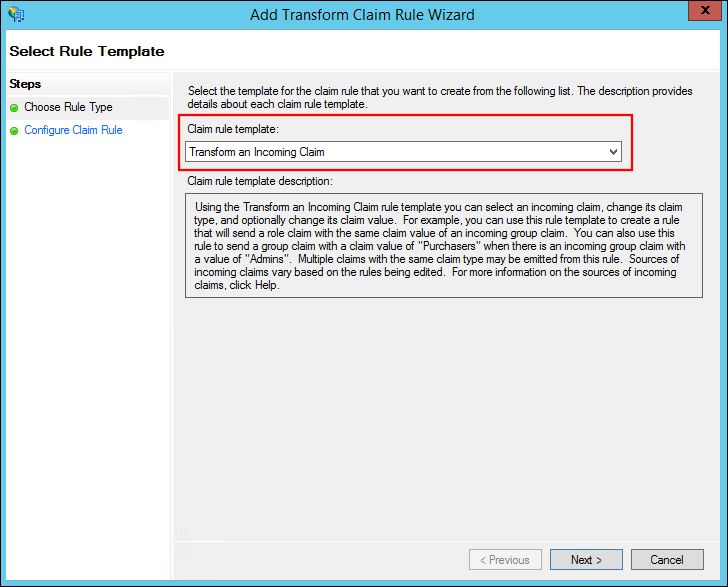
Select Transform an Incoming Claim from the Claim rule template dropdown and click Next.
-
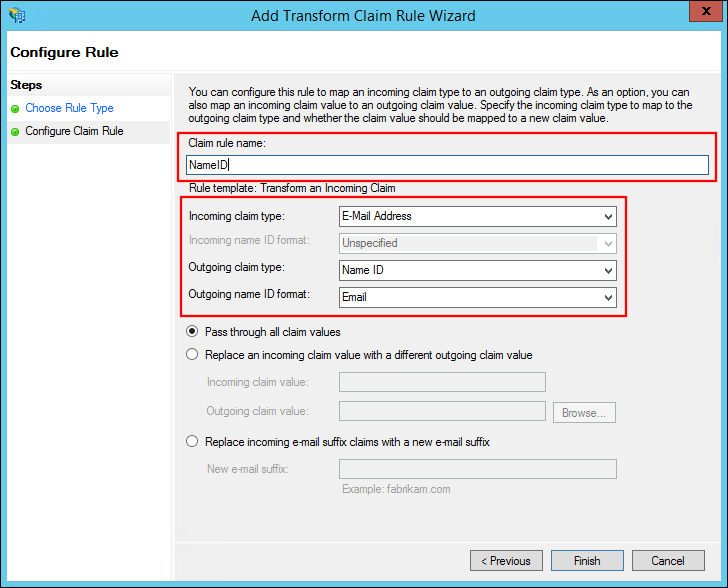
Enter a Claim rule name.
-
Select E-Mail Address for Incoming claim type.
-
Select Name ID for Outgoing claim type
-
Select Email for Outgoing name ID format.
-
Click Finish.
-
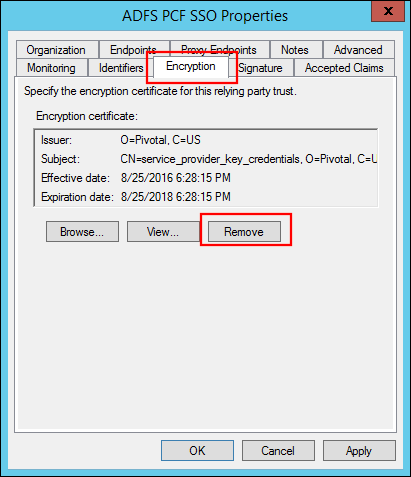
Double-click the new Relying Party Trust to open the properties.
-
Select the Encryption tab and click Remove to remove the encryption certificate.
-
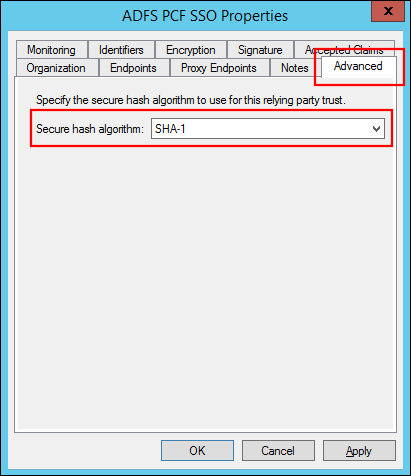
Select the Advanced tab and select the SHA algorithm for the Secure hash algorithm that matches the SHA Algorithm configured for VMware Tanzu Application Service for VMs.
(Optional) Deactivate CRL Checks
If you are using a self-signed certificate, deactivate CRL checks:
-
Open Windows Powershell as an admin.
-
Deactivate the CRL checks by running:
set-ADFSRelyingPartyTrust -TargetName "< Relying Party Trust >" -SigningCertificateRevocationCheck None -
(Optional) If you are using a self-signed certificate, add it to the AD FS trust store. Obtain the Tanzu Operations Manager certificate from
https://OPS_MANAGER_IP/api/v0/security/root_ca_certificateand add this CA certificate to the AD FS trust store, so AD FS can trust the “Service Provider Key Certificate” certificate signed by Tanzu Operations Manager ROOT CA. -
(Optional) To specify any application or group attributes that you want to map to users in the ID token, click Edit Claim Rules… and configure Send LDAP Attributes as Claims. For more information, see the next section.
Set up Groups in SAML from AD FS
To set up groups in SAML from AD FS:
-
Right-click your Relying Party Trust and select Edit Claim Rules….
-
Select Add Rule.
-
Select Send Group Membership as a Claim and click Next.
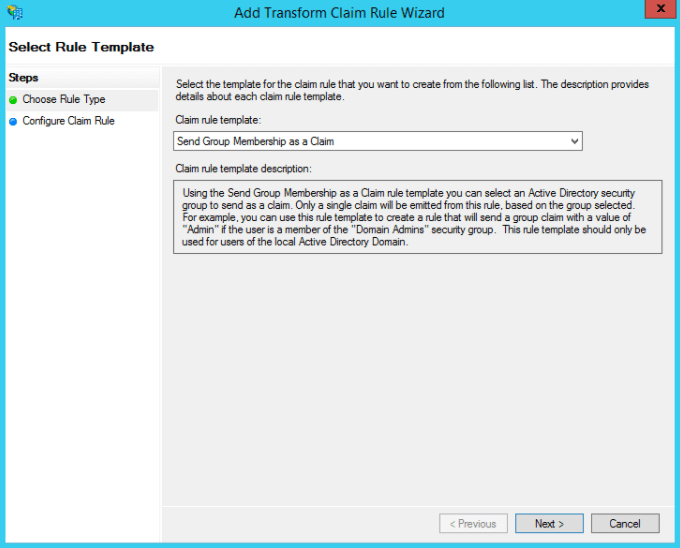
-
Enter the Claim rule name.
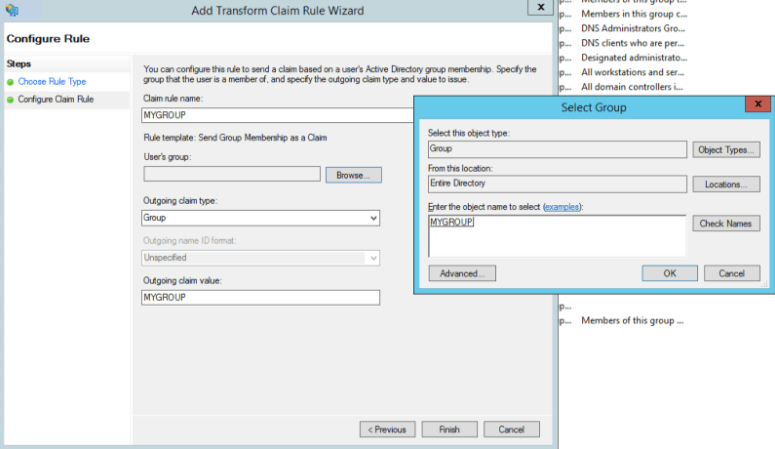
-
Click Browse to select your User’s group.
-
Select Group as your Outgoing claim type.
-
Set your Outgoing claim value to match your group’s name.
-
Click Finish.
-
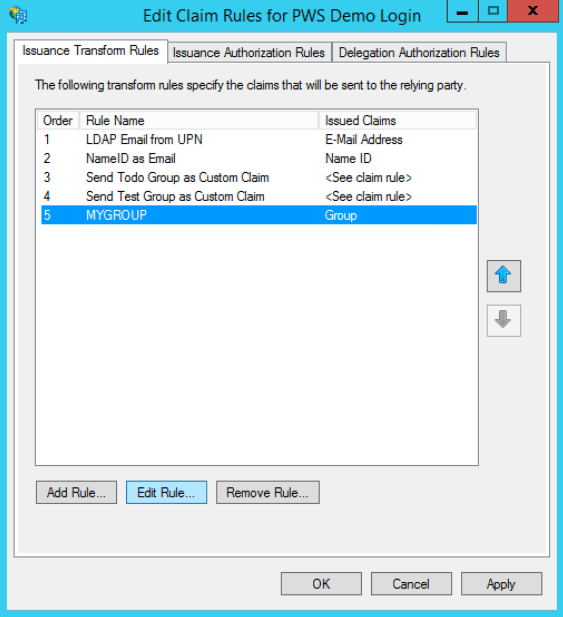
To save these configurations and use the default SAML assertion of
http://schemas.xmlsoap.org/claims/Group, click OK. If you want to pass the claims assertion as a custom value“groups”in the SAML assertion, continue to the Create Custom Value Groups procedure below.
Create Custom Value Groups
To create custom value groups:
-
Select your newly created rule and click Edit Rule.
-
Click View Rule Language.
-
Copy the text in the Claim rule language field to a notepad or other location. You need this text for the next steps.
-
Exit the Edit Rule menu. Select the rule you just added and click Remove Rule.
-
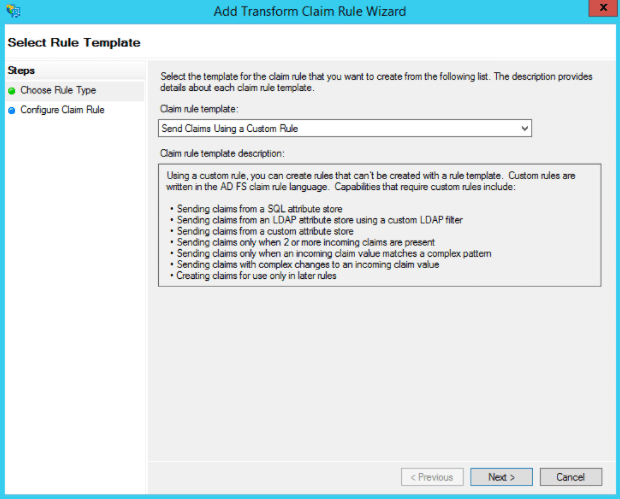
Click Add Rule.
-
Select Send Claims Using a Custom Rule from the Claim rule template dropdown.
-
Click Next.
-
Paste in the text you previously copied in step 3 from the removed rule. Edit the
Typeso that it only says“groups”.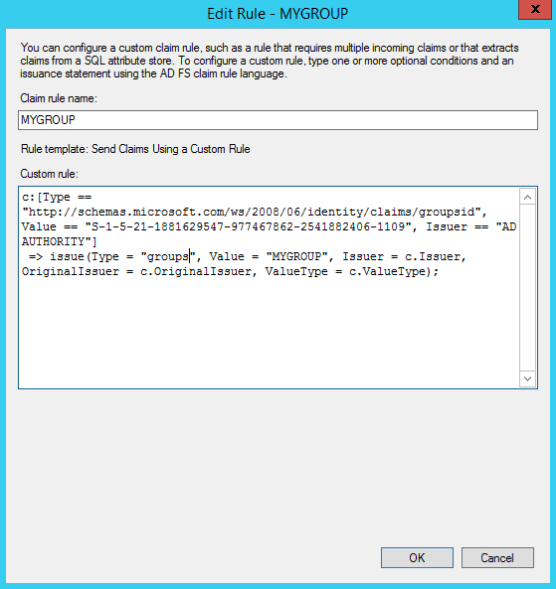
-
Click OK to finish making your changes and save the changes you made.
