


This topic tells you how developers configure their apps to use Single Sign‑On for VMware Tanzu Application Service and use the SSO Admin Client to manage connections between SSO identity providers, apps, users, and other resources.
Overview
Single Sign‑On enables users to log in through a single sign-on service and access other apps that are hosted or protected by the service. Eliminating the need for users to log in to individual apps improves security and productivity.
Register an App
Follow the instructions below to register an app for Single Sign‑On.
Prerequisites for Registering Apps
Before you can register your app for Single Sign‑On, you must create a service instance and choose your Single Sign‑On app type as follows:
-
Create a service instance by doing the procedure in Create Service Instances.
-
Determine your app’s Single Sign‑On app type. This informs which OAuth Grant Type you should use for your app. For more information, see Determining Single Sign‑On Application Type.
If your app is a resource server, you do not need to register the app because it only consumes tokens and does not handle any token acquisition flow itself. A resource server hosts protected resources and accepts and responds to protected resource requests using access tokens, such as an API.
-
Choose a method to register your app with the Single Sign‑On service:
- If your app is hosted on VMware Tanzu Application Service for VMs (TAS for VMs), follow one of the procedures in Register a TAS for VMs App below.
- If your app is not hosted on TAS for VMs, follow one of the procedures in Register an Externally Hosted App below.
Register a TAS for VMs App
To configure Single Sign‑On for a TAS for VMs app, use one of the following methods:
- Configure Single Sign‑On Properties with JSON Bind Parameters
-
Configure Single Sign‑On Properties with the App Manifest
Apps that have environment variables set using the app manifest do not work with
cf bind-service. If you have leftover environment variables previously set using the app manifest, you must remove them withcf unset-env APP-NAME PROPERTY-NAMEbefore you perform a service bind.
Configure Single Sign‑On Properties with JSON Bind Parameters
In Single Sign‑On v1.7.0 and later, you can use a JSON file or string containing bind parameters to configure Single Sign‑On properties. For more information about bind parameters, see Bind Parameters below.
To configure Single Sign‑On properties with JSON bind parameters:
-
Run:
cf bind-service APP-NAME INSTANCE-NAME -c JSONWhere:
APP-NAMEis the name of your appINSTANCE-NAMEis the name of the service instance you are bindingJSONis the path to the JSON file or the full JSON string containing bind parameters
For example:
$ cf bind-service my-app my-instance -c example.json
Binding service my-instance to my-app in org my-org / space test as [email protected]...
OK

$ cat example.json
{
    "grant_types": ["authorization_code"],
    "scopes": ["openid", "todo.read", "todo.write"],
    "authorities": ["openid", "uaa.resource", "todo.read", "todo.write"],
    "redirect_uris": ["https://my-app.example.com/**","http://my-app.example.com/path/to/app"],
    "auto_approved_scopes": ["openid", "todo.read"],
    "identity_providers": ["uaa","ldap","my-saml-provider"],
    "required_user_groups": ["openid","todo.read"],
    "resources": {"todo.read" : "Read to list", "todo.write": "Write to list"},
    "access_token_lifetime": 300,
    "refresh_token_lifetime": 86400,
    "icon": "R0lGODlhAQABAAAAACH5BAEKAAEALAAAAAABAAEAAAICTAEAOw==",
    "launch_url": "http://my-app.example.com",
    "show_on_home_page": true
}
For more information about the
cf bind-servicecommand, see bind-service in the Cloud Foundry CLI Reference Guide.
You can also bind service instances with Apps Manager. For more information, see Bind a Service Instance to an Application.
Bind Parameters
The table below provides descriptions and default values for bind parameters:
| Property Name | Description | Default |
|---|---|---|
grant_types |
The following grant types are supported by Single Sign‑On:
authorization_code and client_credentials grant types at the same time. Otherwise, you can only use one grant type per app. |
n/a |
identity_providers |
Allowed identity providers for the app through the Single Sign‑On service plan. This is a comma-separated list of identity provider origin keys. The origin keys are derived from the identity provider name using the following rules:
example.com Provider, the corresponding origin key is example-com-provider. |
uaa |
redirect_uris |
Comma-separated allowlist of redirection URIs allowed for the app. Each value must be a valid URI. Custom URIs are supported for mobile apps. | Always includes the app route |
scopes |
Comma-separated list of scopes that belong to the app and are registered as client scopes with Single Sign‑On. This value is ignored for client credential grant type apps. | openid |
auto_approved_scopes |
Comma-separated list of scopes that the app is automatically authorized when acting on behalf of users through Single Sign‑On. | Defaults to existing scopes/authorities |
authorities |
Comma-separated list of authorities that belong to the app and are registered as client authorities with Single Sign‑On. Privileged identity zone/plan admin scopes, such as scim.read and idps.write cannot be bootstrapped and must be assigned by zone/plan admins. This value is ignored for any grant type other than client credentials. |
uaa.resource |
required_user_groups |
Comma-separated list of permissions a user must have to log in to the app. The user must have all of the listed permissions to access the app. | n/a |
access_token_lifetime |
Lifetime in seconds for the access token issued to the app by Single Sign‑On. | 43200 |
refresh_token_lifetime |
Lifetime in seconds for the refresh token issued to the app by Single Sign‑On. | 2592000 (not used for client credentials) |
resources |
Resources for the app to use as scopes and authorities for Single Sign‑On created during bind, if they do not already exist. All permissions within the same top level permission, such as todo.read and todo.write, must be specified in the same bind command. You cannot specify additional permissions in the same top level permission, such as todo.admin, in additional binds. |
n/a |
icon |
App icon displayed next to the app name on the Account dashboard. It is displayed if show_on_home_page is set to true. Do not exceed 64kb. |
n/a |
launch_url |
App launch URL used for the app on the Account dashboard if show_on_home_page is set to true. |
The application route |
show_on_home_page |
If set to true, the app appears on the Account dashboard with the corresponding icon and launch URL. |
true |
Configure Single Sign‑On Properties with the App Manifest
If you configure Single Sign‑On properties with the app manifest, you do not need to manually bind your app to the service instance after you deploy your app. Single Sign‑On reads its configuration properties from environment variables that are set in the apps that use it.
These configurations are only applied at the time of the initial service bind. If you run cf push again, the app does not update the configurations. You can update the configurations through the SSO Developer Dashboard.
To register your app with the app manifest, do the following in your app manifest:
- Specify the Single Sign‑On service instance you want to bind your app. For an example, see the
servicessection in the YAML sample below. - Configure the Single Sign‑On configuration properties in your app manifest. For an example, see the properties in the
envsection in the YAML sample below.
The snippet below shows how to register your app with a Single Sign‑On service instance and how to configure the GRANT_TYPE and SSO_IDENTITY_PROVIDERS Single Sign‑On properties in your manifest.
---
applications:
  - name: my-example-app
    services:
    - my-sso-sample-instance
    env:
      GRANT_TYPE: implicit
      SSO_IDENTITY_PROVIDERS: uaa, sample-identity-provider
For examples of configuring Single Sign‑On properties in an app manifest, see the manifest.yml files in the identity-sample-apps GitHub repository.
The table below provides descriptions and default values for Single Sign‑On properties to include in the app manifest:
| Property Name | Description | Default |
|---|---|---|
name |
Name of the app | None, but this value is required. |
GRANT_TYPE |
The following grant types are supported by Single Sign‑On:
authorization_code and client_credentials grant types at the same time. Otherwise, you can only use one grant type per app. |
authorization_code(Web application type) |
SSO_IDENTITY_PROVIDERS |
Allowed identity providers for the app through the Single Sign‑On service plan. This is a comma-separated list of identity provider origin keys. The origin keys are derived from the identity provider name using the following rules:
example.com Provider, the corresponding origin key is example-com-provider. |
uaa(Tanzu Operations Manager internal user store) |
SSO_REDIRECT_URIS |
Comma-separated allowlist of redirection URIs for the app. Each value must be a valid URI. Custom URIs are supported for mobile apps. | (Always includes the app route) |
SSO_SCOPES |
Comma-separated list of scopes that belong to the app and are registered as client scopes with Single Sign‑On. This value is ignored for client credential grant type apps. VMware recommends including openid, which is not added to your user-provided list by default. |
openid |
SSO_AUTO_APPROVED_SCOPES |
Comma-separated list of scopes that the app is automatically authorized when acting on behalf of users through Single Sign‑On. | (Defaults to existing scopes and authorities) |
SSO_AUTHORITIES |
Comma-separated list of authorities that belong to the app and are registered as client authorities with Single Sign‑On. Privileged identity zone and plan admin scopes, such as scim.read, idps.write cannot be bootstrapped and must be assigned by zone and plan admins. This value is ignored for any grant type other than client credentials. VMware recommends including uaa.resource, which is not added your user-provided list by default. |
uaa.resource |
SSO_REQUIRED_USER_GROUPS |
Comma-separated list of permissions a user must have to log in to the app. The user must have all of the listed permissions to access the app. | n/a |
SSO_ACCESS_TOKEN_LIFETIME |
Lifetime in seconds for the access token issued to the app by Single Sign‑On. | 43200 |
SSO_REFRESH_TOKEN_LIFETIME |
Lifetime in seconds for the refresh token issued to the app by Single Sign‑On. | 2592000 (not used for client credentials) |
SSO_RESOURCES |
Resources that the app uses as scopes and authorities for Single Sign‑On to be created during bootstrapping if they do not already exist. The input format can be referenced in the provided sample manifest. Currently, all permissions within the same top-level permission, such as todo.read and todo.write, must be specified in the same app manifest. Currently you cannot specify additional permissions in the same top level permission, such as todo.admin, in additional app manifests. |
n/a |
SSO_ICON |
App icon that is displayed next to the app name on the Account dashboard if Show on Homepage is enabled. Do not exceed 64kb. | n/a |
SSO_LAUNCH_URL |
App launch URL that is used for the app on the Account dashboard if Show on Homepage is enabled. | (App route) |
SSO_SHOW_ON_HOME_PAGE |
If set to true, the app appears on the Account dashboard with the corresponding icon and launch URL. |
true |
For more information and app manifest examples, see the identity-sample-apps GitHub repository.
Register an Externally Hosted App
To configure Single Sign‑On for an app not hosted by TAS for VMs, use one of the following methods:
- Register an Externally Hosted App Using Service Keys
- Register an Externally Hosted App Using the SSO Developer Dashboard
Register an Externally Hosted App Using Service Keys
You can use a JSON file or string containing bind parameters to register an externally hosted app using service keys. For more information about bind parameters, see Bind Parameters above.
Service keys enable you to register apps for automation, such as scripts or pipelines.
To register an externally hosted app using service keys:
-
To create a service key, run:
cf create-service-key INSTANCE-NAME SERVICE-KEY -c JSONWhere:
INSTANCE-NAMEis the name of your service instance.SERVICE-KEYis the name you want for your service key.JSONis the path to the JSON file or the full JSON string containing bind parameters.
You must include the
nameparameter in your JSON file or string. The value ofnameis the user-defined name of your externally hosted app.For example:
$ cf create-service-key my-instance my-service-key -c example.json
Creating service key my-service-key for service instance my-instance as [email protected]...
OK

$ cat example.json
{
    "name": "my-app",
    "grant_types": ["authorization_code"],
    "scopes": ["openid", "todo.read", "todo.write"],
    "authorities": ["openid", "uaa.resource", "todo.read", "todo.write"],
    "redirect_uris": ["https://my-app.example.com/**","http://my-app.example.com/path/to/app"],
    "auto_approved_scopes": ["openid", "todo.read"],
    "identity_providers": ["uaa","ldap","saml"],
    "required_user_groups": ["openid","todo.read"],
    "resources": {"todo.read" : "Read to list", "todo.write": "Write to list"},
    "access_token_lifetime": 300,
    "refresh_token_lifetime": 86400,
    "icon": "R0lGODlhAQABAAAAACH5BAEKAAEALAAAAAABAAEAAAICTAEAOw==",
    "launch_url": "http://google.com",
    "show_on_home_page": false
}
For more information about the
cf create-service-keycommand, see create-service-key in the Cloud Foundry CLI Reference Guide. -
To obtain the service key credentials, run:
cf service-key INSTANCE-NAME SERVICE-KEYWhere:
INSTANCE-NAMEis the name of your service instance.SERVICE-KEYis the name of the service key you created in step 1.
For more information about how to use these values, see Integrate Single Sign‑On with Your App.
client_credentialsgrant types, administrative scopes, and scopes in other spaces are not available. These must be manually added by a plan admin or system operator through the SSO Operator Dashboard or UAA CLI.
Register an Externally Hosted App Using the SSO Developer Dashboard
To register an externally hosted app using the SSO Developer Dashboard:
- Determine the Single Sign‑On app type for your app. For more information, see Determining Single Sign‑On Application Type.
- Log in to Apps Manager as a Space Developer.
- Select the space where your service instance is located.
- Under Services, click Manage next to the Single Sign‑On service instance. This launches the SSO Developer Dashboard.
- Click Register App.
- Enter an App Name.
- Choose an app type under Select an App Type.
-
Under Select Identity Providers, select an identity provider for your app. Internal User Store is the default.
When registering an externally hosted app, a Space Developer can choose from internal and external identity providers. If the Space Developer selects multiple identity providers, users must select which provider to use when they sign in. This option is available for all app types except
Service-to-Service App.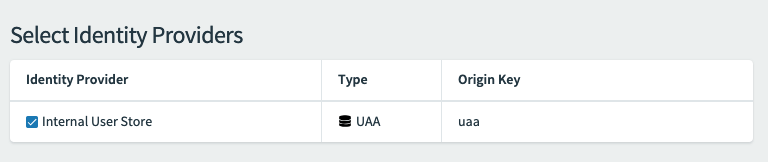
- If your App Type is
Web ApporSingle-Page JavaScript App, under App Settings enter an allowlist of URIs beneath Redirect URIs Whitelist. The redirect query parameter specified on the OAuth request must match the URIs specified in this list. Otherwise, Single Sign‑On rejects the request.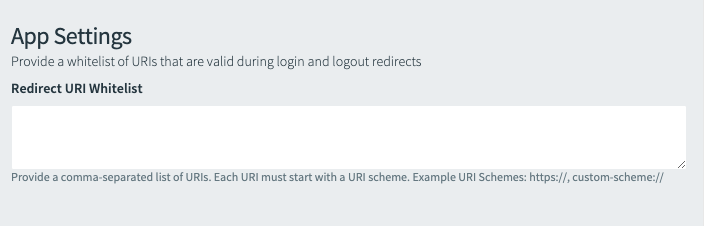
-
Under Authorization, select the System Permissions that the app can request on the user’s behalf. If this app is only for authentication purposes, then the
openidscope is sufficient. If the app makes API calls on behalf of the end user, specify both the scopes that the API enforces and the scopes that the app requests.Scope Description openProvides access to make OpenID Connect request. The default for Web, Native, and Single-Page JavaScript Apps user_attributesProvides access to custom attributes from an external identity provider rolesProvides access to external groups from an identity provider uaa.resourceProvides access to the check_tokenendpoint for service-to-service flows. The default for Service-to-Service Apps.Add the
user_attributesscope to the client scopes to return user attributes from the ID token.Under Scopes, you can select resources defined in any space if the app type is a
Web App,Native App, orSingle-Page JavaScript App. If the app type is aService-to-Service App, you can only select resources defined within the space. -
(Optional) Under Auto-Approved Scopes, select any scopes that Single Sign‑On automatically approves when the app makes a request on behalf of a user. Select only scopes pertaining to apps owned and managed by your company. Do not select scopes that pertain to externally hosted apps.
-
(Optional) Under Authentication, select the permissions that users must have to log in to the app. The user must have all of the selected permissions to access the app.
The Authentication settings do not apply to the
Service-to-Service Appapp type. -
(Optional) Under Token Validity, change the token expiration times. The default is set in the configuration for the Single Sign‑On service plan. For more information about tokens, see Configure a Token Policy.
-
(Optional) If your App Type is a
Web ApporSingle-Page JavaScript App, you can enable Show on Homepage to display the app on the UAA or Account home page. If you want an app to display on the home page, you must enter an App Launch URL or upload an app icon. - In App Launch URL, enter the address you want for your app.
- Upload an app icon for your app. The file size limit and 1 MB, and the file type must be JPEG, GIF, or PNG.

- Click Register App.
- View and download the App ID and App Secret. Record these credentials to use in other Single Sign‑On procedures.
You can only view the App Secret when an app is first registered or the secret is regenerated.
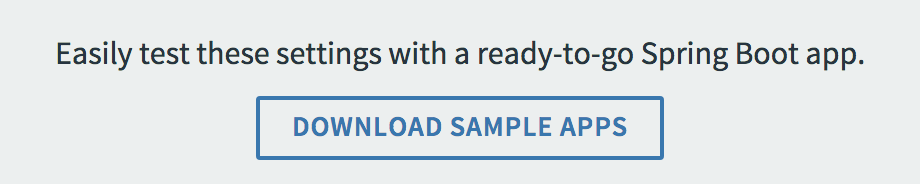
- (Optional) To view examples of how to integrate Single Sign‑On into your Spring Boot apps, click Download Sample Apps.
Manage App Configurations
The SSO Developer Dashboard enables app developers to view the app configurations and resources available within their space.
Prerequisite
Before you access the dashboard, you must create a service instance for your space. See Create Service Instances.
Procedure
To manage your app configurations through the SSO Developer Dashboard:
- Log in to Apps Manager as a Space Developer.
- Select the space where your service instance is located.
- Under Services, click Manage next to the Single Sign‑On service instance to launch the SSO Developer Dashboard.
- Click your app.
-
Under Select Identity Providers, select an identity provider for your app. Internal User Store is the default.
When binding a TAS for VMs app, a Space Developer can choose from internal and external identity providers. If the Space Developer selects multiple identity providers, users must select which provider to use when they sign in. This option is available for all app types except
Service-to-Service App. - If your App Type is
Web ApporSingle-Page JavaScript App, under App Settings enter an allowlist of URIs beneath Redirect URIs Whitelist. The redirect query parameter specified on the OAuth request must match the URIs specified in this list. Otherwise, Single Sign‑On rejects the request. -
Under Authorization, select the System Permissions that the app can request on the user’s behalf. If this app is only for authentication purposes, then the
openidscope is sufficient. If the app makes API calls on behalf of the end user, specify both the scopes that the API enforces and the scopes that the app requests.Scope Description openProvides access to make OpenID Connect request. The default for Web, Native, and Single-Page JavaScript Apps user_attributesProvides access to custom attributes from an external identity provider rolesProvides access to external groups from an identity provider uaa.resourceProvides access to the check_tokenendpoint for service-to-service flows. The default for Service-to-Service Apps.Under Scopes, you can select resources defined in any space if the app type is a
Web App,Native App, orSingle-Page JavaScript App. If the app type is aService-to-Service App, you can only select resources defined within the space. -
(Optional) Under Auto-Approved Scopes, select any scopes that Single Sign‑On automatically approves when the app makes a request on behalf of a user. Select only scopes pertaining to apps owned and managed by your company. Do not select scopes that pertain to externally hosted apps.
-
(Optional) Under Token Validity, change the token expiration times. The default is set in the configuration for the Single Sign‑On service plan. For more information about tokens, see Configure a Token Policy.
-
(Optional) If your App Type is a
Web ApporSingle-Page JavaScript App, you can enable Show on Homepage to display the app on the UAA or Account home page.If you want an app to display on the home page, you must enter an App Launch URL or upload an app icon.
- In App Launch URL, enter the address you want for your app.
- Upload an app icon for your app.
- Click Update App.
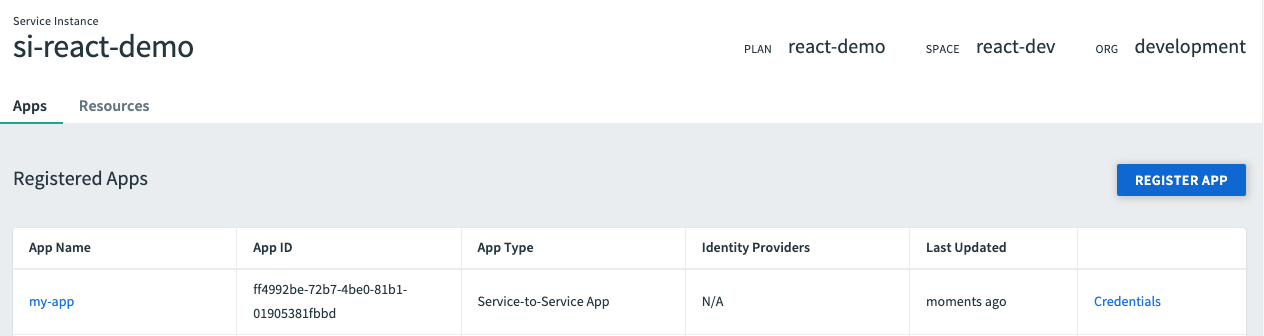
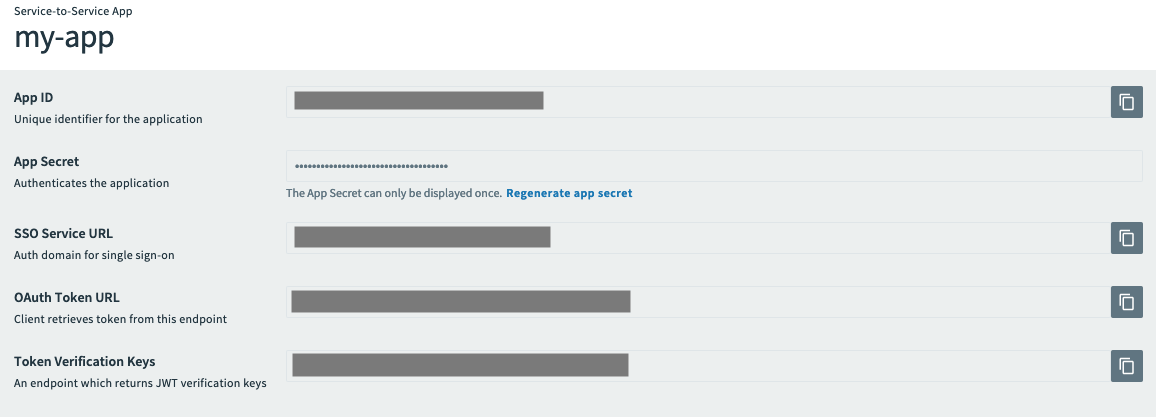
Credentials of Existing App Configurations
You can view the credentials and endpoints required for app integration for an existing app on the Credentials page.
To view credentials of an existing app:
- Log in to Apps Manager as a Space Developer.
- Select the space where your service instance is located.
- Under Services, click the Single Sign‑On service.
- Click Manage next to your Single Sign‑On service instance to launch the SSO Developer Dashboard.
-
Under Apps, click Credentials near the name of your app.
You can only view the App Secret when an app is first registered or the secret is regenerated.
Regenerate an App Secret
You must not regenerate an app secret for TAS for VMs bound apps, because VCAP_SERVICES does not update with the new client_secret. To regenerate a client for a TAS for VMs bound app, you must delete and re-create the service binding from your app to Single Sign‑On.
To regenerate an app secret of an existing app:
- Log in to Apps Manager as a Space Developer.
- Select the space where your service instance is located.
- Under Services, click the Single Sign‑On service.
- Click Manage next to your Single Sign‑On service instance to launch the SSO Developer Dashboard.
- Under Apps, click the Credentials near the name of your app.
- Click Regenerate App secret under the App Secret field.
- On the dialog box, click Regenerate App Secret to confirm that you want to regenerate an app’s secret value.
- View and download the App ID and regenerated App Secret.
- Record these credentials to use in other Single Sign‑On procedures.
Regenerating an App Secret requires you to update the secret at the client.
Create an Admin Client
You can create an admin client to perform administrative functions, such as managing identity providers, apps, users, groups, and resources in a specific zone where you create the client.
You must be at least a plan admin to follow these steps.
To create an admin client:
- Log in to Apps Manager.
- Select the space where your service instance is located. This specifies the zone you manage as an admin client.
- Under Services, click the Single Sign‑On service.
- Click Manage next to your Single Sign‑On service instance to launch the SSO Developer Dashboard.
- Click Register App.
- Enter an App Name.
- Under Select an App Type, select Service-to-Service App.
- Under Authorization, select what actions the admin client can perform from the following Admin Permissions:
Scope Description clients.adminProvides superuser access to create, modify, and delete clients clients.readProvides access to read information about clients clients.writeProvides access to create and modify clients scim.createProvides access to create users scim.readProvides access to read information about users and group memberships scim.writeProvides access to create, modify, and delete users and group memberships idps.readProvides access to read information about identity providers idps.writeProvides access to create, modify, and delete identity providers - Click Register App.
- View and download the App ID and App Secret.
- Record these credentials to use in other Single Sign‑On procedures.
You can only view the App Secret when an app is first registered or the secret is regenerated.
Unregister App from Single Sign‑On
To unregister an app from Single Sign‑On:
-
If you configured a TAS for VMs app in Set Up Apps to Use Single Sign‑On above, see Unregister a TAS for VMs App below.
-
If you registered an externally hosted app using service keys in Register an Externally Hosted App Using Service Keys above, see Unregister an Externally Hosted App Using Service Keys below.
-
If you registered an externally hosted app using the SSO Developer Dashboard in Register an Externally Hosted App Using the SSO Developer Dashboard above, see Unregister an Externally Hosted App Using the Service Instance Developer Dashboard below.
Unregister a TAS for VMs App
To unregister a TAS for VMs app:
-
Run:
cf unbind-service APP-NAME INSTANCE-NAMEWhere:
APP-NAMEis the name of your appINSTANCE-NAMEis the name of the service instance you are binding
For more information about the
cf unbind-servicecommand, see unbind-service in the Cloud Foundry CLI Reference Guide.When you unbind the app, all SSO configuration for the app is permanently deleted.
If you delete a TAS for VMs app, the app is automatically unregistered from Single Sign‑On.
Unregister an Externally Hosted App Using Service Keys
To unregister an externally hosted app using service keys:
-
Run:
cf delete-service-key INSTANCE-NAME SERVICE-KEYWhere:
INSTANCE-NAMEis the name of your service instanceSERVICE-KEYis the name you want for your service key
For more information about the
cf delete-service-keycommand, see delete-service-key in the Cloud Foundry CLI Reference Guide.
Unregister an Externally Hosted App Using SSO Developer Dashboard
To unregister an externally hosted app using the SSO Developer Dashboard:
- To navigate to the SSO Developer Dashboard, follow the procedure in Access the SSO Developer Dashboard.
- Click your app.
- Click Unregister App at the bottom of the page.
- When prompted, click Unregister App to confirm that you want to unregister the app and its configurations.
Deleting an externally hosted app removes the app and its configurations from the SSO Developer Dashboard. However, it still exists on your hosted platform.
