Use the Guest Customization Wizard to save guest operating system settings in a specification that can be applied when cloning virtual machines or deploying from templates.
Procedure
Log in to the VMware vSphere Web Client as someone with administrative privileges.
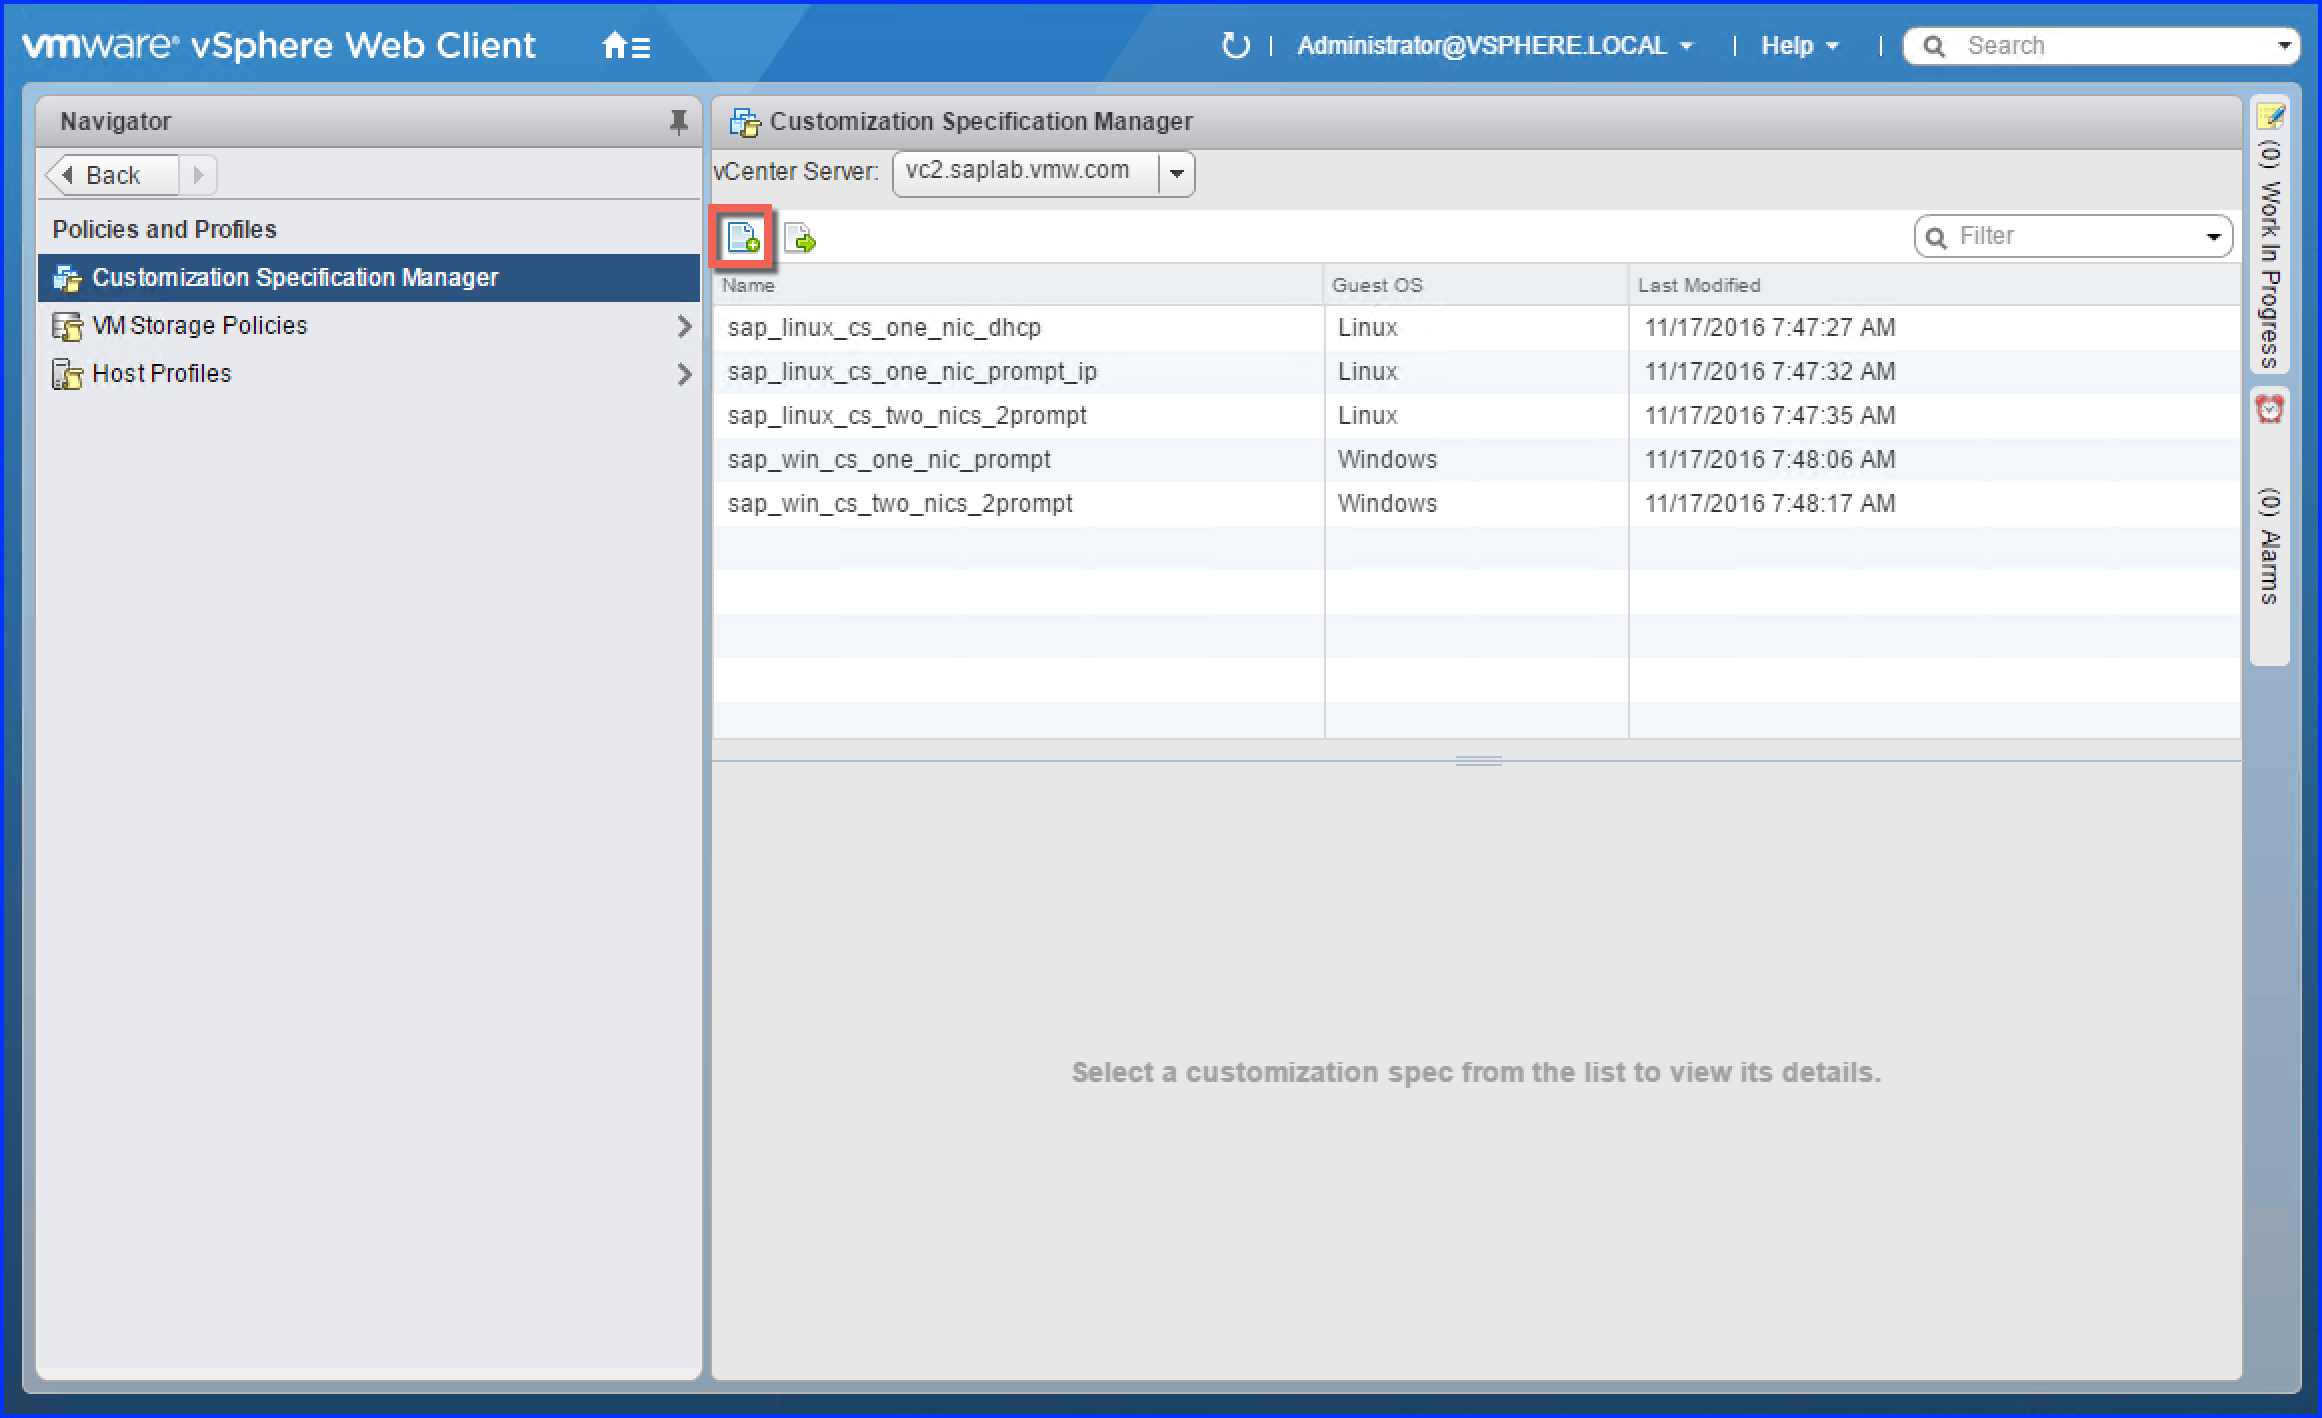
Select Policies and Profiles from the Menu.
Figure 1. Policies and Profiles
Click on Customization Specification ManagerVM Customization Specifications.
The browser displays a page, similar to the following:
Figure 2. VM Customization Specification
Click the plusCreate a new specification icon (highlighted in the preceding figure for emphasis).
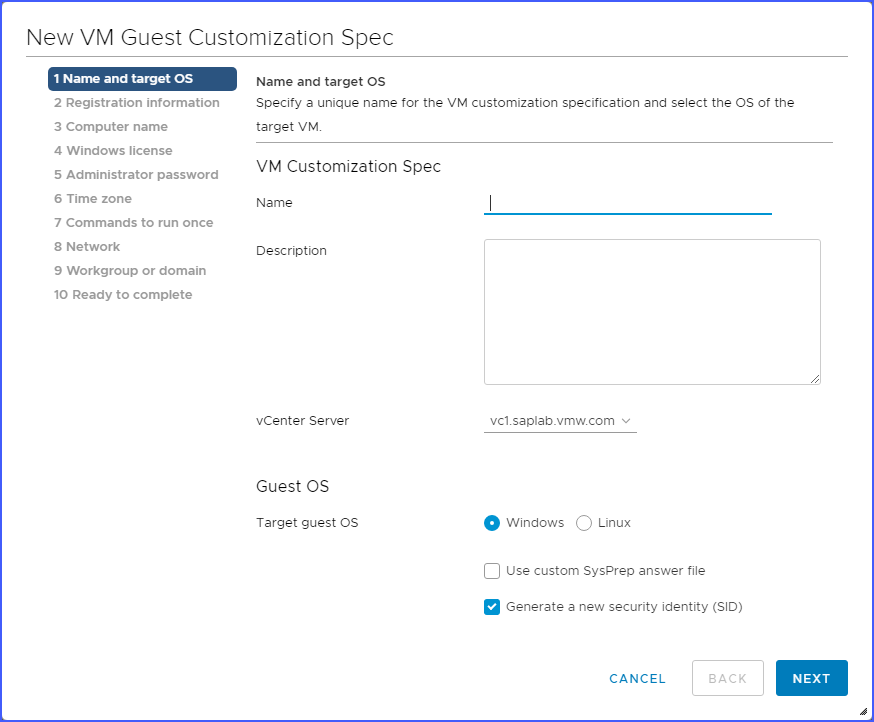
The browser displays the
New VM Guest Customization Spec Wizard similar to the following:
Figure 3. New VM Guest Customization Spec
Select Linux as the Target VM Operating SystemTarget guest OS.
Enter a name for the customization specification in the Customization Spec NameName field. VMware suggests choosing a name that makes it easy for the LaMa Administrator to identify the contents of the customization specification. The Description field should contain a brief description of the customization specification. Note: It cannot contain periods (.) or blank spaces or Backslash (\) or Forward Slash (/) and cannot be made up of digits only
Click Next.
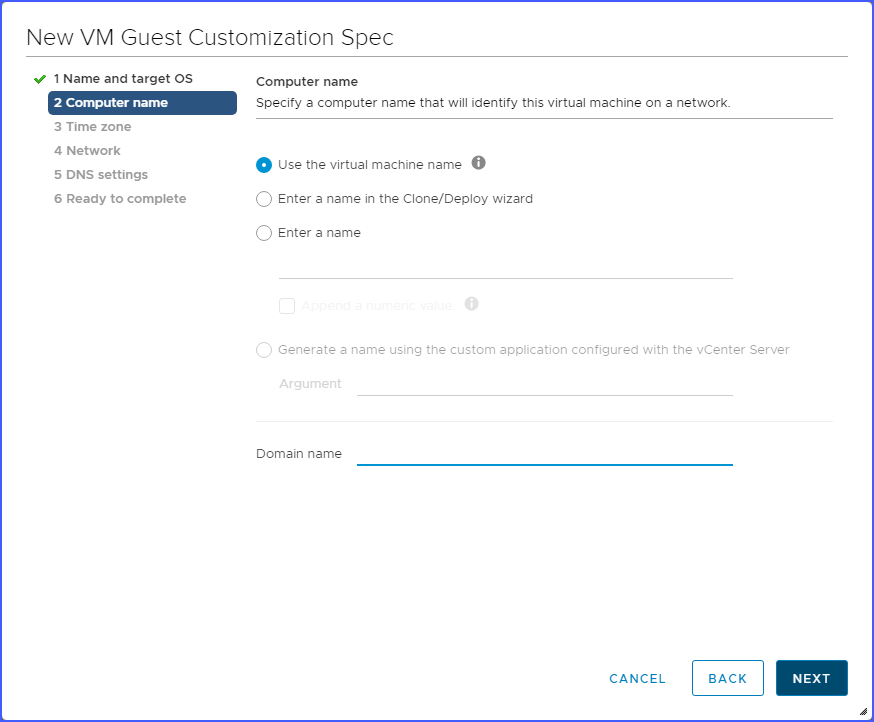
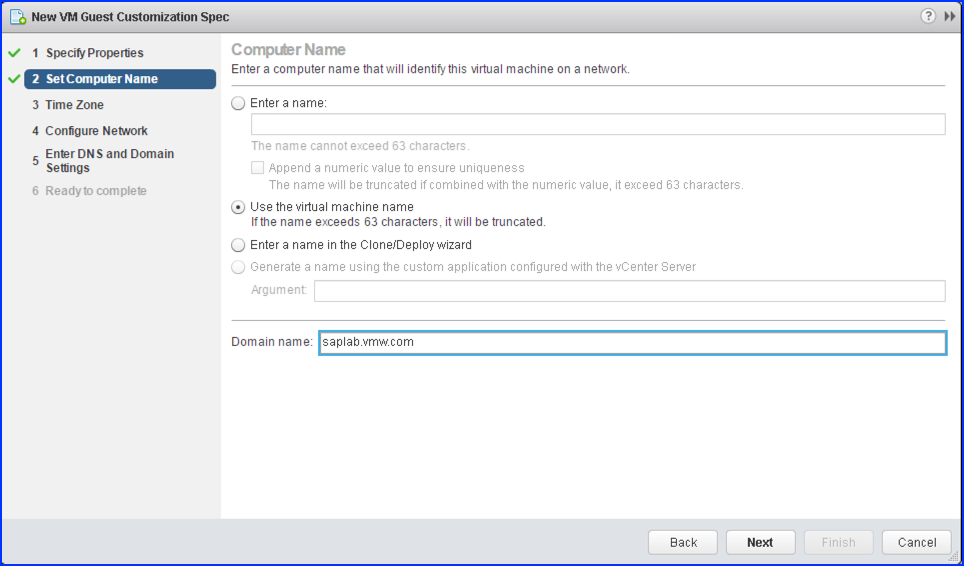
The browser displays the
Set Computer NameComputer name dialog of the Wizard similar to the following:
Figure 4. New VM Guest Customization Spec-Computer Name
Select Use the virtual machine name radio button and enter the DNS domain to which the virtual machine belongs to in the Domain NameDomain name field. Click Next.
The browser displays the
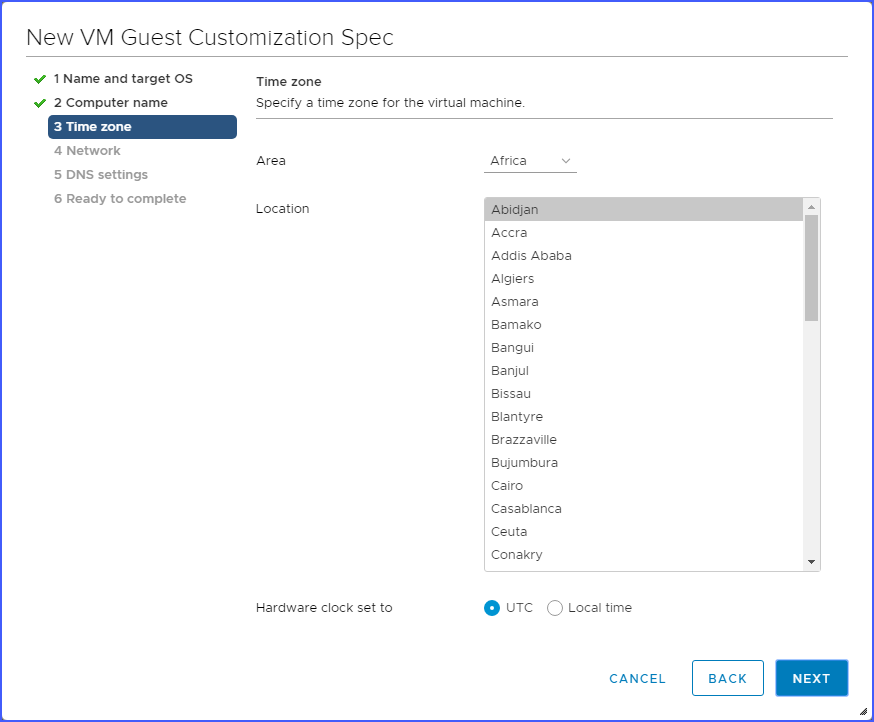
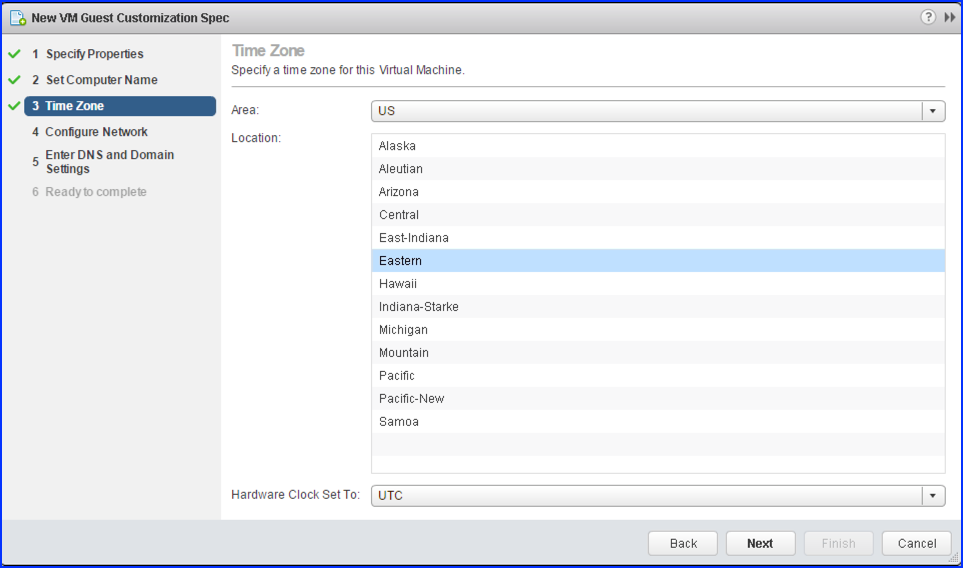
Time ZoneTime zone dialog of the Wizard.
Figure 5. New VM Guest Customization Spec-Time zone
In the Time ZoneTime zone dialog select the Area and Location of the virtual machine so that it has the proper time zone. In the Hardware Clock Set ToHardware clock set to field specify the time zone to which the hardware clock should be set and click Next.
The browser now displays the
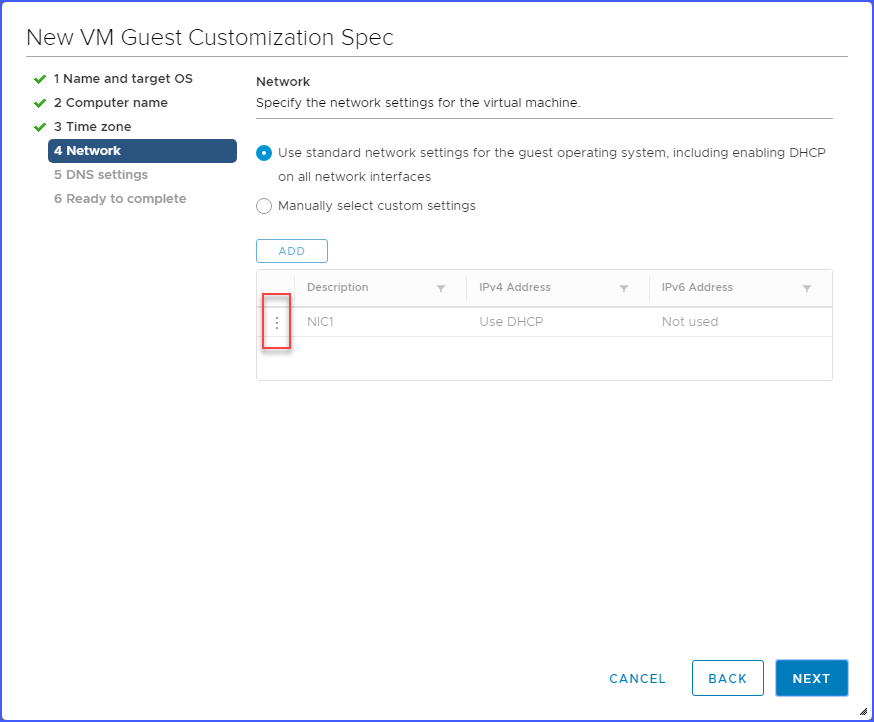
Configure NetworkNetwork dialog of the Wizard.
Figure 6. New VM Guest Customization Spec-Network
It allows to configure every network interface of the customization specification. By default, Wizard defines one network interface, called
NIC1, that use DHCP to get IP parameters.
(Optional) Edit an existing network interface, including IP parameters:
Select Manually select custom settings radio button.
Select the network interface to edit.
Click the Edit(pencil) icon. The Wizard browser displays the Edit Network page, similar to the following:
Click the three dots icon (highlighted in the preceding figure for emphasis) and select Edit. The Wizard browser displays the Edit Network page, similar to the following:
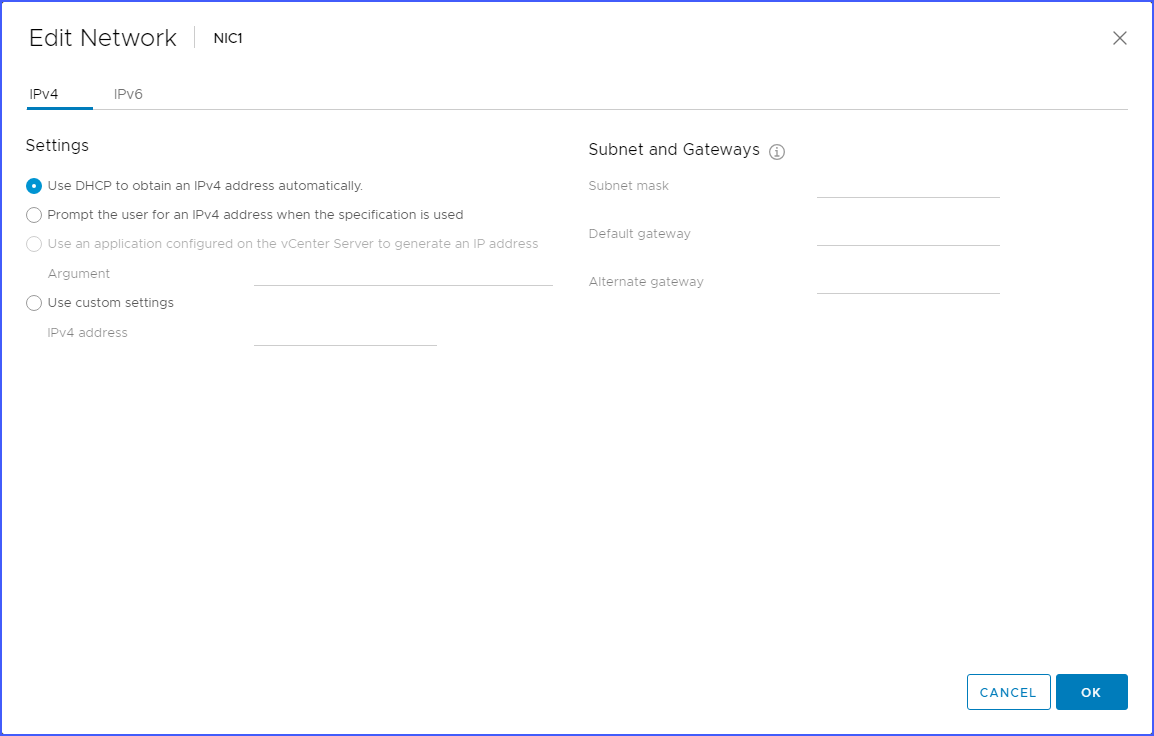
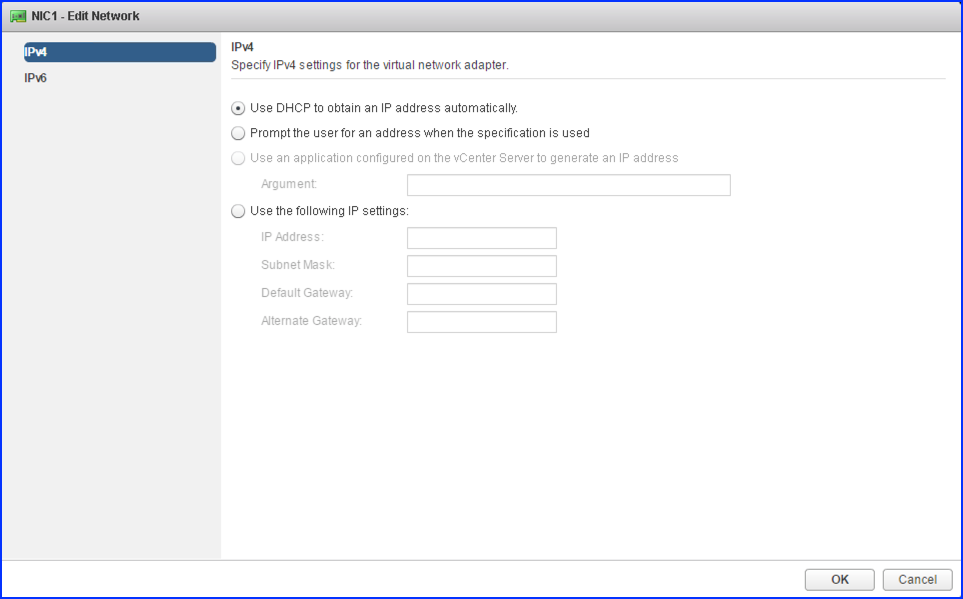
Figure 7. New VM Guest Customization Spec-Network-Edit Network
Choose IPv4 (if not already selected).
Choose the method vCenter Server uses to assign the IP address to this network interface (one of the following):
Use DHCP to obtain an IPv4 address automaticallyUse DHCP to obtain an IP address automatically.
Prompt the user for an IPv4 address when the specification is usedPrompt the user for an address when the specification is used.
Use the following IP settingsUse custom settings - Static IP settings. Enter appropriate values.
Click OK.
(Optional) Add a network interface by clicking the green plusADD icon. VMware recommends creating a Guest Customization Spec per each permutation of number of NICs and the IP configuration (DHCP, Static IP, and Prompt for IP) that may be needed for your environment. Edit new network interface using the previous step.
(Optional) Delete network interface:
Select Manually select custom settings radio button.
Select the interface to delete.
Click the X icon
Click the three dots icon (highlighted in the preceding figure for emphasis) and select Delete .
Click Next.
The browser now displays the
Enter DNS and Domain SettingsDNS settings dialog of the Wizard, similar to the following:
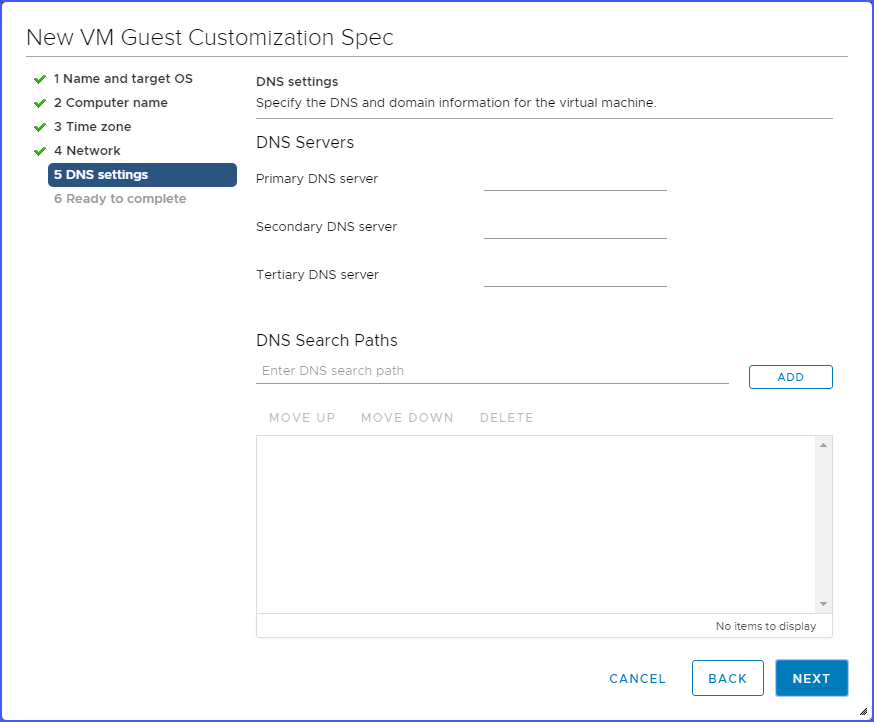
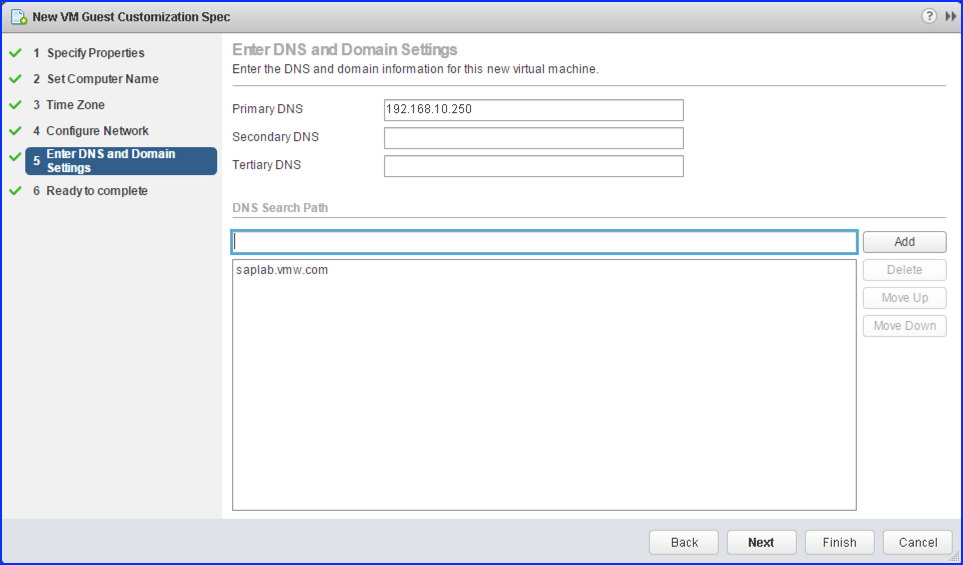
Figure 8. New VM Guest Customization Spec-DNS settings
Enter the DNS servers that the virtual machine should use in the Enter DNS and Domain SettingsDNS settings section of the Wizard. You can also manage the DNS search path. To add a domain, type the domain name in the field under DNS Search PathDNS Search Paths and click Add. Then click Next.
The browser displays the
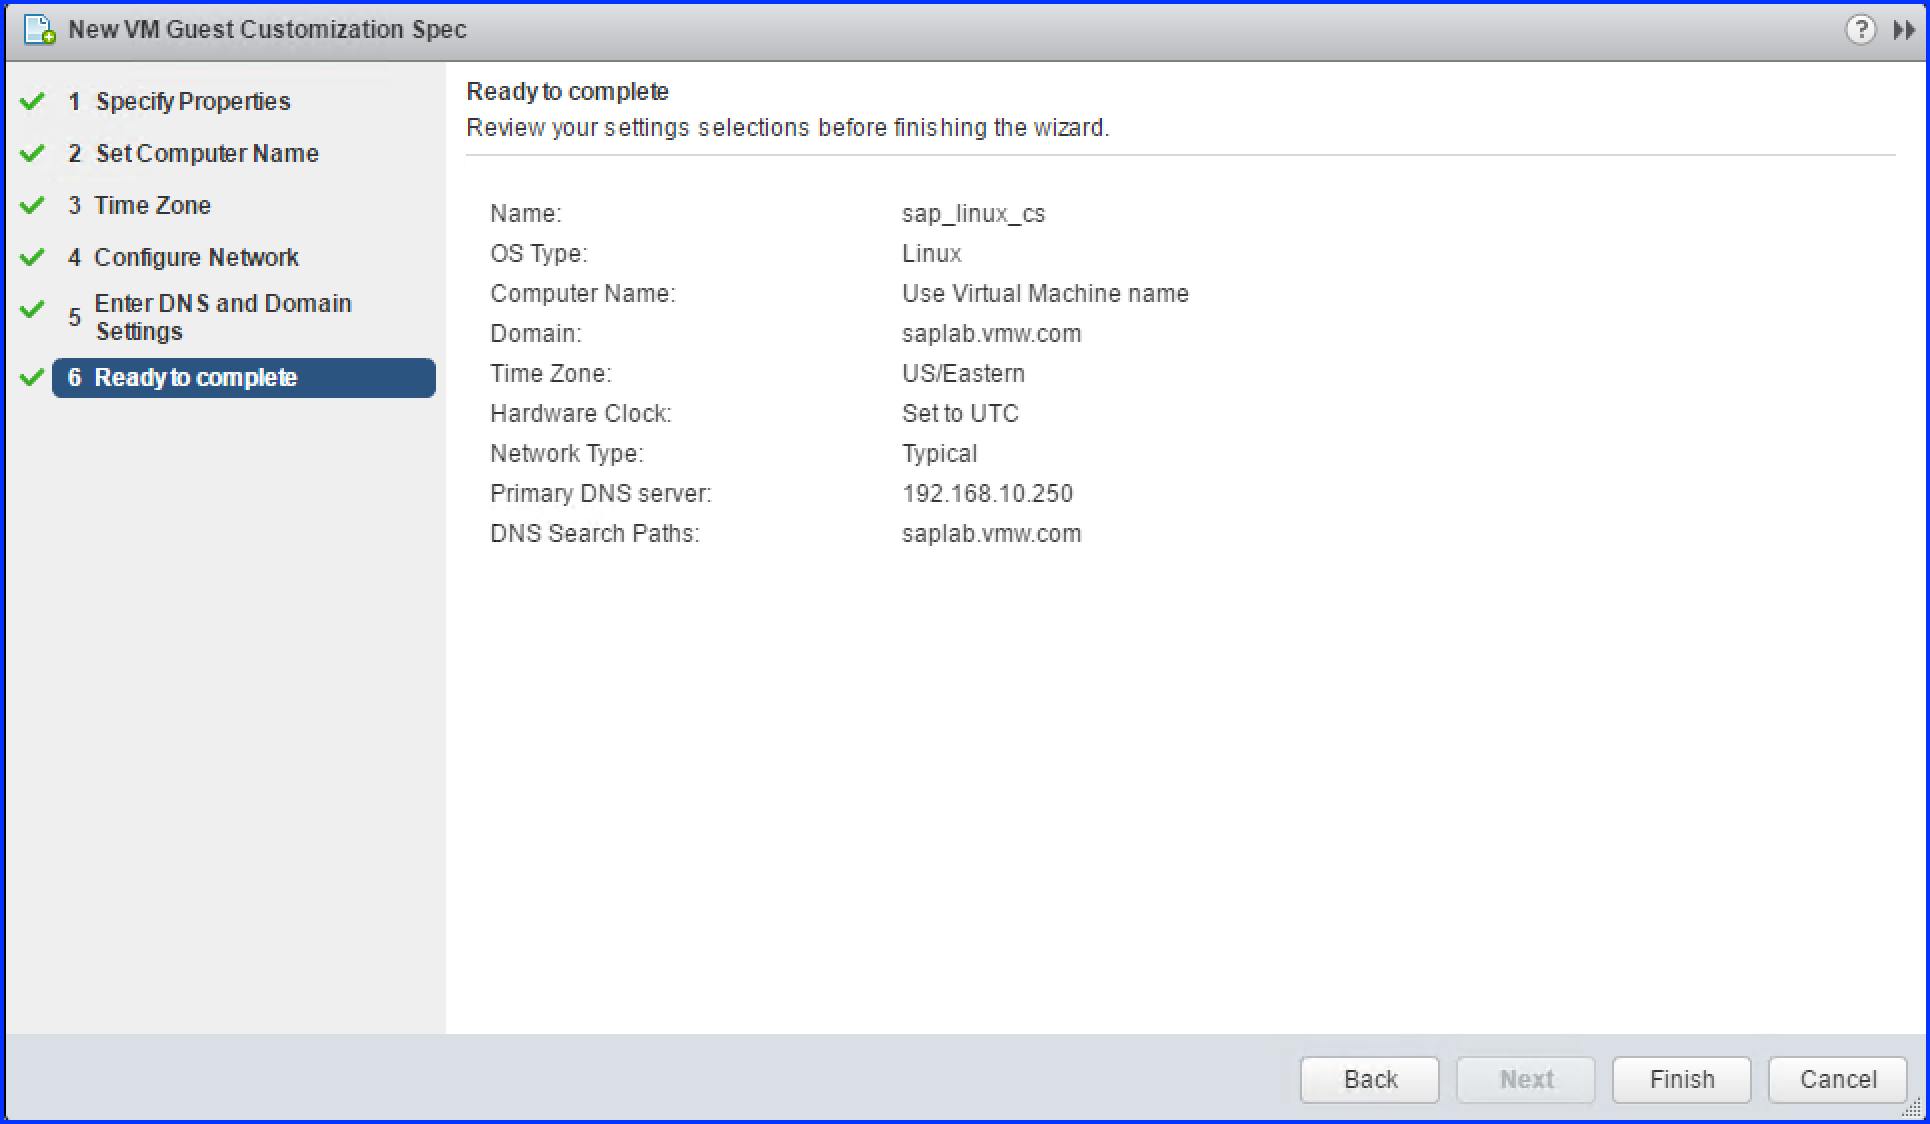
Ready to complete dialog of the Wizard, similar to the following:
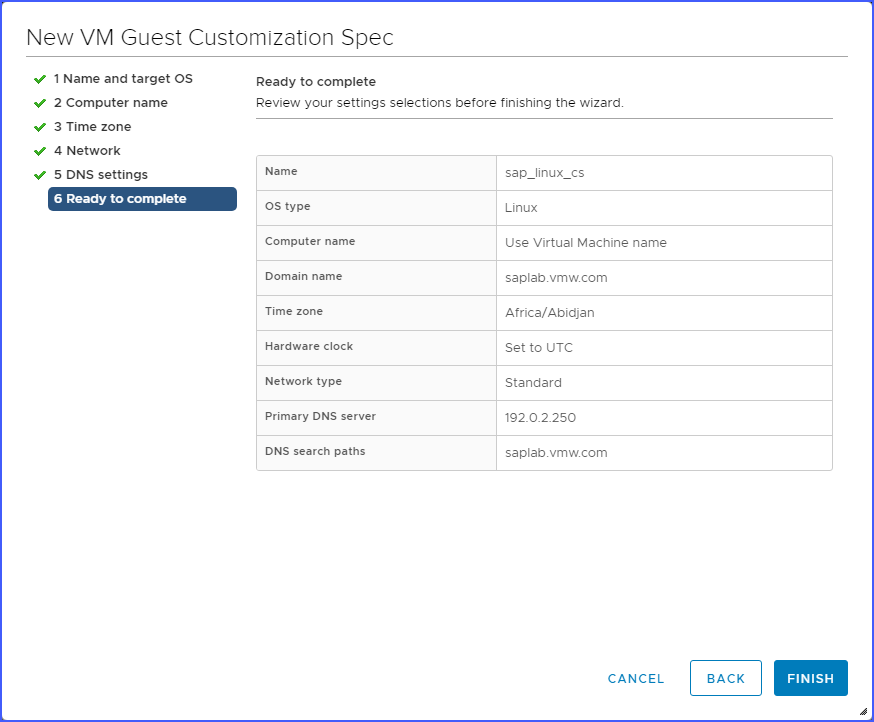
Figure 9. New VM Guest Customization Spec-Ready to complete
Click Finish to create the customization specification.
The new customization specification is now listed in the
Customization Specification ManagerVM Customization Specifications list.
Results
This customization specification can now be used to perform a virtual machine clone or copy operations.