VMware ships the VMware VLA as an OVA File, which you use to create and deploy the VLA Appliance, as follows:
Procedure
Have the VLA OVA file downloaded to your workstation or staged for delivery via a web server on your network.
Login to the VMware vSphere Web Client (VWC) as a user with rights to deploy a virtual machine.
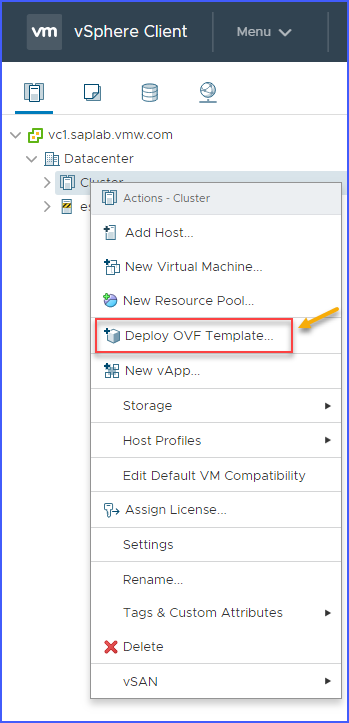
Right Click on the organization object such as a data center, host, cluster, or resource pool to which you wish to deploy the VLA, and then click Deploy OVF Template from the resulting fly-out menu as depicted in the following figure:
Figure 1. Deploy OVF Template
The browser displays the
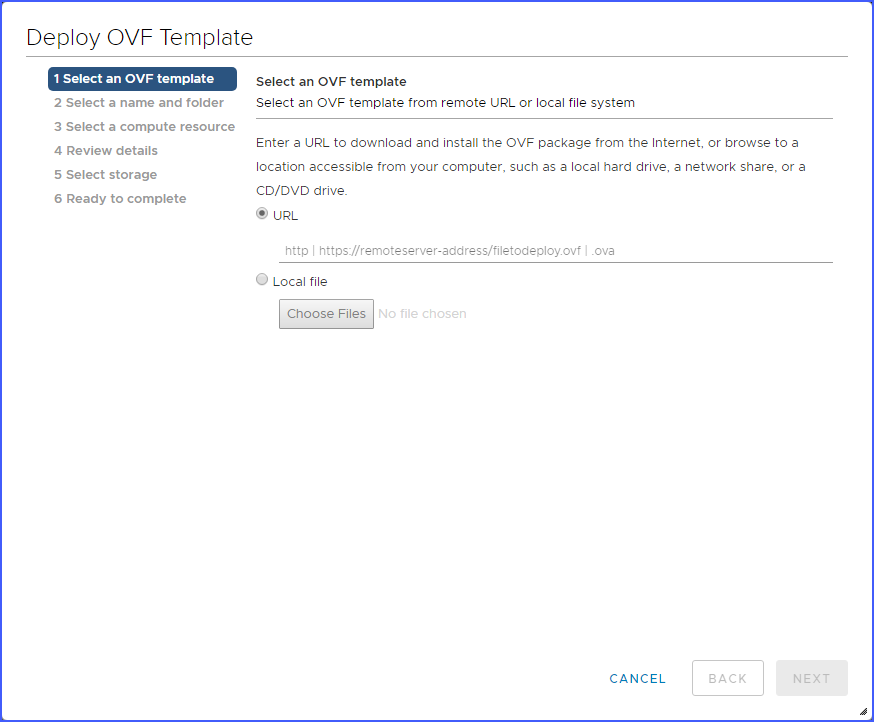
Deploy OVF Template wizard similar to the following:
Figure 2. Deploy OVF template-Select source
In the first step Select an OVF template. If you wish to deploy VLA via a web server on your network, select the radio button URL where you have staged the VLA OVA file. If you wish to deploy VLA with a previously downloaded VLA OVF file, select the radio button Local file. Click on Choose Files button and locate the specific VLA OVF file that you will use to deploy the VLA. Then click Next.
The Wizard displays the
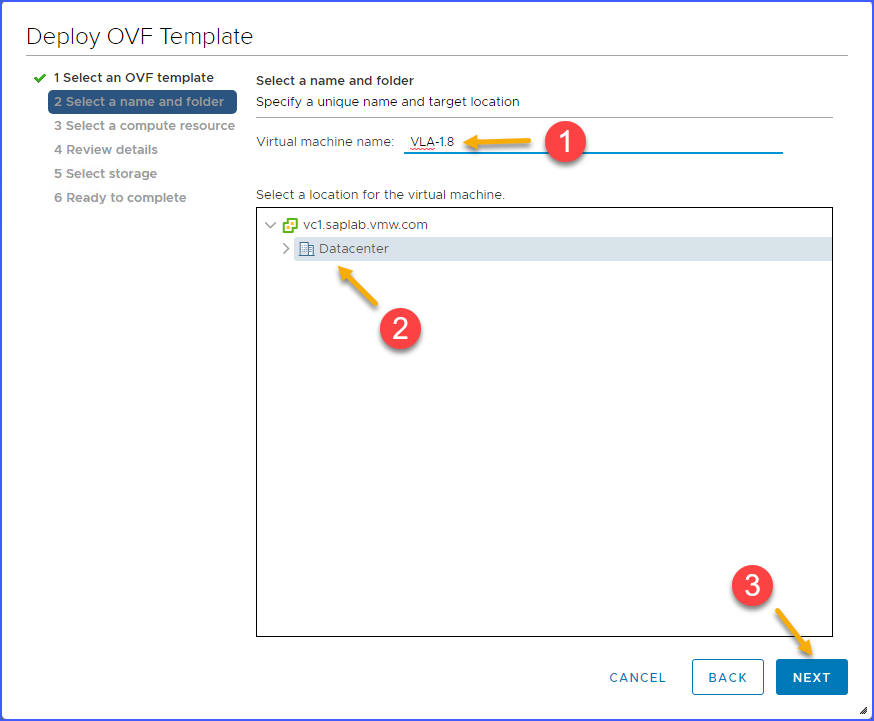
Select a name and location page similar to the following:
Figure 3. Select name and location
Enter a name for the VLA Appliance that allows you to easily identify it. Also, select a datacenter or folder where you wish to deploy the VLA. Then click Next.
The wizard displays
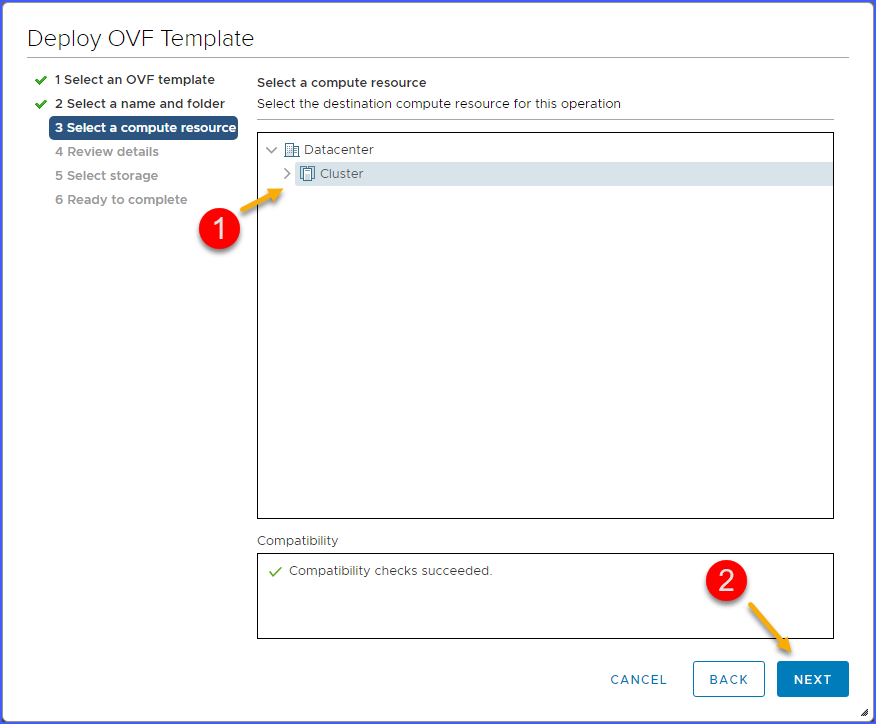
Select a compute resource page similar to the following:
Figure 4. Select a resource
Select a host or cluster or resource pool or vapp (as appropriate), where you will be running your VLA virtual machine. Then click Next.
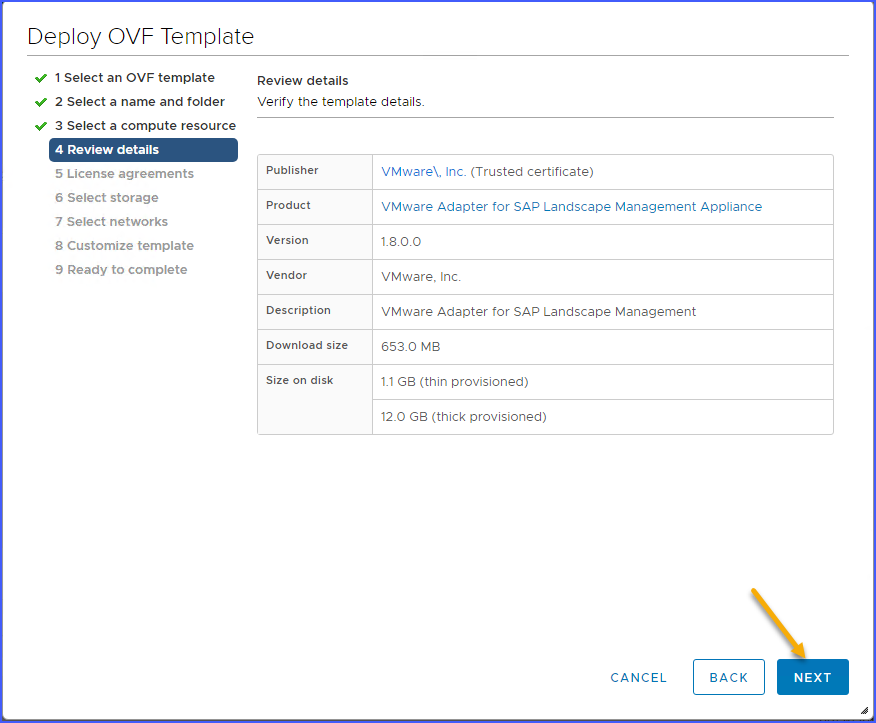
The wizard displays the
Review details page similar to the following:
Figure 5. Review details
Verify the information displayed on the Review details page of the wizard. Click on Next to proceed.
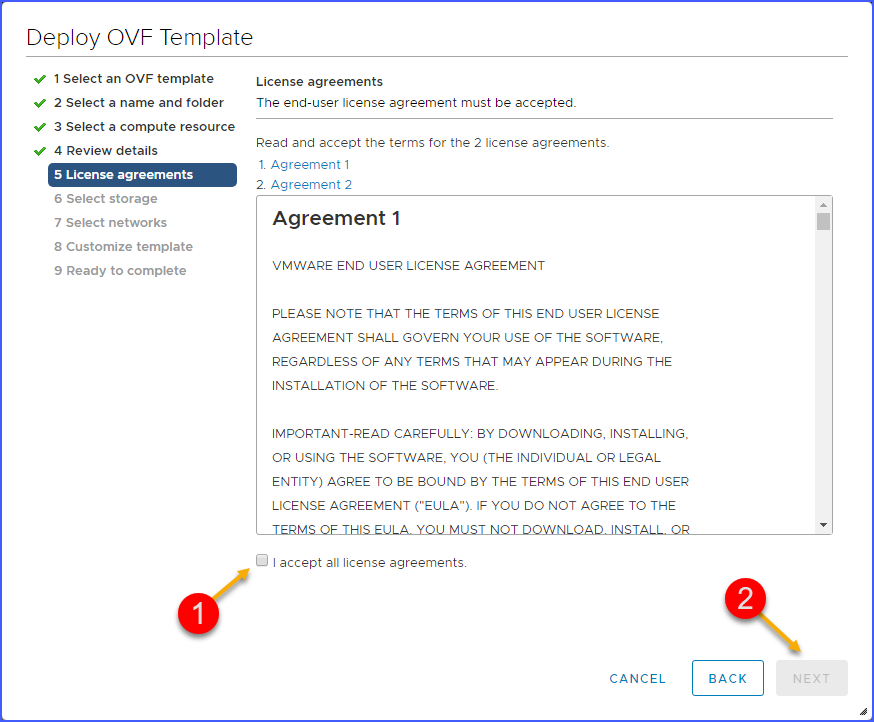
The wizard now displays the
License agreements page.
Read through two license agreements and accept them by selecting the I accept all license agreements checkbox. Click on Next to proceed.
Figure 6. License agreements
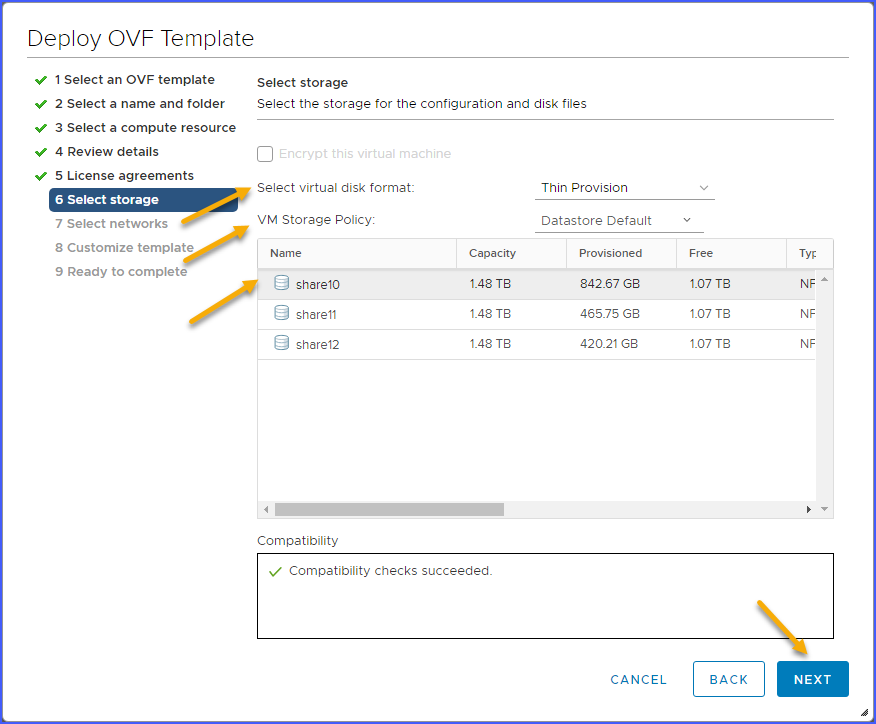
At the completion of this step, the Wizard takes you to the
Select storage page.
Select the datastore on which to write the VLA’s virtual disks. If appropriate, select the virtual disk format (some datastore types do not allow you to choose format), select the storage policy (if one is available), and then click Next.
The
Select storage page of the wizard looks similar to the following:
Figure 7. Select storage
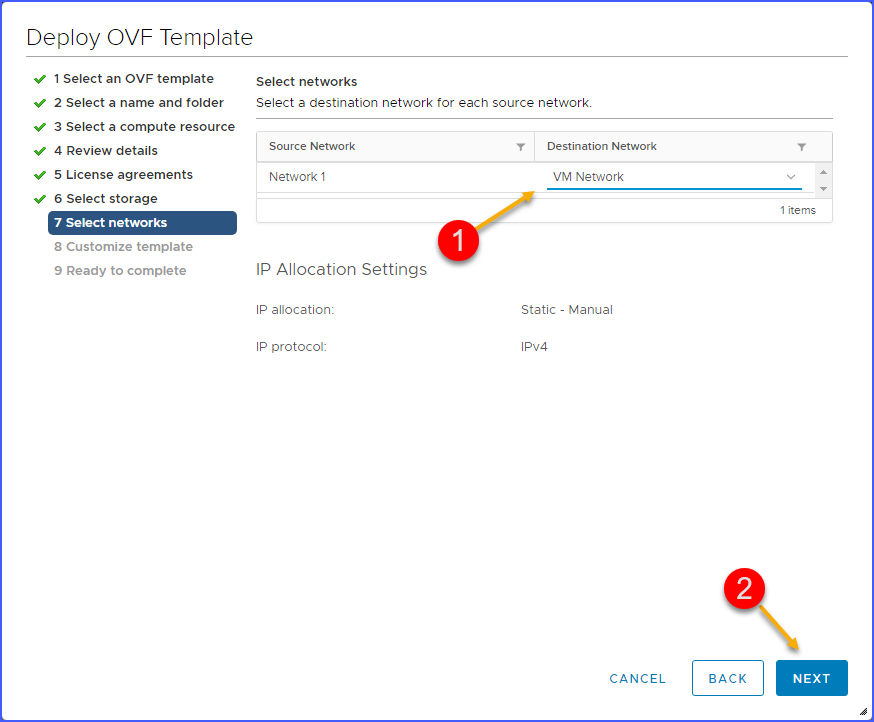
The Wizard now displays
Select networks page.
Select the Destination Network for each Source Network. Click Next to proceed.
The
Select networks page looks similar to the following figure:
Figure 8. Select networks
The wizard now displays the
Customize template page similar to the following:
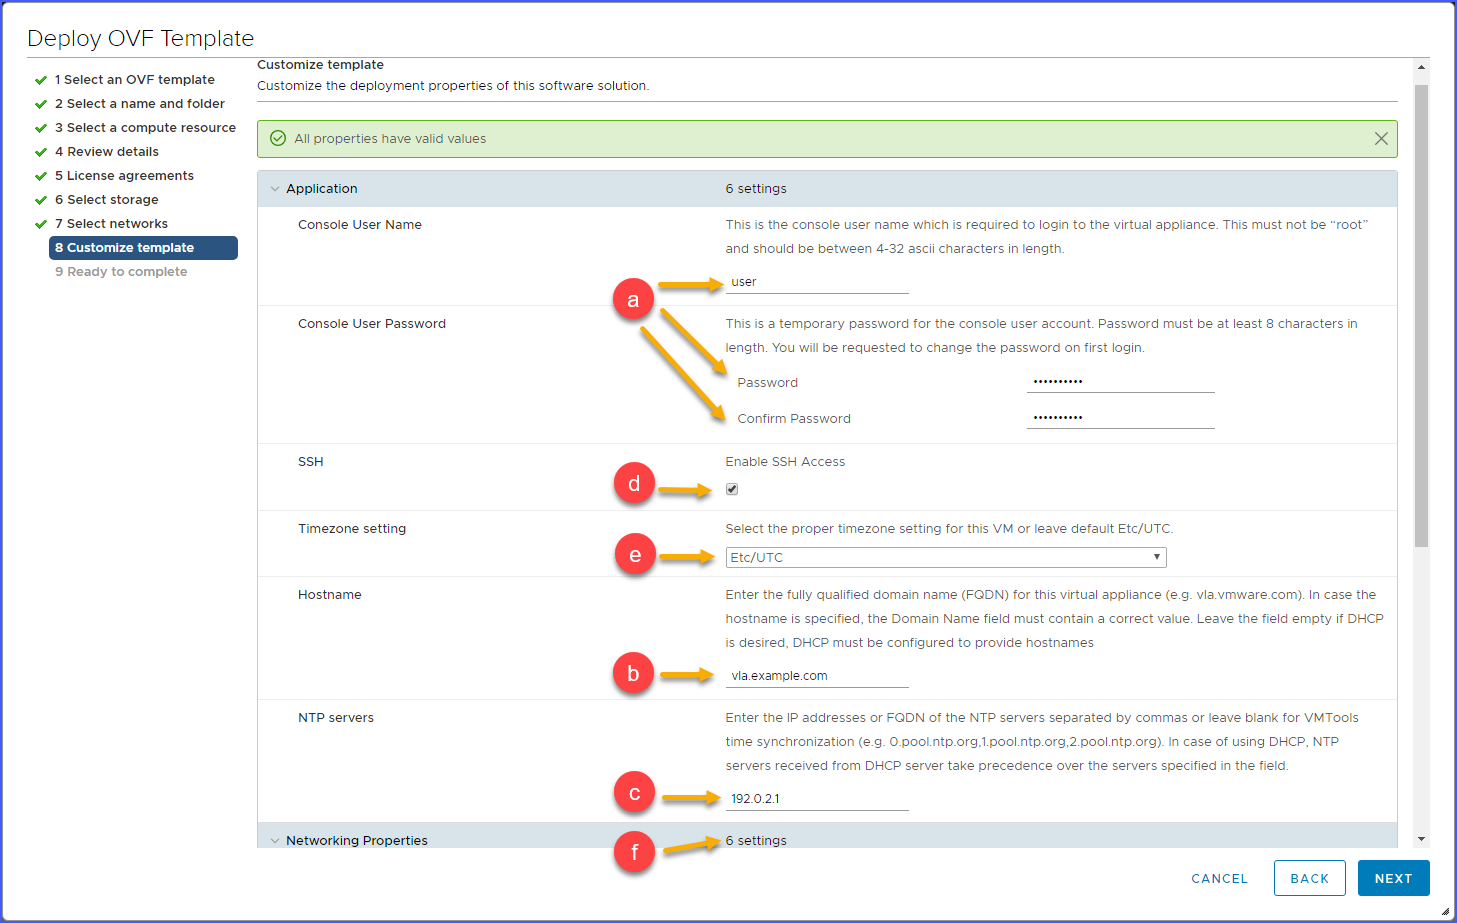
Figure 9. Customize template
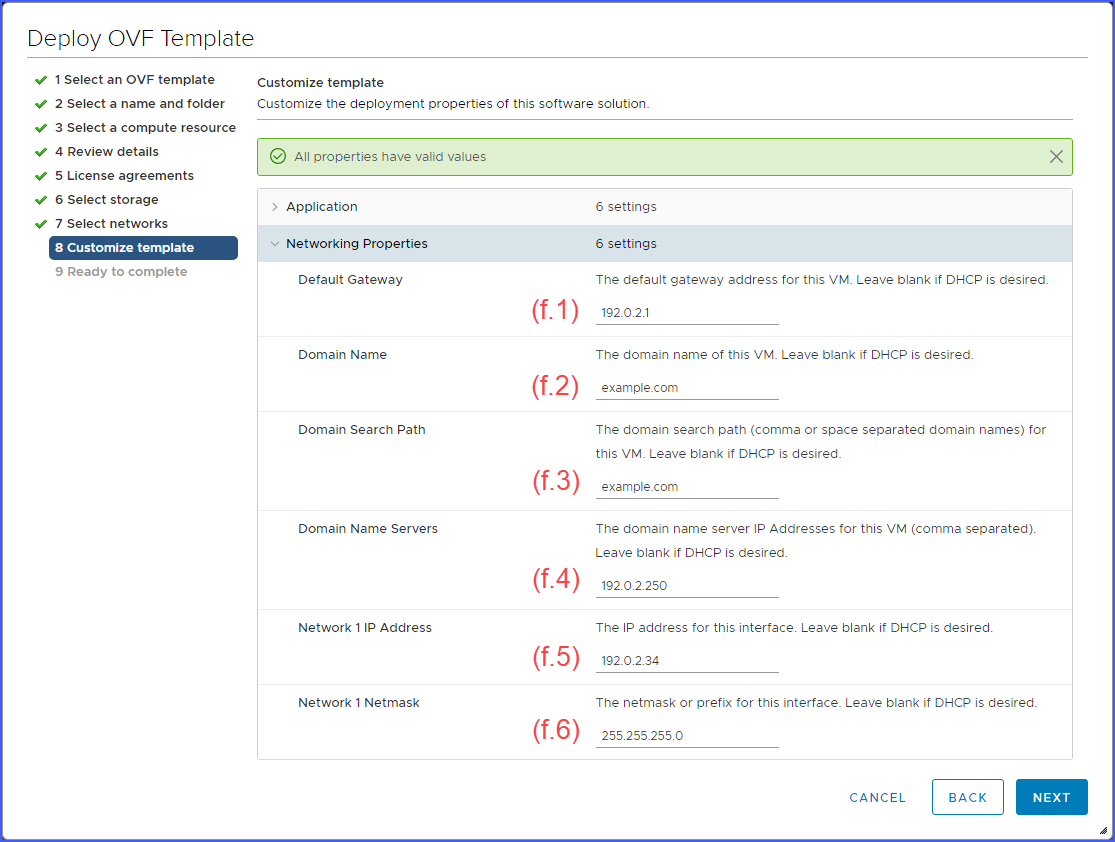
Figure 10. Customize template Contd. (Networking Properties)
In the Customize template dialog —
Enter the Console User Name and Console User Password.
Note: You need to enter the password twice for confirmation. The console password that you enter in this step has an expiration of 60 days.
Enter the hostname or FQDN (Fully Qualified Domain Name) for the new VLA virtual machine to use.
The FQDN should be resolvable to appliance IP Address by DNS server configured during deployment. To avoid issues with certificates generated during installation, a domain name must be specified in the Networking Properties section below when using hostname instead of FQDN.
Note: DHCP networking is not supported. There are too many variations of possible valid and invalid configurations so
VLA does not support DHCP as a provisioning option for now. Users can (at their own risk) specify a hostname by using
hostnamectl and enable DHCP by using
sys_network script after
VLA deploying. In this case,
VLA certificates must be regenerated for working with new hostname as described in
Create Custom Tomcat Instance Certificate for Alternative Hostname.
Type in IP addresses of the NTP servers, separated by commas.
Note: Avoid using only two NTP servers. We strongly recommend to use minimum 3 NTP servers but one is better than two.
If you want to enable SSH select the Enable SSH Access checkbox
Set the Time zone appropriately to your location / datacenter policy.
Expand Networking Properties section to enter static IP information to be used by VLA
Default gateway IP address
Domain name of your VLA Appliance
DNS Server IP addresses, separated by commas
Domain search path, separated by commas or blanks
IP Address of the VLA. If you leave this field blank VLA will get a DHCP acquired IP address.
Network Mask for the interface
After configuring these options, click
Next. The Wizard now displays the
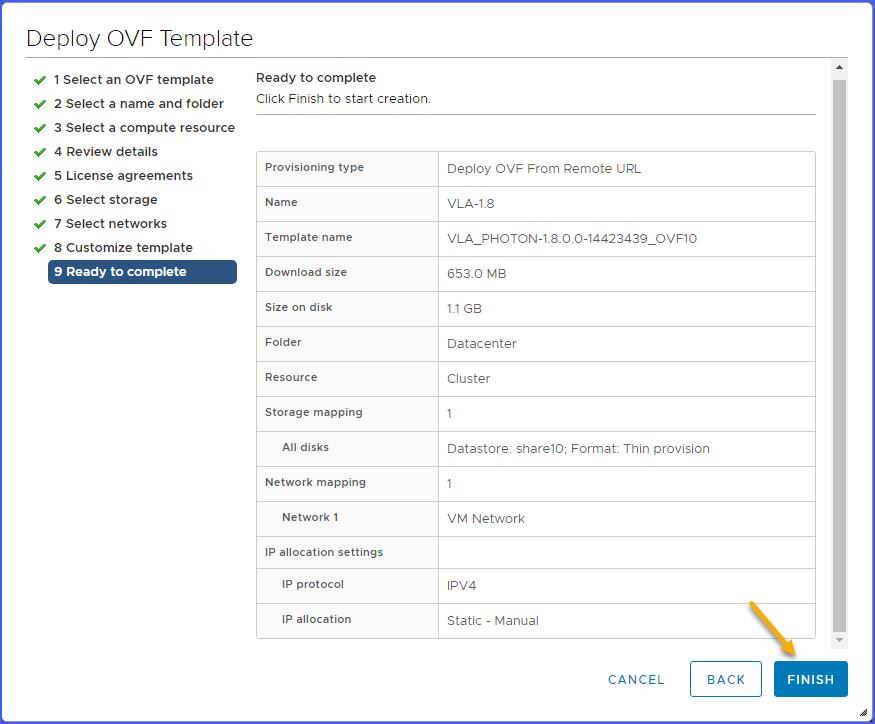
Ready to complete dialog depicted as follows:
Figure 11. Ready to complete
Review all the configurations made so far. Click on Finish to start the VLA virtual machine deployment process. To monitor the progress of VLA deployment, you can watch the Recent Tasks pane in the VMware vSphere Web Client (VWC).
Results
By executing the preceding steps you should be able to successfully deploy a VLA appliance in your environment.