vCenter Single Sign-On supports storing the user and group data in Active Directory or locally to the operating system of the machine where vCenter Single Sign-On is installed.
If your vCenter Server has been associated with an Active Directory Server, create a user there, skip steps 3-6 in this procedure, and perform the rest of the steps to configure the new user access to the vSphere inventory.
Procedure
Log in to the VMware vSphere Web Client (VWC) using administrator credentials.
Select Administration (highlighted for emphasis) from the Menu.
Figure 1. Administration
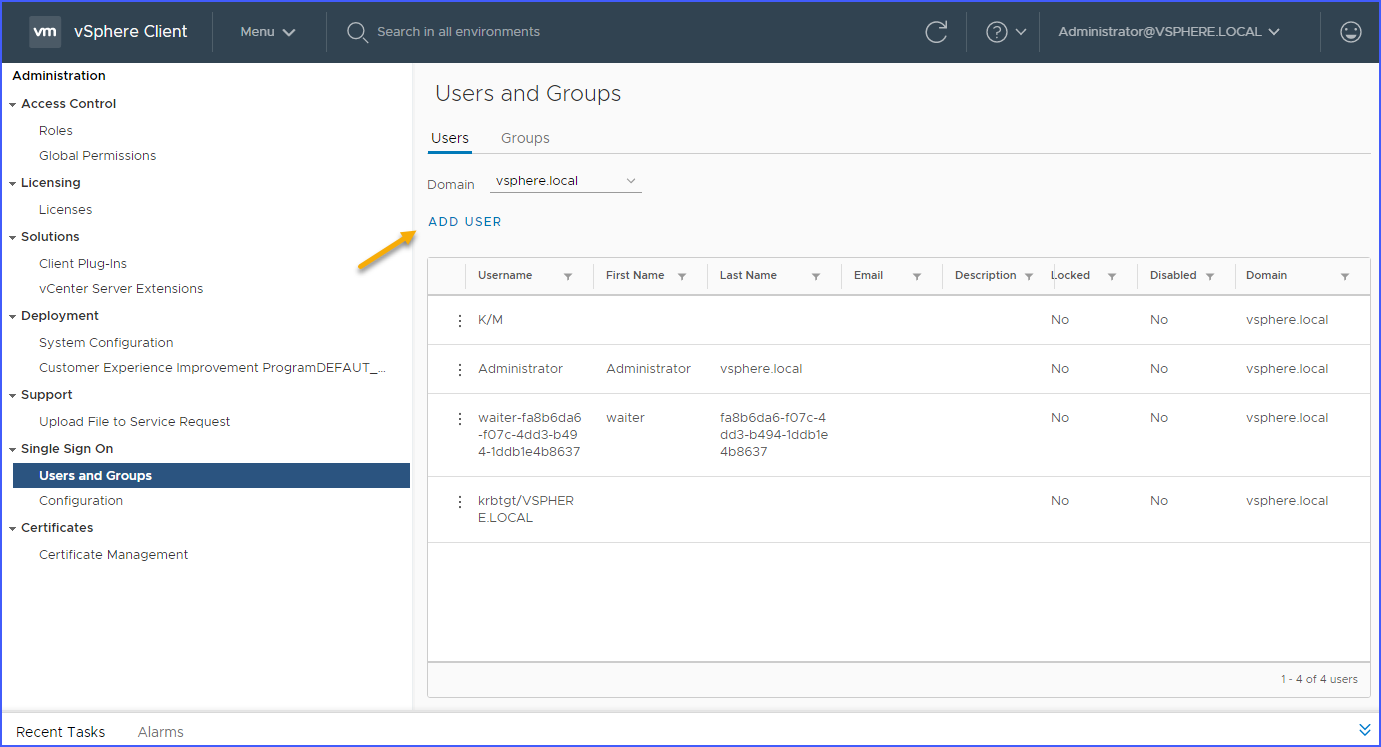
Click Users and Groups.
The browser displays a screen similar to the following:
Figure 2. Users and Groups
Select the SSO domain to which you wish to add the user from the Domain dropdown (e.g., vsphere.local)
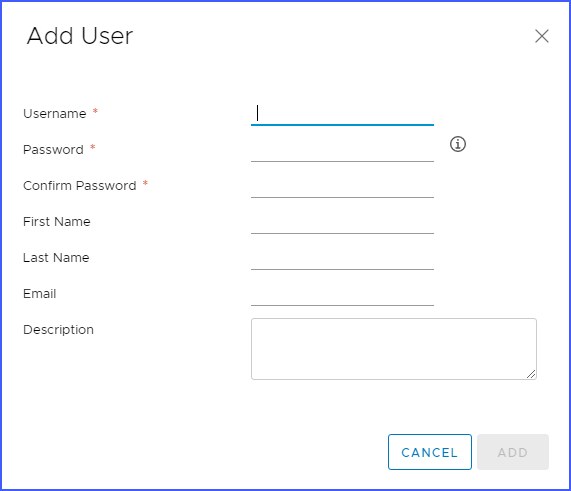
Click ADD USER to add a user.
The browser displays the
Add User dialog similar to the following:
Figure 3. Add User
Complete the fields in the dialog, giving the user the name vla_appliance_user and assigning a conforming password, and then Click ADD.
The browser closes the dialog and displays the
Users and Groups page with your new user added, similar to the following:
Figure 4. vCenter Users and Groups
Note: The list now includes the
vla_appliance_user user, selected for emphasis.
Click Roles in the Navigation pane.
Click the plus icon in the pane to the right of the Navigator pane (pointed to by the arrow for emphasis).
Figure 5. Administration - Roles
The browser displays the
New Role dialog.
In the New Role dialog, find and check the following privileges for the role:
The
New Role dialog on choosing the
Selected privileges should look similar to the following:
Figure 6. New Role
Note:vCenter migration feature requires additional privileges for all
vCenter servers that will be involved in the migration process.
Table 2. Role Privileges for vCenter migration feature
Privilege List
Datastore -> Allocate space
Network -> Assign network
Resource -> Assign virtual machine to resource pool
Resource -> Migrate powered off virtual machine
Click Next.
In the Role name field, type: VMware LaMa Appliance.
Click Finish to create the role.
The browser closes the
New Role dialog. You should now see the new role in the list similar to the following:
Figure 7. Roles
Note: The
VMware LaMa Appliance role selected for emphasis.
Click Hosts and Clusters from the Menu.
Click on the vCenter Server you want the VMware VLA to manage.
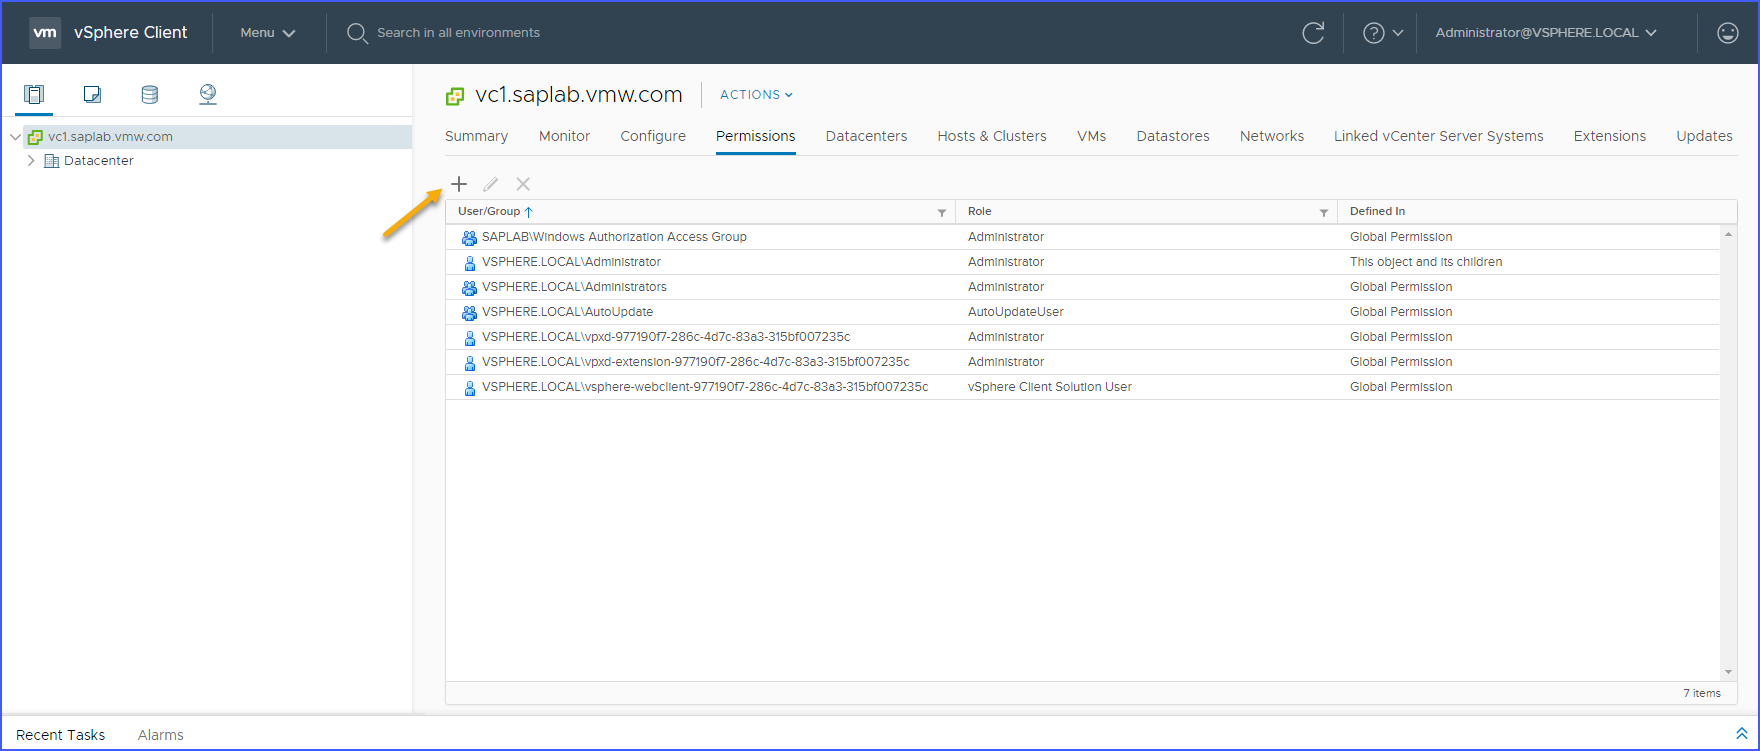
Click Permissions.
Your browser displays a page similar to the following:
Figure 8. Hosts and Clusters-Manage-Permissions
Click the green plusplus icon to add permission.
Your browser displays a page similar to the following:
Figure 9. Add Permission
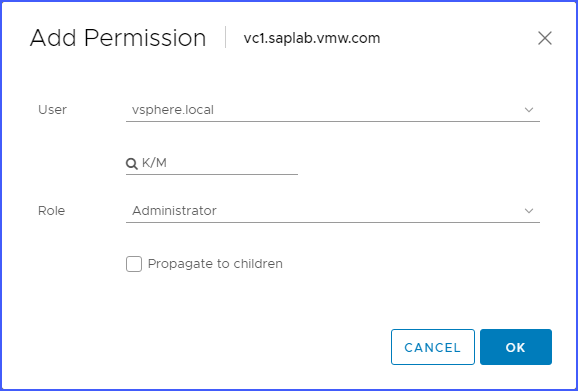
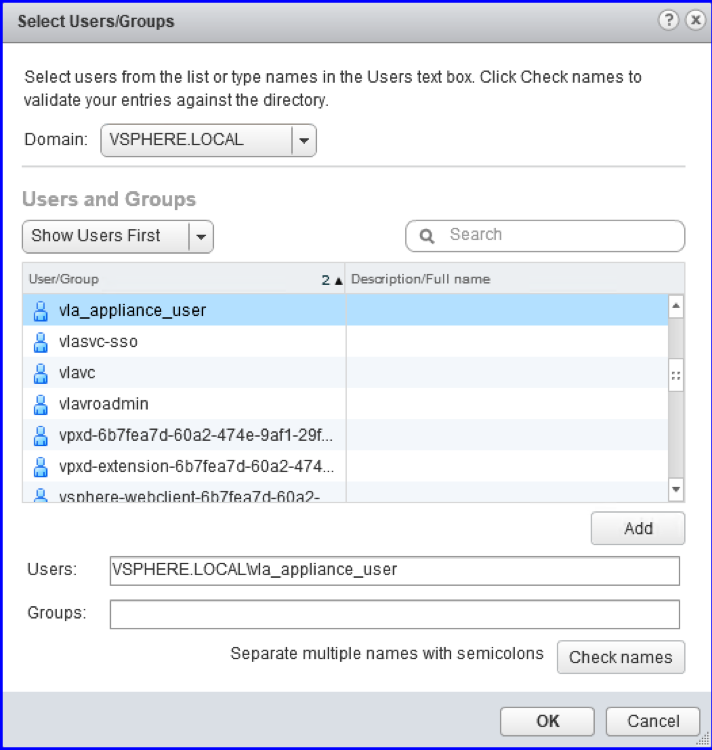
Click Add...
Your browser displays a page similar to the following:
Figure 10. Add User
Choose your SSO domain and select the user vla_appliance_user.
Click OK.
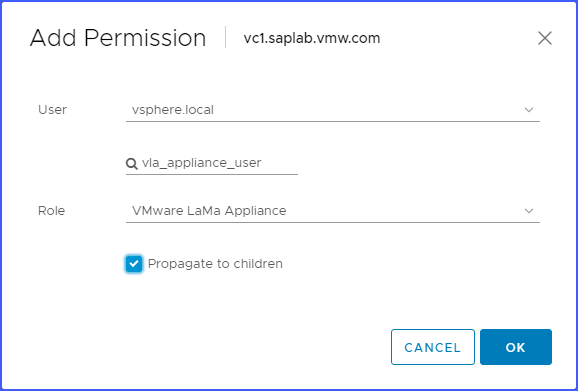
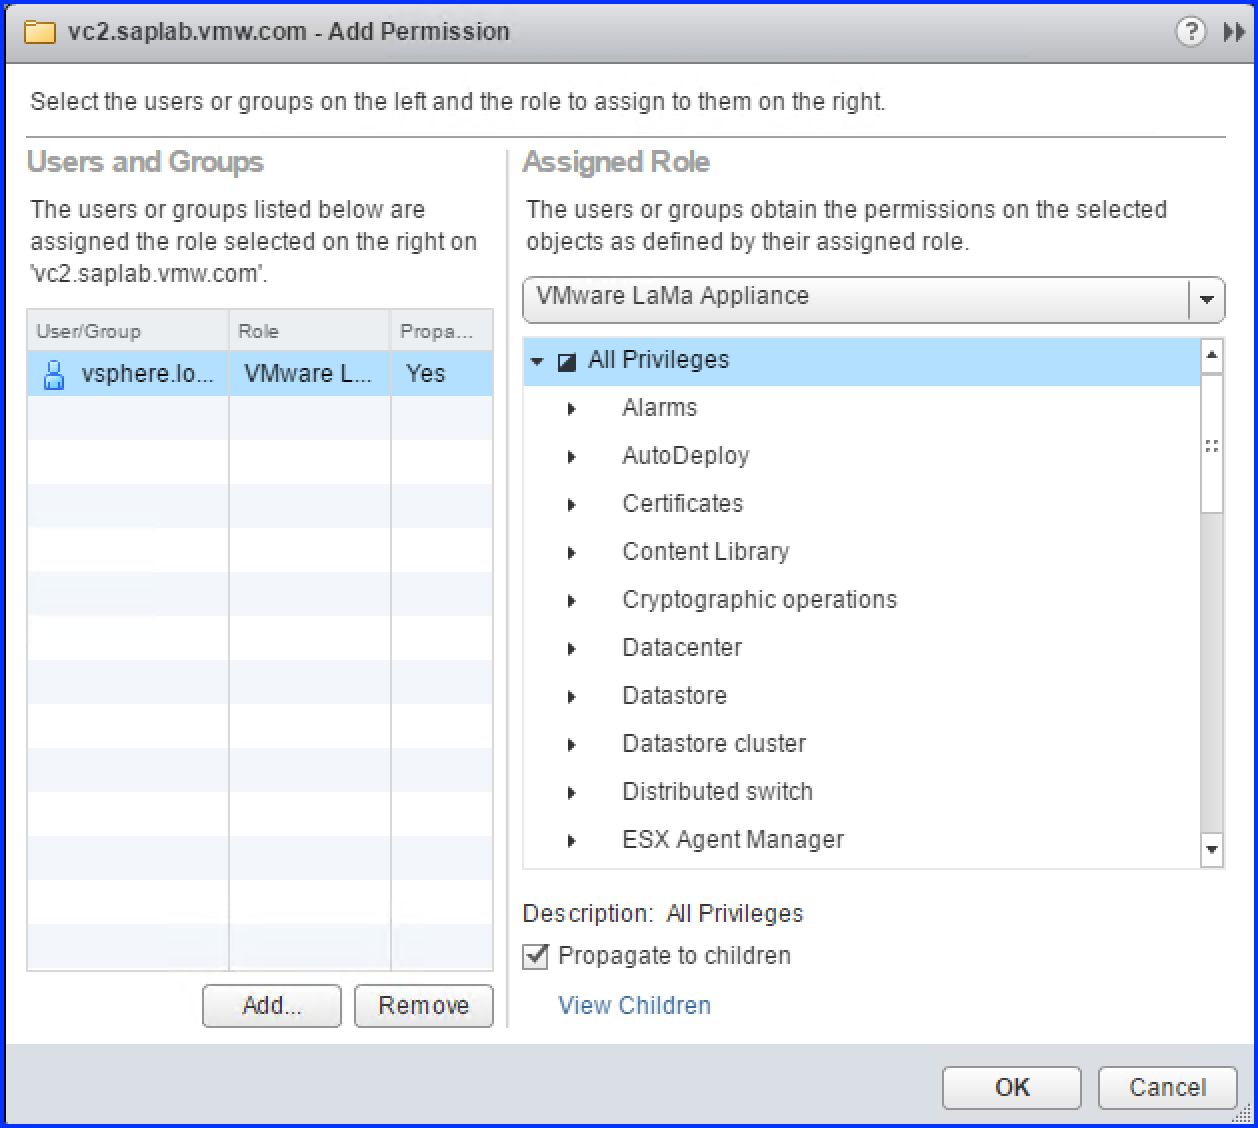
In the Assigned RoleRole list box, select VMware LaMa Appliance.
Your browser displays a page similar to the following:
Figure 11. Add Permission
Make sure the Propagate to children check box is checked.
Click on
View Children and verify that permission was granted to the following inventory objects:
vCenter Server (The Hosts and Clusters view)
Datacenters and Datacenter Folders (The Hosts and Clusters view)
Clusters and ESXi hosts within the Clusters, and Hosts and Clusters Folders (The Hosts and Clusters view)
Resource Pools and vApps (The Hosts and Clusters view)
Virtual Machines, VM Templates and VM Folders (The VMs and Templates view)
Datastores and Datastore Folders (The Storage view)
Networks and Distributed Switches (The Networking view)
Click OK.
This saves the permission.
Note: A lack of permission for some of the aforementioned objects may result in the absence of the objects in LaMa Virtualization Landscape.
Note: If the permission is set not for the
vCenter Server you want the
VMware VLA to manage then it may result in the absence of the objects in LaMa Virtualization Landscape.
Results
You successfully created new vCenter Server user for the VLA and added required permission for it.


 Note: The list now includes the vla_appliance_user user, selected for emphasis.
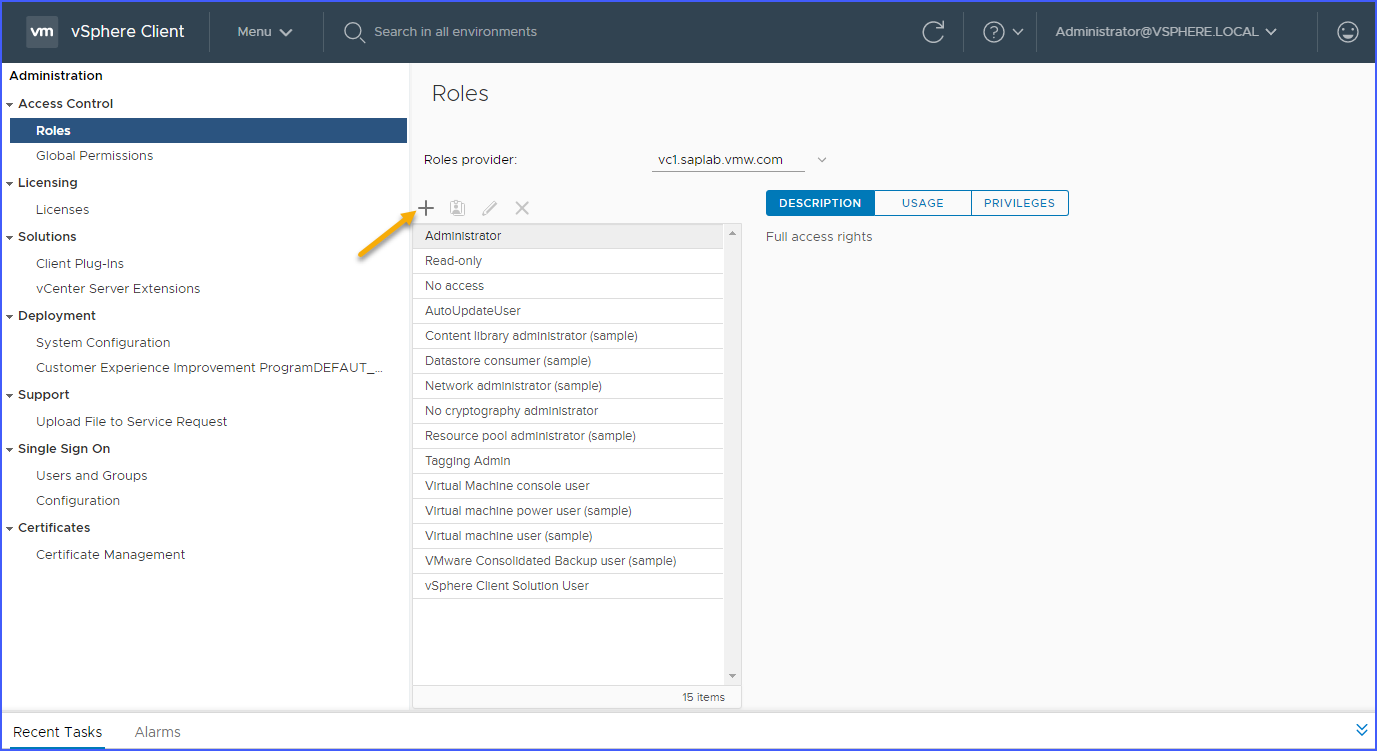
 Note: vCenter migration feature requires additional privileges for all vCenter servers that will be involved in the migration process.
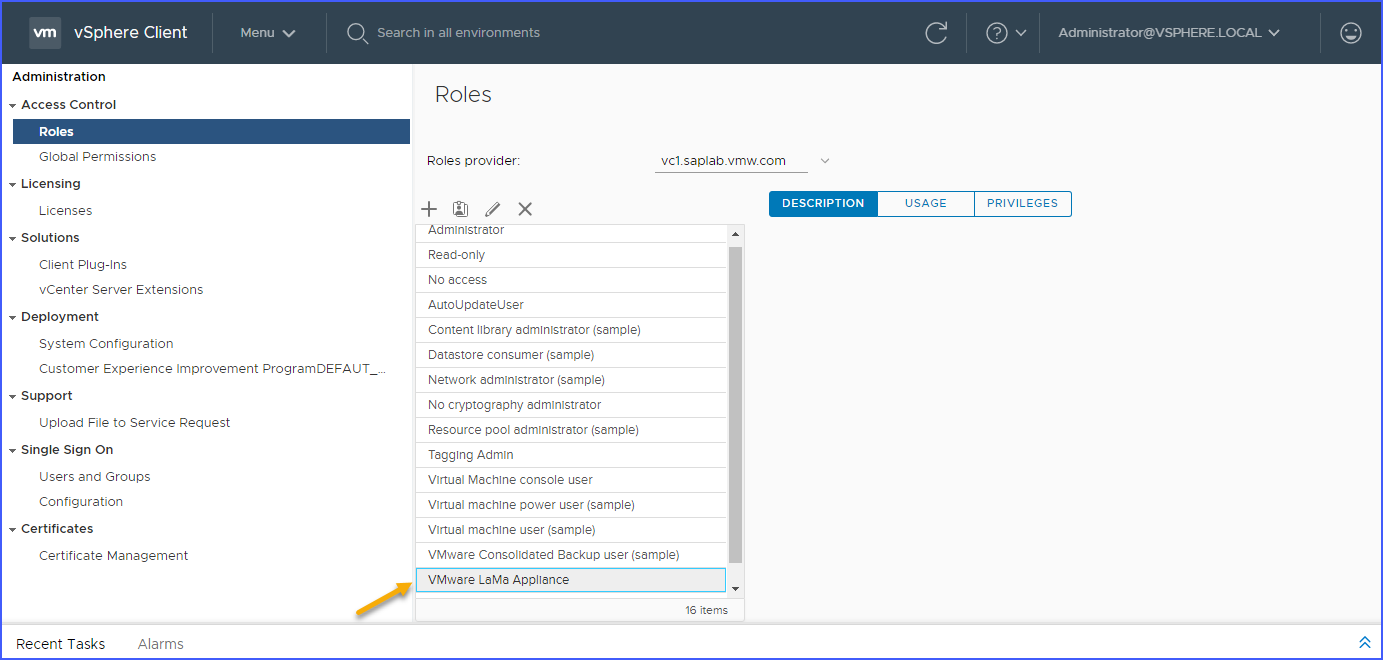 Note: The VMware LaMa Appliance role selected for emphasis.