


Procedure
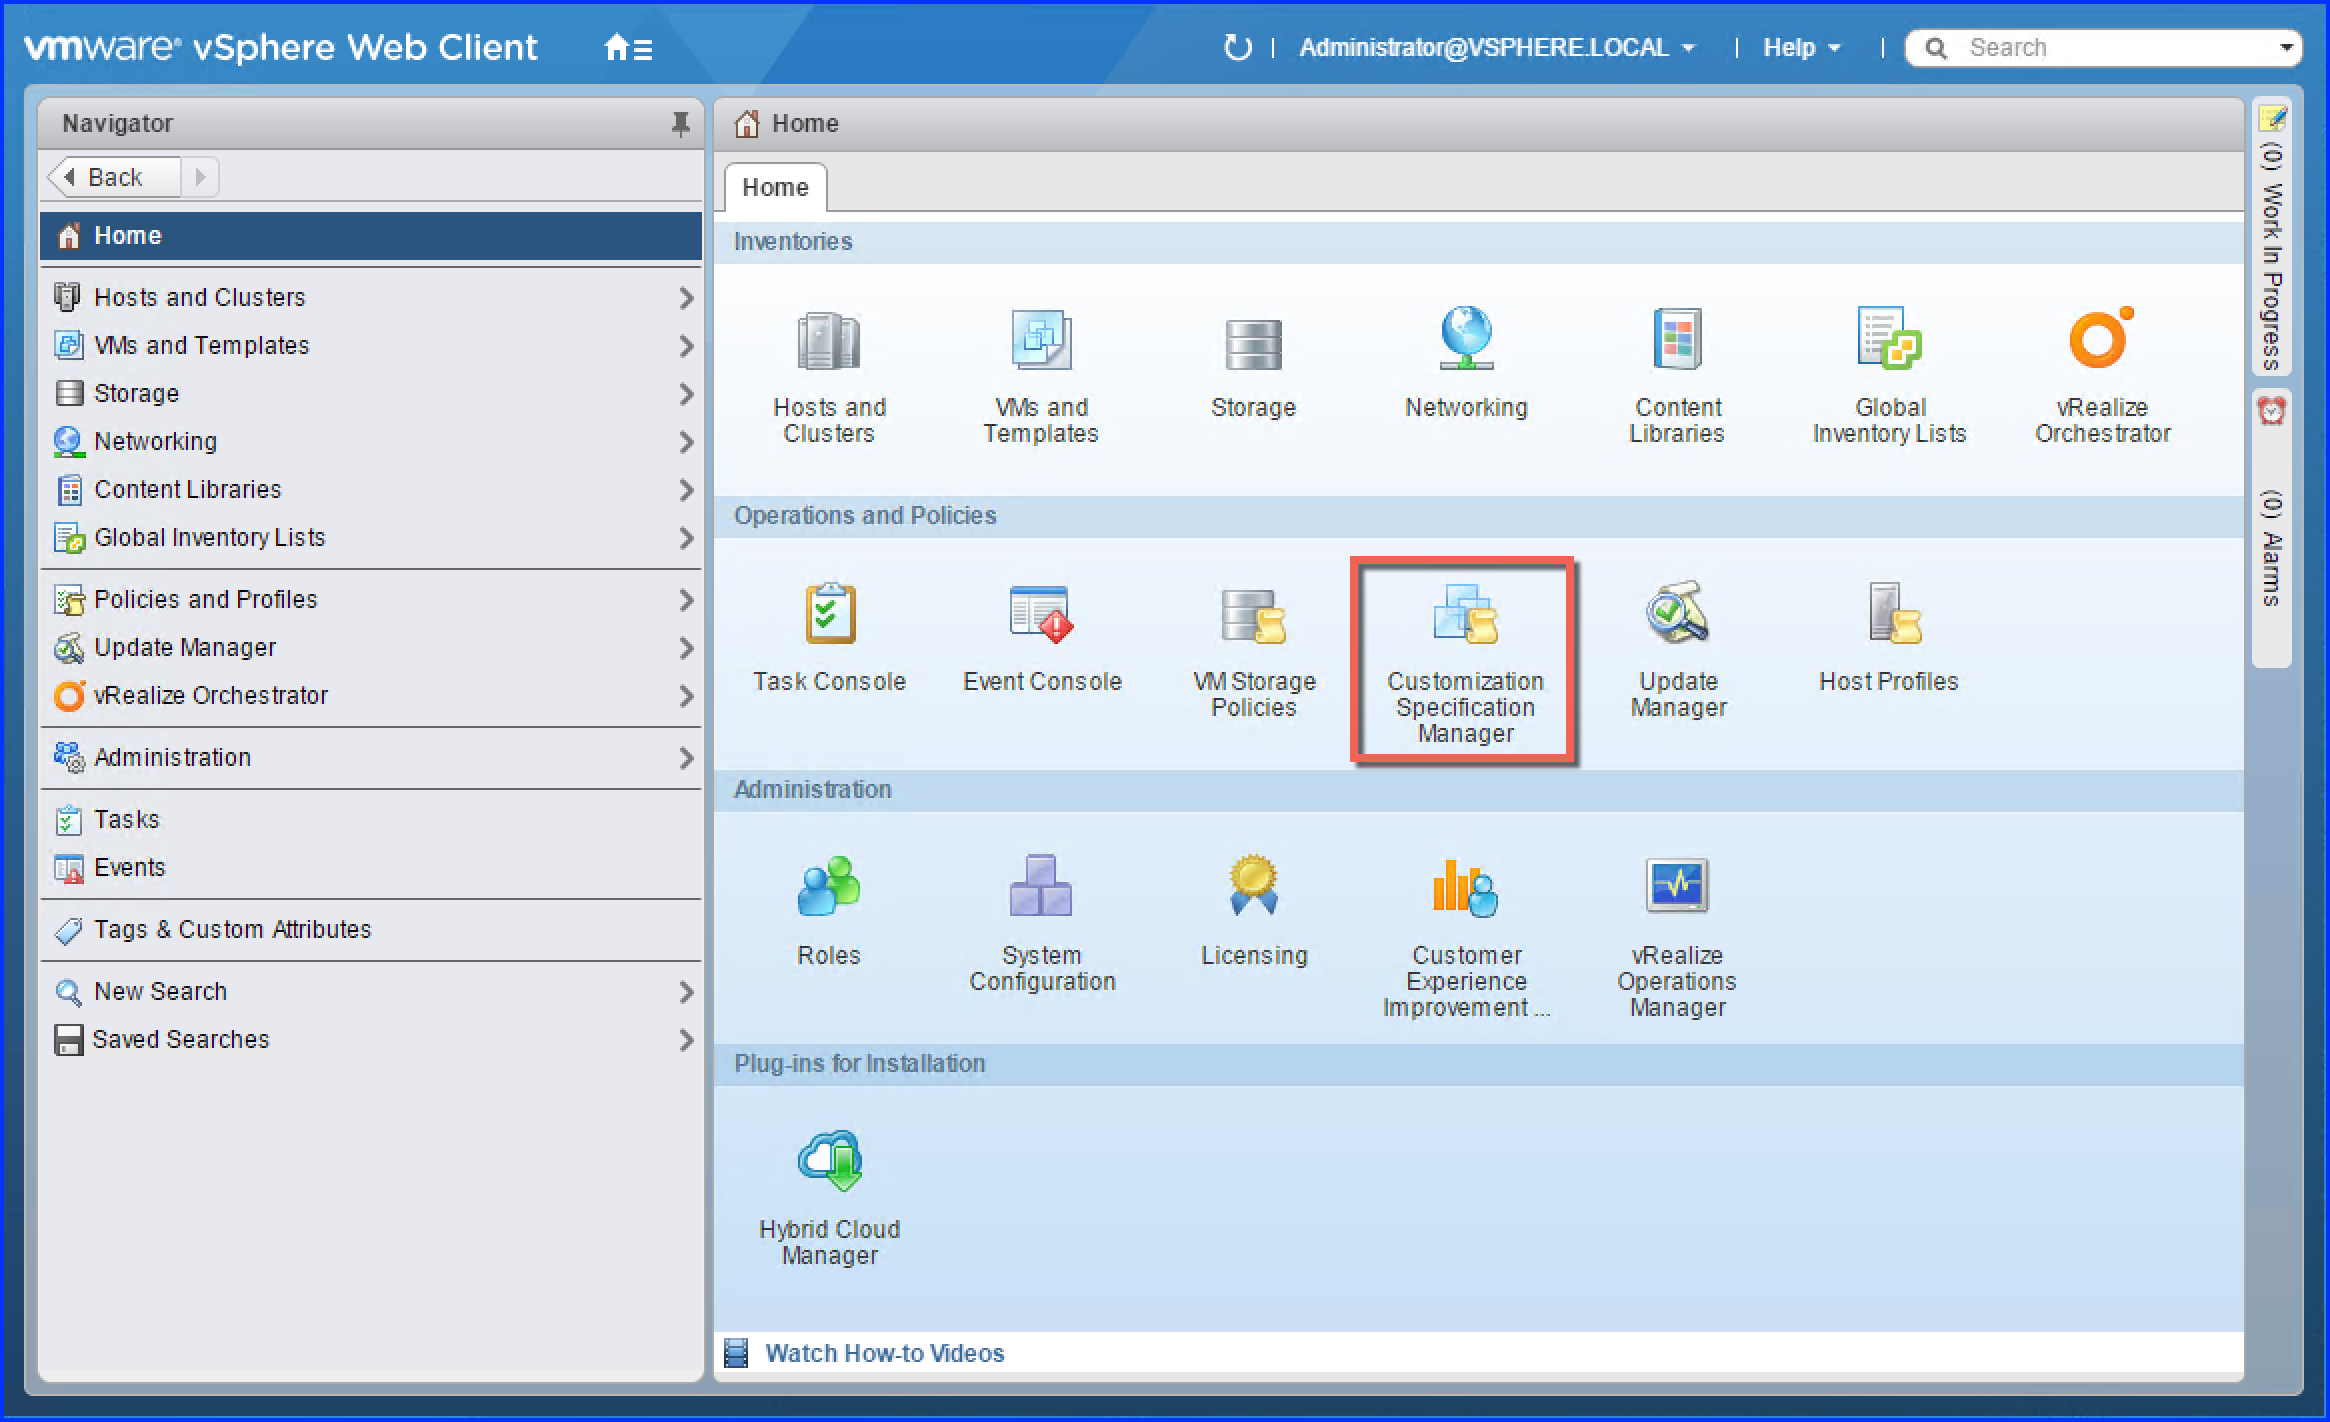
- From the VMware vSphere Web Client(VWC) Home inventory page, select Rules and Profiles > Customization Specification Manager OR Click on Customization Specification Manager tab under Monitoring section as seen in the following screenshot:
Figure 1. VWC-Customization Specification Manager
- Click the Create a New specification icon highlighted in the following screenshot.
This opens up the New VM Guest Customization Specification wizard.
Figure 2. VWC-Guest Customization Spec Wizard

- Select Windows as the Target VM Operating System. Enter a name for the customization specification in the Customization Spec Name field. We suggest you provide a Customization Spec Name that makes it easy for the LaMa Administrator to identify the contents of the customization specification. The Description field should contain a brief description of the Customization Specification. Click Next.
Your browser window looks similar to the following:
Figure 3. VWC-New Customization Specification

- Type the virtual machine owner's name and organization in the Set Registration Information section of the wizard. Then Click Next.
Your browser window looks similar to the following:
Figure 4. VWC-Set Registration Information

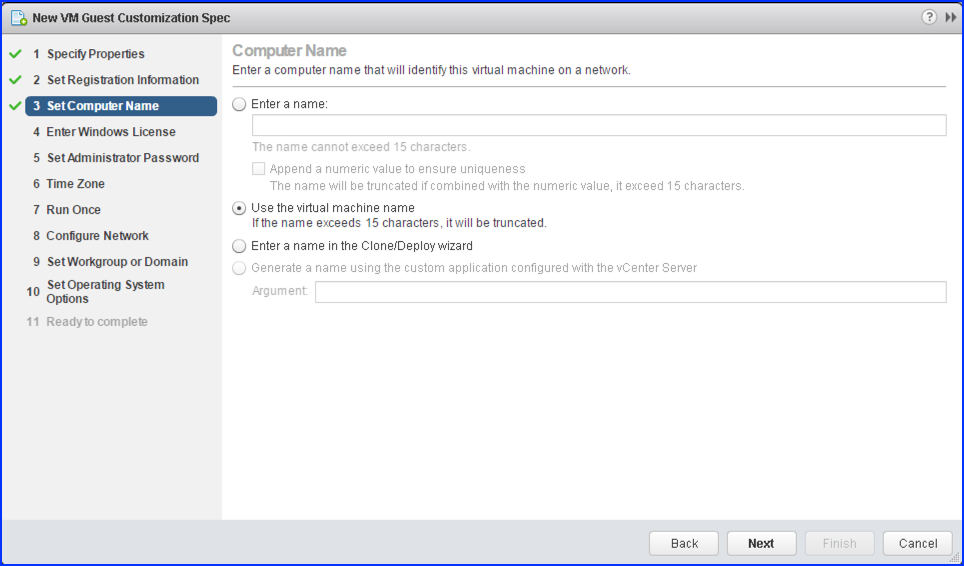
- In the Set Computer Name section of the wizard, Choose Use the virtual machine name, enter the Domain Name for the virtual machine and Click Next.
Your browser window looks similar to the following:
Figure 5. VWC-New VM Guest Customization Spec-Computer Name
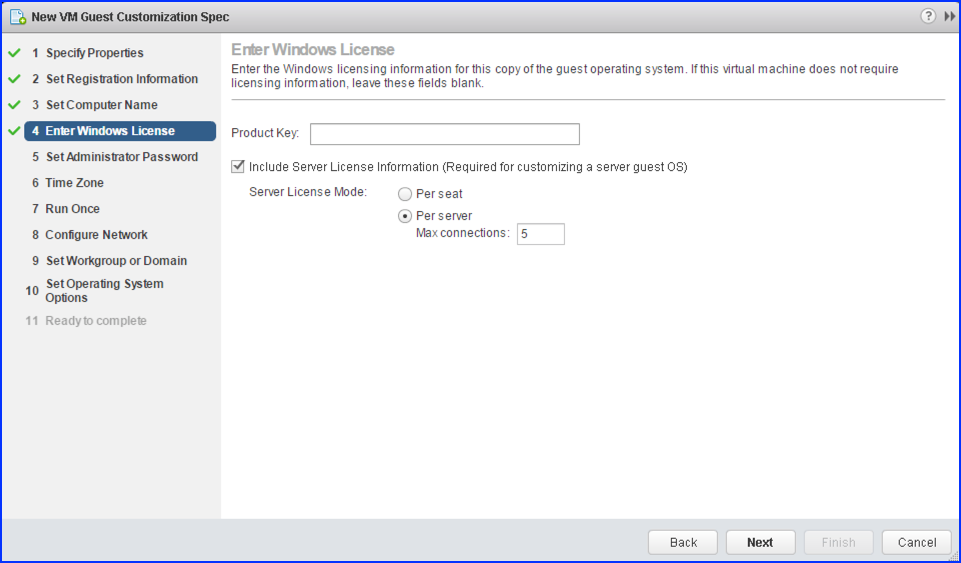
- Provide licensing information for the Windows Operating System and Click Next.
Figure 6. VWC-New VM Guest Customization Spec-Enter Windows License
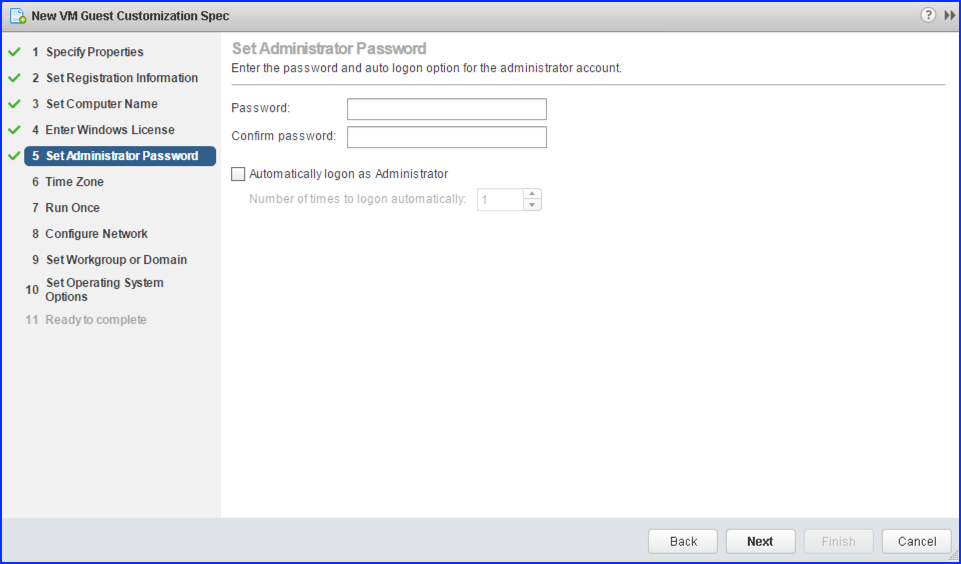
- Configure the administrator password for the virtual machine. You confirm the password and then Click Next.
Your browser window looks similar to the following:
Figure 7. VWC-New VM Guest Customization Spec-Set Administrator Password
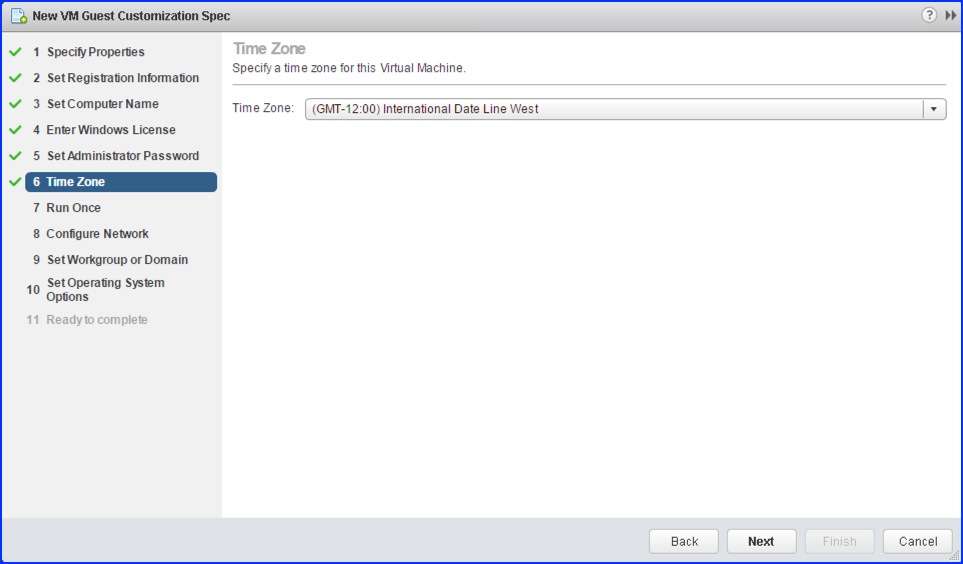
- Select the time zone for the virtual machine and Click Next.
Figure 8. VWC-New VM Guest Customization Spec-Time Zone
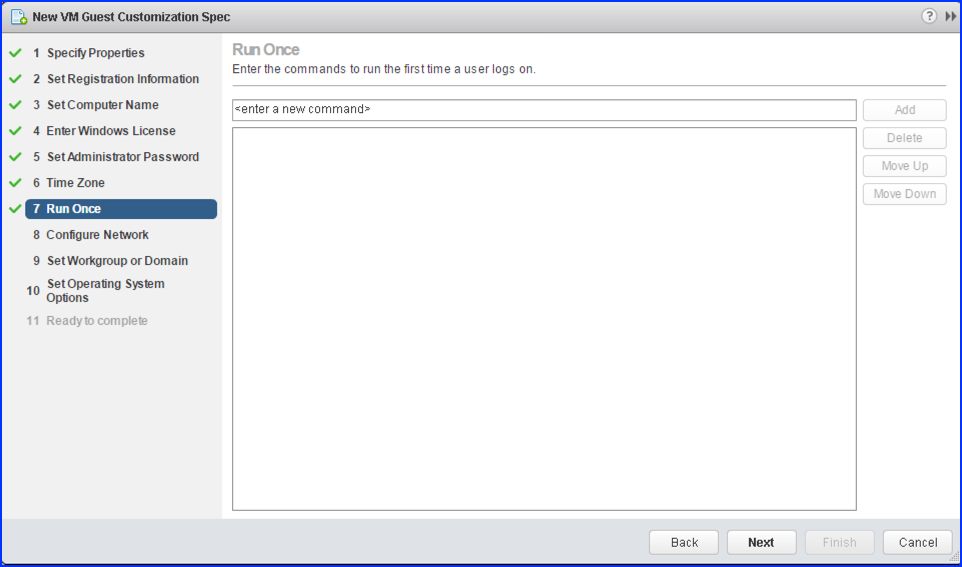
- (Optional) On the Run Once page, specify commands to run the first time a user logs into the guest operating system and Click Next. See the Microsoft Sysprep documentation for information about Run Once commands
Your browser window looks similar to the following:
Figure 9. VWC-New VM Guest Customization Spec-Run Once
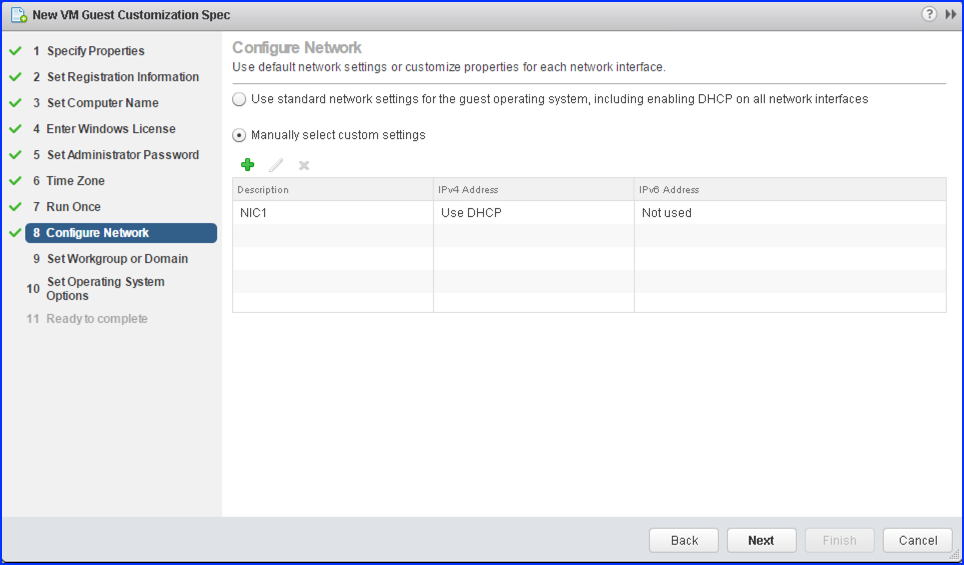
- In the Configure Network section of the wizard, select Manually select custom settings. This section allows you to configure every network interface of the Customization Specification. You can add a network interface by Clicking the plus icon. If you want to change the IP settings of any network interface, Click the edit button (the pencil icon). By default, there is one network interface defined called NIC1. It is configured to use DHCP.
Figure 10. VWC-New VM Guest Customization Spec-Configure Network
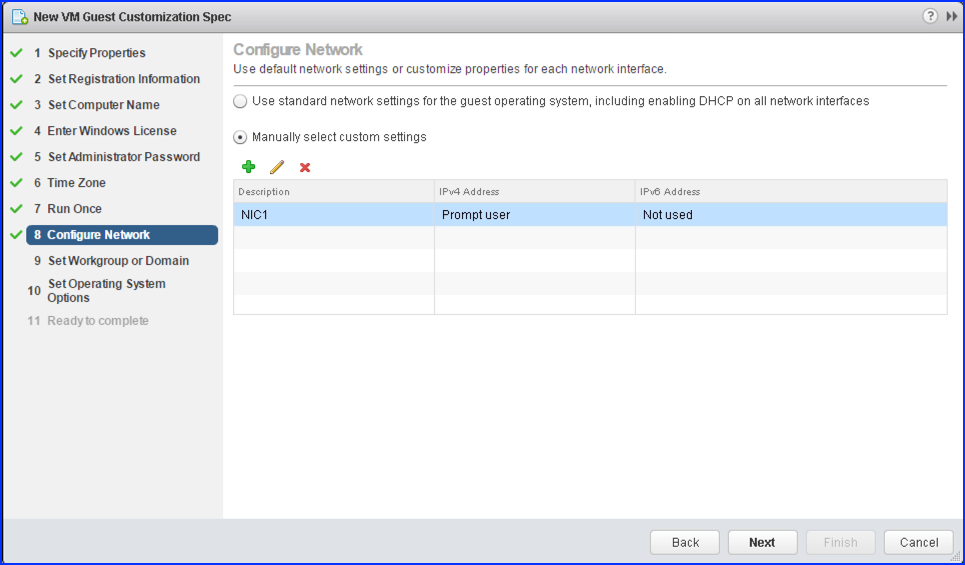
- When you Click the edit button the Edit Network dialog is displayed. If you want to configure the network interface to use DHCP select Use DHCP to obtain an ip address and Click OK. If you want the network interface to use a static ip address, select Prompt the user for an address when the specification is used. Enter the netmask and gateway address and then Click OK.
Your browser window looks similar to the following:
Figure 11. VWC-New VM Guest Customization Spec-IPv4

Figure 12. VWC-New VM Guest Customization Spec-DNS

- Add and configure as many networks interfaces as needed for your Customization Specification. When all of your network interfaces are added and configured, Click Next.
Figure 13. VWC-New VM Guest Customization Spec-Add/Configure Additional network Interfaces
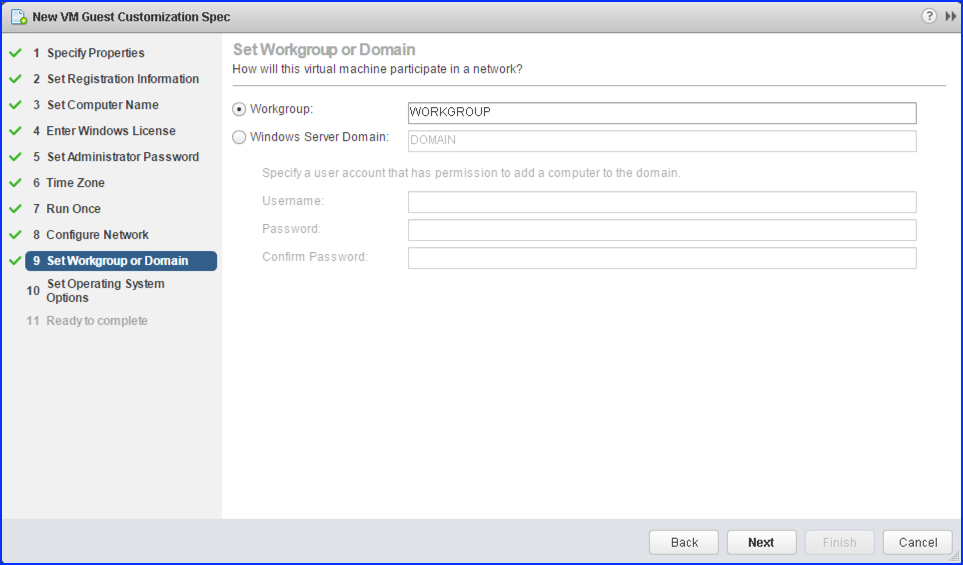
- You now enter the Workgroup or Domain for the virtual machine.
Your browser window looks similar to the following:
Figure 14. VWC-New VM Guest Customization Spec-Set Workgroup or Domain
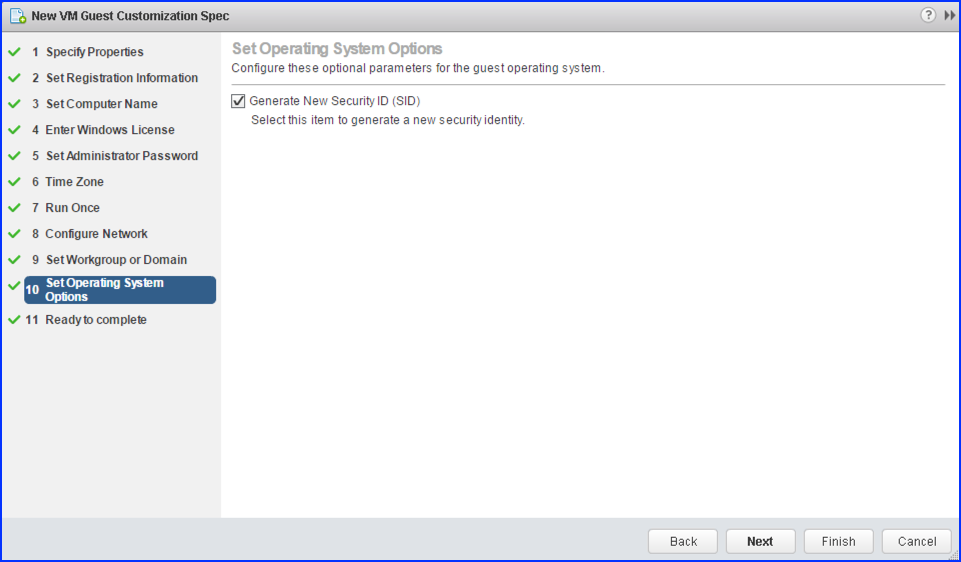
- In the Set Operating System Options section you can choose whether you want to create a new Security ID for the VM. A Windows Security ID (SID) is used in some Windows operating systems to uniquely identify systems and users. If you do not select this option, the new virtual machine has the same SID as the virtual machine or template from which it was cloned or deployed. Duplicate SIDs do not cause problems when the computers are part of a domain and only domain user accounts are used. However, if the computers are part of a Workgroup or local user accounts are used, duplicate SIDs can compromise file access controls. For more information, see the documentation for your Microsoft Windows operating system.
Figure 15. VWC-New VM Guest Customization Spec-Set OS Options
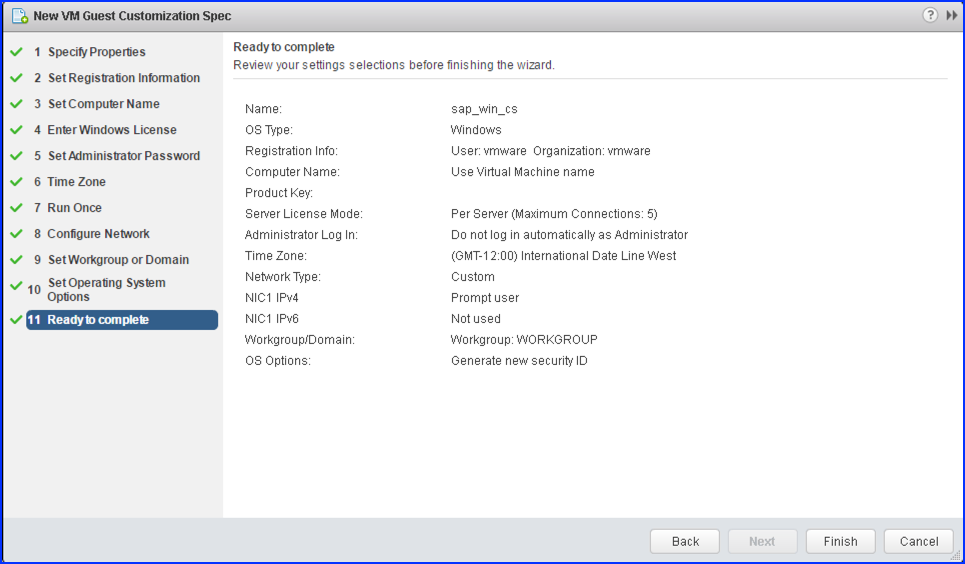
- Click Next to display the Ready to Complete dialog of the wizard, similar to the following:
Figure 16. VWC-New VM Guest Customization Spec-Ready to Complete
Results
You can now use this customization specification to customize virtual machine guest operating systems.
