App Volumes operation mode is determined by configuring a machine manager. You cannot change the operation mode of App Volumes after you configure the machine manager.
Prerequisites
Important: If you are configuring a
vCenter Server as the machine manager, ensure that you have the required
vCenter Server permissions.
Procedure
- From the App Volumes Manager console, click .
- Click Register Machine Manager.
- Select and configure the type of machine manager.
| Machine Manager Type |
Description |
| vCenter Server |
- If you select a vCenter Server instance as the first configured machine manager, you can add and configure additional servers.
- If the App Volumes Manager connects to the vCenter Server through an IPv6 connection, then you must provide the DNS of the vSphere as the host name.
- Ensure that you are aware of the considerations when hypervisor connection type is
VMware vCenter Server.For more information about the considerations, Types of Machine Manager Configurations.
- Follow the instructions as mentioned in step 4.
|
| ESXi (Single Host) |
Enter the host name, user name, and password for the ESXi host. Follow the instructions as mentioned in Step 4. |
| VHD In-Guest |
This connection type does not require any credentials.
- Ensure that you have created a file share and configured the necessary permissions.
For more information about the file share and permissions, see the Configurations Required When Hypervisor Connection Type is VHD In-Guest Services section in Types of Machine Manager Configurations.
- Keep the UNC path or the name of the file share location handy.
You need this information when configuring the storage for this machine manager type.
- Follow the instructions as mentioned in Step 5.
|
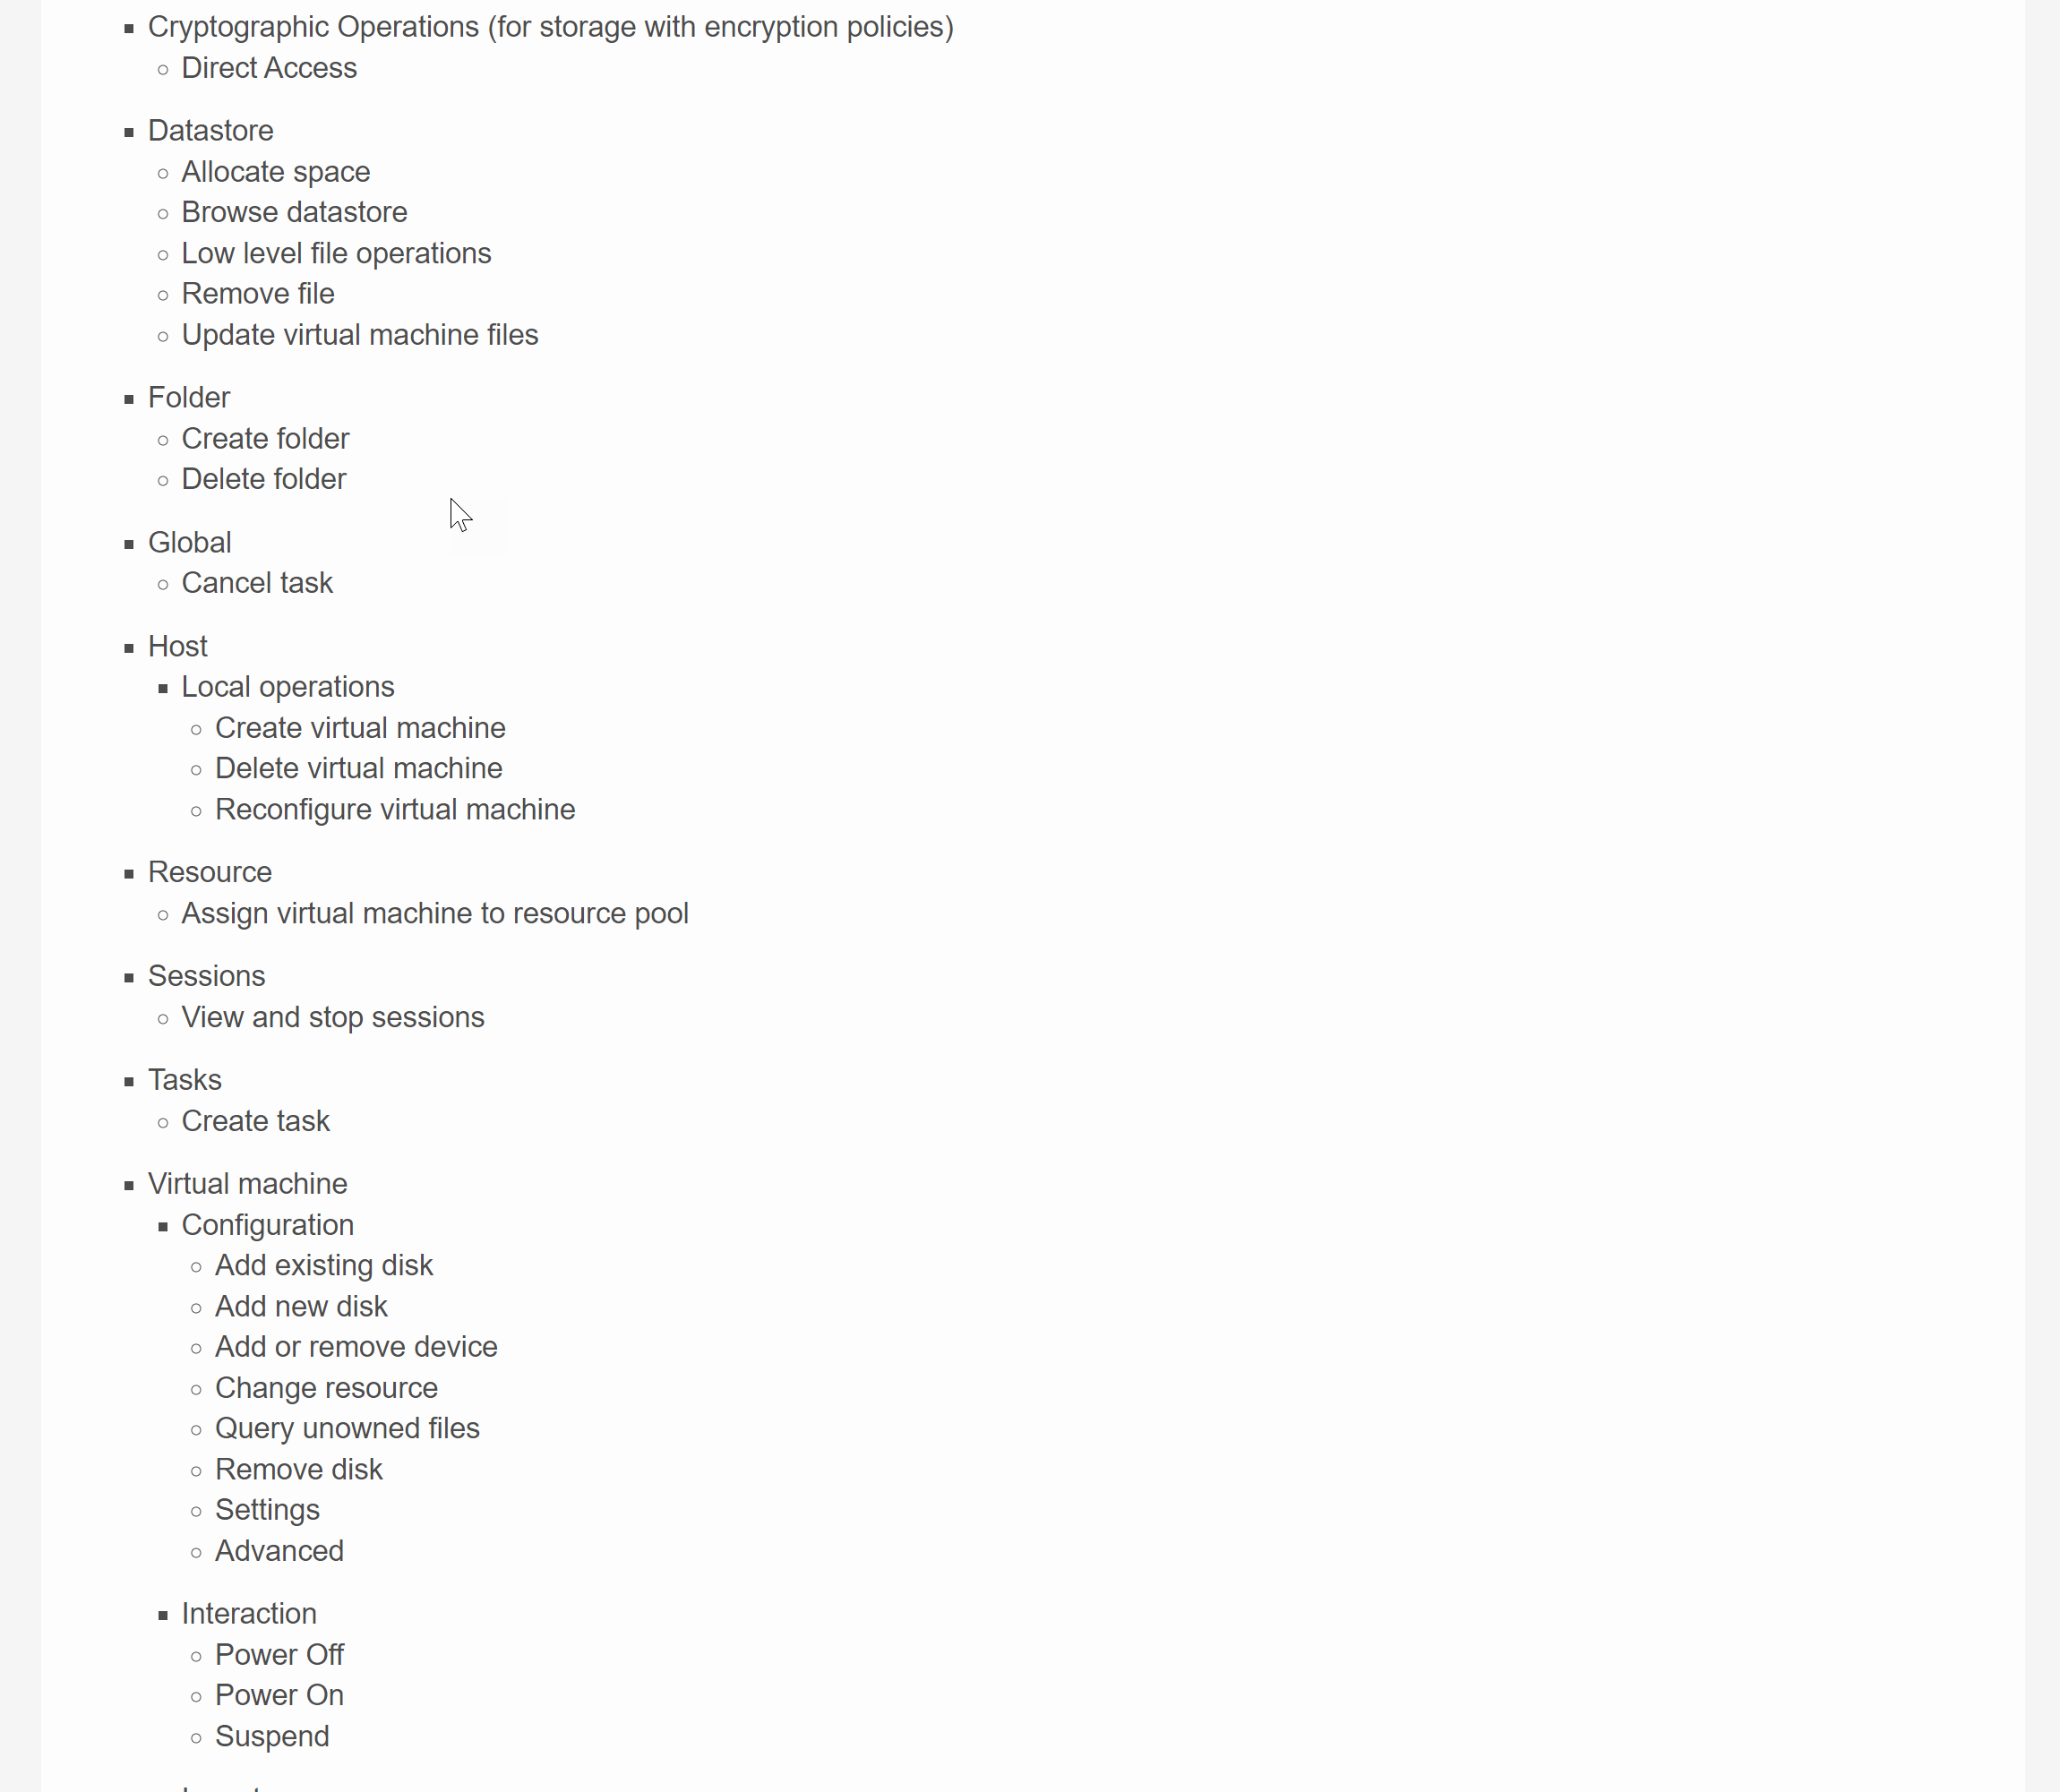
To view the permissions required by the service account, click Required vCenter Permissions.

- If you have selected Machine Manager Type as
vCenter Server and ESXi, perform the following steps:
Note: For
ESXi, you only need to provide the hostname, username, and password.
- Provide the following information:
| Option |
Description |
| Hostname |
The host name of the Machine Manager. For example, server.your-domain.local. For App Volumes on VMware Cloud on AWS, the host name must be of the form vcenter.sddc-xx.xxx-x-xx.vmc.vmware.com |
| Username |
The user name to access the machine.
Note: For a better performance, it is recommended that you use a local account. For information about how to
Create a Local User Account in vCenter Server, see the
vCenter Server Configuration documentation at
VMware Docs.
|
| Password |
The password for the user name. |
| Fast Attach |
When selected, volumes are attached to entities in fast mode.
Important: Fast Attach feature is supported when you have the following system requirements:
- VMware ESXi and vCenter Server 8.0 Update 2 and later
- App Volumes agent 4, version 2303 and later
If your vSphere version is earlier than the supported version for Fast Attach, volumes continue to attach without the Fast Attach functionality. |
| Mount ESXi |
When mounting, connect directly to
ESXi servers.
Note:
- When this option is selected, all vSphere hosts require the same user credentials.
- This option is not applicable for App Volumes on VMware Cloud on AWS.
|
| Mount Local |
Select this option if your VM's datastore has local copies of volumes and you want to mount the local copies. |
| Mount Queue |
Select this option to queue requests to the VM host. Decreases the number of active connections to vCenter Server and ESXi. This results in increased performance and decreases the burden on the vCenter Server. |
| Mount Async |
Wait for the mount request to complete in the background. Increases App Volumes Manager server throughput. Requires the Mount Queue option to be selected. |
| Mount Throttle |
Limits the number of actively processing mount requests. Decreases load on the vCenter Server or ESXi servers. Requires the Mount Queue option to be selected. |
| Maximum number of concurrent mount operations per queue |
The maximum number of concurrent mount operations per queue. Use the servers entry in clock.yml to configure this field. Default value is 5.
Note: Each
vCenter Server and
ESXi server uses a separate queue for every manager process.
|
- Click Save.
The configured machine manager is displayed on the
Machine Managers page.
- If you have selected Machine Manager Type as
vCenter Server, you can connect App Volumes Manager securely to a vCenter Server by following the procedure as mentioned in Establish a Secure vCenter Server Connection.
- (Optional) Create a custom role on the vCenter Server.
- If you have selected Machine Manager Type as
[VHD] In-Guest Services, perform the following:
- Click Next.
- On the page, click Add File Share.
- On the Add File Share page, search for the file share location.
Details of the file share such as Name, UNC Path, and Permissions are displayed.
- (Optional) Enter the Username and Password for the file share.
Note: These credentials are used by
App Volumes Manager and
App Volumes agent.
Username must follow the Domain\Username format.
Username and Password must belong to the service account, which is configured with permissions to access the packages and Writable Volumes on the file share. App Volumes uses the service account to access the volumes on the file share. As a result, it is not necessary to configure NTFS folder permissions for agent machines when using App Volumes with VHD In-guest operation mode. For more information about NTFS folder permissions, see Types of Machine Manager Configurations.
- Expand the name of the file share and click Add.
- On the Confirm Add screen, select Add.
- On the page, select the Default Storage Location for Packages and Writable Volumes.
- Click Next.
- On the Confirm Storage Settings window, choose when you want to import the volumes:
- Import volumes in the background - App Volumes Manager dispatches a background job to import the volume and the display goes back to the manager console immediately.
- Import volumes immediately - App Volumes Manager waits for the import to be completed and the console is not responsive until either the process is complete or 10 minutes have elapsed.
- Upload Templates.


