To store user-specific data such as application settings, user profiles, configuration settings, and licensing information, you can create a Writable Volume for computers and users.
Prerequisites
- Your account must have read access to the domains that you use with App Volumes, and the domains must be configured with a two-way trust if an entity is searched for in the Active Directory forest. See the User Accounts and Credentials section in the VMware App Volumes Installation guide for more information.
- If you are creating a Writable Volume for a group or OU, sync the users in the group or OU so that any changes to group or OU membership for the user are reflected in the App Volumes database.
To synchronize users with Active Directory, see Sync Entities with Active Directory.
- You must have uploaded the required Writable Volumes template to the datastore.
For more information, see Upload Templates.
For more information about Writable Volume templates, see Understanding Templates used in App Volumes.
Procedure
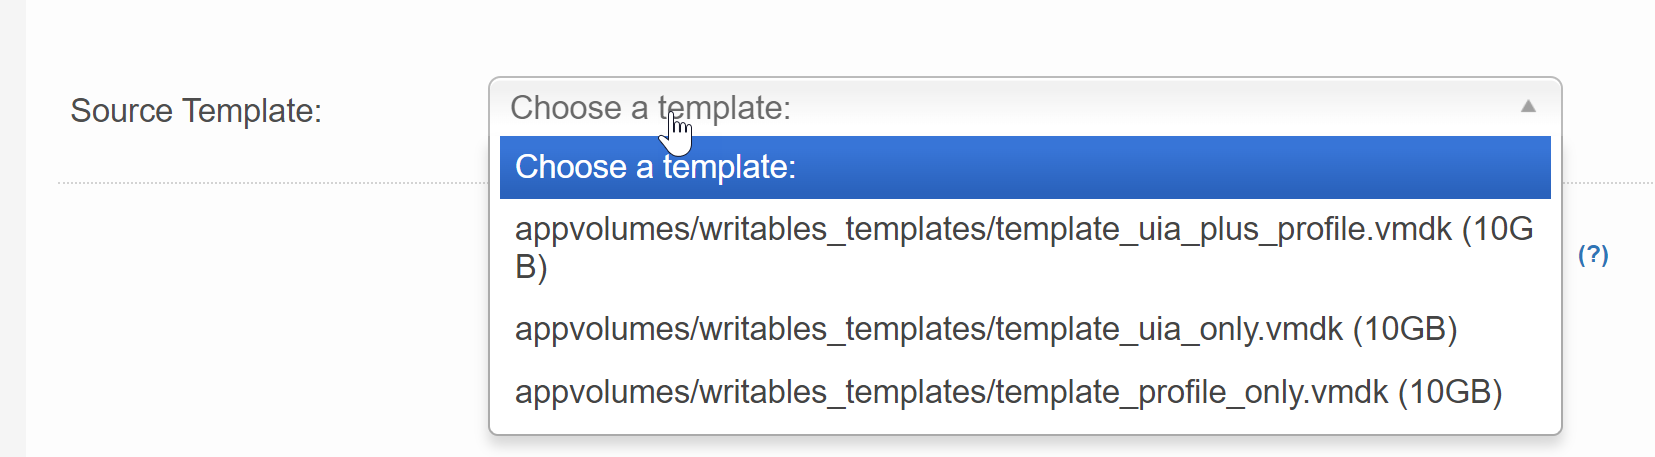
- Enter the destination storage and path, and the source template.
See Configuring Storage for a description of the templates.
Option Description Destination Storage Select either the default datastore or a different datastore. The default datastore is the one that you configured for storing the Writable Volumes. If you select a different datastore, verify that you have the Writable Volumes templates on that datastore in the appvolumes/writable_templates folder. Destination Path The default path is <varname>/appvolumes/writable. Source Template Select a source template from the drop-down menu for the new Writable Volume.
Note: After you select a Writable Volume template type, later, you cannot change to any other template type.For example, if you select the template type as UIA-only for a Writable Volume, you cannot change the Writable Volume to either UIA+profile or Profile-only.
- (Optional) To configure additional settings for the Writable Volume, select the appropriate box.
Option Description Exception Resolution To determine how to resolve login issues when Writable Volumes are unavailable for attachments, select one of the following options: - Disable virtualization and alert user - App Volumes deactivates all volume virtualization and a warning message is displayed when the user logs in.
Note: You can view the warning message under .
- Block user login - Use this setting to handle Writable Volumes conflicts. When there is a conflict due to a Writable Volume being attached elsewhere, App Volumes prevents the user from logging into any additional computers. This prevention protects users from conflicts that arise when a local profile interferes with their profile on the Writable Volume.
- Disable virtualization and alert user (errors only) - App Volumes agent deactivates all volume virtualization and an alert is displayed to the user of the desktop.
Note: Writable Volume conflict is not considered an error. Hence, this option is not triggered when there is a Writable Volume conflict at user login. App Volumes agent does not deactivate volume virtualization.
Limit delivery for these user Writable Volumes Use this setting for users who need not access their Writable Volume on all computers that they use. Also, some users might need separate Writable Volumes that are only attached to specific computers.

For example, a user has two Writable Volumes assigned, one limited to Win7-Dev and another limited to Win7-Test. When the user logs in to the computer named Win7-Dev-021, the user gets the first volume. When the user logs in to Win7-Testing, the user gets the second volume. If the user logs in to Win2012R2, no Writable Volume is attached.
Delay writable creation for group/OU members until they log in Delay the creation of Writable Volumes for group and OU members until their next login. This option only affects groups and OUs. Users and computer entities that were directly selected have their volumes created immediately.
Use this option when you select a group or an OU. Often these containers can have hundreds or thousands of members. Such large number of members can be problematic because creating many volumes at the same time might take a long time. Some members might not need a Writable Volume.
- Disable virtualization and alert user - App Volumes deactivates all volume virtualization and a warning message is displayed when the user logs in.
What to do next
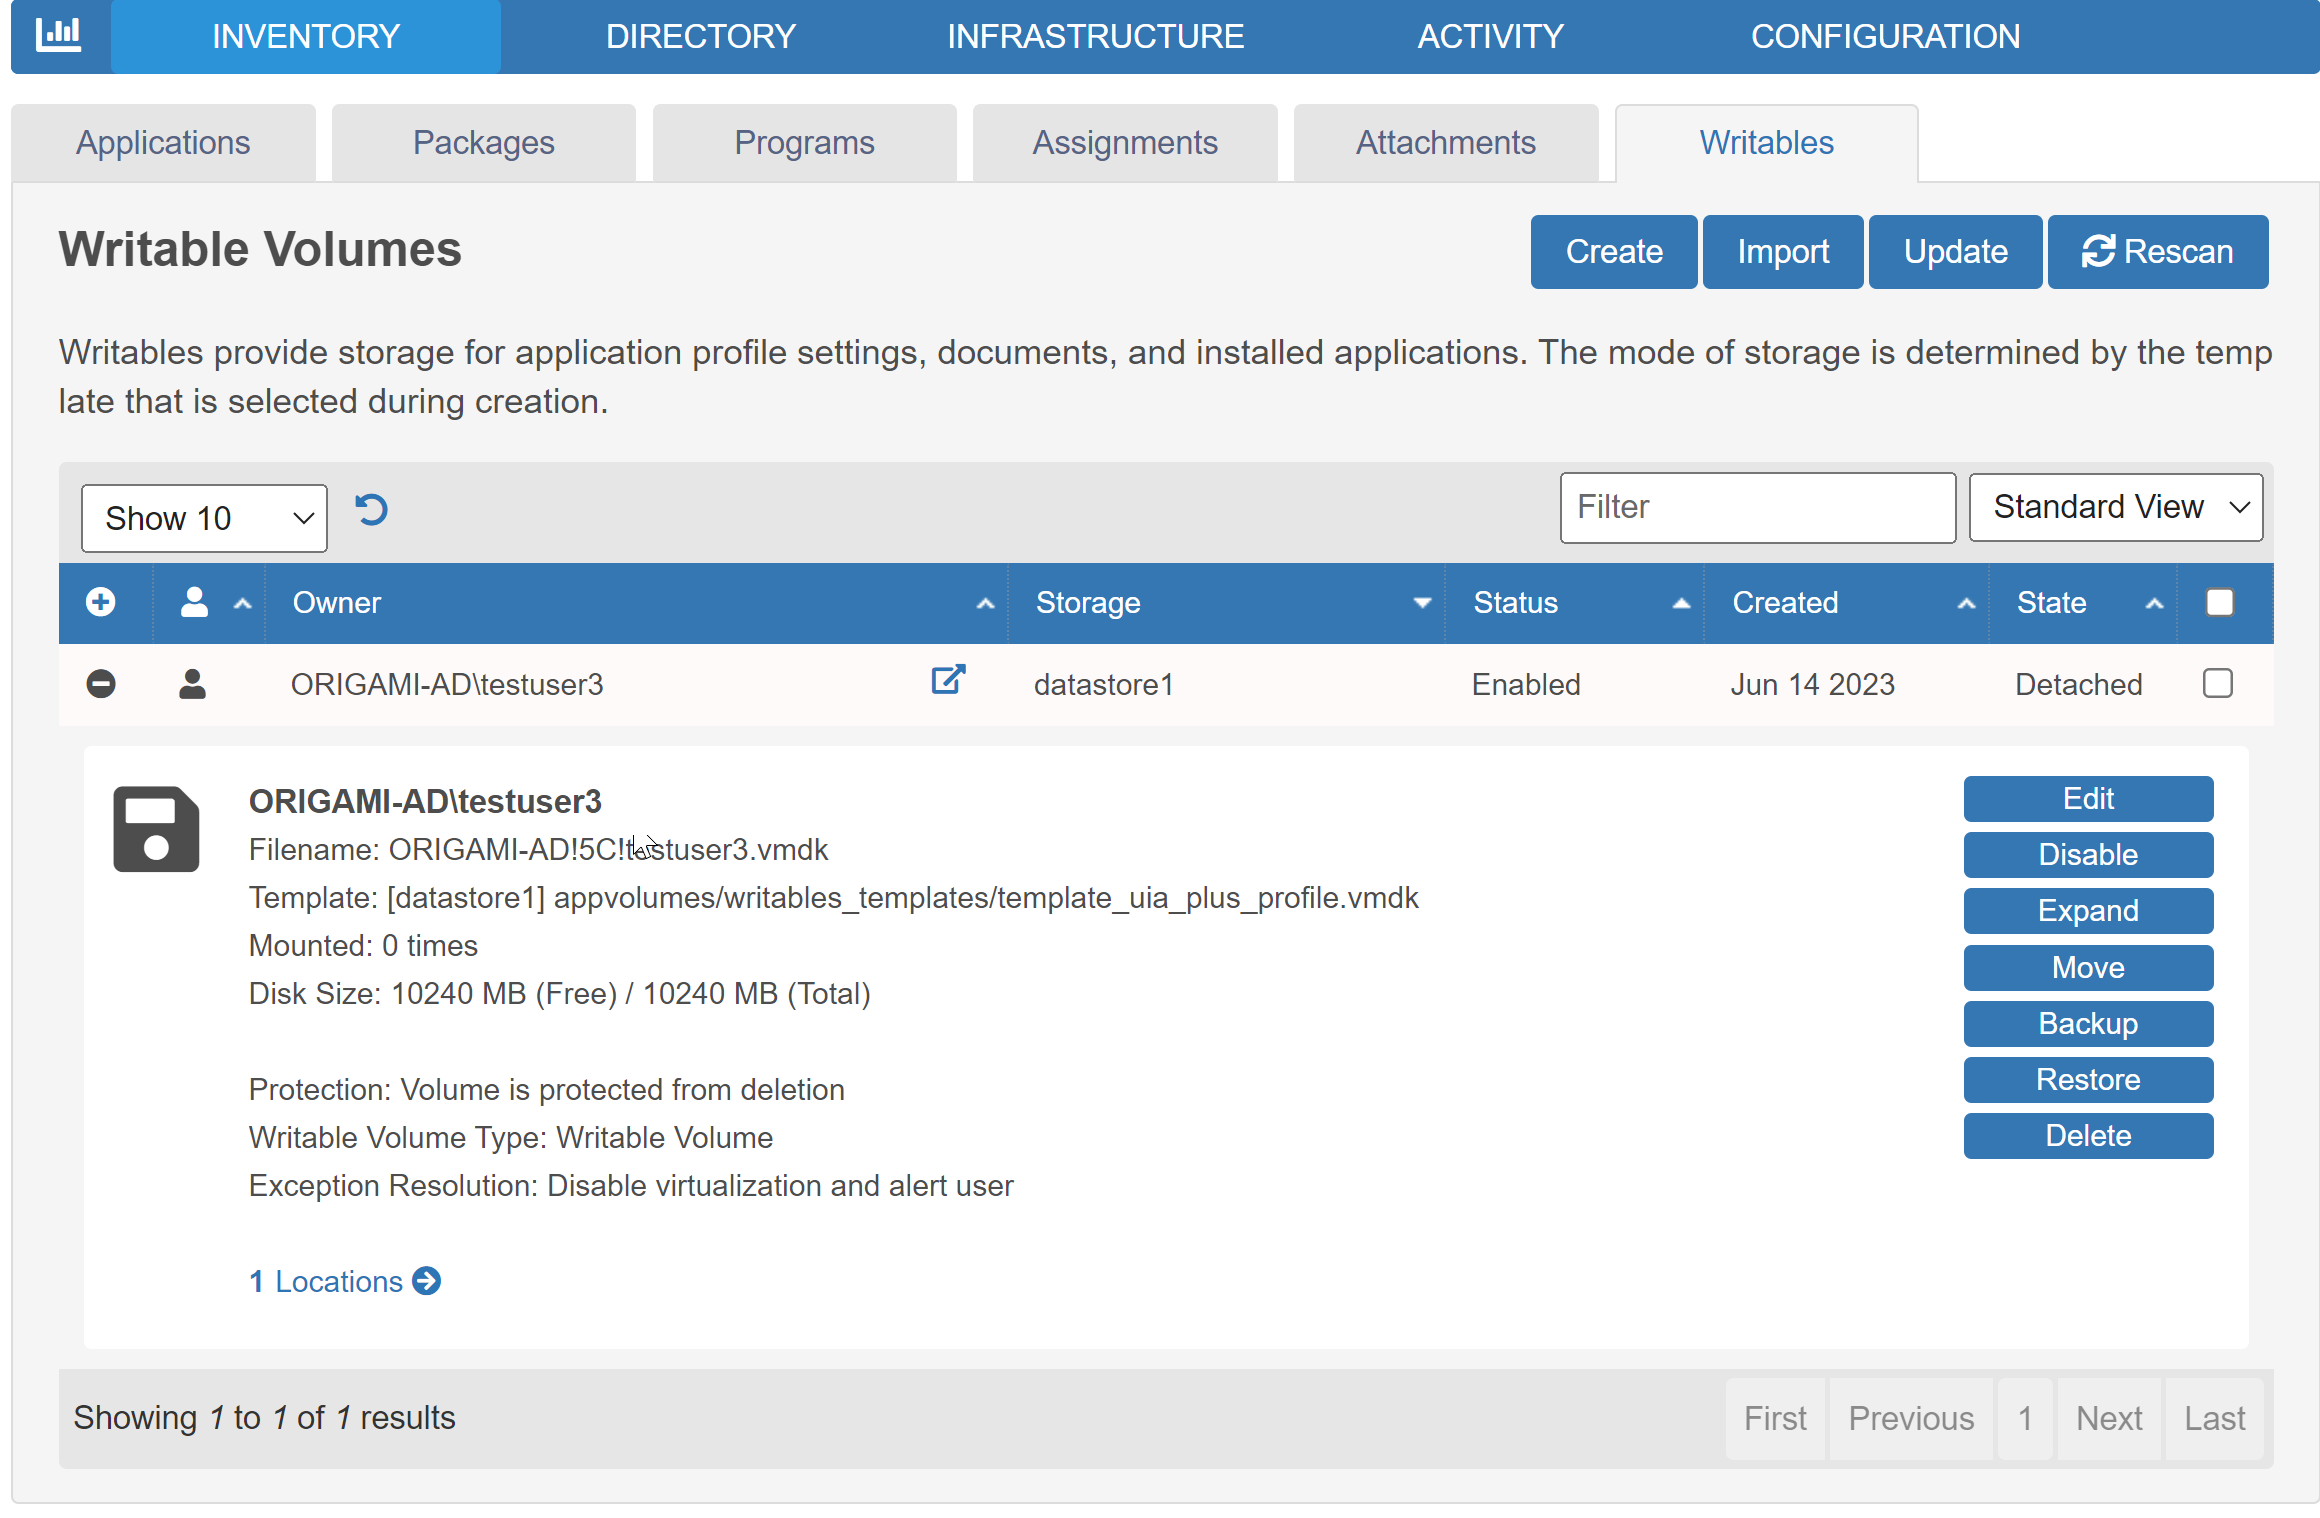
To view the information for a specific Writable Volume, in the Writable Volumes page, click the + sign for a specific record. You can view the filename (name of the Writable Volume), template type used while creating the Writable Volume, disk size allocated for the Writable Volume, location at which the Writable Volume is created, and so on.