


Use dashboards to see top threats, violations, and compliance trends in VMware Aria Automation for Secure Clouds
Once you’ve added cloud accounts to your organization, you can start understanding the security vulnerabilities in your cloud environment and improving your security posture. The dashboard is a good starting point for getting an overview of the configuration gaps detected.
Before you start
Before making changes to your dashboards, know that access and permissions are defined differently based on your organization or project role:
- Only organization and project admins can change the default dashboard.
- Organization and project admins can edit all dashboards at their respective context.
- Organization and project analysts can edit dashboards they created, but not dashboards created by others.
- The viewer role cannot create dashboards.
Dashboard overview
The default dashboard provides a top-down view of the connected threats in the environment by severity, cloud accounts, services, regions, and so on, along with details on the percentage of violating rules and conformity with compliance frameworks.
When you onboard a new organization, VMware Aria Automation for Secure Clouds creates three standard dashboard types:
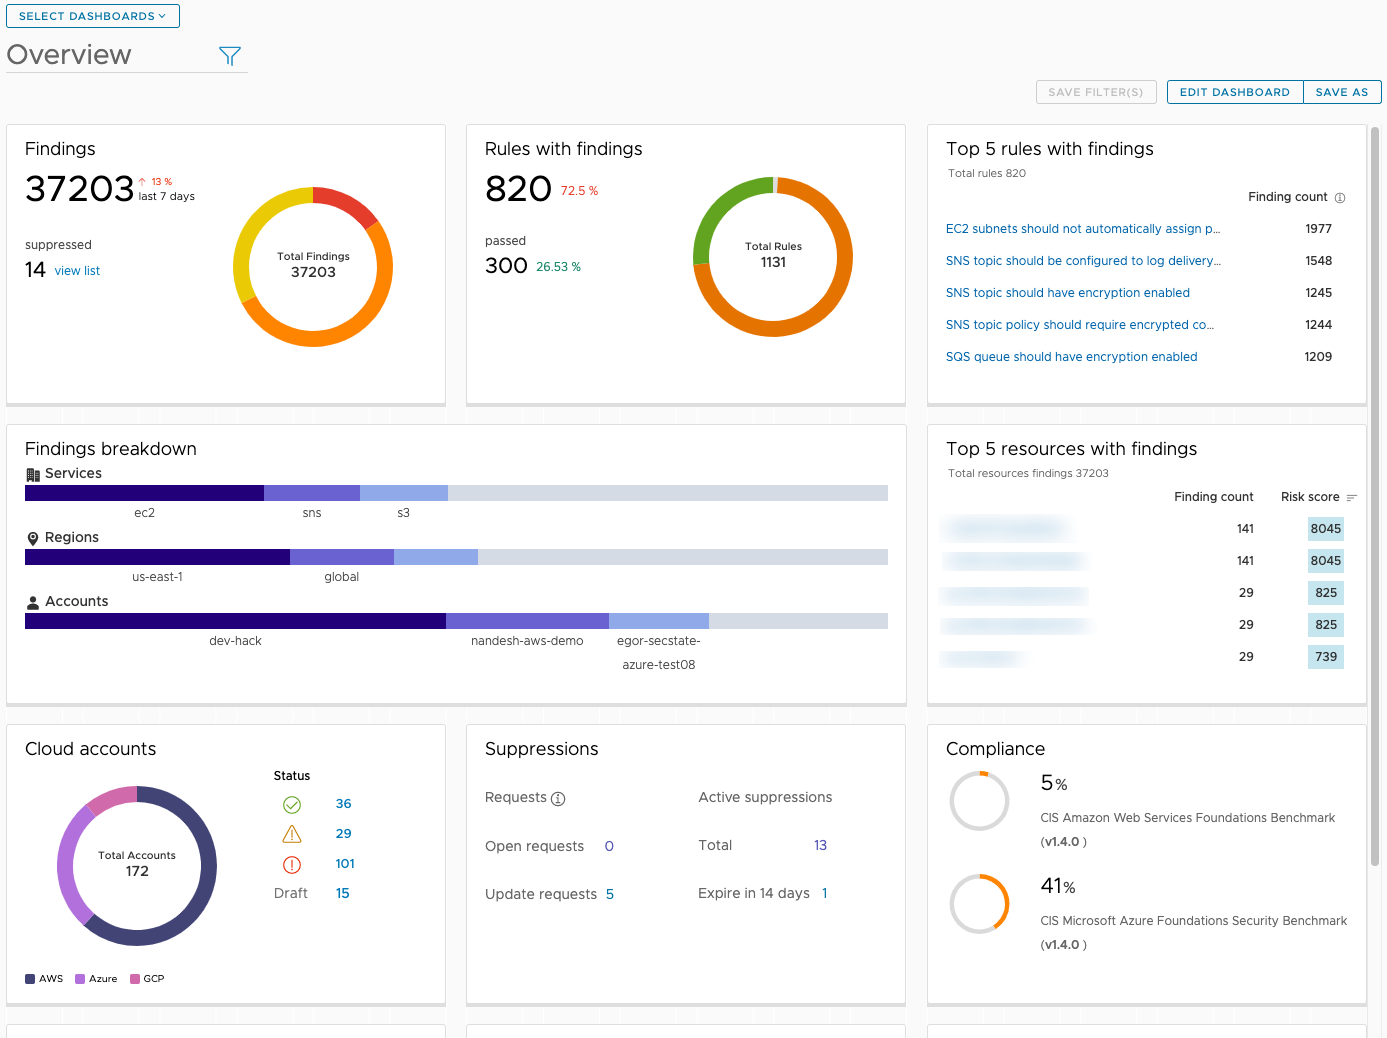
- Overview - Provides a high-level snapshot of your cloud security posture with metrics on findings, onboarded cloud accounts, suppression, compliance, and other top features. This is as set as your default dashboard when you onboard.
- Trends - Displays data visualization for several findings metrics over time. You can view findings data over weekly, monthly, and biannual intervals.
- Compliance - Provides a breakdown of your total compliance to all native and any custom frameworks.
You can switch to any of these dashboards by clicking the Select Dashboards drop-down menu and selecting from the list. If you hover over a dashboard selection, you can also choose to set it as a new default dashboard.
Filter dashboard information
Filters can be applied to this view by clicking the funnel icon at the top. You can apply filters to your dashboard information based on provider, rules, environment, resources, and other options.

Saving filters
Once you apply filters, you can click the Save Filter(s) button to save them to your dashboard's configuration. Your filters now load automatically whenever you select the dashboard.
Create a new dashboard
If you want more dashboards than the original three provided to your organization, you can add more from the Dashboards management screen.
Click the Select Dashboards drop-down menu, then select Manage dashboard.
Select Add Dashboard.
Enter a name for your dashboard, and choose the context if available (organization, or an individual project you have access to).
Select a template for your dashboard (Overview, Trends, or Compliance).
Click Add.
Note: The next steps include features that are in public beta. Reach out to your support team if you have feedback or questions about the process as written.
On the next screen, you can freely move and arrange the various dashboard widgets to your preference. You can even remove widgets that aren't relevant to you, or add new ones with the +Add Widget button.

When adding a widget, select the drop-down menu to switch between widget categories (Chart, Datagrid, and Graph).
Select the Preview toggle to see what your dashboard looks like, then click Save when you're finished.
You can create any number of new dashboards to suit your needs. For example, if you monitor multiple cloud providers with VMware Aria Automation for Secure Clouds, you can create a new overview dashboards with saved filters so you can easily switch between provider-specific views.
Edit a dashboard
You can edit a dashboard any time by selecting it from the drop-down menu and clicking on Edit Dashboard. You can re-arrange, add, and remove widgets or change the context if available. Click Save when you're done making changes.
Copy a dashboard
If you've made a custom dashboard and want to make a slightly different version without making all the same customization selections again, you can copy it instead of starting over from scratch.
From the Dashboards tab, click the Select Dashboards drop-down menu.
Select the dashboard you want to copy.
Once the dashboard loads, click on the Save As button in the the upper-right corner of the screen.
Enter a name for the dashboard and choose the context if available (organization, or an individual project you have access to).
Click Save.
