


How to onboard your GCP projects in VMware Aria Automation for Secure Clouds
To connect a new GCP project, you must first create a service account for authentication. The service account is read-only, and the VMware Aria Automation for Secure Clouds platform uses it to perform several key tasks:
- Scans your GCP resource configurations to create an interconnected cloud security model of the environment.
- Performs near real-time evaluations of configuration changes with the Google Cloud Logging API connected to a Pub/Sub as the event stream.
VMware Aria Automation for Secure Clouds provides shell scripts throughout this guide to simplify the creation of the Service Account and set up the event stream with Google Deployment Manager. Although you can use the Google Cloud SDK in a local shell to run the scripts, using Google Cloud Shell for the setup process offers a more streamlined experience with less dependencies.
Before you start
Before you set up a GCP cloud account, make sure you have the following requirements in place:
- Know the ID of any GCP projects you want to onboard.
- Confirm access to the project in your GCP console.
- Have organization-level permissions (Owner, Organization Role Administrator, and Organization Administrator) to add roles and IAM member bindings in your GCP console.
Add a single cloud account
Use this process when you want to onboard an individual GCP project into VMware Aria Automation for Secure Clouds. To begin the onboarding process:
Navigate to Settings > Cloud accounts.
Click the Add Account button.
Make the following selections:
- Provider - GCP.
- Onboarding Method - Single project.
Click Add.
Step one - Service account connection
To connect VMware Aria Automation for Secure Clouds with your GCP project, you must run a script that enables several APIs and provisions a service account to monitor your project.
Open Google Cloud Shell or any shell with Google Cloud SDK.
Run this command in your shell environment, replacing the Project ID placeholder value.
curl https://api.securestate.vmware.com/download/onboarding/gcp/gcp_single_project_onboarding.sh --output gcp_single_project_onboarding.sh && /bin/bash gcp_single_project_onboarding.sh <project_id>The script outputs a service account key file named vmw-secure-state-sa-key.json for use in the next steps. If you ran the script in a cloud shell, enter this command to download the file.
cloudshell download vmw-secure-state-sa-key.jsonUpload the key where prompted in the VMware Aria Automation for Secure Clouds browser client.
Make any changes you need to the account name, project, environment, account owner, or account email fields before proceeding.
Click Next.
Step two - Event stream
Follow instructions to connect the event stream. This is strongly recommended to ensure you get realtime status updates about security anomalies, violations, and threats, and has no additional cost.
Click Finish when done.
Add multiple cloud accounts
Use this process when you want to onboard a group of GCP projects into VMware Aria Automation for Secure Clouds. To begin the onboarding process:
Navigate to Settings > Cloud accounts.
Click the Add Account button.
Make the following selections:
- Provider - GCP.
- Onboarding Method - Organization level (Multi-projects).
Click Add.
Step one - Service account connection
To connect VMware Aria Automation for Secure Clouds with your GCP projects, you must run a script that enables several APIs and provisions a service account to monitor your projects.
Open Google Cloud Shell or any shell with Google Cloud SDK.
Run this command in your shell environment, replacing the Project ID and Organization ID placeholder values.
curl https://gcp.events.securestate.vmware.com/scripts/gcp-onboarding/vss_sa_onboarding.sh -o vss_sa_onboarding.sh && curl https://gcp.events.securestate.vmware.com/scripts/gcp-onboarding/vss_sa_deploy_template.jinja -o vss_sa_deploy_template.jinja && sh vss_sa_onboarding.sh --project-id <project_id> --organization-id <organization_id>The script outputs a service account key file named vmw-secure-state-sa-key.json for use in the next steps. If you ran the script in a cloud shell, enter this command to download the file.
cloudshell download vmw-secure-state-sa-key.jsonUpload the key where prompted in the VMware Aria Automation for Secure Clouds browser client.
Select the GCP projects you want to onboard.
Click Next.
Step two - Projects configuration
On this step, make any changes you need to the account name, project, environment, account owner, or account email fields for the associated projects. Click Next when finished.
Step three - Event stream
Follow instructions to connect the event stream. This is strongly recommended to ensure you get realtime status updates about security anomalies, violations, and threats, and has no additional cost.
Click Finish when done.
Turn on event stream
After you configure the GCP projects to monitor, you should set up an event stream for each project. VMware Aria Automation for Secure Clouds uses event streams to provide real-time updates about security findings for your monitored cloud accounts. Configuring an event stream for your cloud account is necessary to get information about misconfigurations and other vulnerabilities immediately, otherwise your information is only as accurate as your most recent system scan.
Setup with Google Cloud Shell
VMware Aria Automation for Secure Clouds provides a simple script and a ready-to-use command in the UI for this setup. You can run this command from Google Cloud Shell or on a local terminal if you've installed the Google Cloud SDK.
curl https://gcp.events.securestate.vmware.com/scripts/gcp-eventstream/setup-securestate-events.sh -o setup-securestate-events.sh && curl https://gcp.events.securestate.vmware.com/scripts/gcp-eventstream/gcp-event-bridge.jinja -o gcp-event-bridge.jinja && sh setup-securestate-events.sh --endpoint=https://gcp.events.securestate.vmware.com --project-ids=<gcp_project_id1,gcp_project_id2,gcp_project_id3>
A Cloud Logging Sink and Pub/Sub is created per project selected to send change configurations to the service.
Note: While not recommended, a central event stream can also be setup for change monitoring across multiple projects. An Aggregator Sink must be configured to aggregate and send all log entries to the service.
After you run the script, click Finish. The GCP projects you selected are onboarded for monitoring.
Remove event stream
You can remove the event stream for an individual GCP account or a group of accounts using a simple script. To remove the event stream, follow these steps:
- Navigate to Settings > Cloud accounts.
- Select your GCP cloud account.
- On the cloud account details page, select Turn-Off under event stream and follow the instructions.
The script will remove the Cloud Logging, Pub/Sub topic and other pieces for the selected GCP projects.
Manage GCP cloud accounts
To onboard additional GCP projects in your environment after the initial setup, go to the details page for one of your GCP cloud accounts and select Manage.
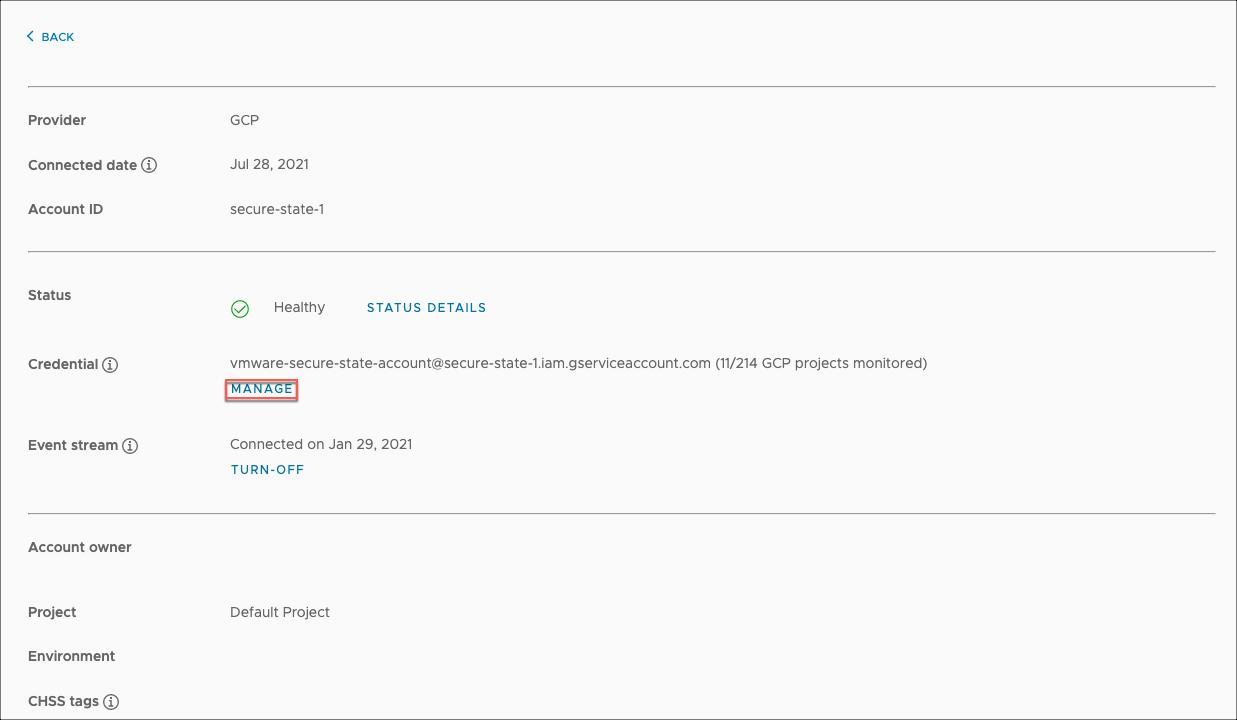
This initiates the cloud account management workflow for your GCP credentials (that is, your service account). You can onboard new GCP Projects or remove existing ones connected to the service account from here.
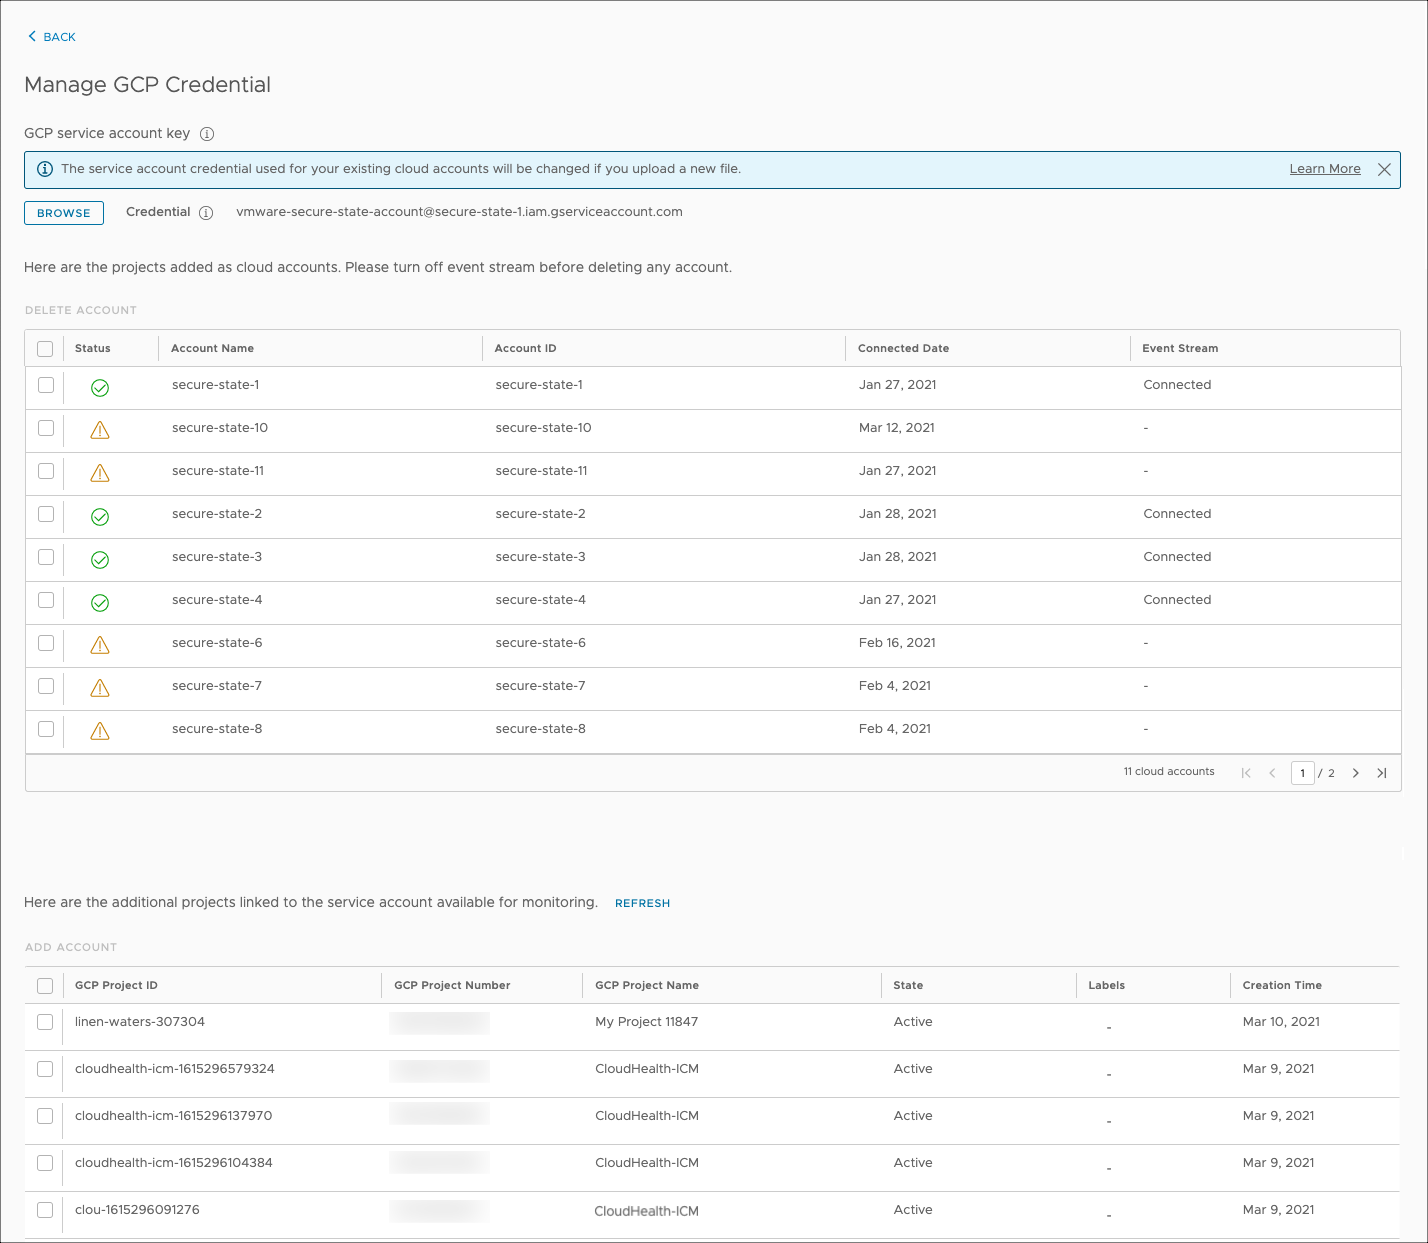
To onboard new GCP projects, select the projects to onboard from the table at the bottom of the screen and click on Add Account. You’ll then be able to optionally provide Environment, Account Owner Name, and Account Owner Email Address related details, and to configure the event stream. Refer to the GCP event stream overview section for more information on event streams.
Remove cloud accounts
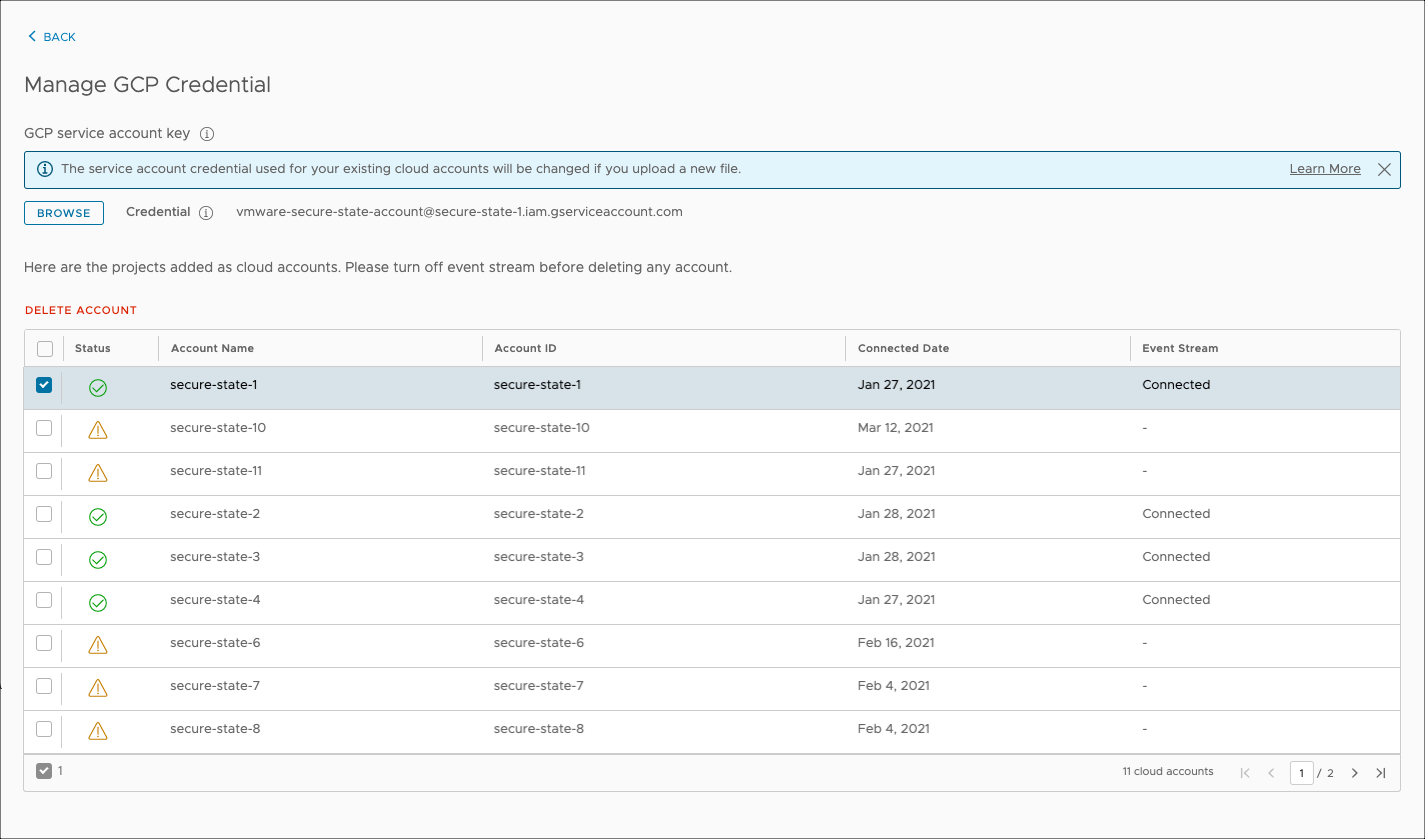
You can either remove GCP projects in bulk by going through the same work workflow for adding cloud accounts that share the same credential (service account) or do the removal on a per-account basis.
For bulk GCP account removal, begin by selecting Manage on one of the accounts. From the list of onboarded accounts, select the ones to remove and click Delete Account. A confirmation box will be presented for you to verify that only the desired cloud accounts have been selected for removal.
Next, click Delete, and the selected GCP account will be removed from monitoring. This action is not reversible and will lead to the removal of all findings, reports, remediations, and so on for the removed cloud accounts.
To remove a single GCP cloud account, navigate to the cloud account details page, click the Actions button, and select Delete. A confirmation dialog will be presented to verify whether this is intended. Select Delete and the cloud account will be removed from the service along with its findings, reports, remediations, and so on.
Note: You must remove the cloud account’s event stream before the cloud account can be removed from monitoring.
