


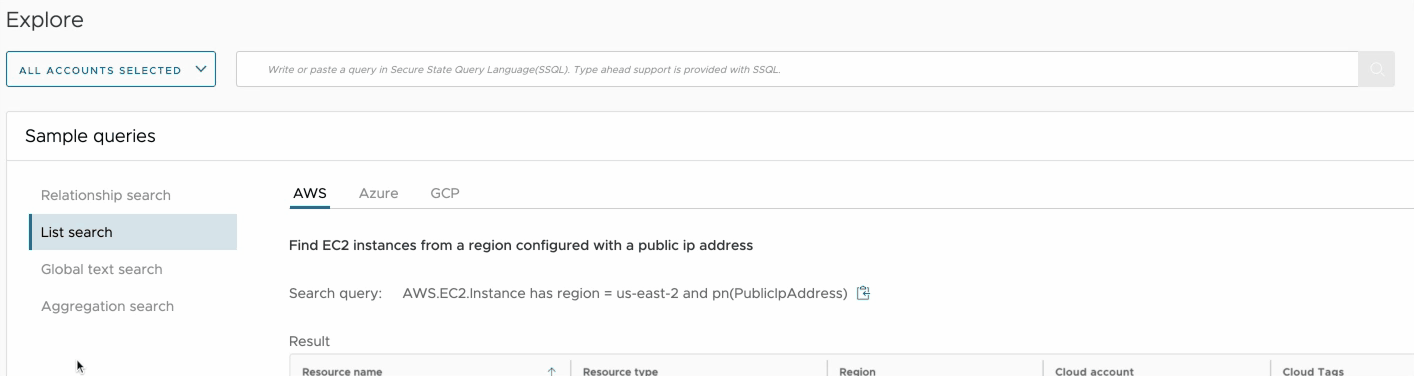
Use Explore Search to research the root cause of findings in VMware Aria Automation for Secure Clouds
Explore Search provides a high-level overview of your cloud resources based on the criteria you put in. Here's a quick example of what a typical cloud account might look like.
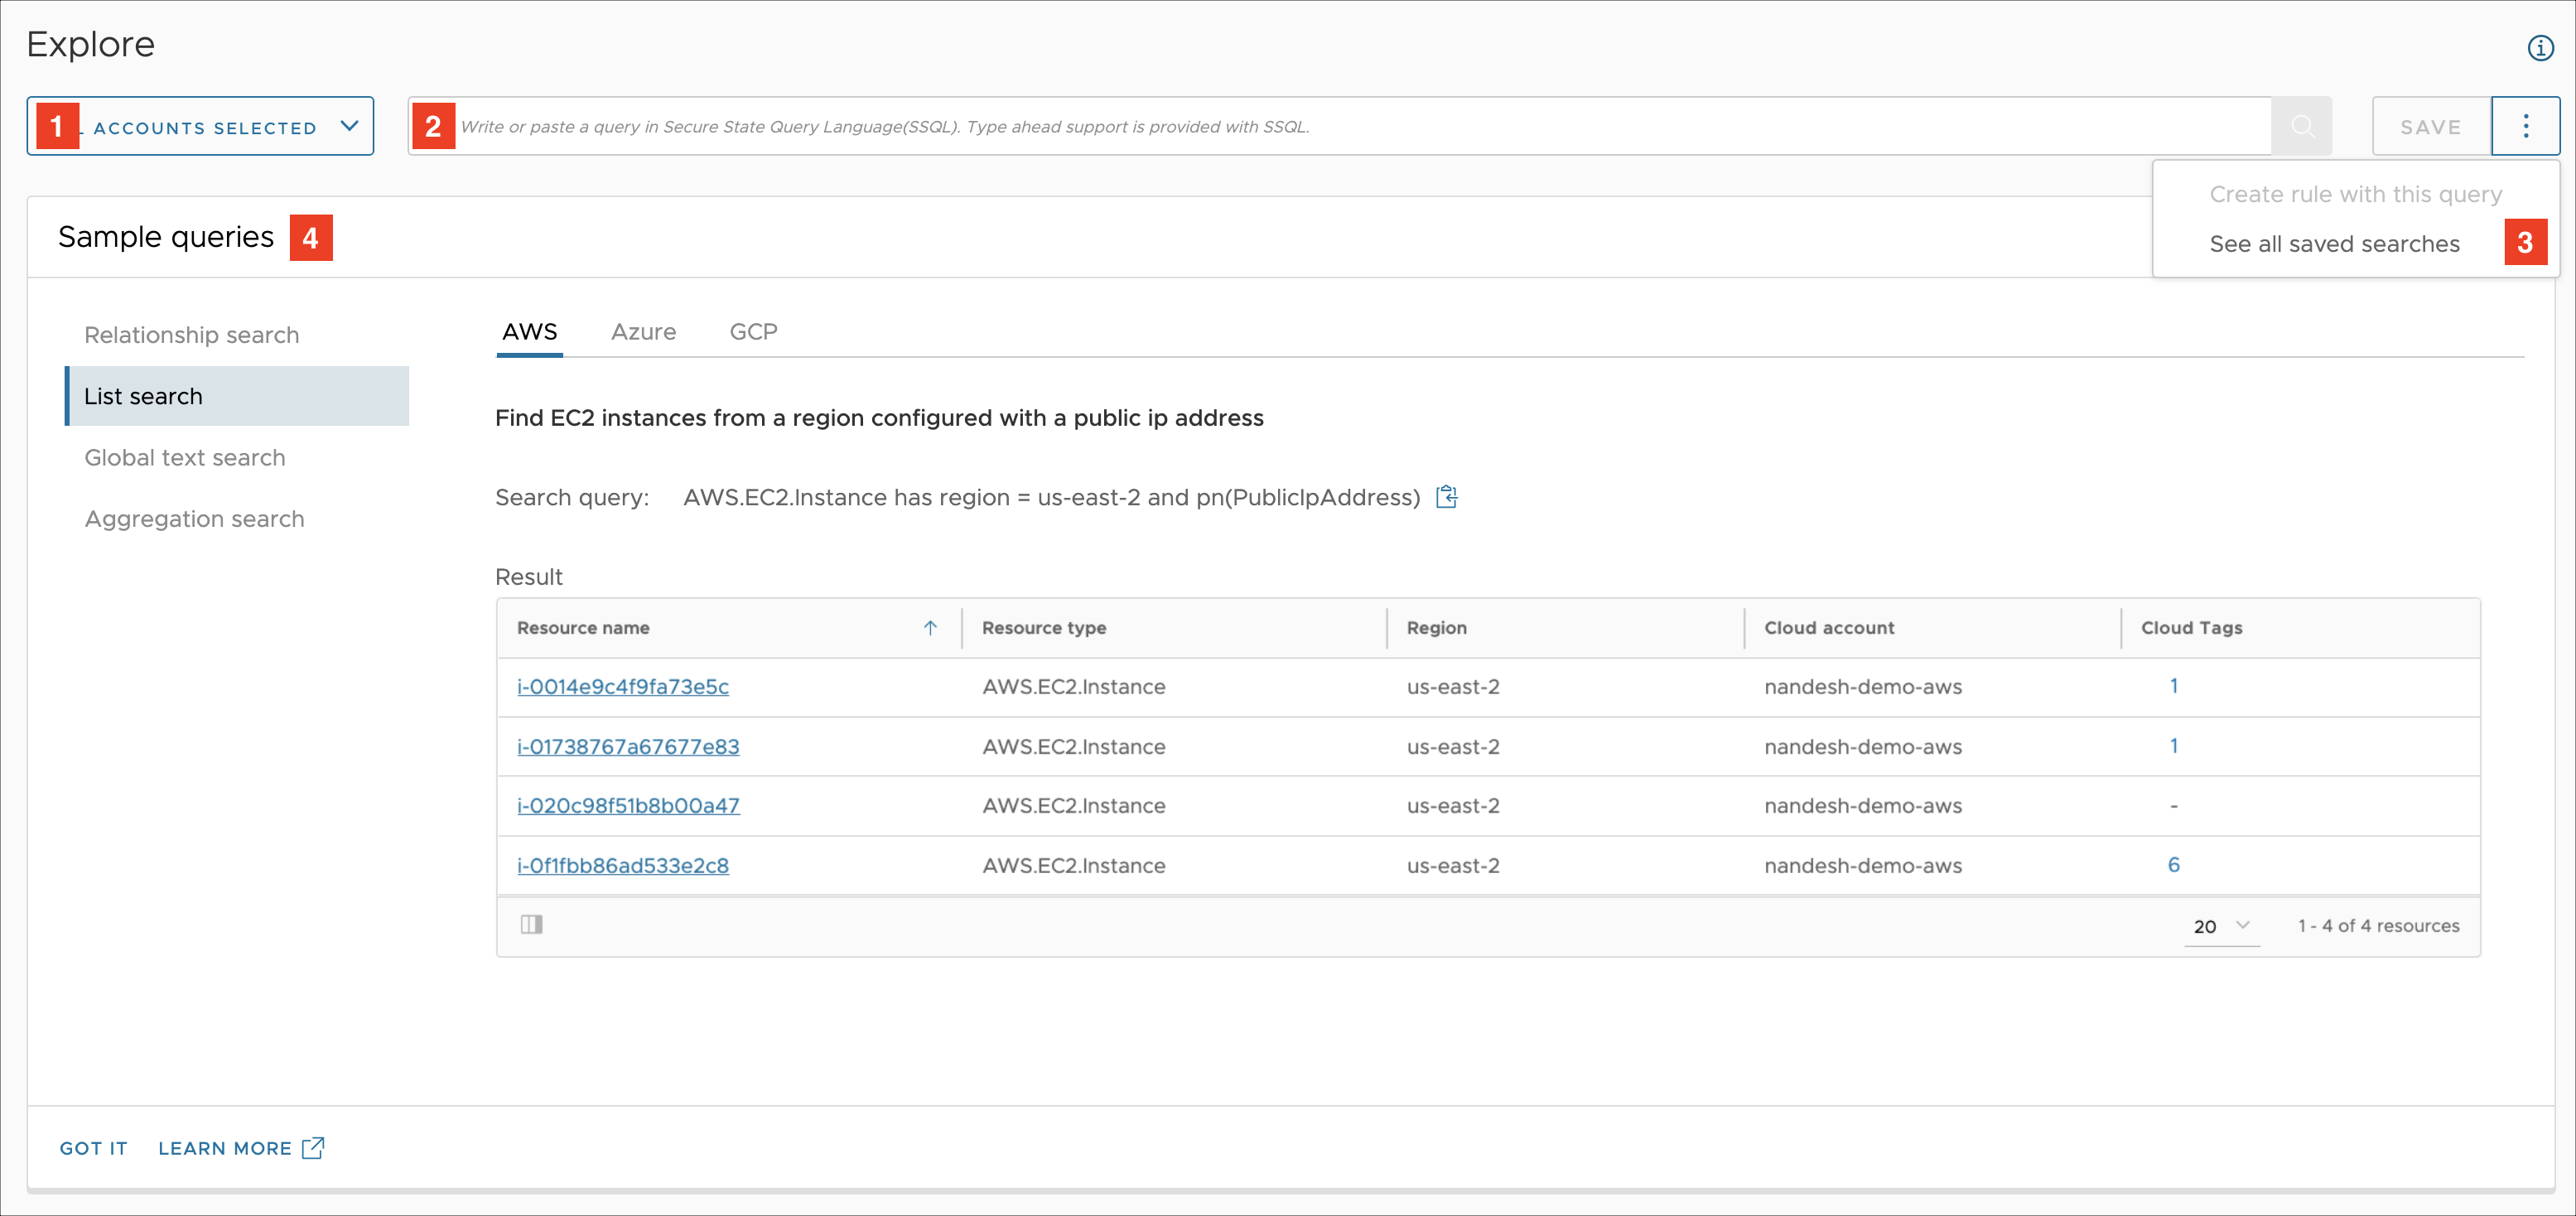
- Cloud account selector used specify the scope of your searches
- Search query input box
- Three-dot menu with additional options
- Sample queries panel to easily get started
Select cloud accounts
Use the cloud account selector to specify the scope of your search. You can select all accounts, accounts by provider or choose accounts individually. By default, all accounts are selected.

Select all accounts from a provider
To select all accounts from a given cloud provider, perform the following steps:
- Click on the cloud account selector to expand the panel.
- If all accounts are selected, remove the selection by unchecking the checkbox or using the CLEAR SELECTION button.
- Select one or more providers by using the relevant checkboxes.
- Click Done to close the cloud account selector panel.
Select accounts individually
To select individual cloud accounts, perform the following steps:
- Click on the cloud account selector to expand the panel.
- Click on the CLEAR SELECTION button to remove any existing group account selection (all accounts or accounts by provider).
- Select individual cloud accounts from the list.
- If you have more than 40 accounts in your organization, the first 40 will be loaded until you scroll down.
- To filter the accounts list, use the input box above the list of accounts to run a case-sensitive search in all cloud account fields, like name, tags, environment, provider, etc.
Create a search query using type-ahead suggestions
The search query input box presents contextual suggestions that guide you when building your searches. Let's say we want to create a search for unencrypted EC2 Volumes that are not in region us-east-1:
- Start typing the word volume until you see AWS.EC2.Volume on top of the suggestions list.
- Select the first suggestion by clicking it with your mouse or navigating to it with the keyboard. The string AWS.EC2.Volume will be filled into the box and the list of suggestions will change.
- Select the keyword HAS from the list of suggestions. The keyword will be added to the query and new suggestions with all the properties of the Volume resource type will show up.
- Select the property Encrypted, then the equality operator = and the value false.
- Select the AND operator to add another condition to your query (so far it should have become AWS.EC2.Volume HAS Encrypted = false).
- Select the property Region, then the inequality operator != and the value us-east-1.
- Your query should look as below. Hit the Enter key or click on the search button to run it. AWS.EC2.Volume HAS Encrypted = false AND Region != us-east-1
Use sample queries to get started
To easily get started with the different query types use, refer to the Example queries panel to view the supported search types and see an example of each for the different cloud providers. You can easily copy and paste a query into the input box and run it, but please keep in mind that it may or may not produce results for your organization.
Supported search types
Explore search supports several search types, depending on the output you can receive
List search
The list search returns a set of result objects in a tabular format. Use it to get a list of resource types that match certain criteria.
Example:
| Query | Description |
|---|---|
| AWS.EC2.Instance has region = us-east-2 and pn(PublicIpAddress) | Get a list of EC2 Instances from a specific region that have a Public IP Address property configured. |
Aggregation search
The aggregation search counts the number of results of a list search based on a tag or property and provides the number of results for each of the values of the aggregation property or tag.
Example:
| Query | Description |
|---|---|
| AWS.EC2.Instance has pn(PublicIpAddress) count(region) | Count the number of EC2 Instances with a Public IP Address in each region |
Relationship search
The relationship search displays the relationship between resource types and lets you understand the security impact in the context of the related objects.
Examples:
| Query | Description |
|---|---|
| AWS.IAM.User → AWS.IAM.AccessKey HAS AccessKeyLastUsedDate ⇐ monthsAgo(1) | Users with access keys that haven't been used in the last month |
| AWS.IAM.User !-> AWS.IAM.AccessKey | Find IAM Users without an access key |
Note: To run a relationship search, you need to select a single account.
Global text search
The global text search tries to match the query keyword to all property names, property values, tag names and tag values. It returns partial matches, unless the keyword has been surrounded by double quotes. For example:
- large will match values like m5.large, m5n.large and and anything else containing large
- "large" will look for exact matches, which in many cases will produce an empty result set.
Explore search results
Different result views are supported based on the search type.
Table view
The list view presents data in a tabular format. It is used to display the results of list, aggregation and global text searches. Click on the double arrow in the first column to see additional information about the result:
- For list and global text searches: Security and configuration details
- For aggregation searches: Breakdown by cloud account
For list searches you can also modify the visible columns from the column chooser in the bottom left section of the grid. The exact set of columns for list searches is dynamically adjusted based on the filter criteria. Both with list and aggregation searches, you can export the search results to CSV.
Graph view
The graph view is available for both list and relationship searches. It presents results as chains of connected objects. The graph view is a powerful exploration tool that supports the following capabilities:
- View security and configuration details of a resource
- Zoom in/out
- Modify the distance between connected chains
- Overlay security information about resource risk score and open findings
- Overlay activity details of configuration changes or activity logs
- Add connected resources to the graph
Explore resource models
Resource models provide a more intuitive, visual way to understand what resources, properties, and values are available in Explore Search. You can use resource models to:
- See a list of resources to search for under supported provider services.
- View available properties, values, relationships, and tags for a specific resource.
- See how many resources, properties, values, and tags are in your organization.
- Build search queries from a selected combination of resources, properties, values, and tags.
- See what real-time events a resource supports to help author custom rules or make choices about rate-limiting.
To get started, select Resource models from the Explore page. Select any provider and service to start exploring available resources. You can click the Show resource count in your inventory checkbox in the upper right corner at any time to see how many of a given entity are in your organization.
Build a property or tag query with resource models
Use these directions to build a query for a property or tag through resource models:
From the Explore page, select Resource models.
Choose a provider from the list on the left.
Select the service you'd like to build a query for.
Choose a property or tag, then select one of the following options as available:
- Add to query as filter - Adds the property or tag as a required condition of the search query (Example: AWS.EC2.Instance HAS propertyName(PublicIpAddress)).
- Add to query as count - Adds the entity as a count search (Example: AWS.EC2.Instance count(PublicIpAddress)). For more information, see Count search results.
- You can also select from the list of available values if you want your query to be more specific, then add the value as a filter (Example: AWS.EC2.Instance HAS CloudAccountId = MyCloudAccountId).
You can add more properties, values, and tags if necessary. The updated query should appear in your search bar each time you select Add to query (note that it also appends to your browser URL).
Build a relationship query with resource models
You can also use resource models to create a relationship query between multiple resources. Follow these directions to build a sample query for EC2 instances with active security group rules:
- From the Explore page, select Resource models.
- Choose AWS from the provider list on the left, then choose EC2 as a service.
- Select Instance as your resource type.
- Under Relationships, select AWS.EC2.SecurityGroup, then choose Add to query as filter. You should see the text AWS.EC2.Instance → AWS.EC2.SecurityGroup appear in the query bar.
- Select AWS.EC2.SecurityGroup again, then select Navigate to. This takes you to the security group details page.
- Under Relationships, select AWS.EC2.SecurityGroupRule and choose Add to query as filter.
Your final query should be AWS.EC2.Instance → AWS.EC2.SecurityGroup → AWS.EC2.SecurityGroupRule. You can run this query as-is, or you can navigate to the AWS.EC2.SecurityGroupRule details page to add specific properties and values to query rules for specific ports, IP addresses, and so on. More relationships, properties, and tags can be added to any query by following these guides and making your own selections based on what you want to find.
Clear query data
There are several ways to clear your data while building a query, or after running one:
- Click the X symbol at the end the query bar to clear all data. The symbol only appears after you've added at least one property, relationship, or tag to the query. This is useful after you've completed a query and want to start a new one.
- Click the back button on your browser to undo the last update you made to a query. Use the back button if you're trying to correct an error you made while building the query without starting over.
- Clicking the provider list and selecting a property, relationship, or tag for a different service automatically overwrites your previous query.
Saved searches
You can use the saved searches functionality to easily run a search query has been created and saved by you or another member of your organization. Saved searches can be either personal (visible only for their creator) or shared (visible for all users in the organization)
Access the list of saved searches
To access the list of saved searches available for you, navigate to the three-dot menu next to the "Save" button and choose the "See all saved searches" option. You will be able to see both personal and shared searches.
Run a saved search
To run a saved search, simply click on the name of the search from the list. It will be executed against the cloud account used when saving the search.
Create a saved search
To create a saved search, perform the following steps:
- Create a valid query in the main search input box and run it.
- Click on the Save button. This will open a dialog with saved search properties.
- Specify the Name and Scope of your Saved search and click the Save button.
Note: If you save the query in the organization scope:
- All users from your org will be able to see and run it.
- Organization administrators will be able to modify or delete it .
Modify or delete a saved search
To modify a saved search just click on the editing icon from the list of saved searches. Please note that:
- you can modify queries you have created
- you can modify queries created by other user
- you can modify the saved search name and scope, but not the actual query itself
To delete a saved search, use the bin icon. Permissions for deleting saved searches are the same as for modification. The operation cannot be reversed.
