vRealize Automation Automation Config is a modern configuration management platform with the performance, speed, and agility IT teams need to manage large, complex IT systems and improve efficiency at scale. Use this guide to determine how to install Automation Config on your system.
As IT system administrators and DevOps team members, you are aware that your role involves more than setting up servers and running services. VMware Aria Automation Config helps your team automate common infrastructure administration tasks and ensures that all the components of your infrastructure are operating in a consistent desired state.
Automation Config is pluggable and plays well with many existing technologies. You don't have to refactor all of your existing configuration management systems to use Automation Config. It can react to the output codes and information from third-party tools to manage the entire machine life cycle.
Installation goals
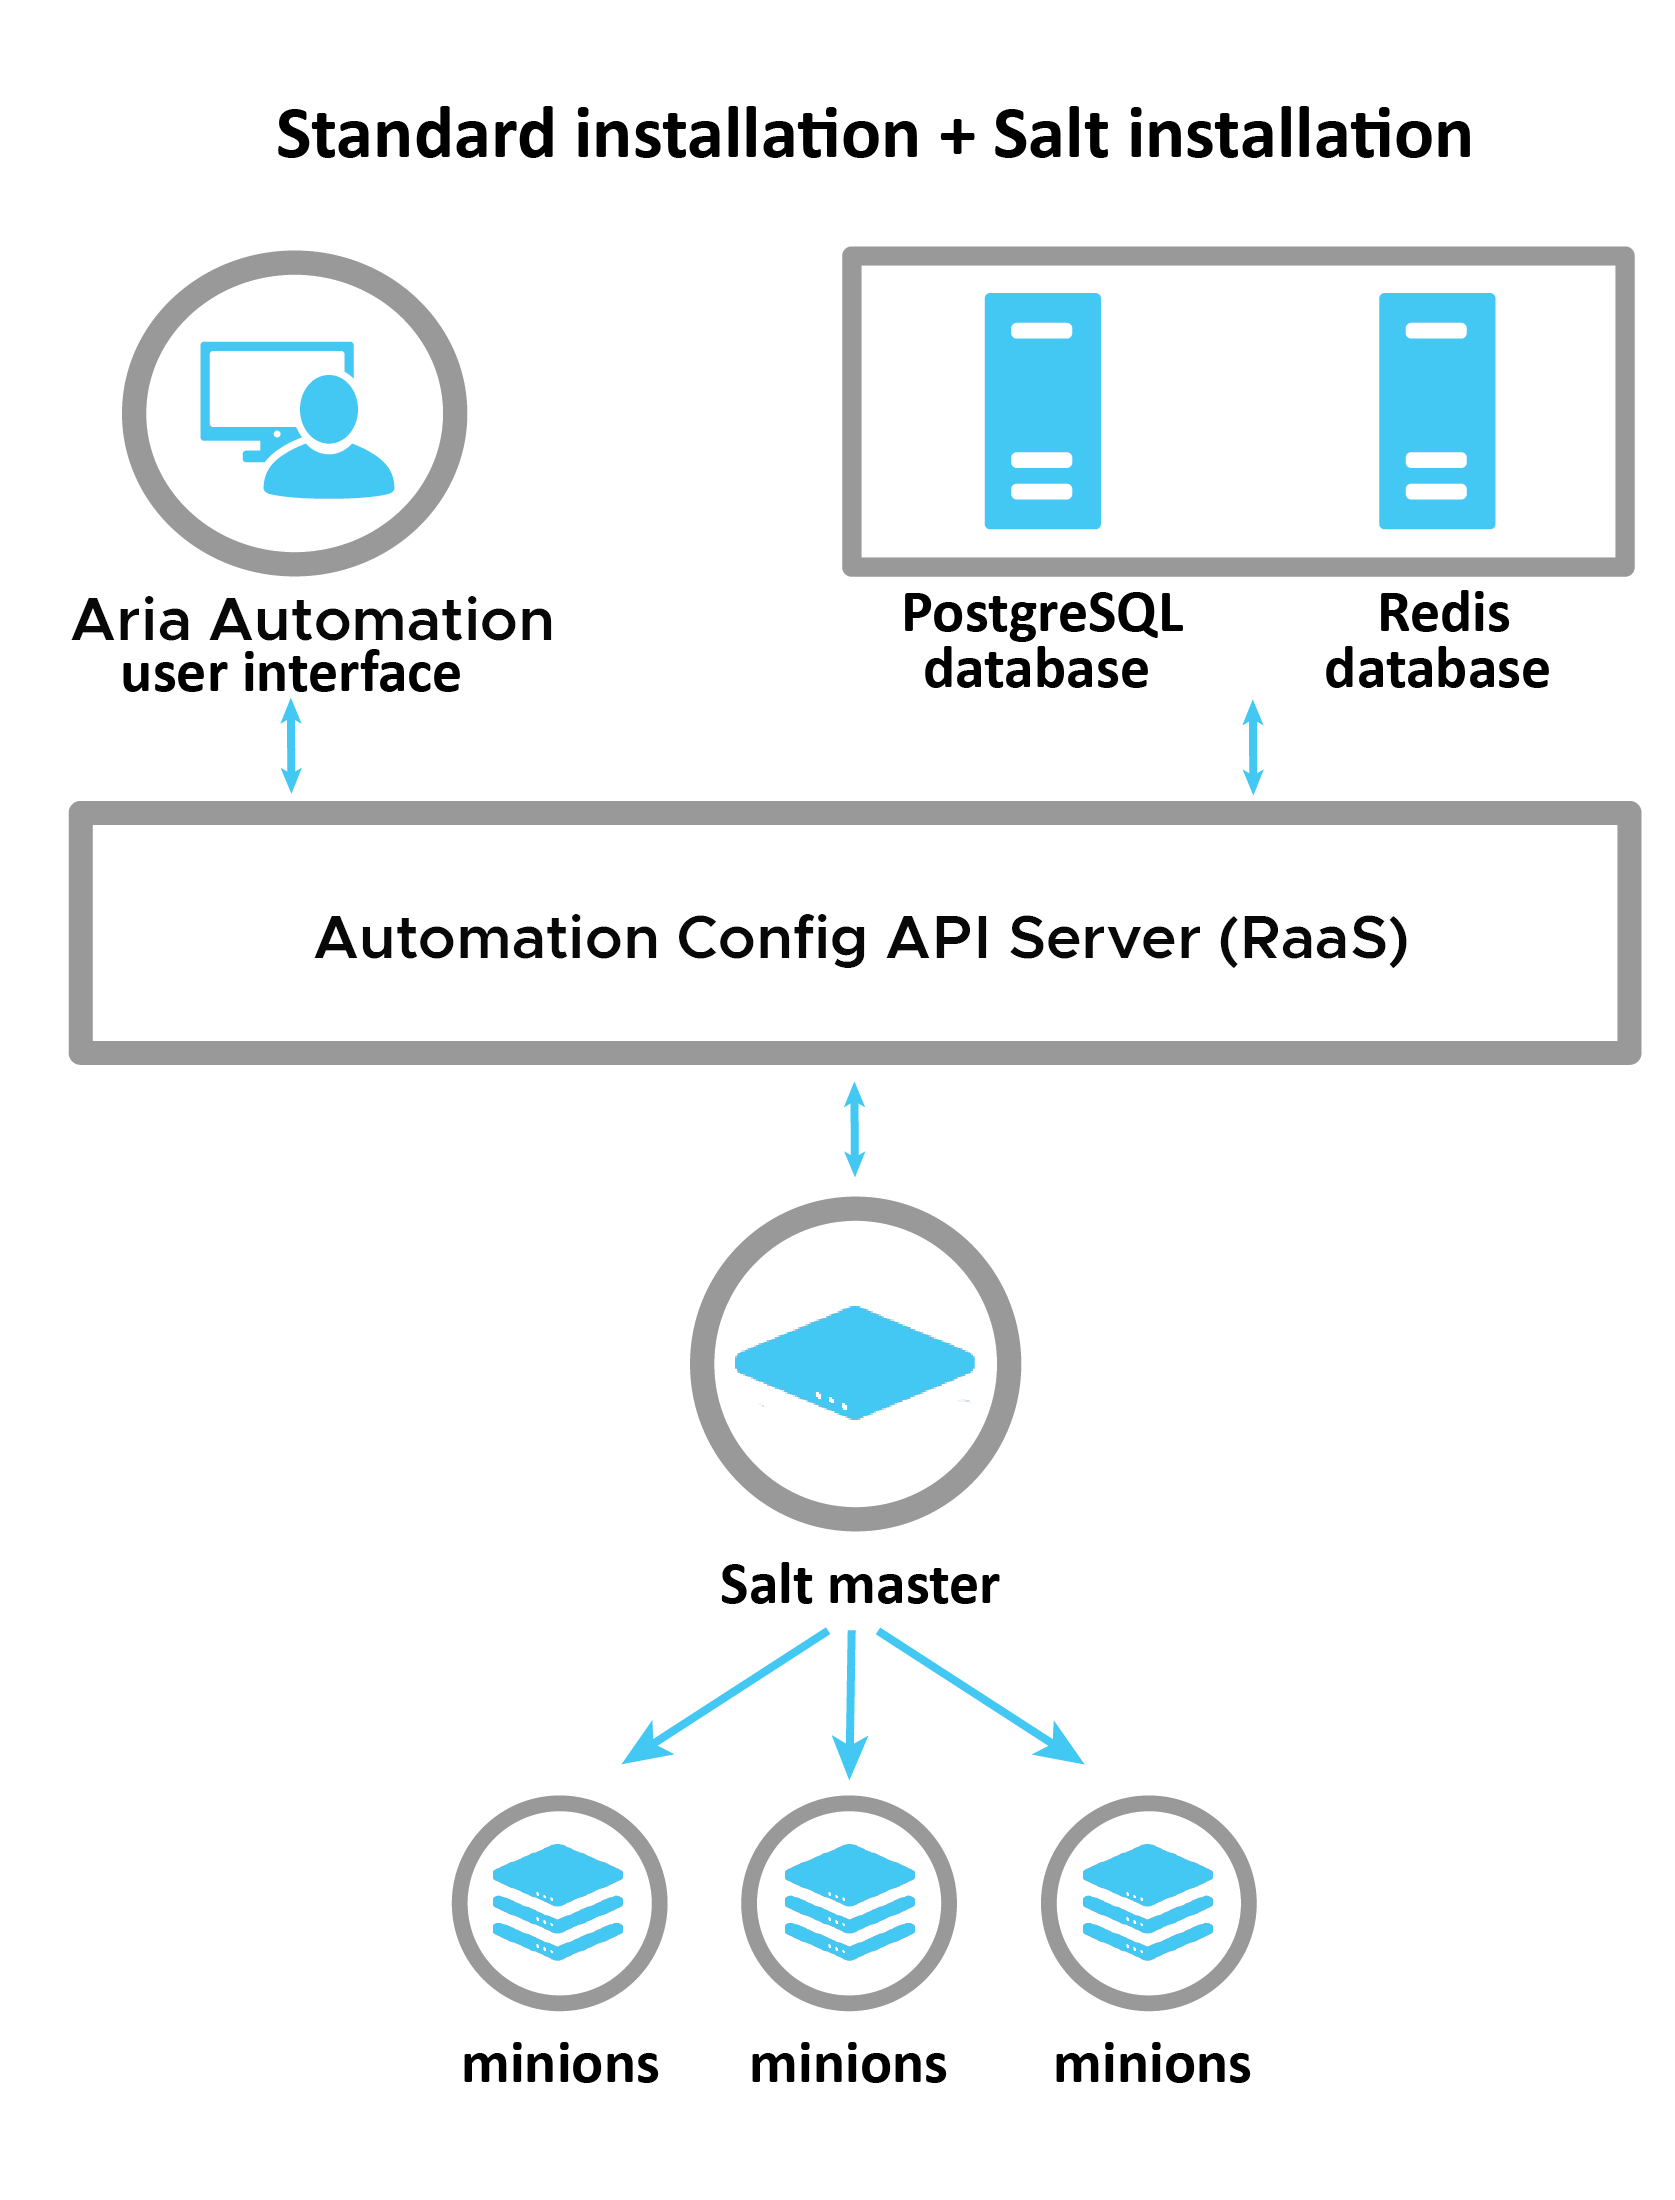
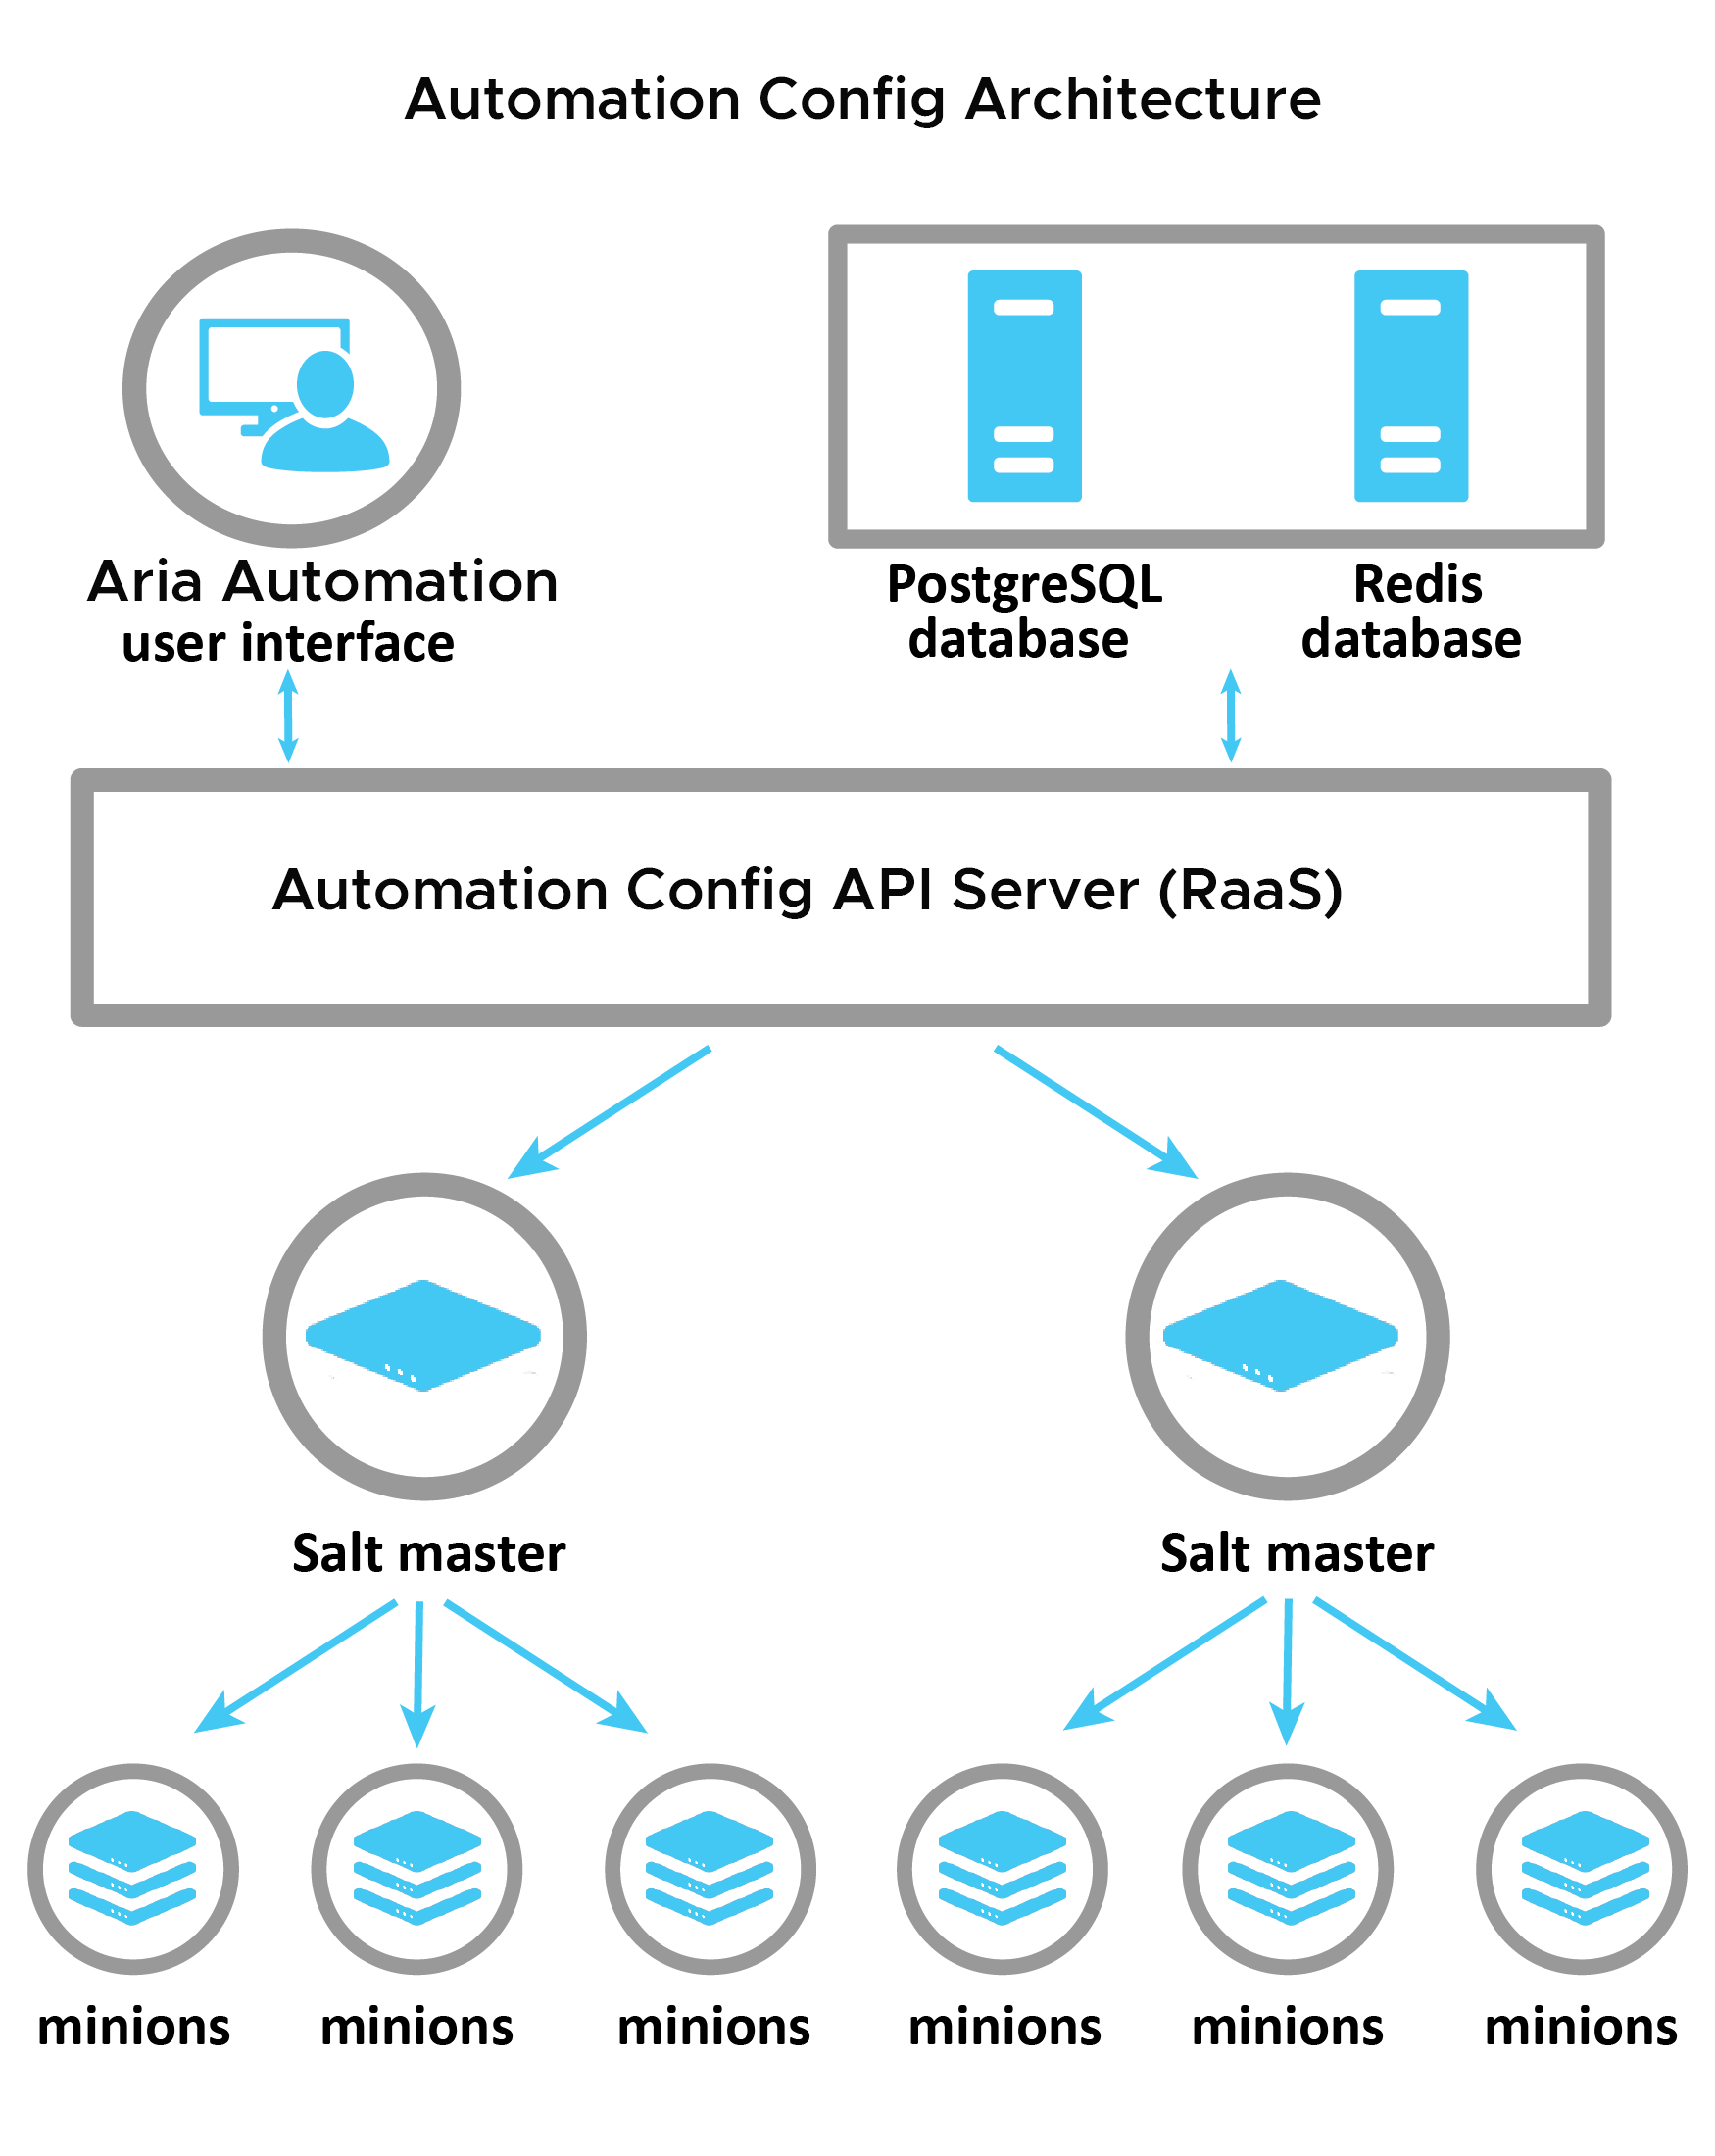
The goal of the installation process is to create the back-end Automation Config system architecture, which consists of four main components:
| Component | Description |
|---|---|
| Automation Config API server, also known as RaaS | RaaS (Returner as a Service) provides RPC endpoints to receive management commands from the Automation Config user interface, as well as RPC control endpoints to interface with connected Salt master(s). |
| Salt master(s) and the Master Plugin | You can connect as many Salt masters as needed to Automation Config, but at least one is required. The Salt master is the main connection between Automation Config and the rest of the managed nodes on your network (referred to as minions). When you issue a command from Automation Config (such as a job), the command goes to the Salt master for distribution to the targeted minions. The Master Plugin is installed on the Salt master(s). It allows the Salt master(s) to communicate with the Automation Config backend server, the RaaS node. The Master Plugin allows the Salt master(s) to access jobs or processes initiated by Automation Config, as well as external files and pillar data that are stored on the PostgreSQL database. |
| PostgreSQL database | Automation Config uses a PostgreSQL database to store minion data, job returns, event data, files and pillar data, local user accounts, as well as additional settings for the user interface. |
| Redis database | Automation Config uses a Redis database to store certain types of data in temporary storage, such as cached data. It also uses temporary data storage to distribute queued work to background workers. |
In the standard installation scenario, each of these components will be deployed to a dedicated node, which means you'll have four dedicated nodes when you're finished. If your system needs high availability, you might need to deploy multiple Salt masters, PostgreSQL databases, and Redis databases.
The following image shows the end goal of a standard installation:
Installation overview
The installation process has five main phases:
- Preinstallation
- Installation
- Post-installation
- Integrate with VMware Aria Automation
- Install Salt on the nodes you want to manage with Automation Config
You can deploy the Salt minion service to your nodes using either VMware Aria Automation cloud templates or by installing the service through Secure Shell (SSH).
The following image shows the system architecture that you'll have after you complete the standard installation, post-installation, integration, and Salt installation steps: