During design, you often build a cloud template by starting with the essentials, then deploying and testing as the template grows. This example demonstrates some of the in-progress testing built into Automation Assembler.
To be certain that a deployment works the way that you want, you might test and deploy the cloud template several times. Gradually, you add more resources, retest, and redeploy along the way.
Procedure
- Click Cloud Templates, and open the WordPress-BP cloud template.
The basic cloud template appears, in the design canvas and code editor.
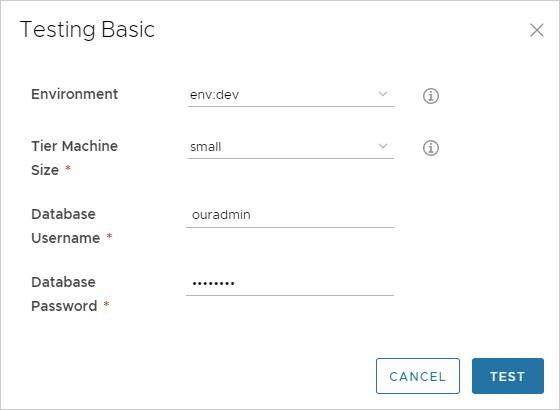
- To check template syntax, placement, and basic validity, click Test at the lower left.
- Enter input values, and click Test.
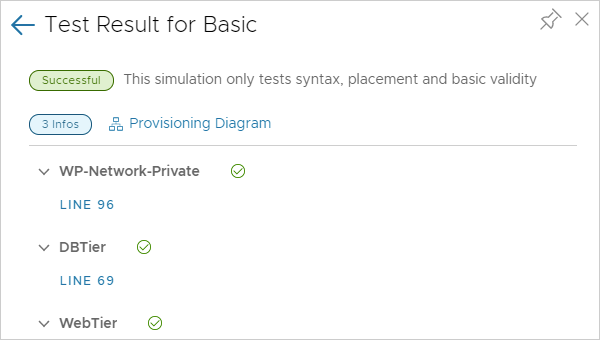
The test is only a simulation and does not actually deploy virtual machines or other resources.
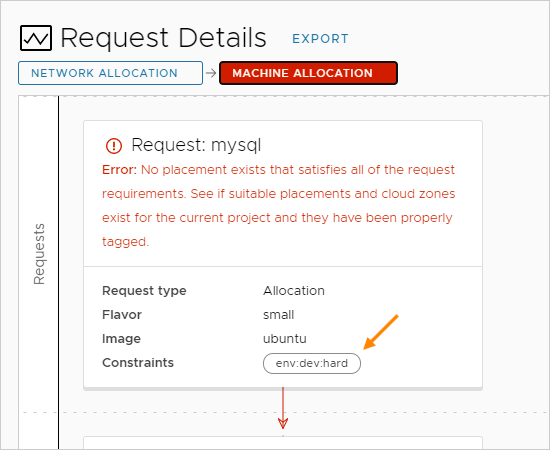
The test includes a link to a Provisioning Diagram, where you can inspect the simulated deployment flow and see what occurred. The simulation exposes potential issues, such as not having any resource capabilities defined that match hard constraints in the cloud template. In the example error that follows, a cloud zone of capability tag env:dev wasn't found anywhere in the defined infrastructure.
A successful simulation doesn't guarantee that you can deploy the template without errors.
- After the template passes the simulation, click Deploy at the lower left.
- Select Create a new deployment.
- Name the deployment WordPress for OurCo and click Next.
- Enter input values, and click Deploy.
- To verify that the template successfully deployed, look under .
If a deployment fails, click its name, and click the History tab to see messages that can help you troubleshoot.
Some history entries might have the Provisioning Diagram link at the far right. The diagram is similar to the simulated one, where you inspect the flow chart of Automation Assembler decision points in the provisioning process.
More flow charts are available under .
- To verify that the application is working, open the WordPress start page in a browser.
- Wait for the WordPress servers to be fully created and initialized.
It might take 30 minutes or more for initialization, depending on the environment.
- To locate the site FQDN or IP address, go to .
- On the canvas, click the WebTier, and find the IP address in the panel on the right.
- Enter the IP address as part of the full URL to the WordPress start page.
In this example, the full URL is:
http://{IP-address}/mywordpresssite
or
http://{IP-address}/mywordpresssite/wp-admin/install.php
- After inspecting WordPress in a browser, if the application needs more work, make template changes and redeploy using the Update an existing deployment option.
- Consider versioning the cloud template. You can revert to a working version if a change causes deployment to fail.
- On the cloud template design page, click Version.
- On the Creating Version page, enter WP-1.0.
Do not enter spaces in version names.
- Click Create.
To review or revert to a version, on the design page, click the
Version History tab.
- With a basic deployment now possible, try your first deployment-time enhancement by increasing CPU and memory on the application and database servers.
Update to a medium node size for both. Using the same template, select
medium at deployment time, redeploy, and verify the application again.
What to do next
Expand the cloud template into a production-worthy application by adding even more resources.


