


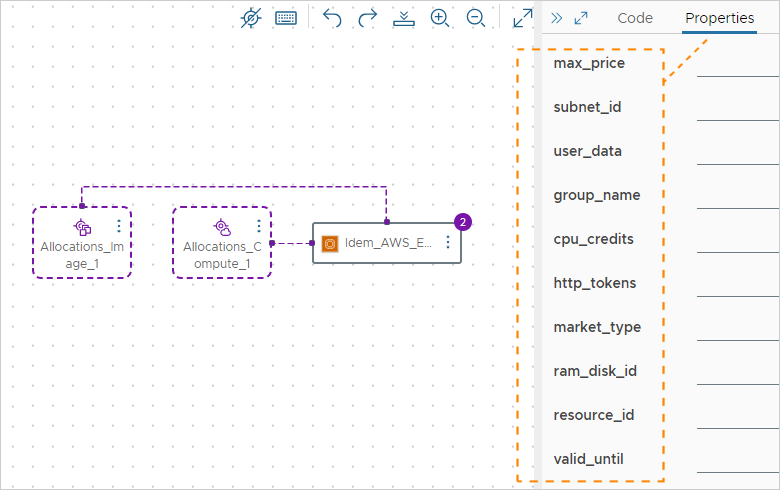
Allocation settings are typically integrated into each resource. However, allocation can be decoupled from resources, in the form of helpers, which serve as a bridge between resources and your zoned and profiled infrastructure.
You can use helpers in a one-to-many configuration, where one helper provides allocation logic, such as zone placement, for several resources. You then further customize the resources according to their full list of properties as defined by the cloud provider and supported by the associated plug-in.
Because properties come from the cloud provider, allocation helpers work only with a vendor-specific selection for the design canvas. They can't be used in cloud agnostic designs. If you need a cloud agnostic template, keep using cloud agnostic resource elements and the classic, in-resource allocation approach.
You can use allocation helpers with Avi Load Balancer resources, Terraform resources, and custom resources.
Available allocation helpers
The helpers provide the following allocation functions.
- Cloud zone helper
Selects the account and zone for provisioning based on account type and constraint tags. Also resolves the provisioning priority as set in the project.
- Custom naming helper
Generates custom names for your resources.
You can view properties for allocation helpers in the code editor. You can also view properties for allocation helpers by opening a recent deployment on the Deployments page and opening the right-hand pane.
Classic resources
In the Automation Assembler left side menu, the earlier design resources are labeled (Classic). You can use allocation helpers with Avi Load Balancer, Terraform, and custom resources, but not classic resources.
You can still add classic resources to a template. In addition, you can set up dependencies between them and resources that use helpers.
How to design
- In Infrastructure, add an account, zones, project, mappings, profiles, and capability tags in the classic way that you're already used to.
- In the design canvas, drag in allocation helpers.
- Drag in non-classic resources.
- Add bindings to the helpers.
You can write property bindings manually in the code editor or connect an allocation helper to a non-classic resource in the canvas.
- In the code editor, configure the allocation helpers and non-classic resources.
Linking allocation helpers to resources
When you link allocation helpers to resources, the following property bindings are automatically created for you in the code editor:
Allocations.CloudZone- Avi Load Balancer resources:
account,cloud_ref,tenant_ref
- Avi Load Balancer resources:
User input
You can send user input to helpers the same way that you can send user input directly to a classic resource:
inputs:
  my-image:
    type: string
    enum:
      - coreos
      - ubuntu
resources:
  Allocations_Image_1:
    type: Allocations.Image
    properties:
      accountType: aws
      image: '${input.my-image}'
For more information about user inputs, see User input in VMware Aria Automation requests.
