


You must have the manager Active Directory attributes configured in Workspace ONE Access VMware Identity Manager if you plan us use role-based approvers for approval policies in Automation Service Broker. To do this you must have permission to configure the VMware Identify Manager instance that you use with VMware Aria Automation.
This procedure primarily covers work that you perform outside of VMware Aria Automation. Links to relevant procedure are provided.
Prerequisites
- Verify that you have administrator credentials in Workspace ONE Access and VMware Identity Manager.
Procedure
- Configure the user attributes.
The basic steps are provided below. For more information, see Managing User Attributes that Sync from Active Directory.
- In Identity Manager, click your local administrator login and click Administration Console.

- Select the Identity and Access Management tab and click Setup.
- Click User Attributes.
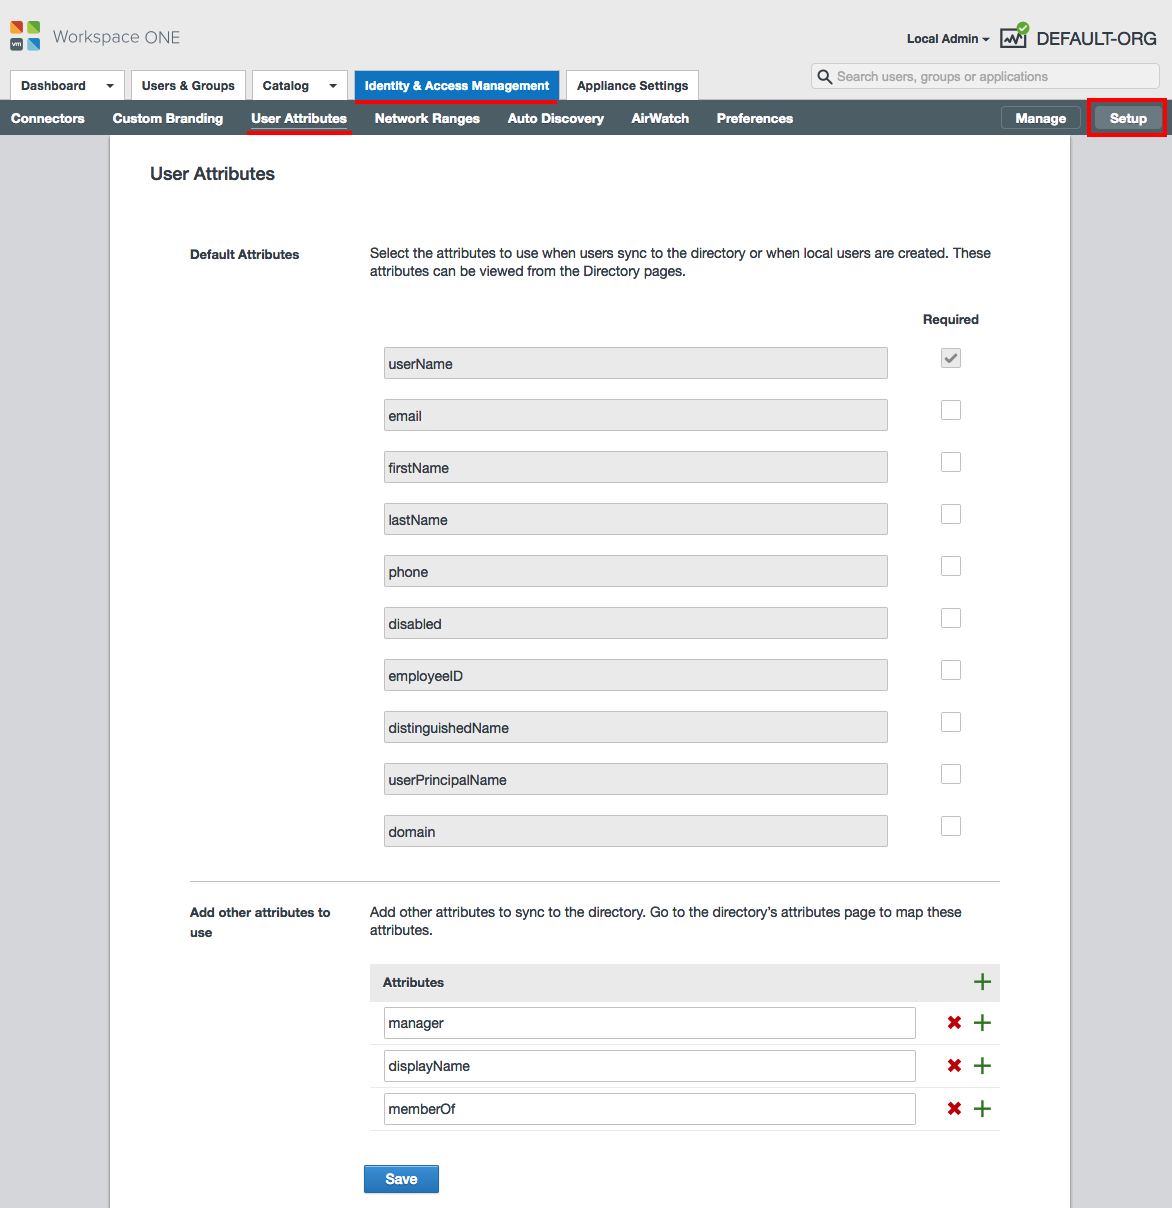
- Verify that the following attributes exist in the Default Attributes section.
- userName
- firstName
- LastName
- phone
- disabled
- employeeID
- distinguishedName
- userPrincipalName
- domain
- In the Add other attributes to use section add the following attribute.
- manager
- Click Save.
- In Identity Manager, click your local administrator login and click Administration Console.
- After you make any changes, you must synchronize the affected directories.
- Click Manage.
- Select the Directories tab.
- Open the directory by clicking the directory name and click Sync Settings.
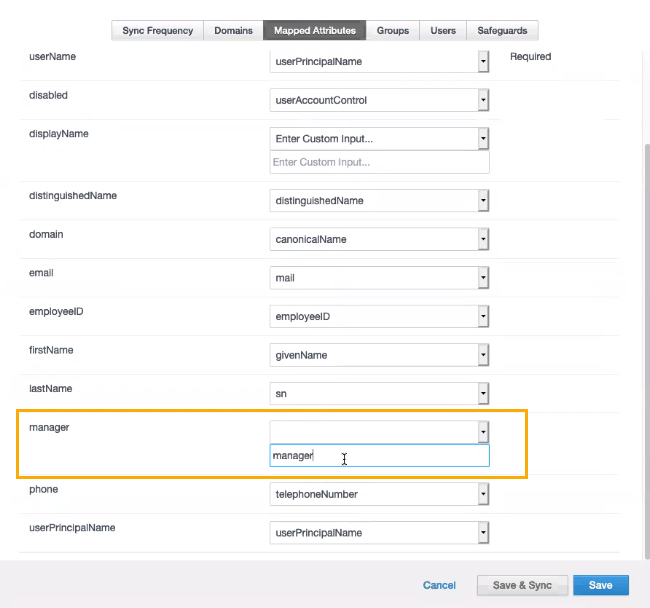
- Click Mapped Attributes and verify that the manager attribute is defined as manager.
- Click Save and Sync.
- Click Sync Directory.
Results
You can now use the AD Manager role in you approval policies.
