


To set up and verify your Automation Service Broker instance, you import known working content from outside sources to make them available in the catalog, and then deploy catalog items to ensure that they are working.
As a cloud administrator, this is your first time using Automation Service Broker and you want to set it up, import content, and then deploy the content to ensure that you can connect to your cloud vendors before fully populating the catalog and inviting other users to join the service.
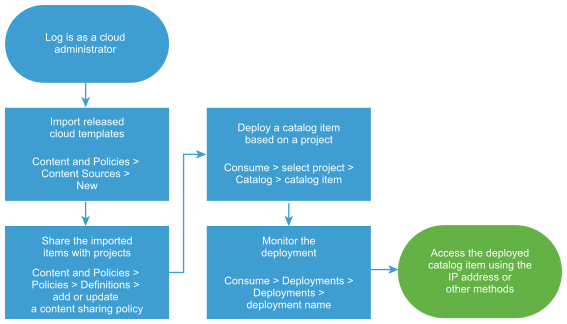
In this use case, you import released Automation Assembler templates. You can also import Amazon CloudFormation templates, but the process is not presented here. See Add CloudFormation Templates to the Automation Service Broker Catalog in Using Automation Service Broker.
Prerequisites
- Log in as a cloud administrator.
- Verify that the templates that you are importing are deployable and released in Automation Assembler before you import it. See How to save different versions of a cloud template in Using Automation Assembler.
Procedure
- Import templates.

- Select , and then click New.
- Click Template and enter a name for the source.
- Select the Source Project that is associated with your Automation Assembler templates and click Validate.
The process verifies the connection and tells you the number of templates that will be imported
- Click Create and Import.
- Share the imported templates with a project.
Automation Assembler templates are associated with projects when they are created in Automation Assembler. Projects include a group of users and the account regions where the templates are deployed. In Automation Service Broker, you can share the templates with other users, but you must ensure that the target projects include the account regions with the cloud resources to support the deployment.
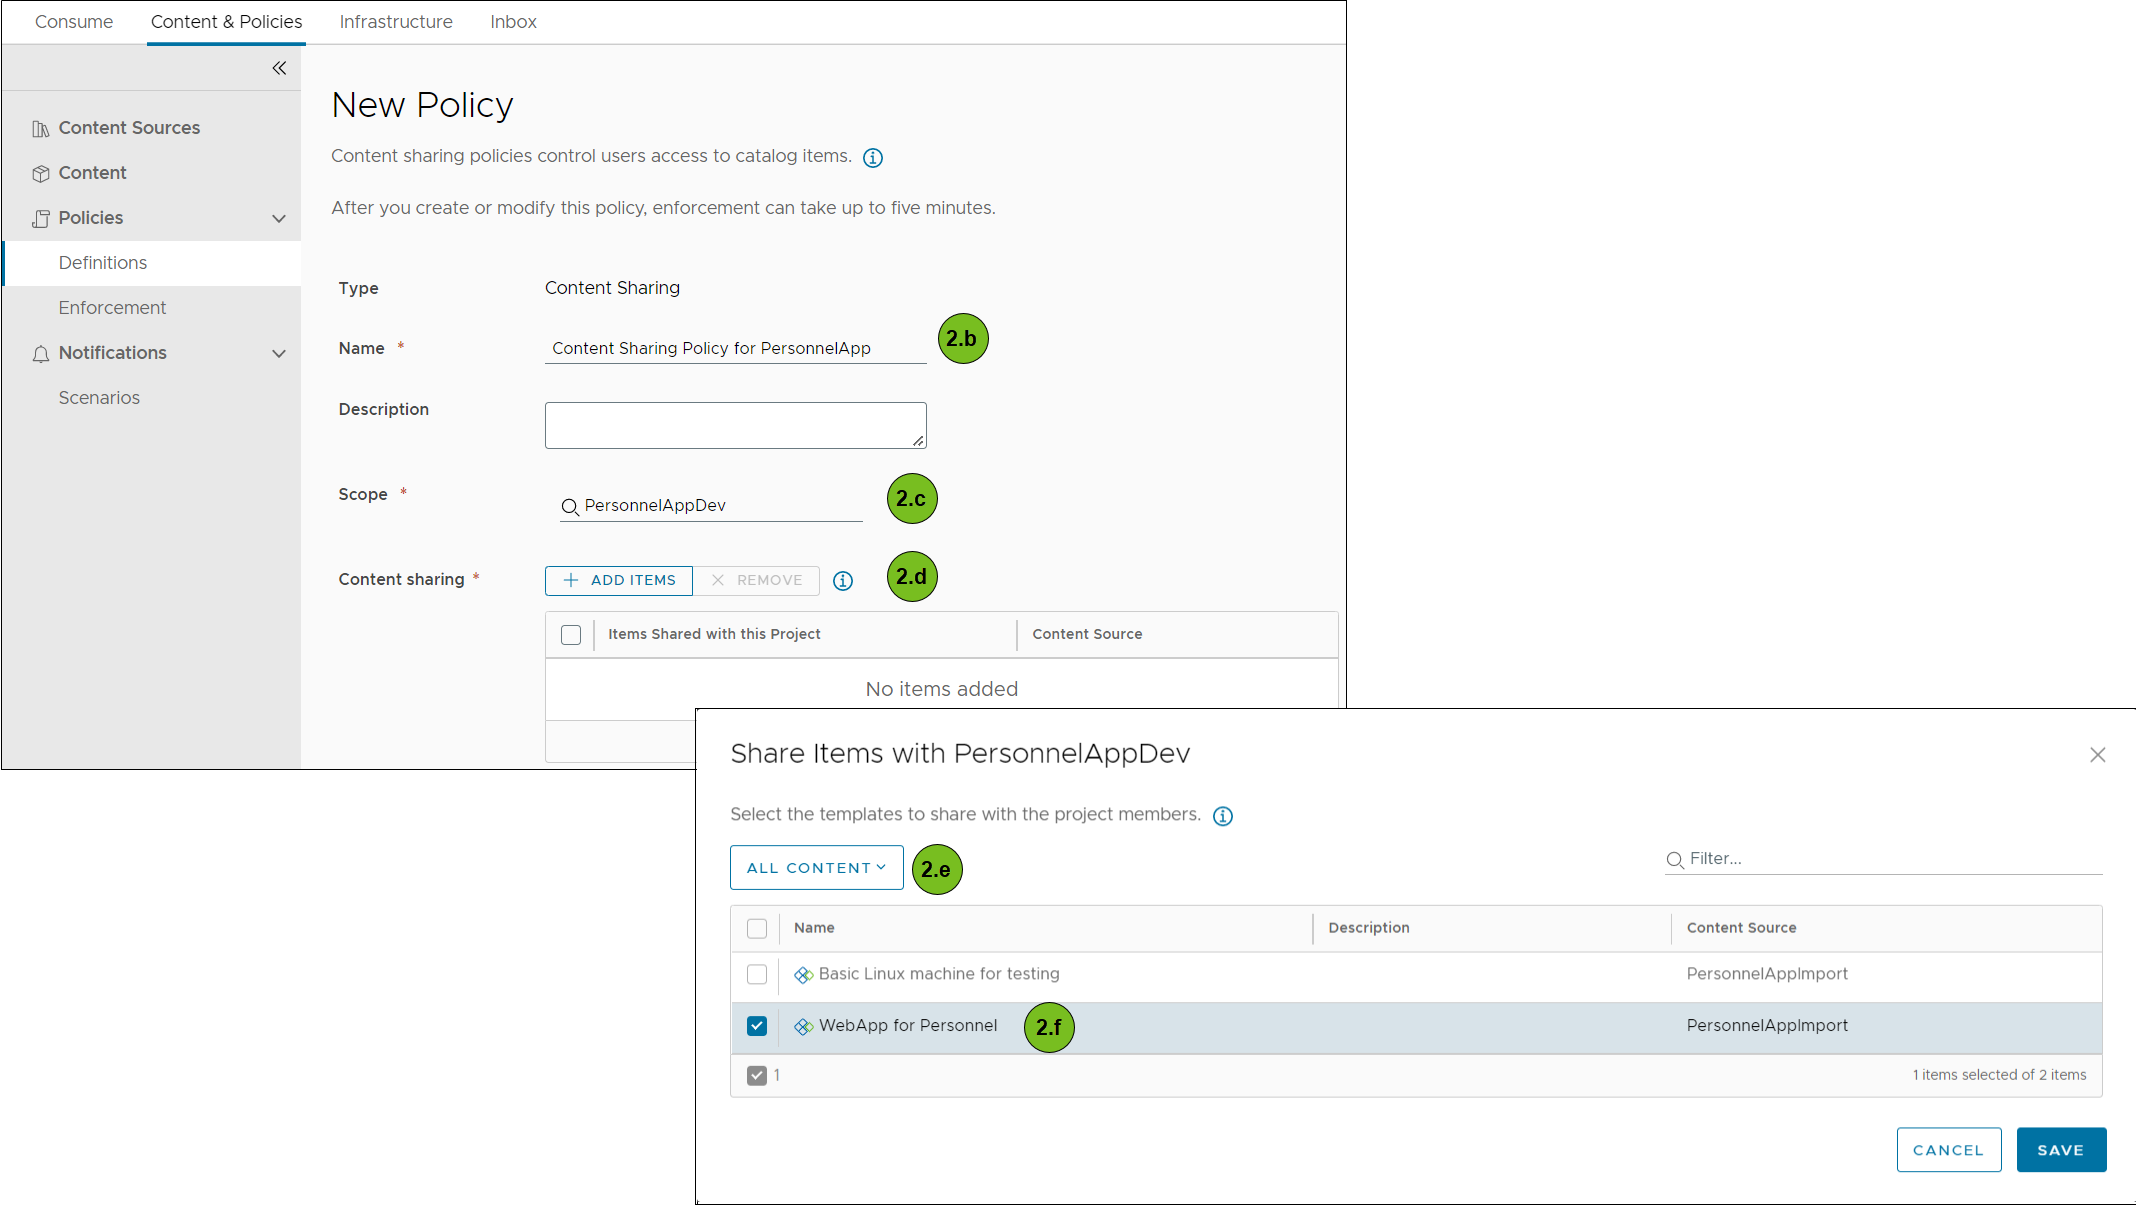
- Select , and create a new content sharing policy.
- Enter a name for the content sharing policy.
- In the Scope list, select the target project.
- In the Content sharing section, click Add Items.
- To select only particular templates, select All Content in the Content Sources drop-down menu.
- Select the templates to share with the project, and click Save.
- In the Users section, select the users and user groups that you want to have access to the templates.
- Click Create.
The list for the project now includes the templates and the imported templates are available in the catalog.
- Deploy an imported template.
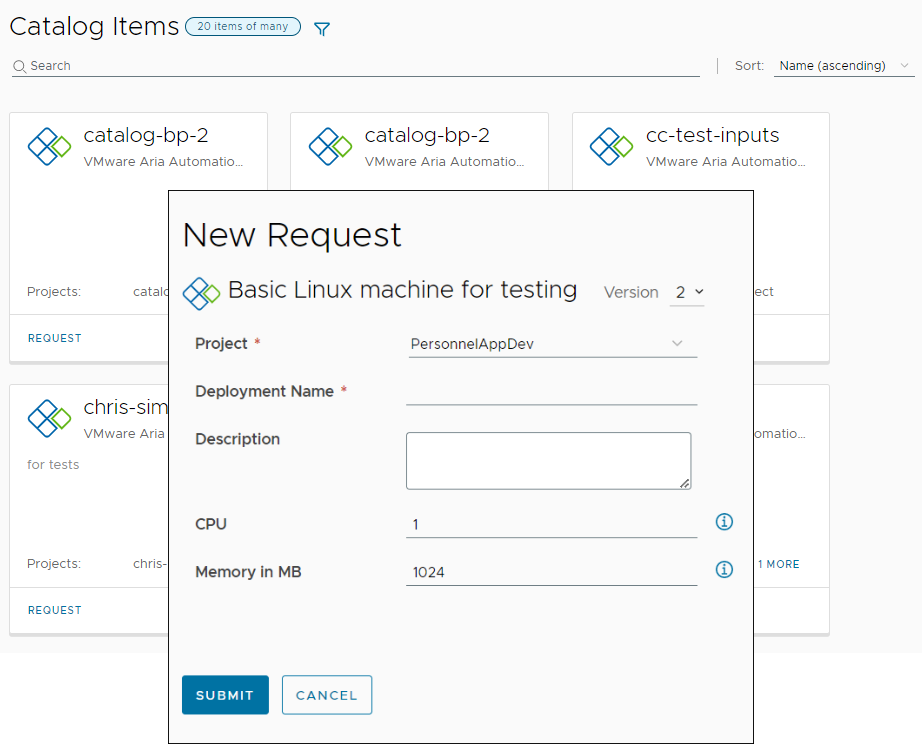
- Click .
- Locate the card for the template that you want to deploy and click Request on the card.
- Complete the request form and click Submit.
The deployment process begins. - Monitor the deployment.
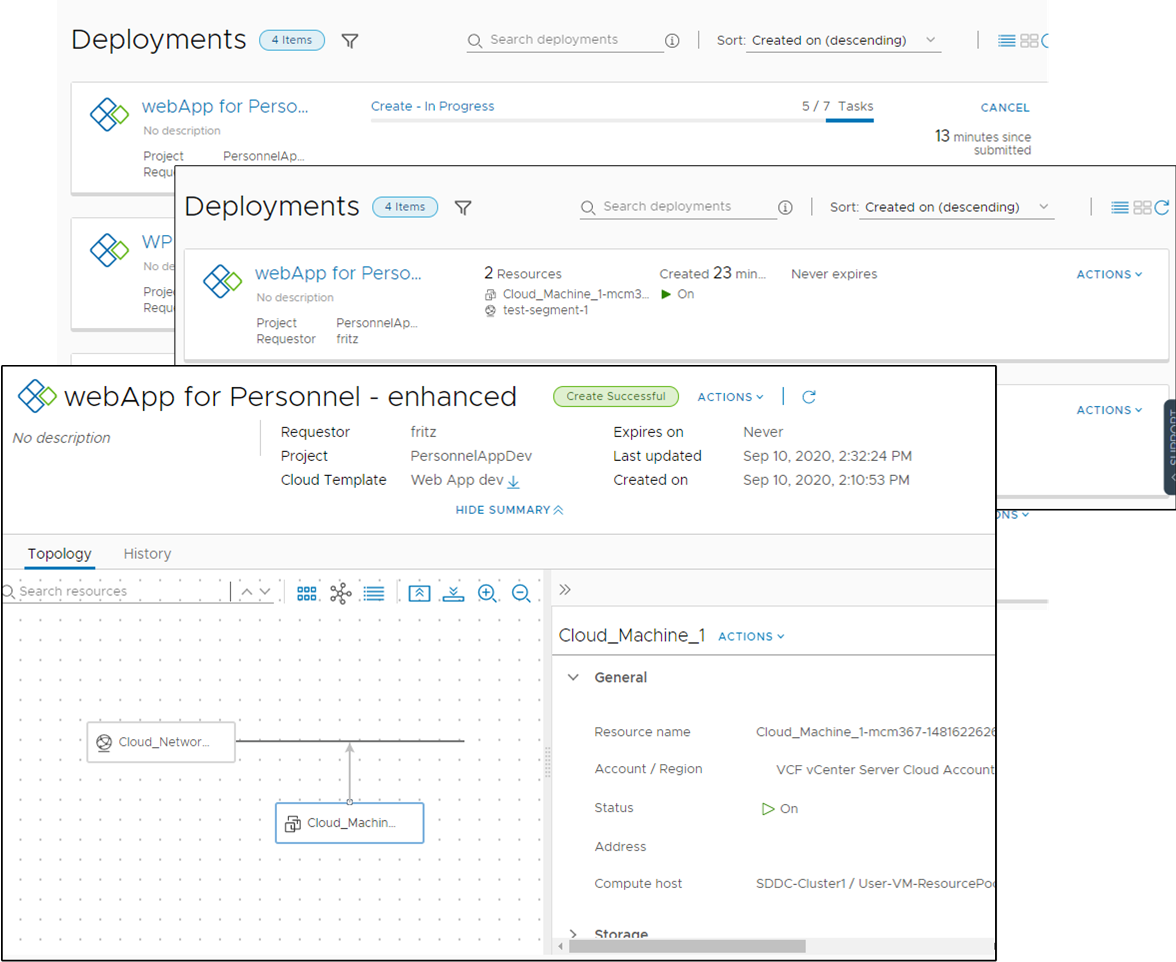
- Select , and then use the search and filter options to locate the deployed catalog item.
- When the deployment is completed, locate the IP address on the card or by clicking the name and viewing the details.
