After deploying the cloud extensibility proxy, you can perform additional configuration procedures to help you with maintenance and troubleshooting.

After performing the initial deployment of the cloud extensibility proxy, you might encounter scenarios, such as troubleshooting your Automation Orchestrator instance, where you must change the cloud extensibility proxy configuration. Covered configuration procedures include:

  • Shutting down and starting the cloud extensibility proxy.
  • Resetting the root password of the cloud extensibility proxy.
  • Replacing the cloud extensibility proxy certificate.
  • Scaling the heap memory of the cloud extensibility proxy.

Shutdown and start the cloud extensibility proxy

You can shutdown and start your cloud extensibility proxy from the vSphere Client.

Procedure

  1. Log in to the vSphere Client as an administrator.
  2. In the VMs and templates inventory, expand the management domain vCenter tree and expand the management domain data center.
  3. Select the virtual machine on which the cloud extensibility proxy is deployed.
  4. Right-click on the virtual machine and select the relevant option depending on the operation you want to perform.
    Operation Option
    Shutdown Select Power > Shutdown Guest OS.
    Start Select Power > Power on.

    Verify the operational state of the cloud extensibility proxy virtual machine after the startup.

Reset the root password of the cloud extensibility proxy

You can reset a lost or forgotten cloud extensibility proxy root password.

Prerequisites

Verify that you have administrator credentials to access the host vCenter appliance.

Procedure

  1. Shutdown and start the virtual machine on which the cloud extensibility proxy is deployed.
  2. When the Photon operating system command line window appears, enter e and press the Enter key to open the GNU GRUB boot menu editor.
  3. In the GNU GRUB editor, enter rw init=/bin/bash at the end of the line that begins with linux "/" $photon_linux root=rootpartition as shown below:

    reset root password string in context

  4. Click the F10 key to push your change and restart the cloud extensibility proxy.
  5. Wait for the cloud extensibility proxy to restart.
  6. At the root [/]# prompt, enter passwd and press the Enter key.
  7. At the New password: prompt, enter your new password and press the Enter key.
  8. At the Retype new password: prompt, re-enter your new password and press the Enter key.
  9. At the root [/]# prompt, enter reboot -f and press the Enter key to complete the root password reset process.

    reset root password success

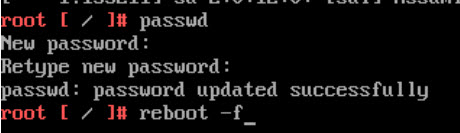
Replace the certificate of the cloud extensibility proxy

By using the .8.chain.pem file, generated with the CertGen-VVS utility, you update the self-signed certificate of the cloud extensibility proxy.

Prerequisites

Verify that the .8.chain.pem file, generated with the CertGen-VVS utility, is available. See Certificate Generation Utility for VMware Validated Solutions.

Procedure

  1. Copy the certificate PEM file from your local machine to the /tmp folder of the cloud extensibility proxy, by using an SCP utility such as WinSCP.
  2. Log in to the cloud extensibility proxy command line over SSH as root.
  3. Move to the tmp folder.
    cd /tmp
  4. Retreive the sh256 thumbprint from the certificate file.
    vracli certificate ingress --set <.8.chain.pem>
    Note: The command returns the sha256 sum and says that it cannot be validated as it is self-signed. Ignore this warning.
  5. By using the sha256 sum, displayed after completing the previous step, import the certificate.
    vracli certificate ingress --set <.8.chain.pem> --sha256 <sha256_thumbprint>
  6. Install the certificate and restart the services by running the deploy.sh script.
    /opt/scripts/deploy.sh
  7. (Optional) If, after completing the procedure, the signed certificate is not in use, run the following command in the cloud extensibility proxy command line.
    kubectl -n ingress delete pod -l app=traefik

How to scale the heap memory size of the cloud extensibility proxy

You can scale the heap memory size of the cloud extensibility proxy by creating a custom profile and modifying the resource metrics file. By adjusting the heap memory, your environment can manage changing workloads.

Prerequisites

  • Enable SSH access to the cloud extensibility proxy.
  • Increase the RAM of the virtual machine on which cloud extensibility proxy is deployed up to the next suitable increment. Because it is important that enough memory is left available for the rest of the services, the cloud extensibility proxy resources must be scaled up first. For example, If the desired heap memory is 7G then the cloud extensibility proxy RAM must be increased with 4G respectively because the subtraction between the default heap value of 3G and the desired heap memory is 4G. For information on increasing the RAM of a virtual machine in vSphere, see Change the Memory Configuration in vSphere Virtual Machine Administration.

Procedure

  1. Log in the cloud extensibility proxy command line over SSH as root.
  2. To create the custom profile directory and the required directory tree that is used when the profile is active, run the following script:
    vracli cluster exec -- bash -c 'base64 -d <<< IyBDcmVhdGUgY3VzdG9tIHByb2ZpbGUgZGlyZWN0b3J5Cm1rZGlyIC1wIC9ldGMvdm13YXJlLXByZWx1ZGUvcHJvZmlsZXMvY3VzdG9tLXByb2ZpbGUvCgojIENyZWF0ZSB0aGUgcmVxdWlyZWQgZGlyZWN0b3J5IHRyZWUgdGhhdCB3aWxsIGJlIHVzZWQgd2hlbiB0aGUgcHJvZmlsZSBpcyBhY3RpdmUKbWtkaXIgLXAgL2V0Yy92bXdhcmUtcHJlbHVkZS9wcm9maWxlcy9jdXN0b20tcHJvZmlsZS9oZWxtL3ByZWx1ZGVfdmNvLwoKIyBDcmVhdGUgImNoZWNrIiBmaWxlIHRoYXQgaXMgYW4gZXhlY3V0YWJsZSBmaWxlIHJ1biBieSBkZXBsb3kgc2NyaXB0LgpjYXQgPDxFT0YgPiAvZXRjL3Ztd2FyZS1wcmVsdWRlL3Byb2ZpbGVzL2N1c3RvbS1wcm9maWxlL2NoZWNrCiMhL2Jpbi9iYXNoCmV4aXQgMApFT0YKY2htb2QgNzU1IC9ldGMvdm13YXJlLXByZWx1ZGUvcHJvZmlsZXMvY3VzdG9tLXByb2ZpbGUvY2hlY2sKCiMgQ29weSB2Uk8gcmVzb3VyY2UgbWV0cmljcyBmaWxlIHRvIHlvdXIgY3VzdG9tIHByb2ZpbGUKY2F0IDw8RU9GID4gL2V0Yy92bXdhcmUtcHJlbHVkZS9wcm9maWxlcy9jdXN0b20tcHJvZmlsZS9oZWxtL3ByZWx1ZGVfdmNvLzkwLXJlc291cmNlcy55YW1sCnBvbHlnbG90UnVubmVyTWVtb3J5TGltaXQ6IDYwMDBNCnBvbHlnbG90UnVubmVyTWVtb3J5UmVxdWVzdDogMTAwME0KcG9seWdsb3RSdW5uZXJNZW1vcnlMaW1pdFZjbzogNTYwME0KCnNlcnZlck1lbW9yeUxpbWl0OiA2RwpzZXJ2ZXJNZW1vcnlSZXF1ZXN0OiA1RwpzZXJ2ZXJKdm1IZWFwTWF4OiA0RwoKY29udHJvbENlbnRlck1lbW9yeUxpbWl0OiAxLjVHCmNvbnRyb2xDZW50ZXJNZW1vcnlSZXF1ZXN0OiA3MDBtCkVPRgpjaG1vZCA2NDQgL2V0Yy92bXdhcmUtcHJlbHVkZS9wcm9maWxlcy9jdXN0b20tcHJvZmlsZS9oZWxtL3ByZWx1ZGVfdmNvLzkwLXJlc291cmNlcy55YW1sCg== | bash'
  3. Edit the resource metrics file in your custom profile with the desired memory values.
    vi /etc/vmware-prelude/profiles/custom-profile/helm/prelude_vco/90-resources.yaml
  4. The 90-resources.yaml file should contain the following default properties:
    polyglotRunnerMemoryRequest: 1000M
    polyglotRunnerMemoryLimit: 6000M
    polyglotRunnerMemoryLimitVco: 5600M
    
    serverMemoryLimit: 6G
    serverMemoryRequest: 5G
    serverJvmHeapMax: 4G
    
    controlCenterMemoryLimit: 1.5G
    controlCenterMemoryRequest: 700m
    
    Property Type Description
    Polyglot properties Memory properties associated with the Polyglot scripting feature. The value of these properties is set in megabytes (M). When editing these values, remember that on average a container needs 64M of memory. With the default memory limit of 6000M, you can run approximately 100 Polyglot scripts in parallel.

    If you want to increase the number of Polyglot scripts that can run in parallel, you need to increase the values of the polyglotRunnerMemoryLimit and polyglotRunnerMemoryLimitVco properties.

    First, edit the memory limit of the polyglotRunnerMemoryLimit property and then change the value of polyglotRunnerMemoryLimitVco to be 300M less than the value you set in the polyglotRunnerMemoryLimit property.

    The following is an example polyglot memory limit configuration:

    polyglotRunnerMemoryRequest: 1000M
    polyglotRunnerMemoryLimit: 7000M
    polyglotRunnerMemoryLimitVco: 6700M
    Server memory properties The memory properties of the cloud extensibility proxy. The value of these properties is set in gigabytes (G). First, edit the serverJvmHeapMax property with the desired memory value. The values of the serverMemoryLimit and serverMemoryRequest properties must be adjusted by adding 2G for serverMemoryLimit and 1G for serverMemoryRequest on top of the memory value selected for the serverJvmHeapMax property.

    The following is an example server memory configuration:

    serverMemoryLimit: 9G
    serverMemoryRequest: 8G
    serverJvmHeapMax: 7G
    
    Control Center memory properties The memory properties of the Automation Orchestrator Control Center. The values of these memory properties must not be updated.
  5. Save the changes to the resource metrics file and run the deploy.sh script.
    /opt/scripts/deploy.sh