


Automation Pipelines provides a REST plug-in, which allows you to integrate Automation Pipelines with other applications that use a REST API so that you can continuously develop and deliver software applications that must interact with each other. The REST plug-in invokes an API, which sends and receives information between Automation Pipelines and another application.
With the REST plug-in, you can:
- Integrate external REST API-based systems into a Automation Pipelines pipeline.
- Integrate a Automation Pipelines pipeline as part of the flow of external systems.
The REST plug-in works with any REST API, and supports GET, POST, PUT, PATCH, and DELETE methods to send or receive information between Automation Pipelines and other applications.
| What you do | What happens as a result |
|---|---|
| Add a REST task to your pipeline. | The REST task communicates information between applications, and can provide status information for a successive task in the pipeline stage. |
| In the REST task, select the REST action and include the URL. | The pipeline task calls the URL when the pipeline runs. For POST, PUT, and PATCH actions, you must include a payload. In the payload, you can bind your pipeline and task properties when the pipeline runs. |
| Consider this example. | Example use of the REST plug-in: You can add a REST task to get information that is needed for a subsequent pipeline task. |
Similar to using the REST plug-in to invoke an API, you can include a Poll task in your pipeline to invoke a REST API and poll it until it completes and the pipeline task meets the exit criteria. See What types of tasks are available in Automation Pipelines.
You can also use REST APIs to import and export a pipeline, and use the example scripts to run a pipeline.
In this procedure, the REST task gets a build tag from one service and a subsequent CI task uses the build tag to get a CICD build number.
Procedure
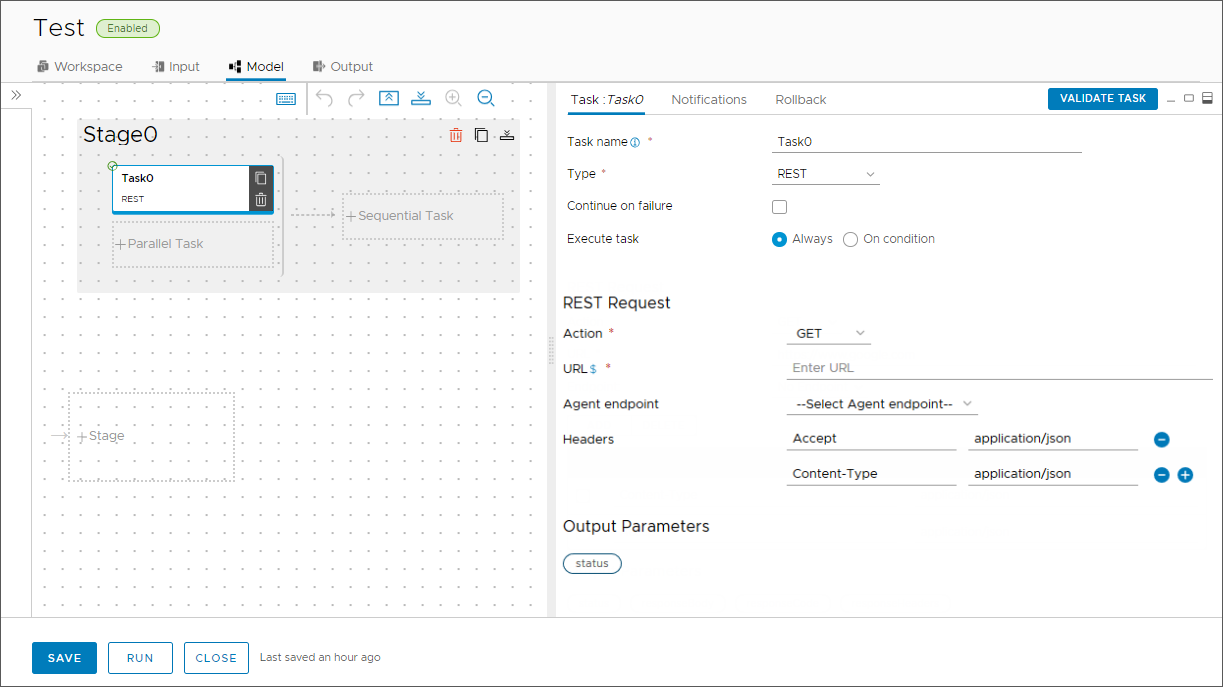
- In the task pane, add the REST task:
- Enter a name for the task.
- In the Type drop-down menu, select REST.
- In the REST Request area, select GET.
To have the REST task request data from another application, you select the GET method. To send data to another application, you select the POST method.
- Enter the URL that identifies the REST API endpoint used to obtain the build tag. For example:
https://devops.mycompany.com:8001/job/service-build/api/json
Note: Automation Pipelines does not supportFor a REST task to import data from another application, you can include the payload variable. For example, for an import action, you can enter%2Fas URL encoding for/as in:https://gitlab.com/api/v4/projects/1234567/repository/files/FOLDERNAME%2Ftest.yaml
When specifying the REST API endpoint, use a basic URL format such as:https://gitlab.com/api/v4/projects/1234567/repository/files/FOLDERNAME/test.yaml
${Stage0.export.responseBody}. If the response data size exceeds 5 MB, the REST task might fail.Use secret variables to hide and encrypt sensitive information. Use restricted variable for strings, passwords, and URLs that must be hidden and encrypted, and to restrict use in executions. For example, use a secret variable for a password or URL. You can use secret and restricted variables in any type of task in your pipeline.
- To provide authorization for the task, click Add Headers and enter header keys and values, such as:
Key Value Accept application/json Content-Type application/json
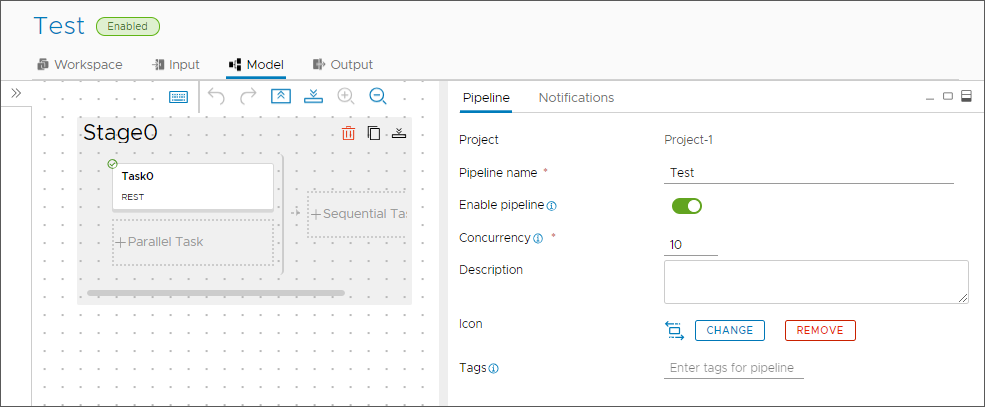
- On the pipeline tab, click Enable pipeline.
- To watch the pipeline run, click Executions.

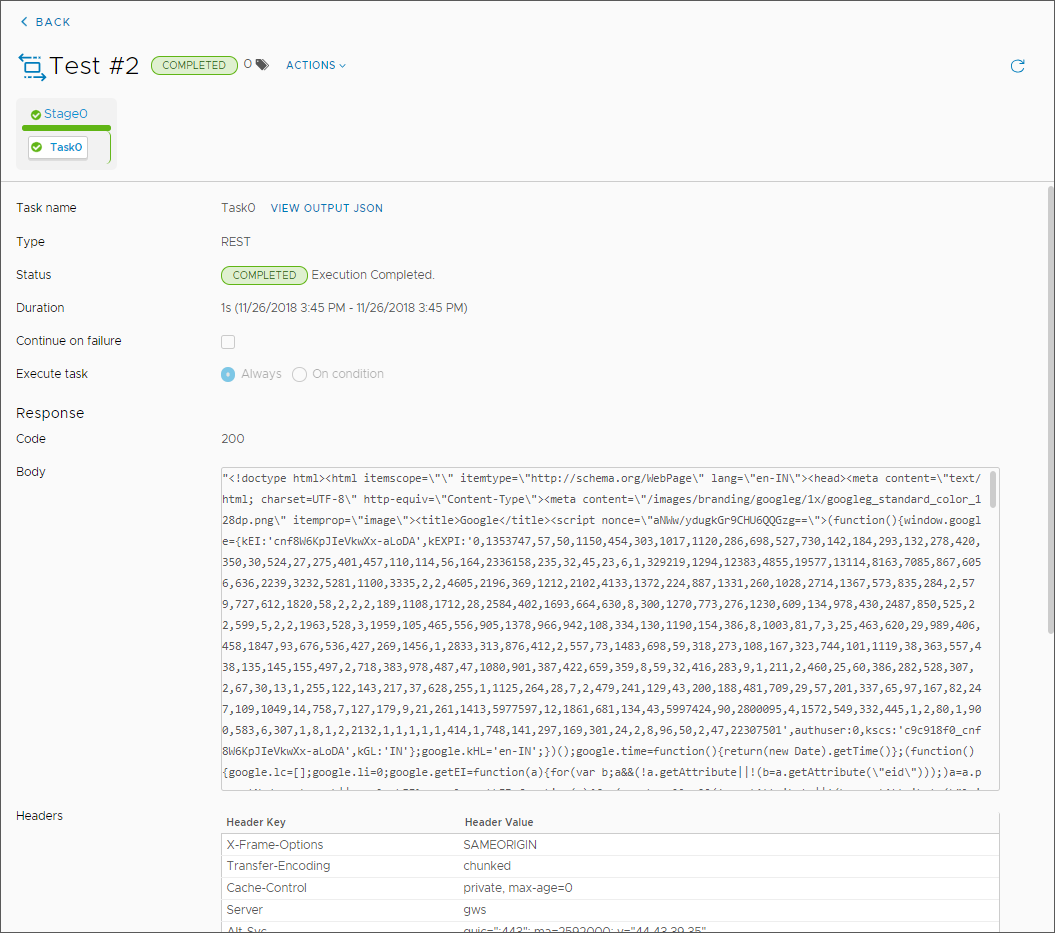
- To verify that the REST task returns the information you expect, examine the pipeline execution and the task results.
- After the pipeline completes, to confirm that the other application returned the data you requested, click the link to the pipeline execution.
- Click the REST task in the pipeline.
- In the pipeline execution, click the task, observe the task details, and verify that the REST task returned the expected results.
The task details display the response code, body, header keys, and values.
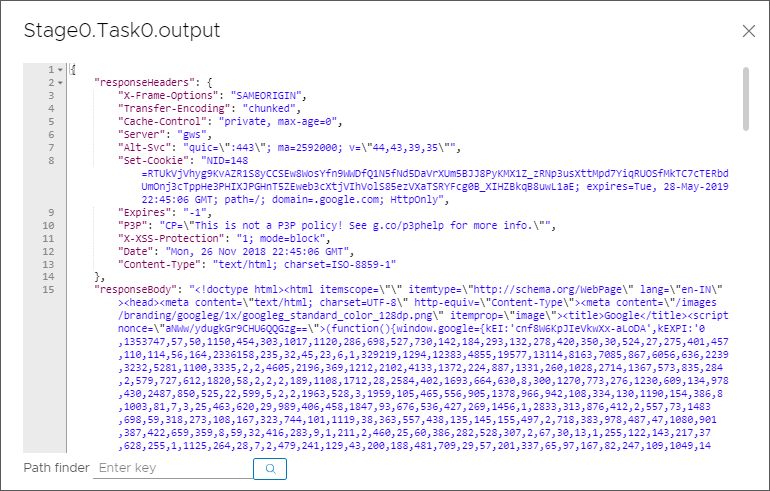
- To see the JSON output, click VIEW OUTPUT JSON.
Results
Congratulations! You configured a REST task that invoked a REST API and sent information between Automation Pipelines and another application by using the REST plug-in.
What to do next
Continue to use REST tasks in your pipelines to run commands and integrate Automation Pipelines with other applications so that you can develop and deliver your software applications. Consider using poll tasks that poll the API until it completes, and the pipeline task meets the exit criteria.
