As a cloud administrator, you can customize the email notifications that the users in your organization receive about events in Automation Service Broker and Automation Assembler.

You can change the text and the branding elements of the email, such as the logo, so that it matches the requirements of your organization.

How do I customize the branding of email notifications

As a cloud administrator, you can customize the way that email notifications look.

You can change the background color, edit the text, and add a new logo in the header and the footer of email notifications. Branding is applied across all notification templates.

In this scenario, you want to replace the default VMware logo and company name in the notifications your users receive with the logo of your company.

Procedure

  1. Select Content and Policies > Notifications > Scenarios.
  2. Click Edit shared branding.
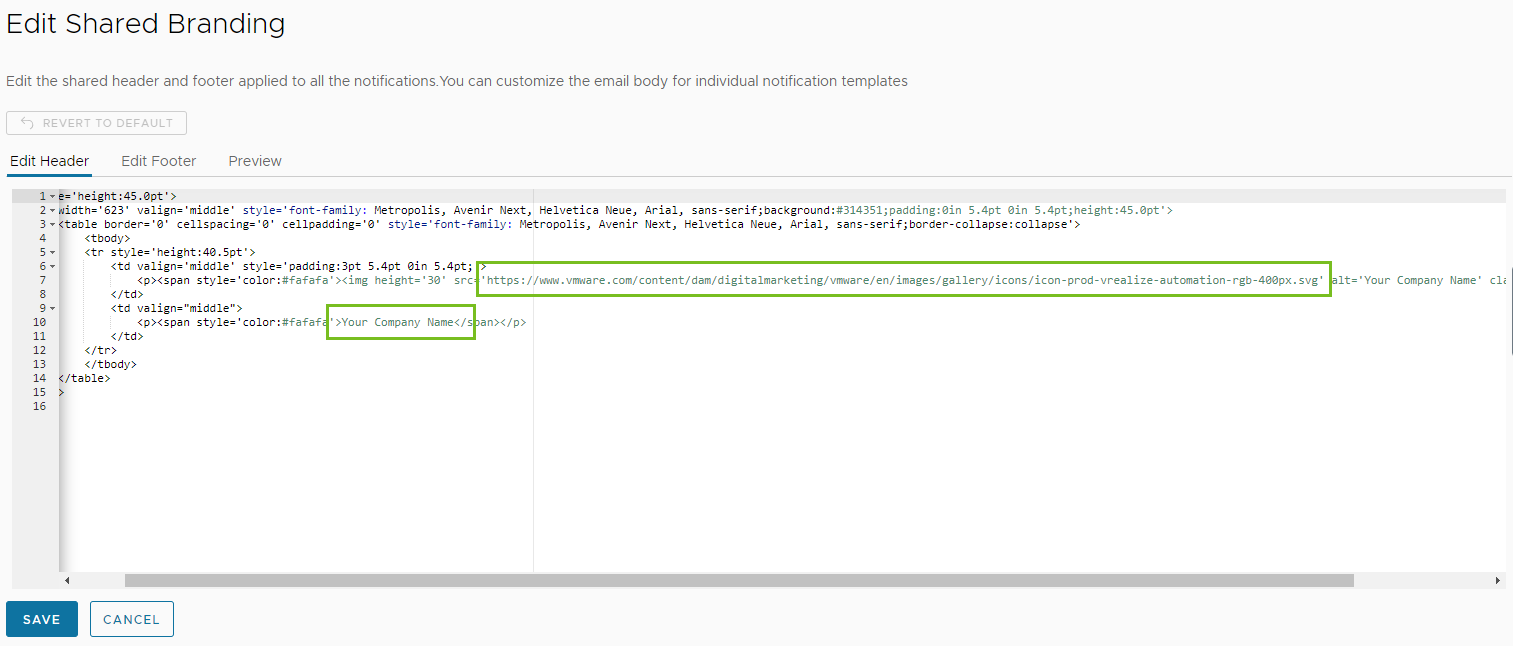
  3. On the Edit header tab, add the URL of your logo and the name of your organization.
    The Edit Header tab where the updated logo URL and company name are highlighted in the editor box.
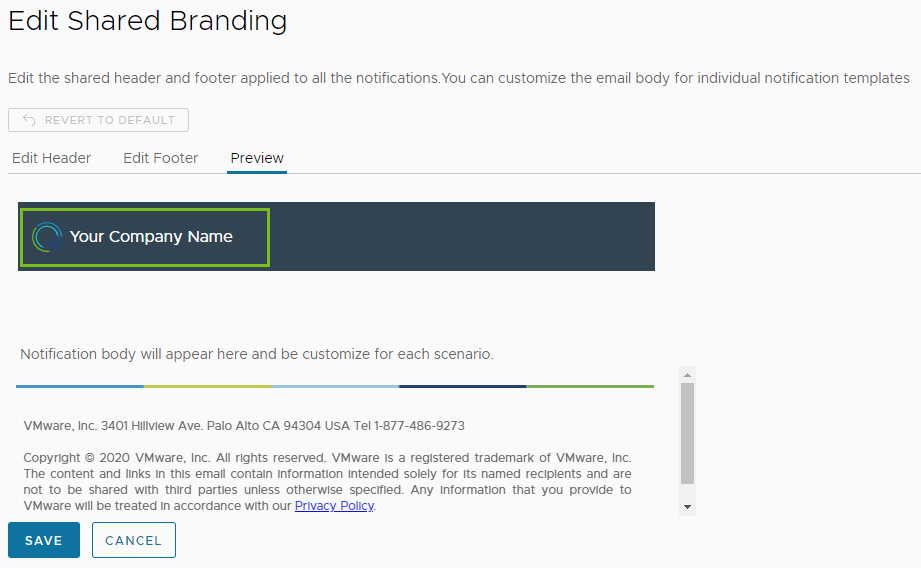
  4. To review you changes, click the Preview tab.
    The Preview pab where the updated company logo and name are highlighted in the preview.
  5. Click Save.

How do I customize the subject and body of email notifications

You can edit the subject line and the message body of each notification template and use the deployment attributes that are available for the scenario.

As a cloud administrator, you want to craft an email notification that informs your developers when a cloud service is provisioned and provides details about the deployment.

In this scenario, you add the deployment name to the subject of an email notification.
Procedure

  1. Select Content and Policies > Notifications > Scenarios.
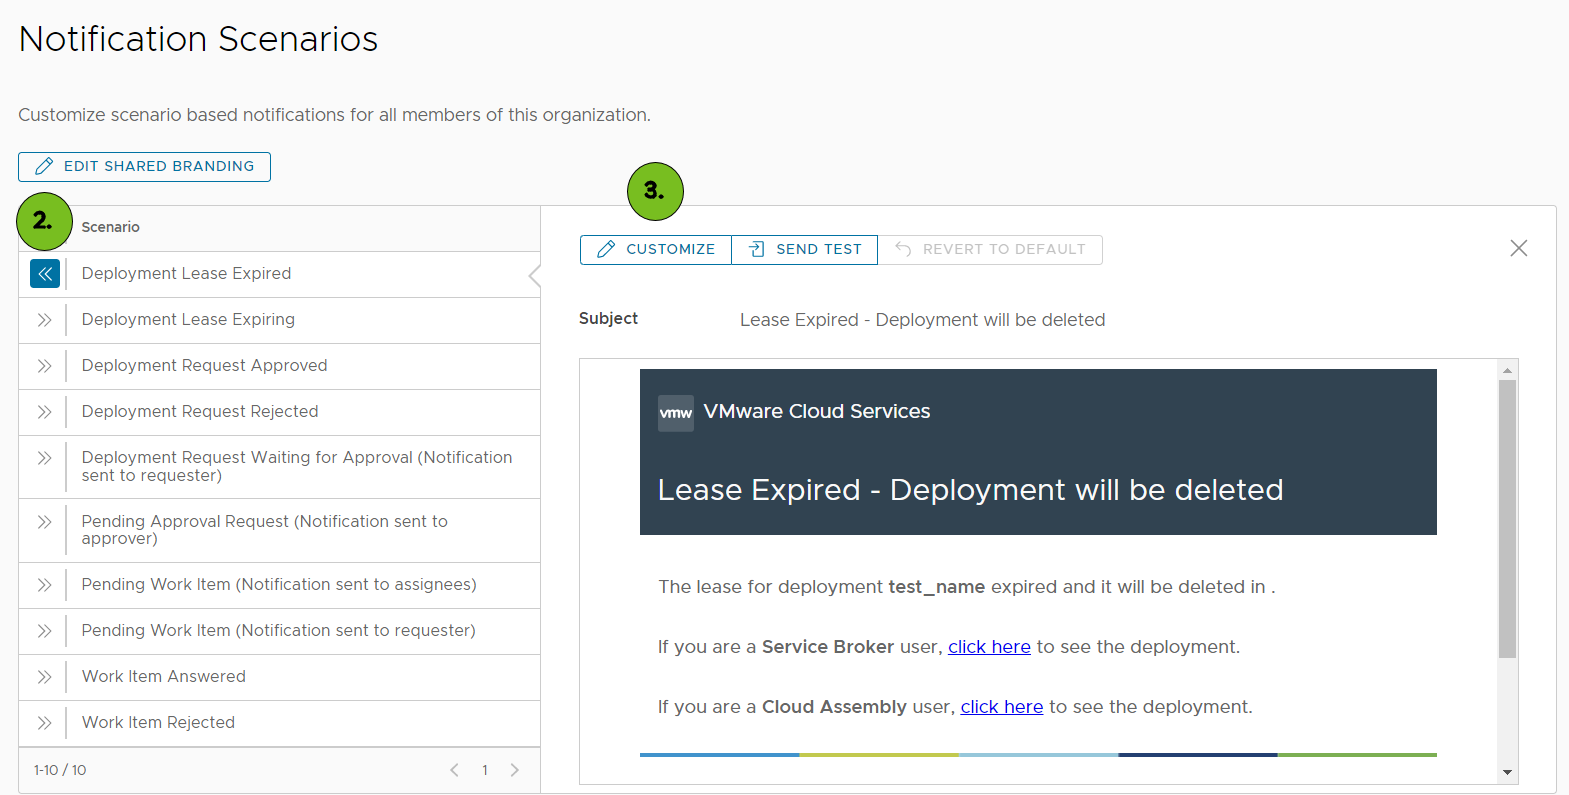
  2. Click the arrow on the left of the notification scenario you want to customize.
    A preview of the notification email appears on the right.
  3. Click Customize.
    The Notification Scenarios page with the list of scenarios on the right and one notification template expanded on the right.
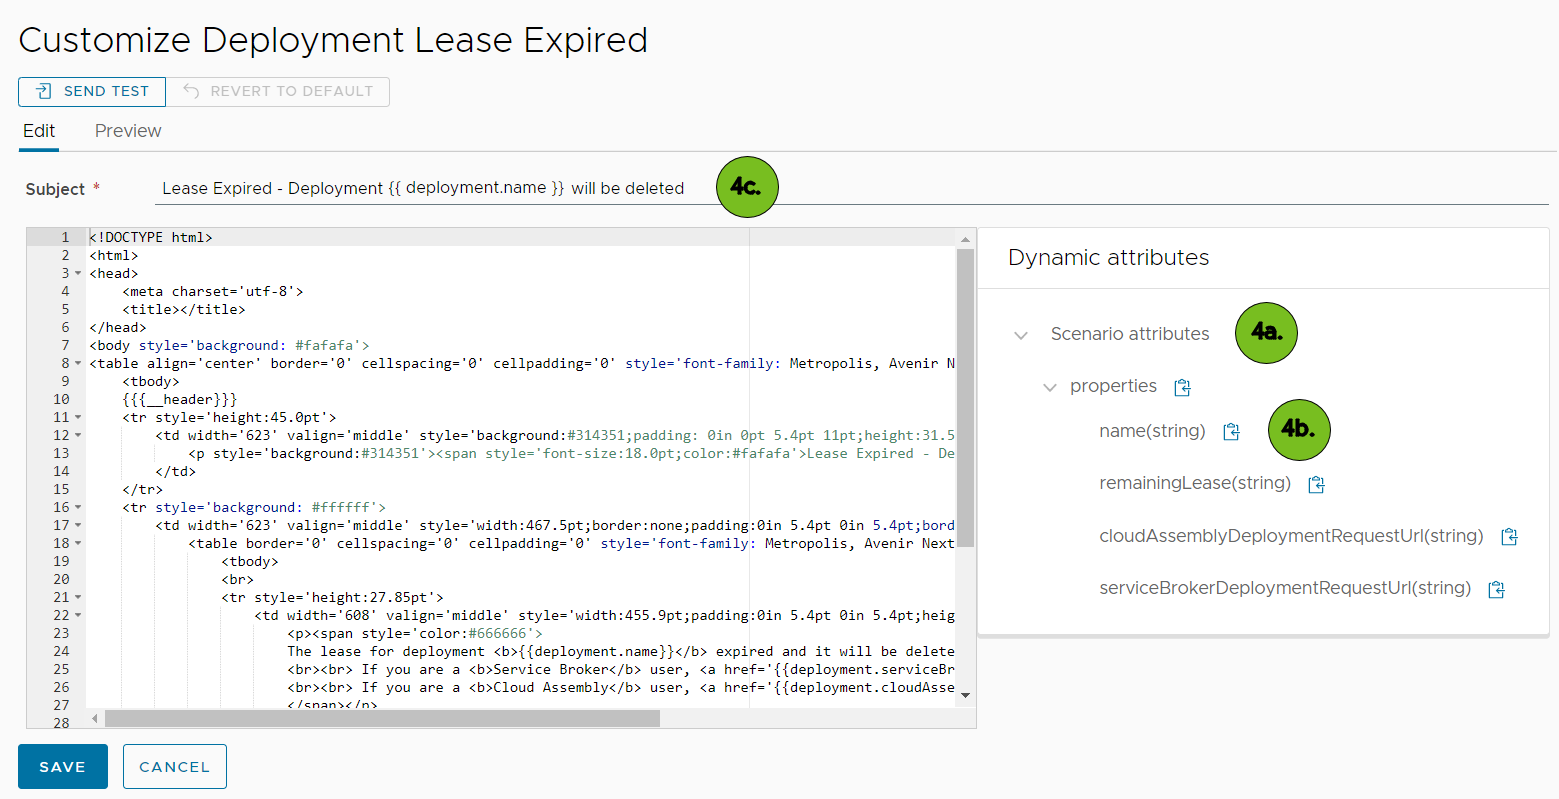
  4. On the Edit tab, update the subject line and the message body of the notification as necessary.
    1. Click Scenario attributes > properties.

      The available attributes are specific to each notification scenario.

    2. Click the copy icon next to the name(string) property.
    3. Paste the property in the Subject field.
    You can also add the dynamic attributes in the message body. Using custom properties is not supported. The Edit tab on the customization page, showing the editor box and the dynamic attributes for the template.
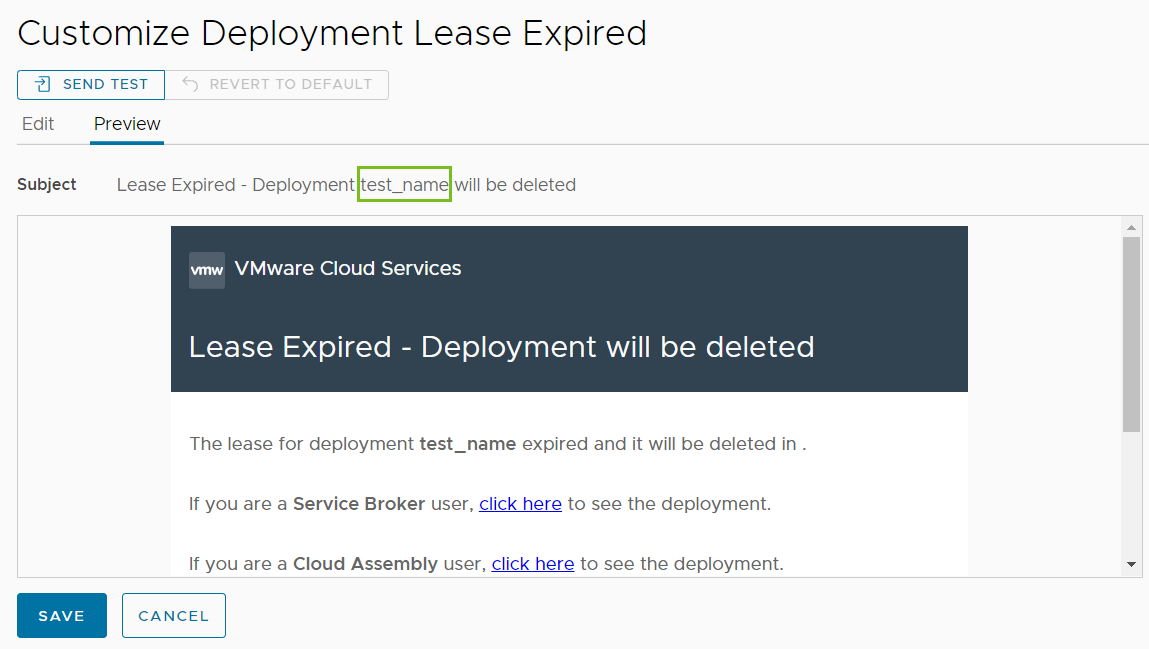
  5. To review you changes, click the Preview tab.
    The Preview of the deployment name attribute in the subject of the notification.
    You see the placeholder text for the deployment name in the subject.
  6. Click Save.
  7. (Optional) Test the updated notification.
    1. Click Send test.
    2. Enter an email to send the test email to.
    3. Click Send test.