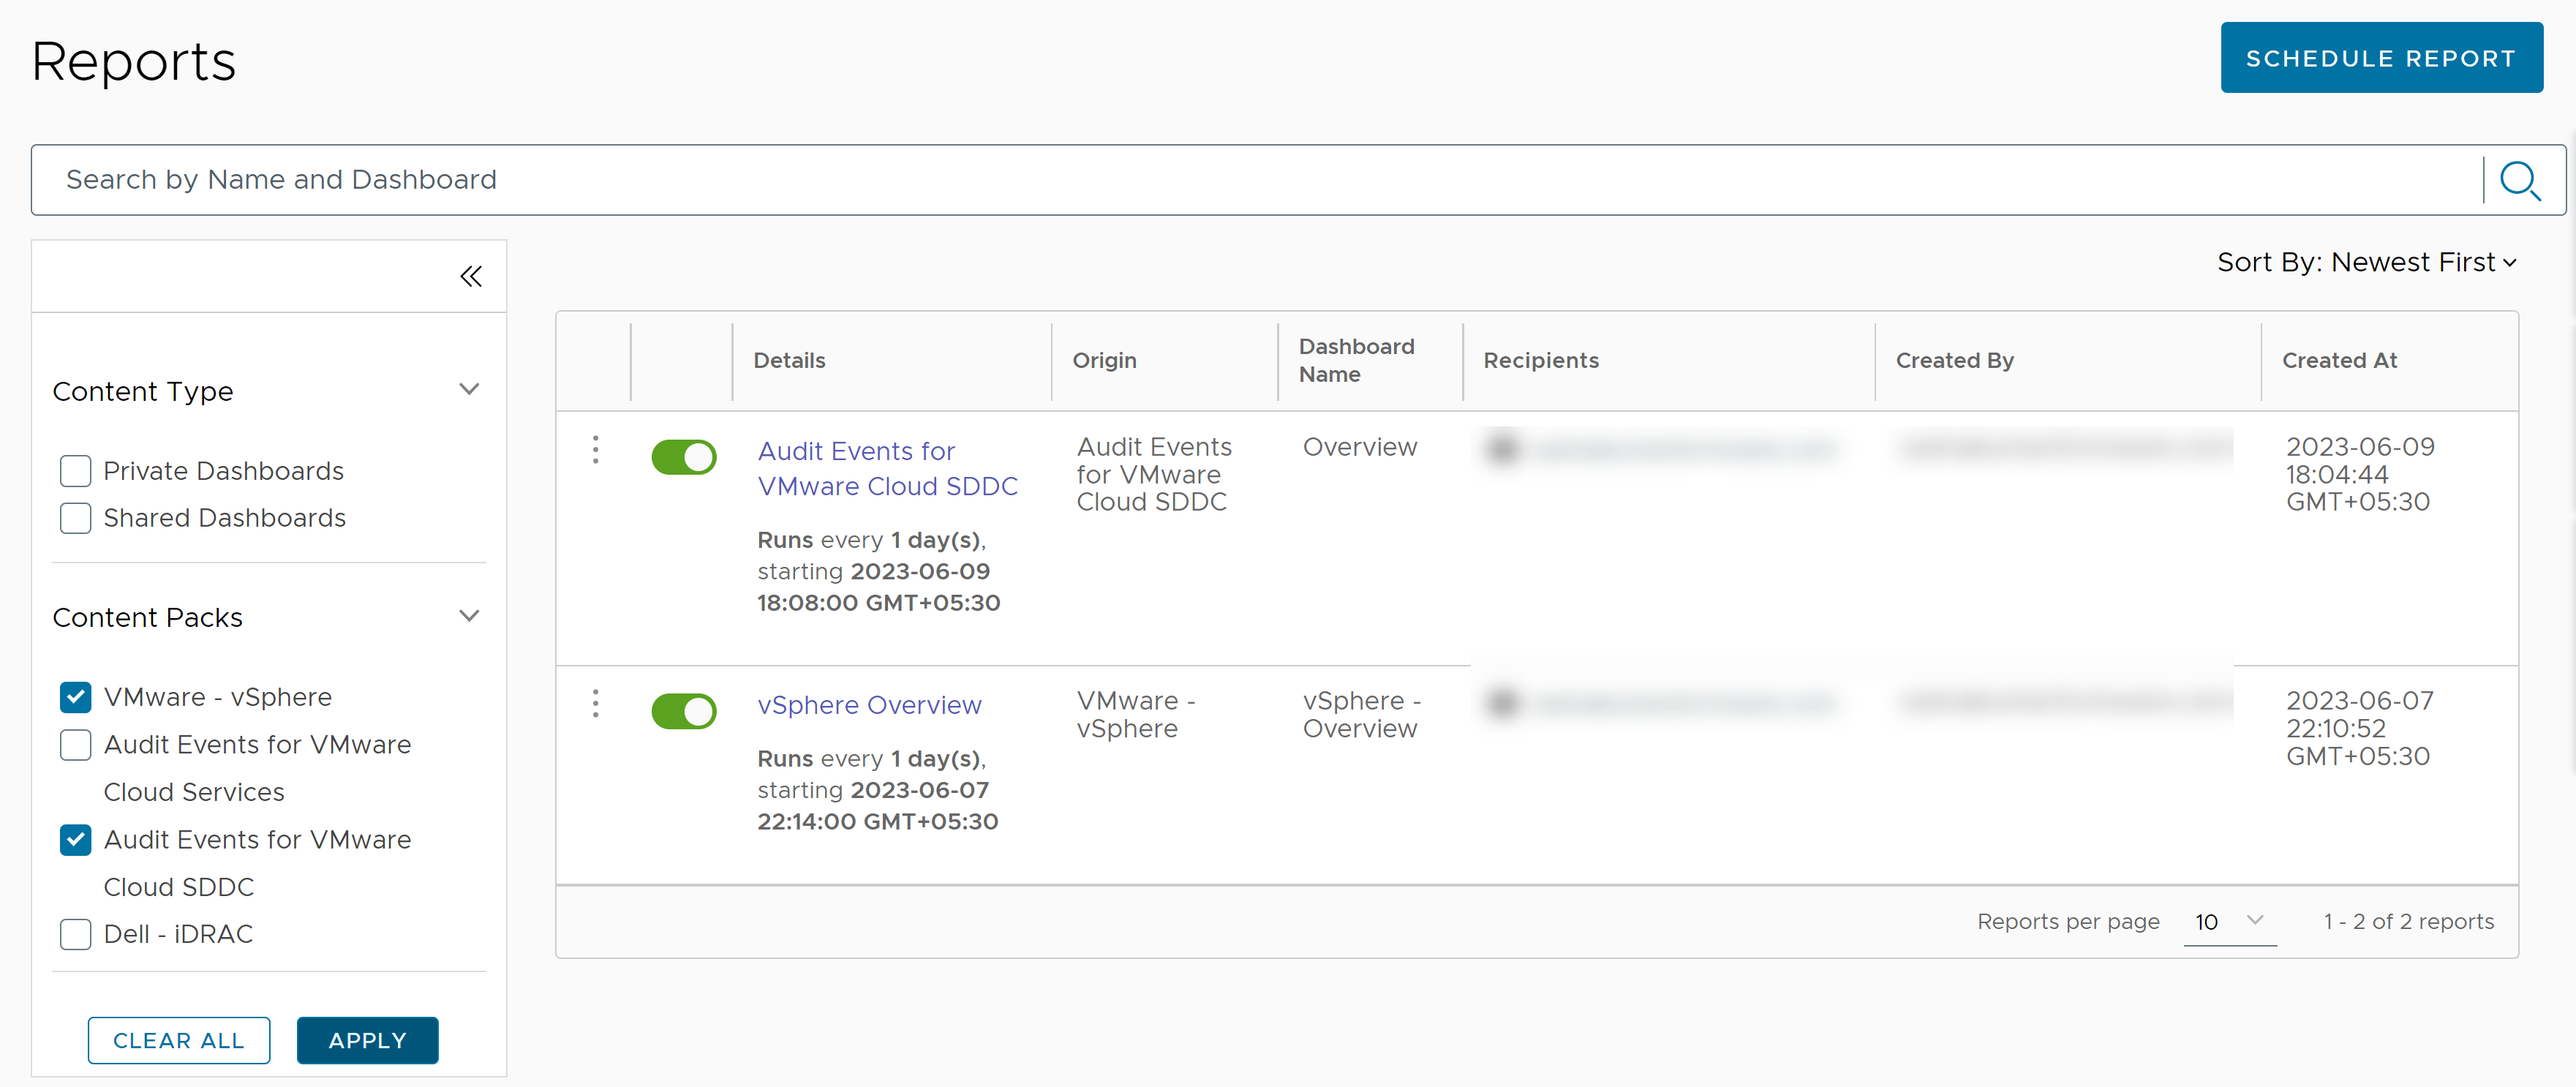
You can view reports, activate or deactivate reports, set up email notifications for reports, view report history, and modify reports on the Reports page.
To view or modify reports, expand the main menu and click Reports. On the Reports page, you see a list of reports and details such as origin, dashboard name, email recipients, and so on.
Procedure
- Expand the main menu and click Reports.
- Locate the report that you want to manage. You can search for the report by entering keywords in the search bar or by using the filter options.
To view reports by content type or content packs, select the content type or content pack from filter options on the left of the screen and click Apply.

- Perform the following actions based on your requirement:
- Activate or deactivate reports using the toggle switch button before the report name.
- Edit the report.
- Click the three dots icon before the report name and click Edit.
- Modify report details.
- Click Save.
- Clone a report.
- Click the three dots icon before the report name and click Clone.
- Enter a new name for the report.
- Edit report configurations as required.
- Click Save.
- Delete the report by clicking the three dots icon before the report name and selecting Delete.
- View report history.
Note: Historical reports are available for a maximum of seven days from the time of report generation.
- Select the report for which you want to view the history.
- On the individual report page, click the Report History tab to view all reports sent in the last seven days.
- If a report has failed, click the three dots icon before the failed report and select Regenerate to reattempt generating the report.
- If a report has succeeded, click the three dots icon before the report to resend or download the report.

Note: You can clone, edit, and delete a report from the individual report page. You can also click
View Dashboard to view the dashboard associated with the report.

