


-
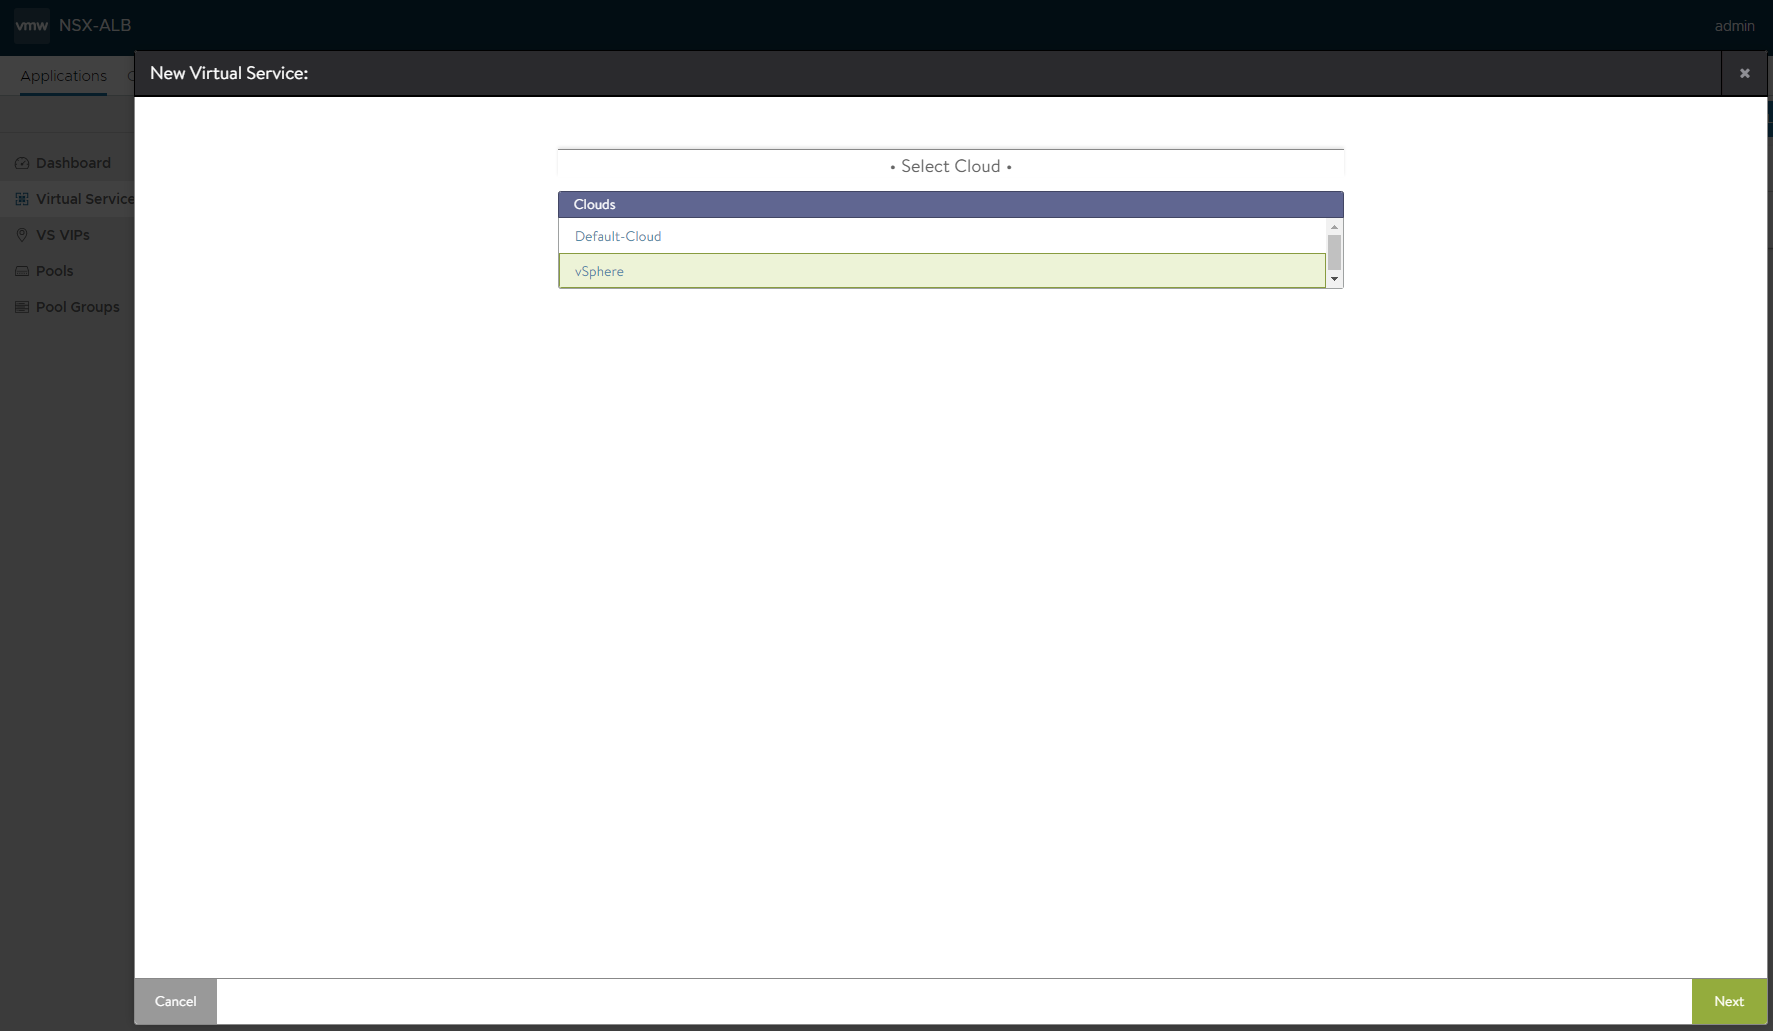
Select Applications → Virtual Services → CREATE VIRTUAL SERVICE → Advanced Setup.
Select the appropriate cloud and click NEXT.
Enter a name for the Virtual Service. For example: vRLI_Cluster_UDP.
Select VIP Address under VS VIP and choose the one we have created in Step 3.
Select System-Syslog for Application Profile and System-UDP-No-SNAT for TCP/UDP Profile.
Select the Pool accordingly (from the list of created Pools in Step 2).
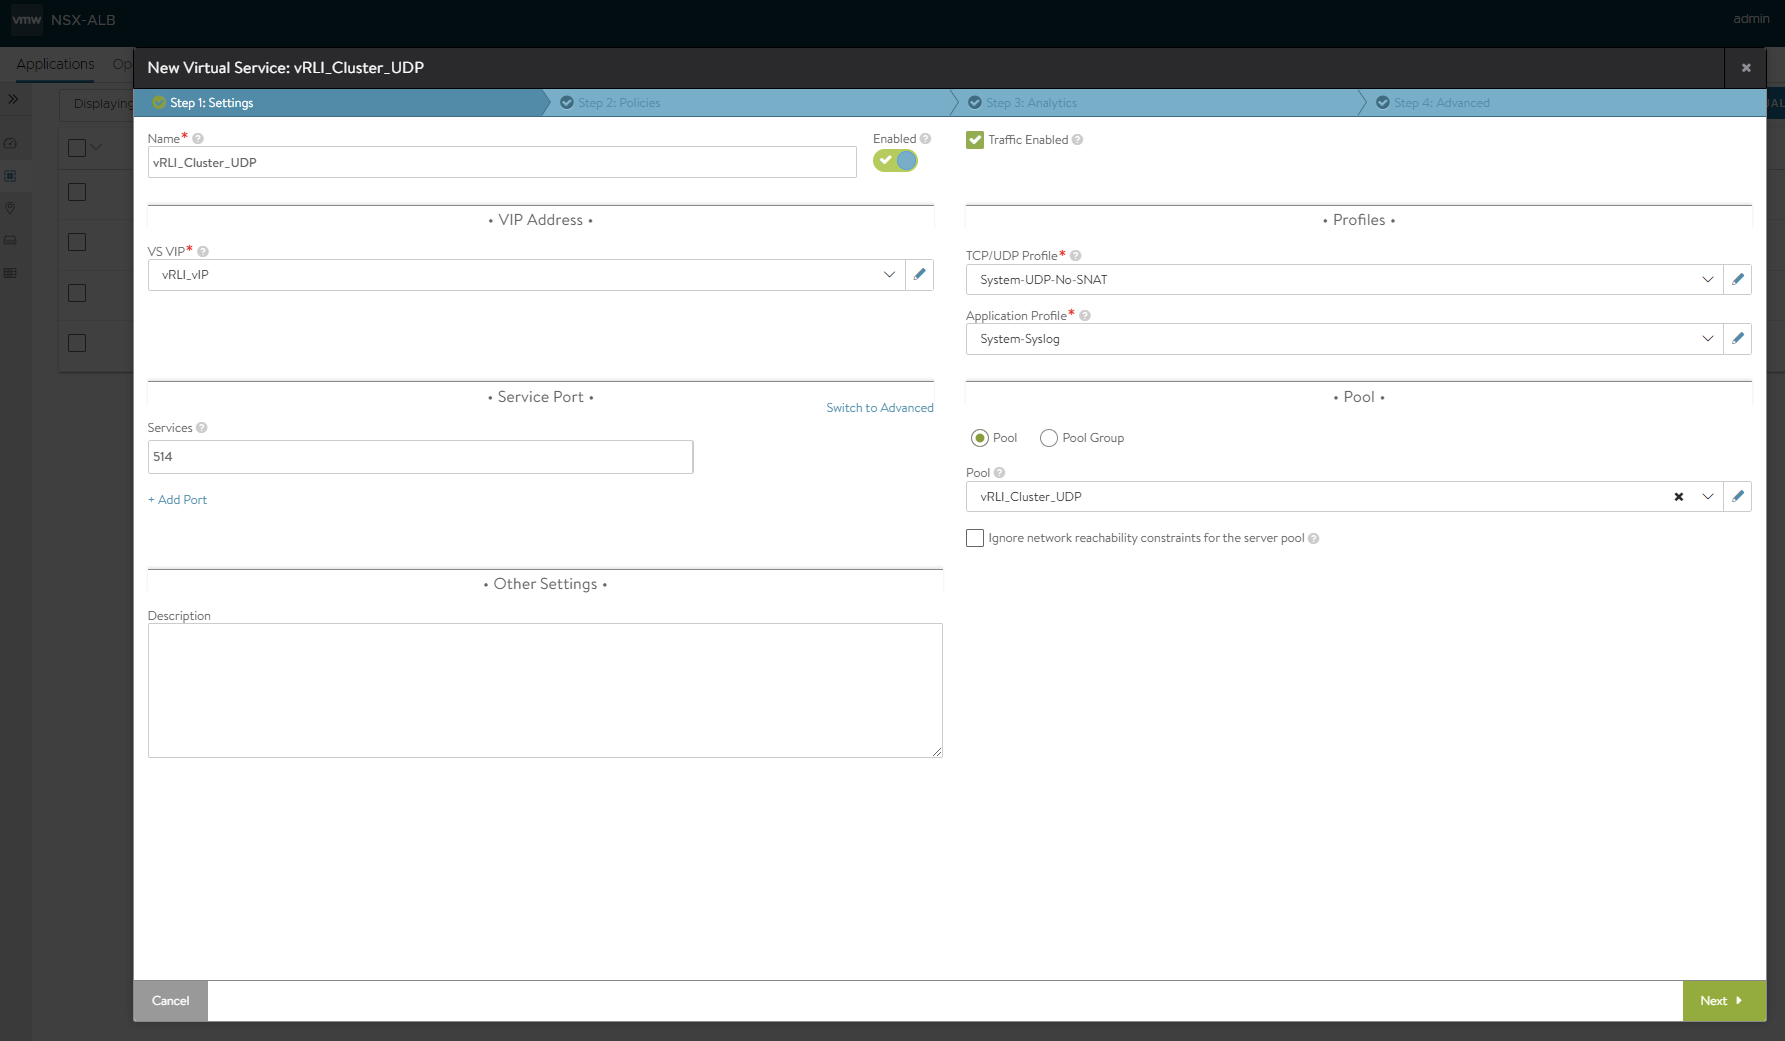
Click Next (three times - Step1: Settings, Step 2: Policies, Step 3: Analytics).
Select Service Engine Group that was created for this purpose (Prerequisites).
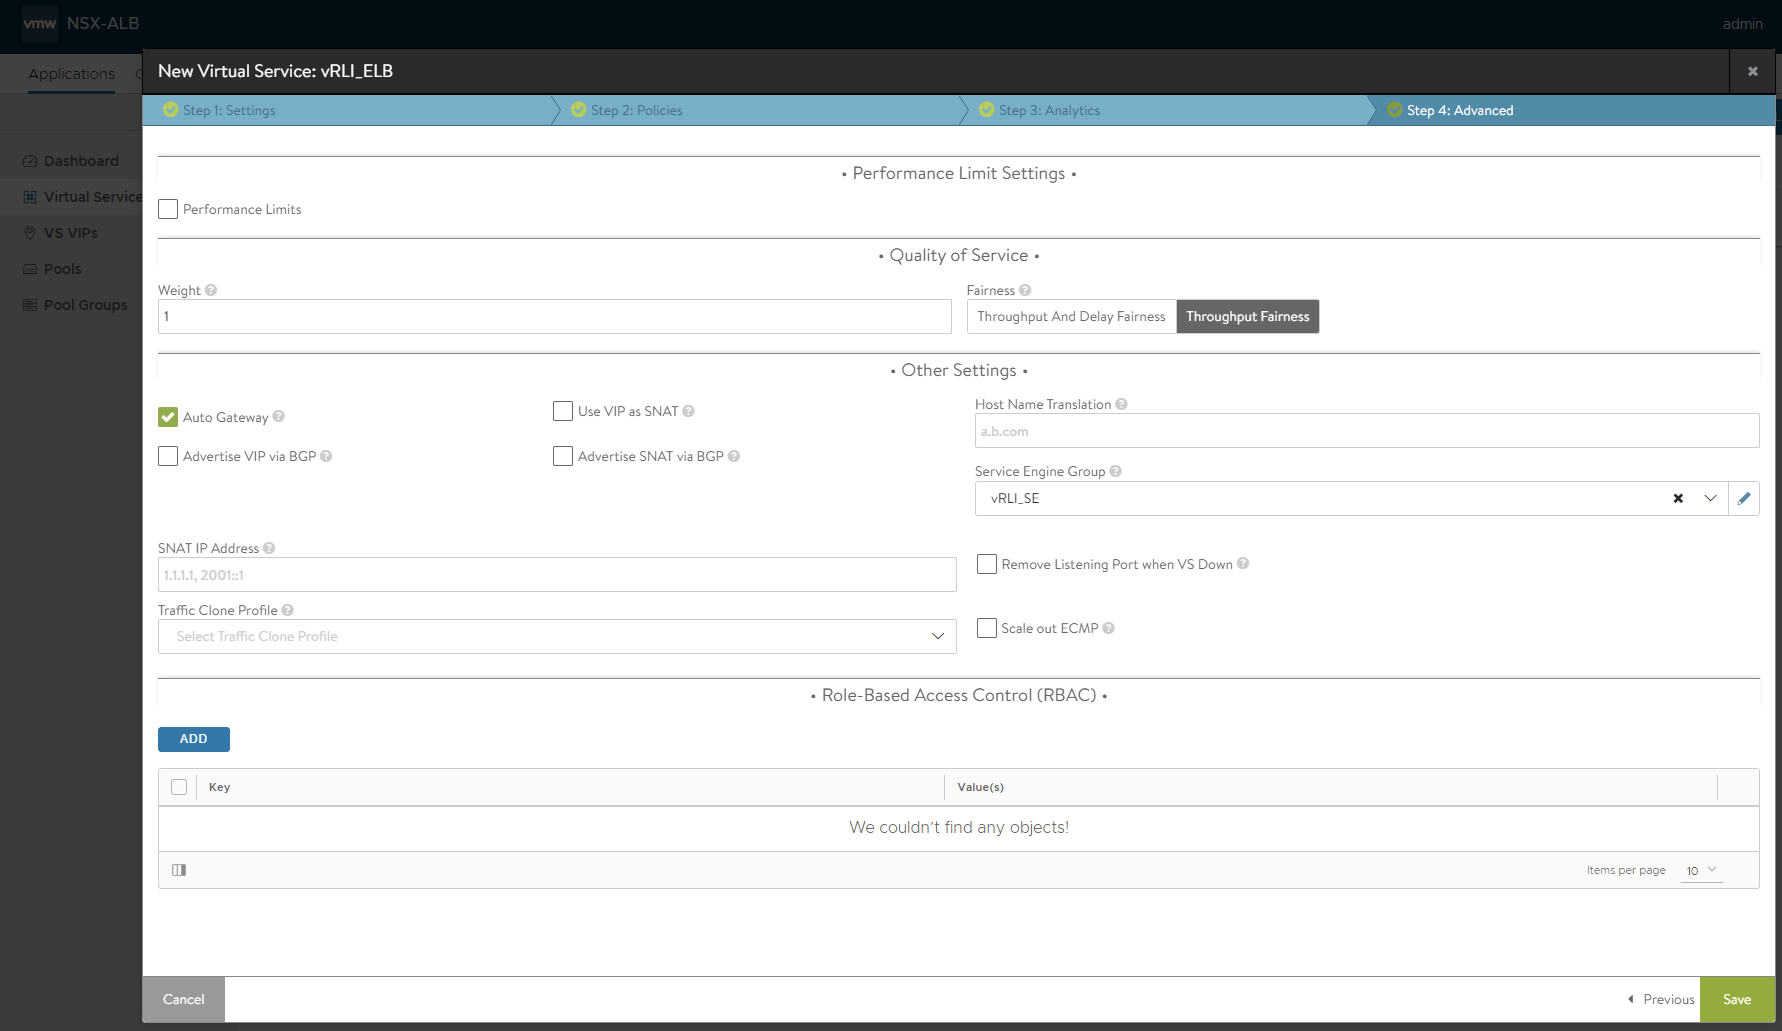
Click Save.
-
Select Applications → Virtual Services → CREATE VIRTUAL SERVICE → Advanced Setup.
Select the appropriate cloud and click NEXT.
Enter a name for the Virtual Service. For example: vRLI_Cluster_TCP_514.
Select VIP Address under VS VIP and choose the one we have created in Step 3.
Select System-L4-Application for Application Profile and System-TCP-Fast-Path for TCP/UDP Profile.
Change the Service port to 514 under the Service Port section.
Select the Pool accordingly (from the list of created Pools in Step 2).
Click Next (three times - Step1: Settings, Step 2: Policies, Step 3: Analytics).
Select Service Engine Group that was created for this purpose (Prerequisites).
Click Save.
-
Select Applications → Virtual Services → CREATE VIRTUAL SERVICE → Advanced Setup.
Select the appropriate cloud and click NEXT.
Enter a name for the Virtual Service. For example: vRLI_Cluster_TCP_9000.
Select VIP Address under VS VIP and choose the one we have created in Step 3.
Select System-L4-Application for Application Profile and System-TCP-Fast-Path for TCP/UDP Profile.
Change the Service port to 9000 under the Service Port section.
Select the Pool accordingly (from the list of created Pools in Step 2).
Click Next (three times - Step1: Settings, Step 2: Policies, Step 3: Analytics).
Select Service Engine Group that was created for this purpose (Prerequisites).
Click Save.
-
Select Applications → Virtual Services → CREATE VIRTUAL SERVICE → Advanced Setup.
Select the appropriate cloud and click NEXT.
Enter a name for the Virtual Service. For example: vRLI_Cluster_SSL_1514.
Select VIP Address under VS VIP and choose the one we have created in Step 3.
Select System-L4-Application for Application Profile and System-TCP-Fast-Path for TCP/UDP Profile.
Change the Service port to 1514 under the Service Port section.
Select the Pool accordingly (from the list of created Pools in Step 2).
Click Next (three times - Step1: Settings, Step 2: Policies, Step 3: Analytics).
Select Service Engine Group that was created for this purpose (Prerequisites).
Click Save.
-
Select Applications → Virtual Services → CREATE VIRTUAL SERVICE → Advanced Setup.
Select the appropriate cloud and click NEXT.
Enter a name for the Virtual Service. For example: vRLI_Cluster_SSL_6514.
Select VIP Address under VS VIP and choose the one we have created in Step 3.
Select System-L4-Application for Application Profile and System-TCP-Fast-Path for TCP/UDP Profile.
Change the Service port to 6514 under the Service Port section.
Select the Pool accordingly (from the list of created Pools in Step 2).
Click Next (three times - Step1: Settings, Step 2: Policies, Step 3: Analytics).
Select Service Engine Group that was created for this purpose (Prerequisites).
Click Save.
-
Select Applications → Virtual Services → CREATE VIRTUAL SERVICE → Advanced Setup.
Select the appropriate cloud and click NEXT.
Enter a name for the Virtual Service. For example: vRLI_Cluster_SSL_9543.
Select VIP Address under VS VIP and choose the one we have created in Step 3.
Select System-L4-Application for Application Profile and System-TCP-Fast-Path for TCP/UDP Profile.
Change the Service port to 9543 under the Service Port section.
Select the Pool accordingly (from the list of created Pools in Step 2).
Click Next (three times - Step1: Settings, Step 2: Policies, Step 3: Analytics).
Select Service Engine Group that was created for this purpose (Prerequisites).
Click Save.
-
Select Applications → Virtual Services → CREATE VIRTUAL SERVICE → Advanced Setup.
Select the appropriate cloud and click NEXT.
Enter a name for the Virtual Service. For example: vRLI_UI.
Select VIP Address under VS VIP and choose the one we have created in Step 3 (vRLI_vIP).
Select System-L4-Application for Application Profile and System-TCP-Fast-Path for TCP/UDP Profile.
Change the Service port to 443 under the Service Port section.
Select the Pool accordingly (from the list of created Pools in Step 2).
Click Next (three times - Step1: Settings, Step 2: Policies, Step 3: Analytics).
Select Service Engine Group that was created for this purpose (Prerequisites).
Click Save.
Configure HTTP redirect to HTTPS
Select Applications → Virtual Services → CREATE VIRTUAL SERVICE → Advanced Setup.
Select the appropriate cloud and click NEXT.
Enter a name for the Virtual Service. For example: vRLI_HTTP_Redirect.
Select VIP Address under VS VIP and choose the one we have created in Step 3 (vRLI_vIP).
Click Next.
Select HTTP Security and click
 icon.
icon.Choose Redirect to HTTPS as an Action.
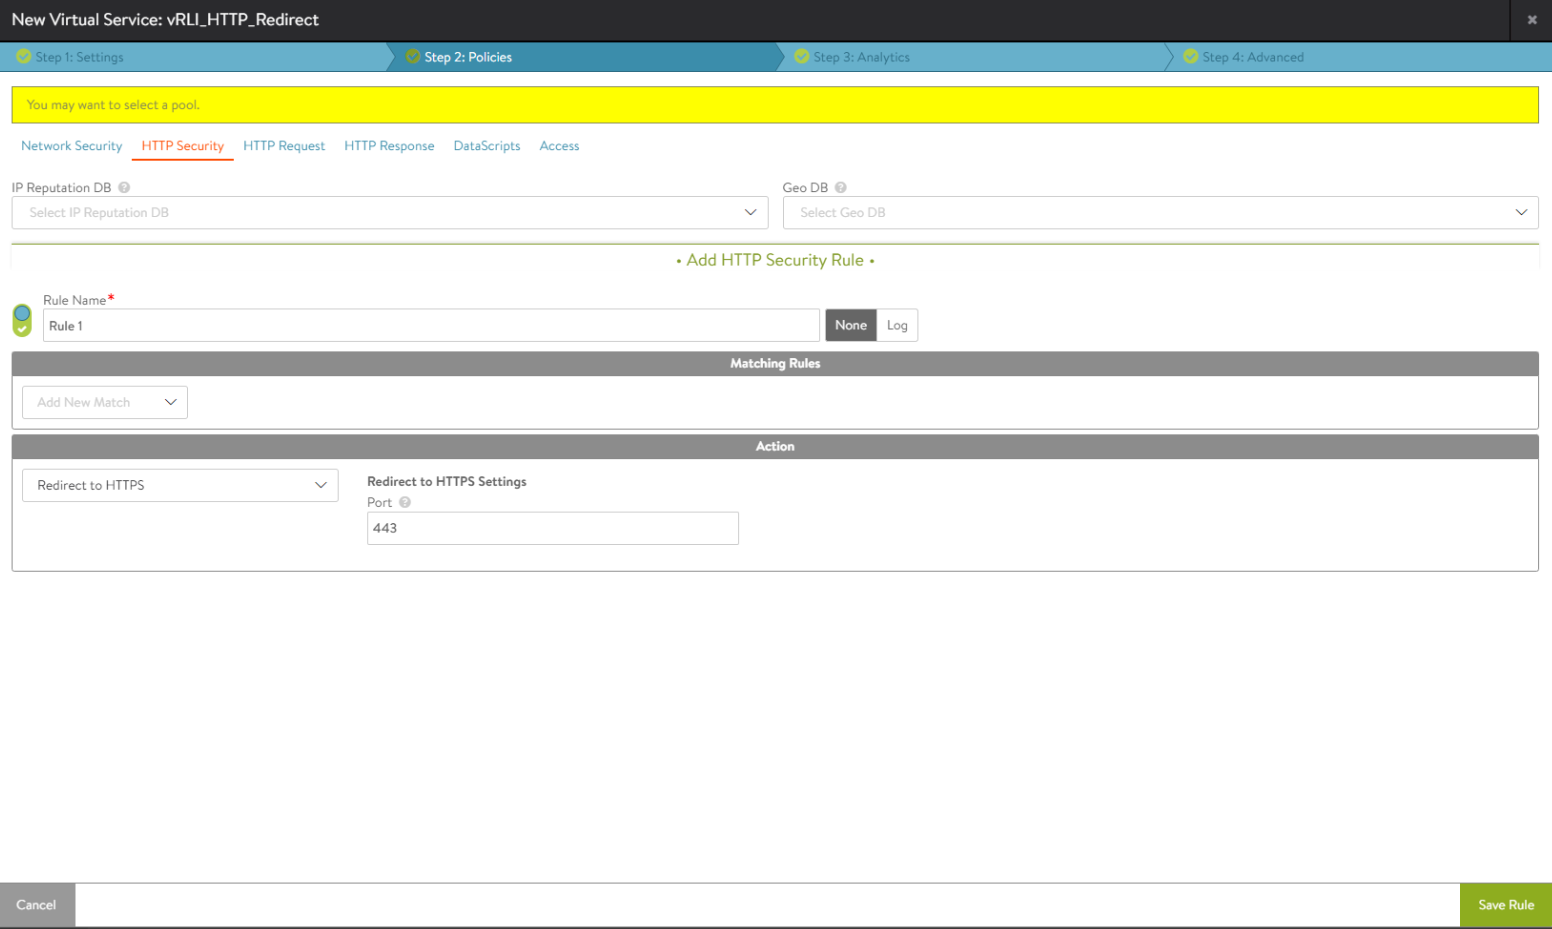
Click Save Rule.
Click Next (two times - Step 2: Policies, Step 3: Analytics).
Select Service Engine Group that was created for this purpose (Prerequisites).
Click Save.
