


-
Select Applications → Virtual Services → CREATE VIRTUAL SERVICE → Advanced Setup.
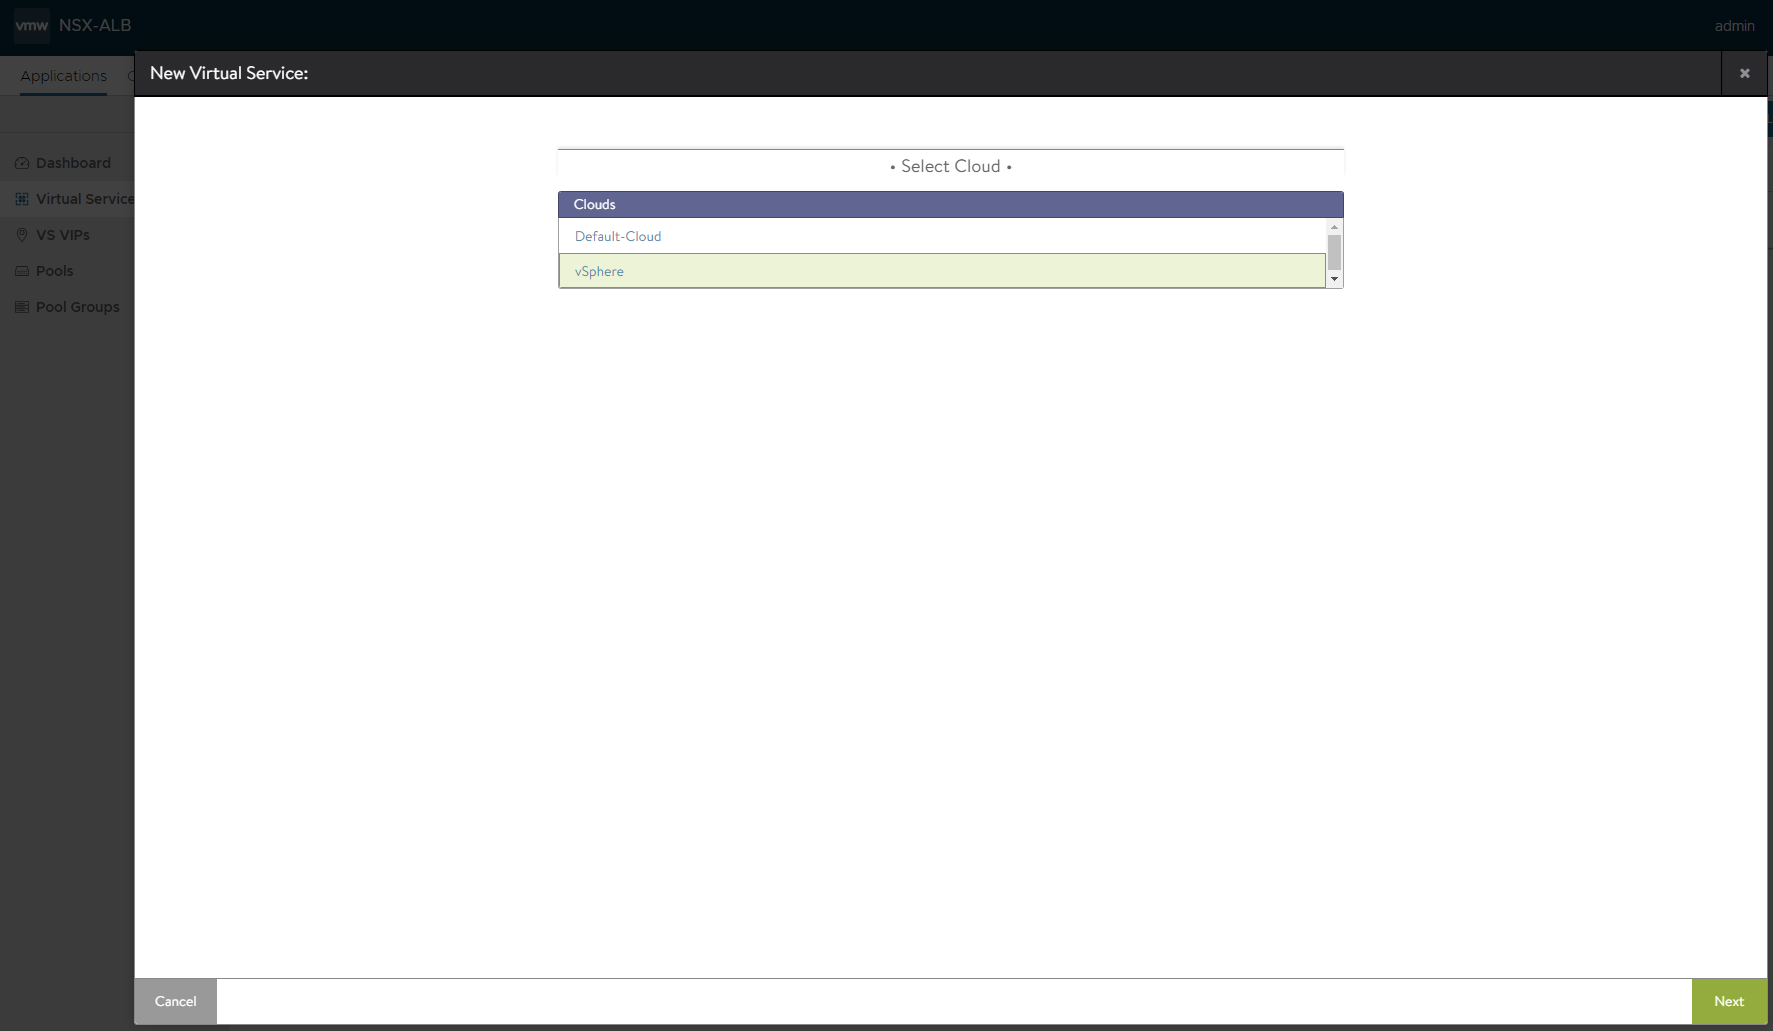
Select the appropriate cloud and click NEXT.
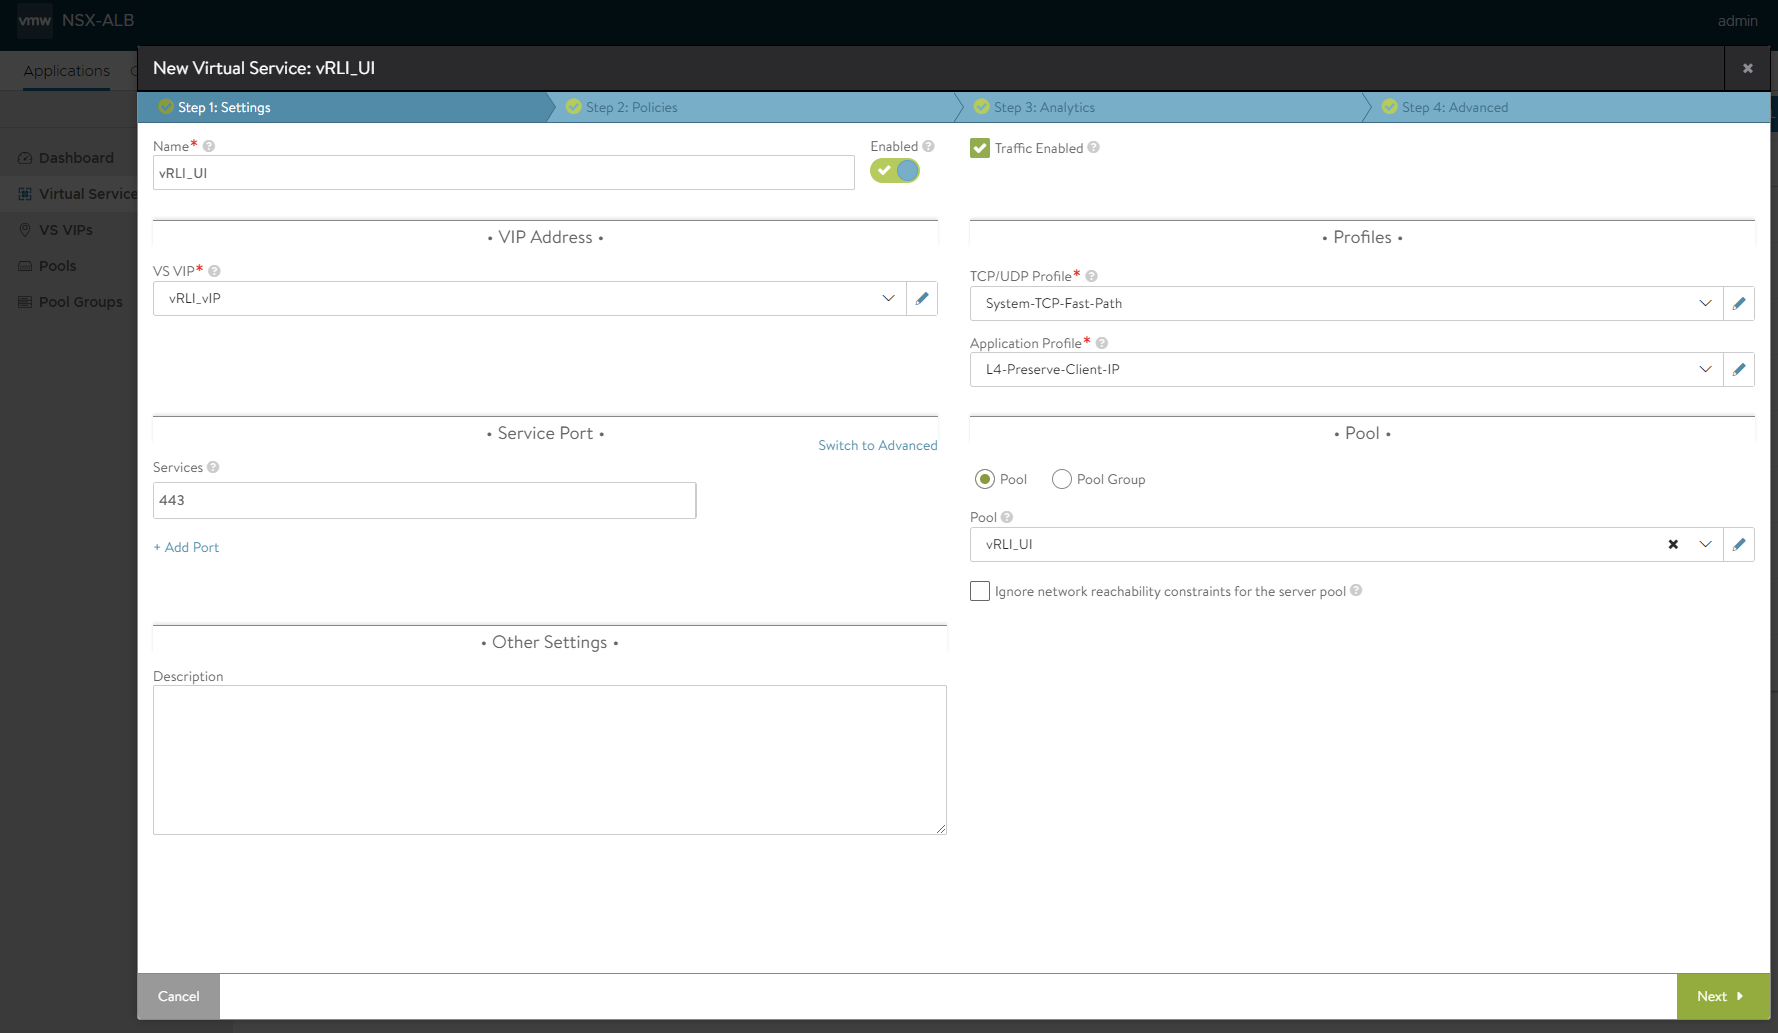
Enter a name for the Virtual Service. For example: vRLI_UI.
Select VIP Address under VS VIP and choose the one we have created in Step 6 (vRLI_vIP).
Select Application Profile that we have created in Step 5 (L4-Preserve-Client-IP) and System-TCP-Fast-Path for TCP/UDP Profile.
Change the Service port to 443 under the Service Port section.
Select the Pool accordingly (from the list of created Pools in Step 4).
Click Next (three times - Step1: Settings, Step 2: Policies, Step 3: Analytics).
Select Service Engine Group that was created for this purpose (Prerequisites).
Click Save.
HTTP redirect to HTTPS
Select Applications → Virtual Services → CREATE VIRTUAL SERVICE → Advanced Setup.
Select the appropriate cloud and click NEXT.
Enter a name for the Virtual Service. For example: vRLI_HTTP_Redirect.
Select VIP Address under VS VIP and choose the one we have created in Step 6 (vRLI_vIP).
Click Next.
Select HTTP Security and click
 icon.
icon.Choose Redirect to HTTPS as an Action.
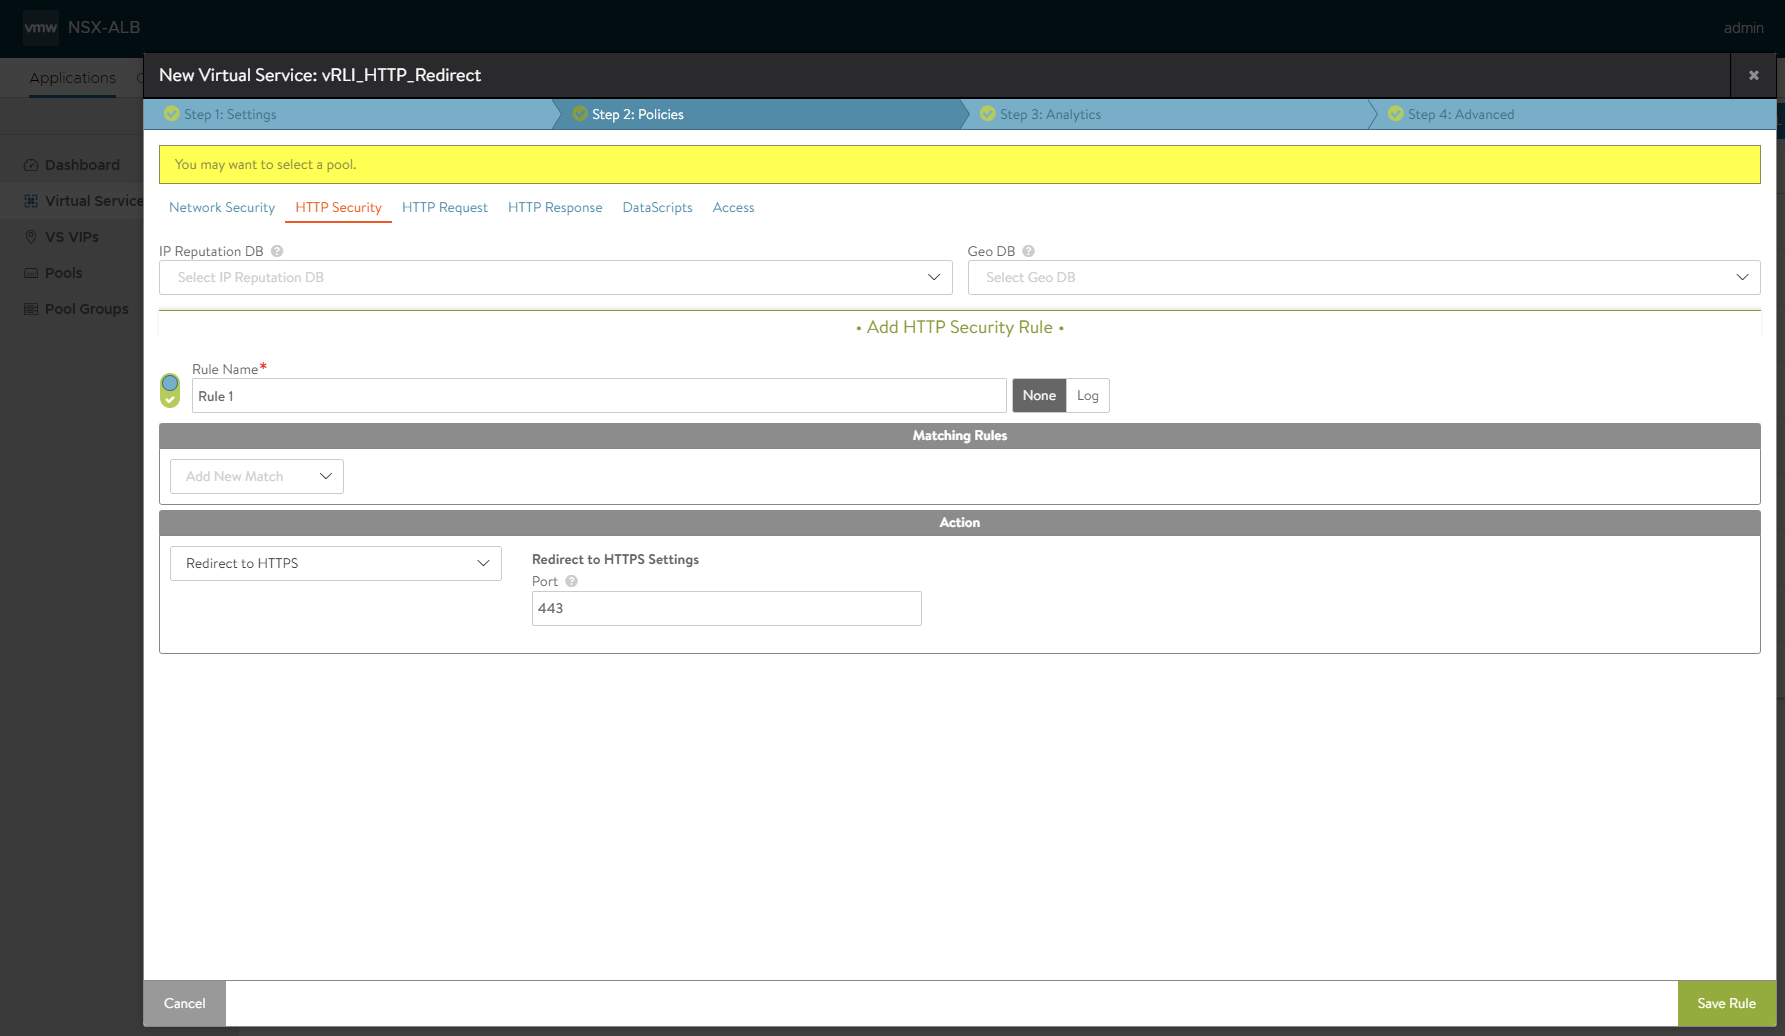
Click Save Rule.
Click Next (two times - Step 2: Policies, Step 3: Analytics).
Select Service Engine Group that was created for this purpose (Prerequisites).
Click Save.
-
Select Applications → Virtual Services → CREATE VIRTUAL SERVICE → Advanced Setup.
Select the appropriate cloud and click NEXT.
Enter a name for the Virtual Service. For example: vRLI_UDP_514.
Select VIP Address under VS VIP and choose the one we have created in Step 6 (vRLI_vIP).
Select System-Syslog for Application Profile and System-UDP-No-SNAT for TCP/UDP Profile.
Select the Pool accordingly (from the list of created Pools in Step 4).
Click Next (three times - Step1: Settings, Step 2: Policies, Step 3: Analytics).
Select Service Engine Group that was created for this purpose (Prerequisites).
Click Save.
-
Select Applications → Virtual Services → CREATE VIRTUAL SERVICE → Advanced Setup.
Select the appropriate cloud and click NEXT.
Enter a name for the Virtual Service. For example: vRLI_TCP_514.
Select VIP Address under VS VIP and choose the one we have created in Step 6 (vRLI_vIP).
Select Application Profile that we have created in Step 5 (L4-Preserve-Client-IP) and System-TCP-Fast-Path for TCP/UDP Profile.
Change the Service port to 514 under the Service Port section.
Select the Pool accordingly (from the list of created Pools in Step 4).
Click Next (three times - Step1: Settings, Step 2: Policies, Step 3: Analytics).
Select Service Engine Group that was created for this purpose (Prerequisites).
Click Save.
-
Select Applications → Virtual Services → CREATE VIRTUAL SERVICE → Advanced Setup.
Select the appropriate cloud and click NEXT.
Enter a name for the Virtual Service. For example: vRLI_TCP_1514.
Select VIP Address under VS VIP and choose the one we have created in Step 6 (vRLI_vIP).
Select Application Profile that we have created in Step 5 (L4-Preserve-Client-IP) and System-TCP-Fast-Path for TCP/UDP Profile.
Change the Service port to 1514 under the Service Port section.
Select the Pool accordingly (from the list of created Pools in Step 4).
Click Next (three times - Step1: Settings, Step 2: Policies, Step 3: Analytics).
Select Service Engine Group that was created for this purpose (Prerequisites).
Click Save.
-
Select Applications → Virtual Services → CREATE VIRTUAL SERVICE → Advanced Setup.
Select the appropriate cloud and click NEXT.
Enter a name for the Virtual Service. For example: vRLI_TCP_6514.
Select VIP Address under VS VIP and choose the one we have created in Step 6 (vRLI_vIP).
Select Application Profile that we have created in Step 5 (L4-Preserve-Client-IP) and System-TCP-Fast-Path for TCP/UDP Profile.
Change the Service port to 6514 under the Service Port section.
Select the Pool accordingly (from the list of created Pools in Step 4).
Click Next (three times - Step1: Settings, Step 2: Policies, Step 3: Analytics).
Select Service Engine Group that was created for this purpose (Prerequisites).
Click Save.
-
Select Applications → Virtual Services → CREATE VIRTUAL SERVICE → Advanced Setup.
Select the appropriate cloud and click NEXT.
Enter a name for the Virtual Service. For example: vRLI_TCP_9000.
Select VIP Address under VS VIP and choose the one we have created in Step 6 (vRLI_vIP).
Select Application Profile that we have created in Step 5 (L4-Preserve-Client-IP) and System-TCP-Fast-Path for TCP/UDP Profile.
Change the Service port to 9000 under the Service Port section 7. Select the Pool accordingly (from the list of created Pools in Step 4).
Click Next (three times - Step1: Settings, Step 2: Policies, Step 3: Analytics).
Select Service Engine Group that was created for this purpose (Prerequisites).
Click Save.
-
Select Applications → Virtual Services → CREATE VIRTUAL SERVICE → Advanced Setup.
Select the appropriate cloud and click NEXT.
Enter a name for the Virtual Service. For example: vRLI_TCP_9543.
Select VIP Address under VS VIP and choose the one we have created in Step 6 (vRLI_vIP).
Select Application Profile that we have created in Step 5 (L4-Preserve-Client-IP) and System-TCP-Fast-Path for TCP/UDP Profile.
Change the Service port to 9543 under the Service Port section.
Select the Pool accordingly (from the list of created Pools in Step 4).
Click Next (three times - Step1: Settings, Step 2: Policies, Step 3: Analytics).
Select Service Engine Group that was created for this purpose (Prerequisites).
Click Save.


