Use this procedure to replace the VMware Identity Manager certificate or the globalenvironment setting in your VMware Aria Suite Lifecycle environment.
For related information about replacing certificates for VMware Aria Suite Lifecycle, see Replace certificate for VMware Aria Suite Lifecycle products.
Generate a self-signed certificate
Use the Locker service to generate a Certificate Signing Request (CSR) and create a .pem file. With information from the .pem file, you import the cerficiate into the VMware Aria Suite Lifecycle locker .
- From the My Services dashboard, click Locker.
- Click Generate CSR and enter the name globalenvironment.
- Enter customer-specific values for all required fields on he Generate CSR form and click Generate to generate the .pem file.
A sample form is shown below.
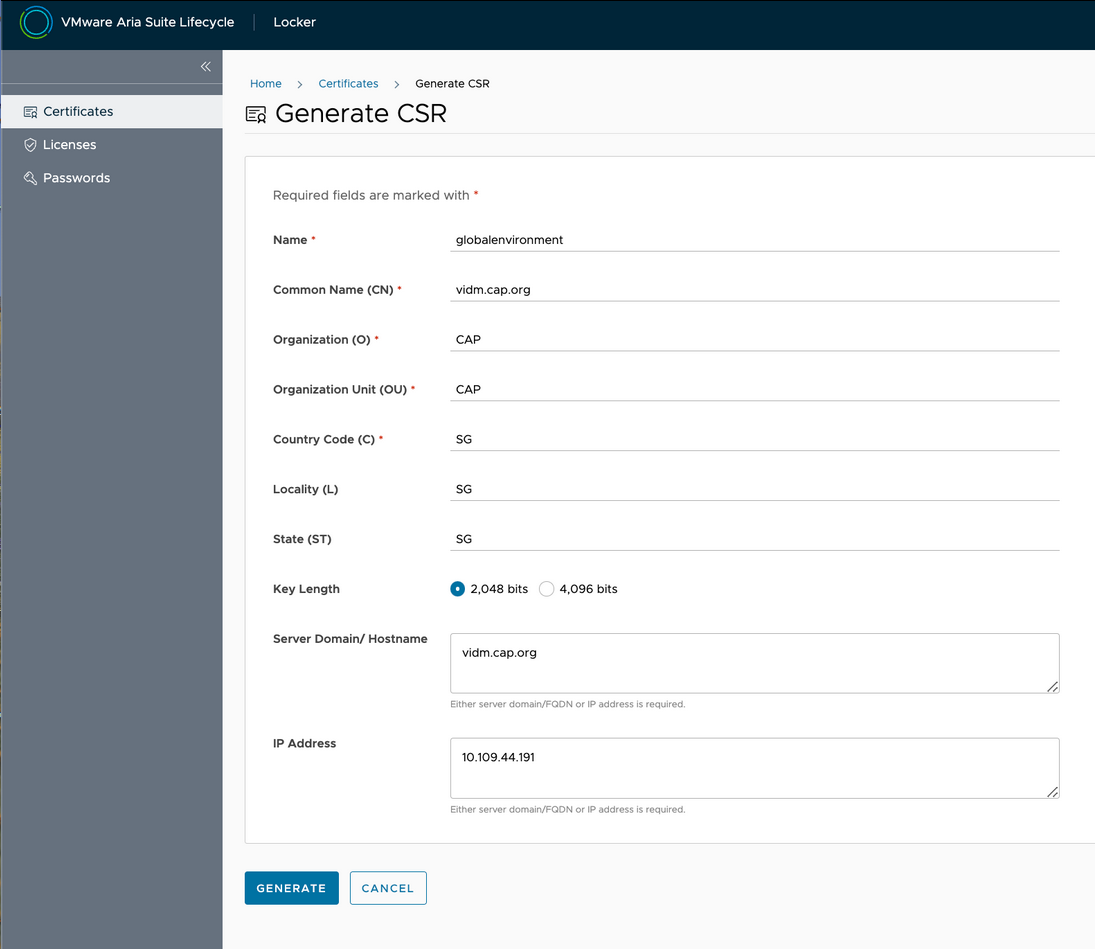 Note: To replace your certificate in a clustered environment, enter multiple domain names and IP addresses, separated by commas.A .pem file contains a certificate signing request and a private key as in the example below with certificate and key details removed.
-----BEGIN CERTIFICATE REQUEST-----
...
-----END CERTIFICATE REQUEST-----
-----BEGIN PRIVATE KEY-----
...
-----END PRIVATE KEY-----
- Submit the .pem file to a signing authority to request that it be signed. If you do not have a configured signing authority, perform the following steps.
In this example, the signing authority is the Microsoft Active Directory Certificate Service and it is configured for http://localhost/certsrv/.
- Open http://localhost/certsrv/.
- Click .
- For this example, click Request a certificate.
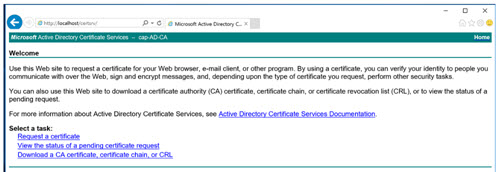
- Click Advanced certificate request.

- Click the Submit a certificate request using base64 encoded … option.

- Paste the certificate .pem file content from your certificate request and click Submit.
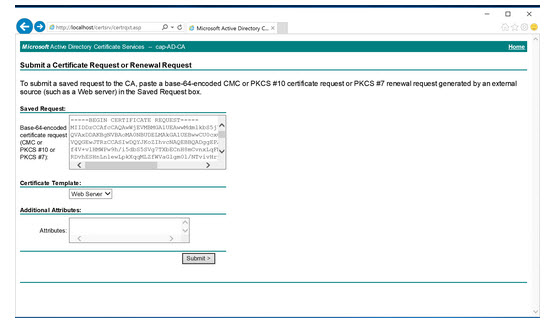
- After the .pem is submitted. you are prompted to download a certificate. Select the Base64 encoded certificate format and select both the Download certificate and the Download certificate chain options.
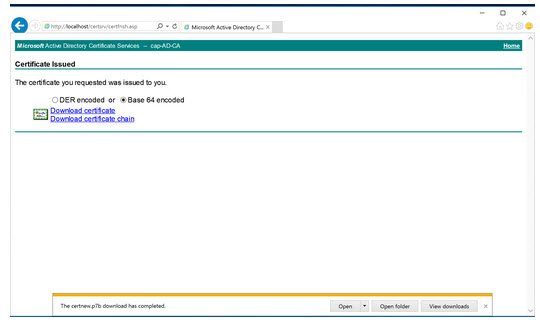 This actions downloads
certnew.cerfor the certificate andcertnew.p76for the certificate chain. In this example, they are downloaded to a user downloads folder ofC:\USERS\ARUN|DOWNLOADS. An example of both are provided below:- certnew.cer - certificate
Reference: certnew.cer
-----BEGIN CERTIFICATE-----
...
-----END CERTIFICATE-----
- certnew.p7b - certificate chain
Reference: certnew.p7b

-----BEGIN CERTIFICATE-----
...
-----END CERTIFICATE-----
- certnew.cer - certificate
- The root certificate is needed. In this example, an existing server certificate named
cap-AD-CAexists and an existing root certificate ofvidm.cap.orgexists and both were issued by a signing authority of cap-AD-CA.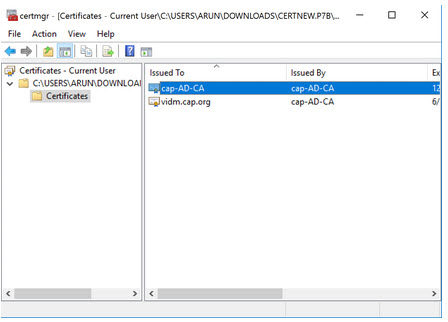
- Split this into the globalenvironment certificate and the root certificate by using the Copy To File function. The certificates involved are
certnew.cert,globalenvironmentcert.cert,rootcert.certand thecertnew.p7bcertificate chain.
- Import the globalenvironment certificate into the VMware Aria Suite Lifecycle Locker service:
- Click Locker from the VMware Aria Suite Lifecycle My Services page
- Click .
- The Import Certificate page appears. In the Name field, enter
globalenvironment.
- Using the extracted globalenvironment and root certificate as source, open Notepad ++ or any other text editor and create a certificate chain with two certificate sections: the server certificate content at the top followed by the root certificate content . The example below shows the two sections with details removed.
-----BEGIN CERTIFICATE-----
...
###server certificate content###
...
-----END CERTIFICATE-----
-----BEGIN CERTIFICATE-----
...
###root certificate content###
...
-----END CERTIFICATE-----
- Copy and paste the private key content from the .pem file created by the generated CSR into the Private Key section of the Import Certificate form.
- Copy and paste the content with the two certificate sections into the Certificate Chain section of the Import Certificate form.
- Verify the certificate chain by using a verification tool such https://tools.keycdn.com/ssl.
- Click Import to import the new globalenvironment certificate into VMware Aria Suite Lifecycle.
A sample populated Import Certificate form is shown below.
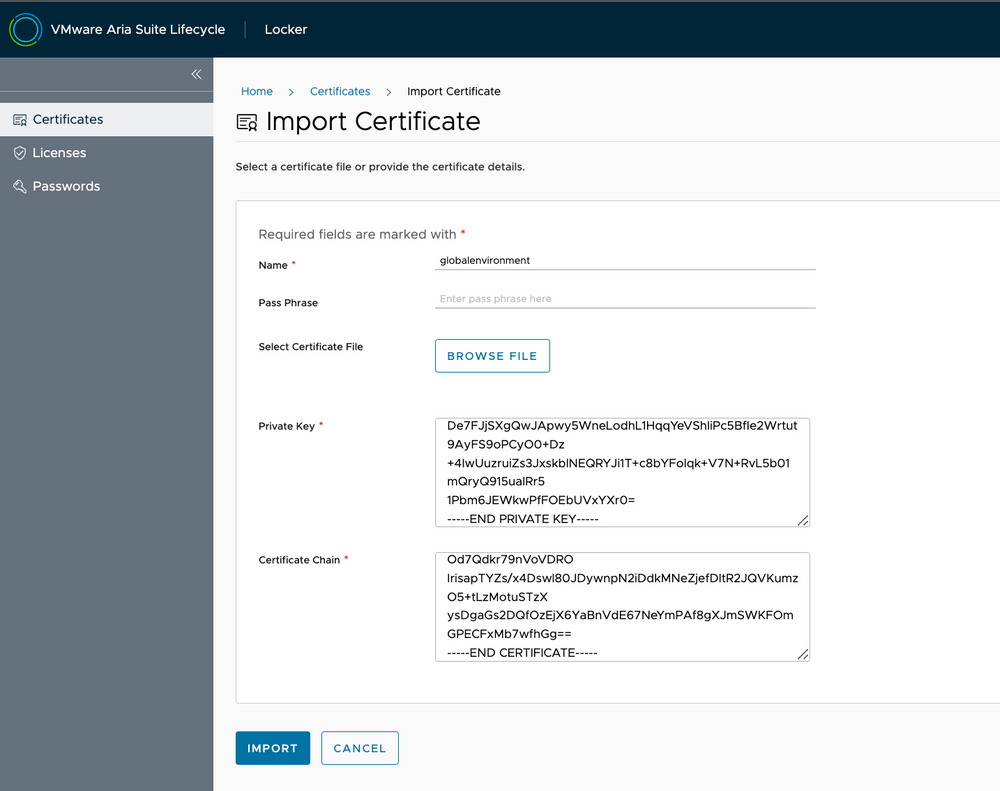
When the import is successful, the Certificate successfully added. statement appears, as shown below.

- You can display details about the successfully imported new certificate. A sample is shown below.
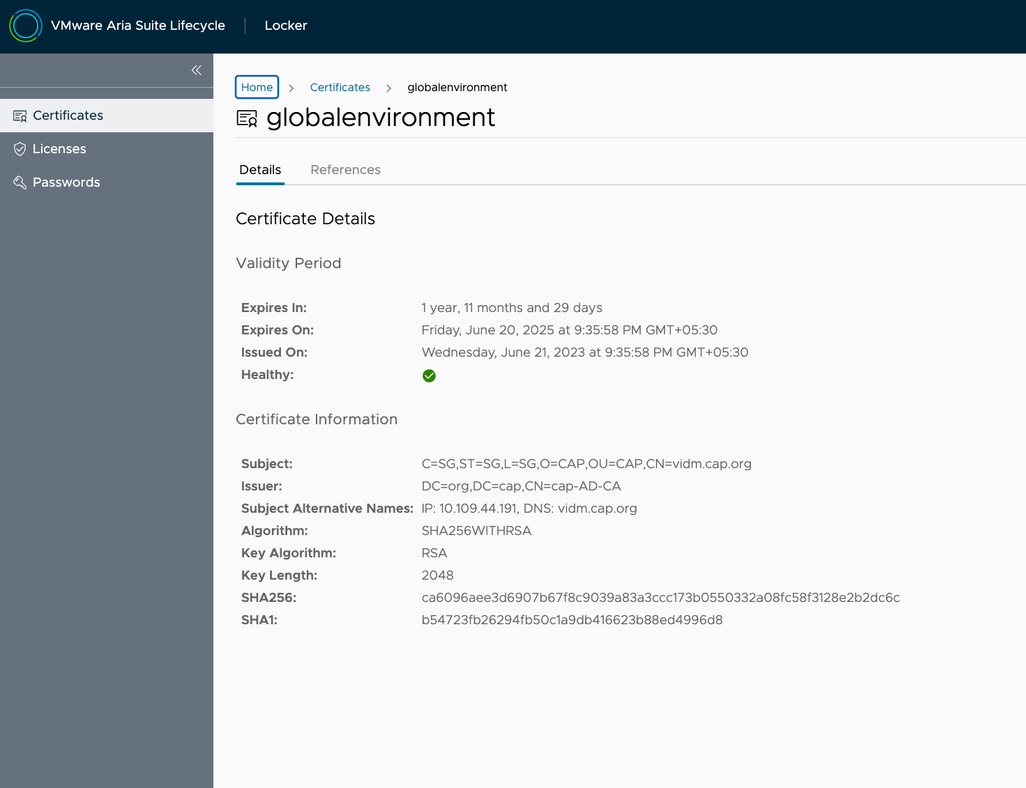
Create a snapshot of the environment
Before replacing your existing globalenvironment certificate with the new certificate, take a snapshot in the Lifecycle Operations service.
- From the VMware Aria Suite Lifecycle dashboard, click Lifecycle Operations.
- Click Environments and then click View Details on the globalenvironment tile.
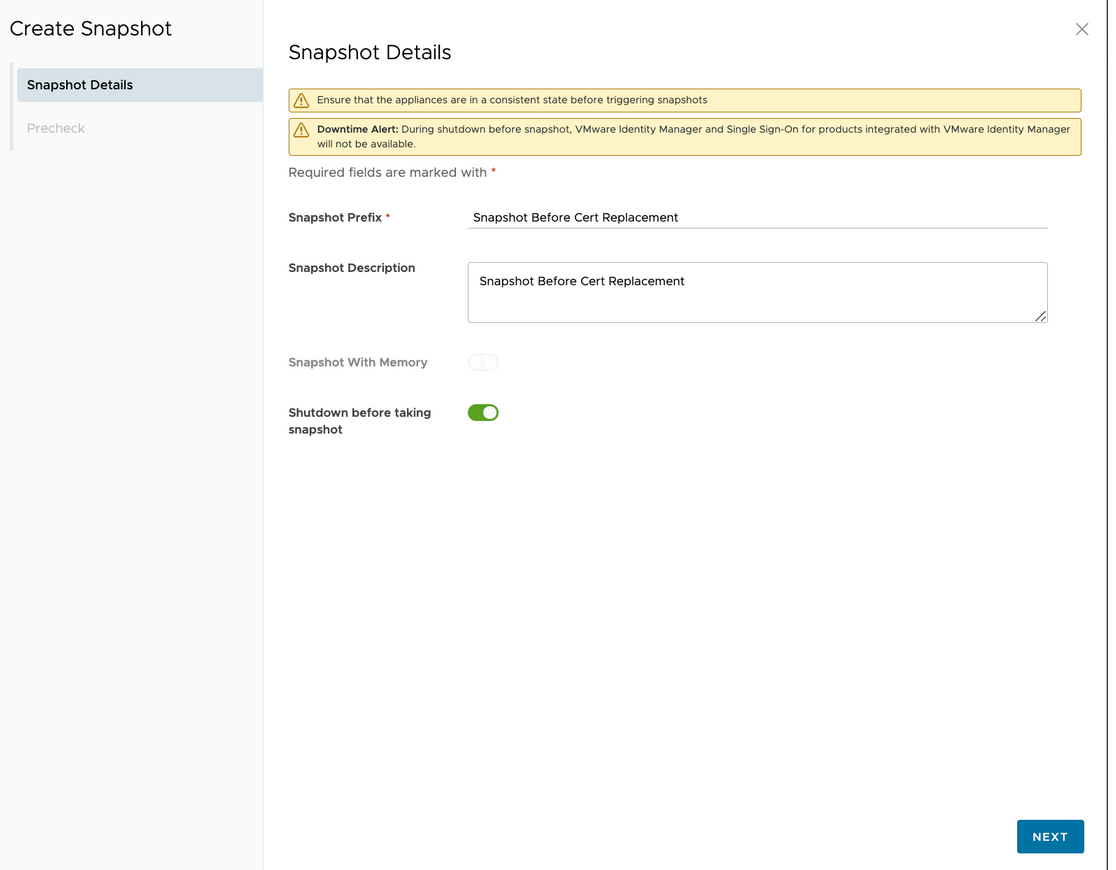
- Click the 3 dot ellipse (…) following the Change Admin Password option and select from the drop-down menu.
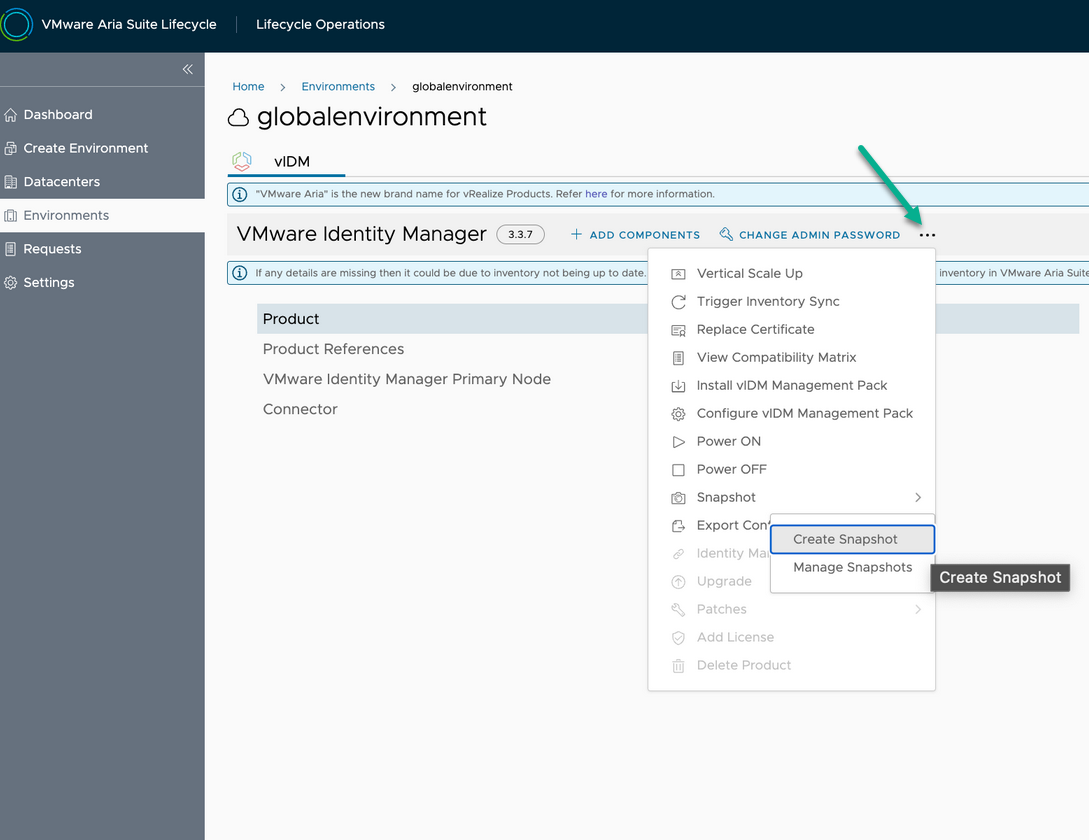
- For this example, enter Snapshot Before Cert Replacement in the Snapshot Prefix field Description fields.
- Switch the Shutdown before taking snapshot option to the on position and click Next.
- When prompted, click Run Precheck.
- When the precheck result is returned, click Finish.
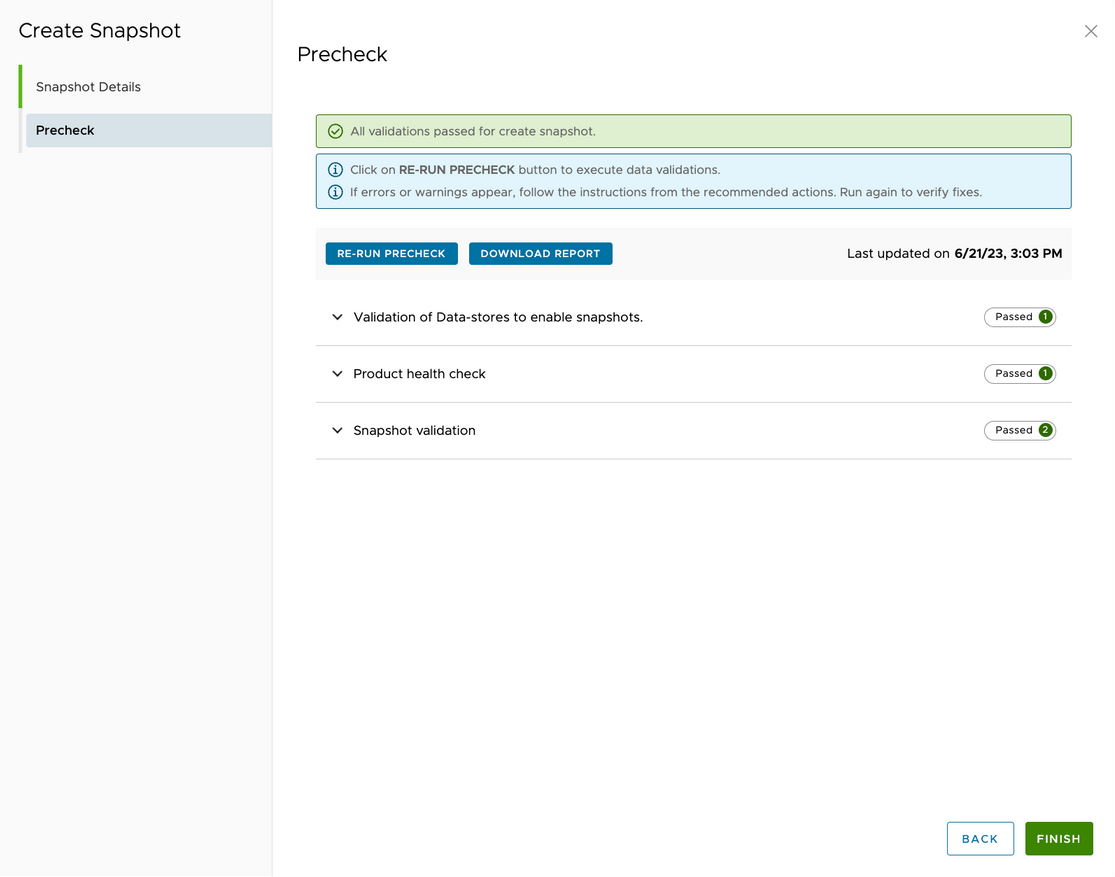
- After you click Finish, the Request Details page automatically appears and displays the progression of each stage of the pre-check process.
- When the snapshot request is complete, you can proceed to make the certificate replacement request.
Create the certificate replacement request
After you create the snapshot, you're ready to initiate the certificate replacement request and replace the existing standalone globalenvironment certificate with the new self-signed certificate.
- On the VMware Aria Suite Lifecycle My Services page, click Lifecycle Operations and then click Environments.
- Click View Details on the globalenvironment tile.
- Click the three dot icon (...) in the VMware Identity Manager row and click Replace Certificate from the drop-down menu.
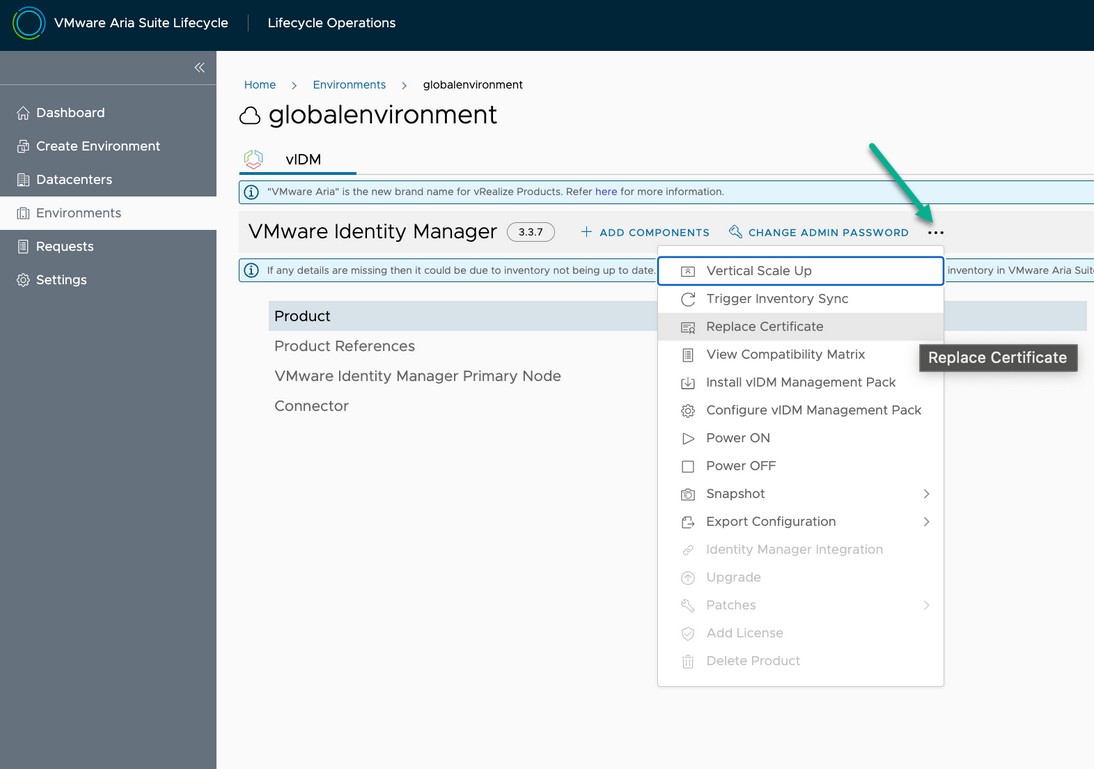
The Current Certificate details page appears. If you've never replaced the certificate, then this is the default certificate that was used during installation of the product.
- On the resultant Current Certificate details page, click Next.
The Select Certificate page appears.
- On the Select Certificate page, select globalenvironment from the drop-down menu.
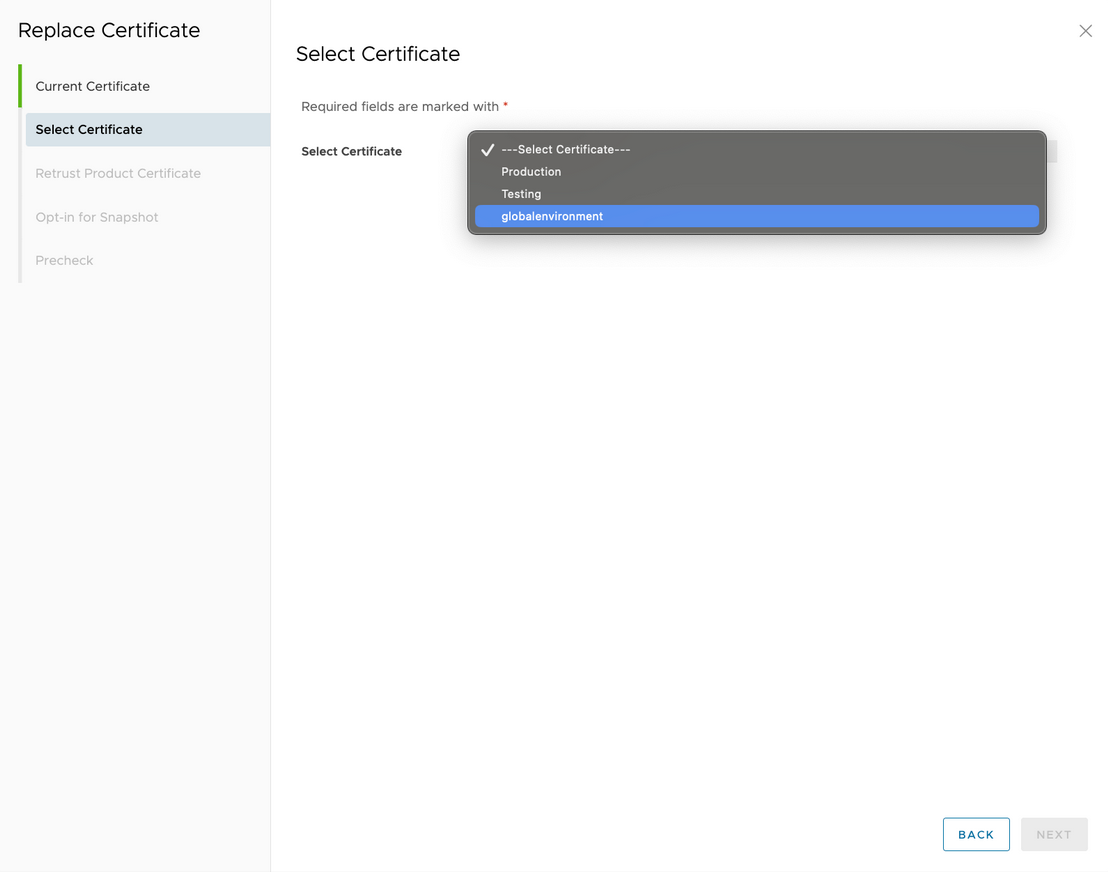
The Select Certificate details page appears.
- On the resultant Select Certificate details page, click Next.
The Retrust Product Certificate page appears.
- On the Retrust Product Certificate page, select all the products to be impacted by the retrust certificate action and then click Next.
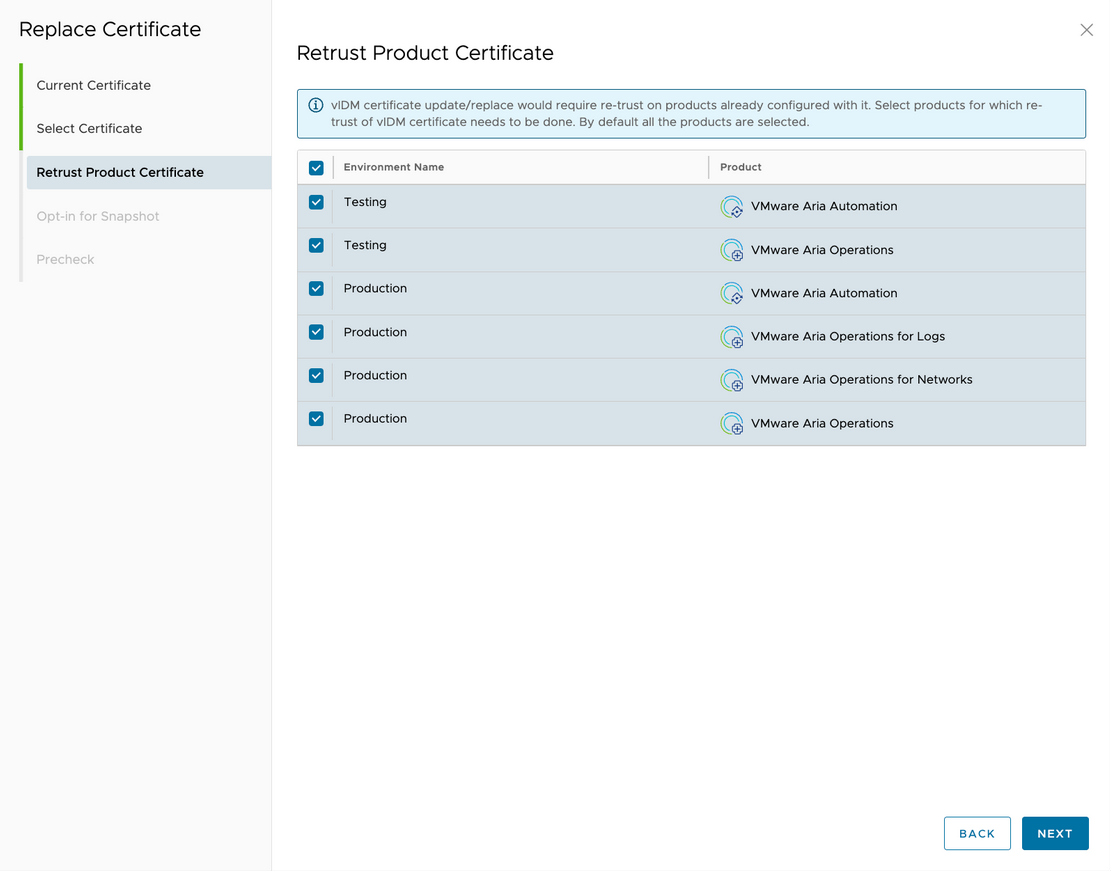
The Opt-in for Snapshot page appears.
- Click the Opt-in for Snapshot check box to enable the option and then click Next.
The Precheck page appears.
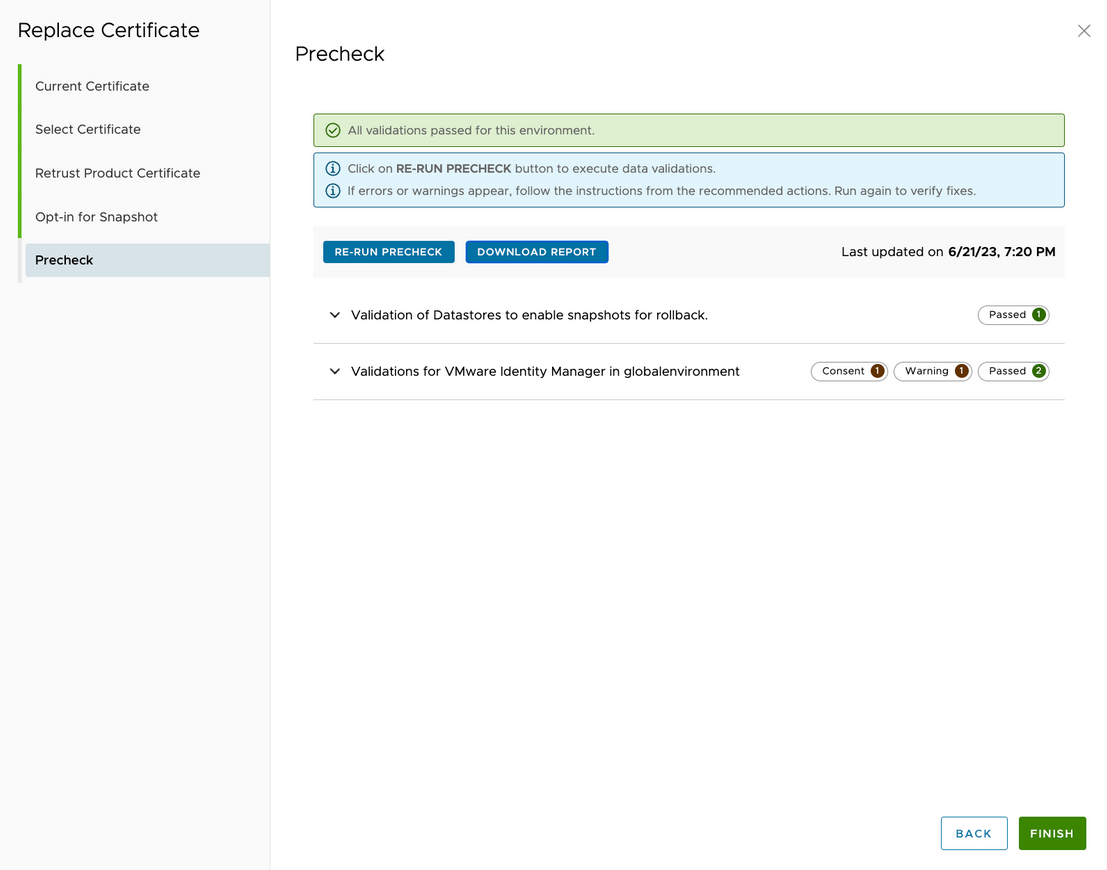
- On the Precheck page, click Run Precheck.
- If you are prompted to consent to a validation request, click Re-run Precheck.
Review the pre-check results and take any further actions that are needed as prompted on-screen.
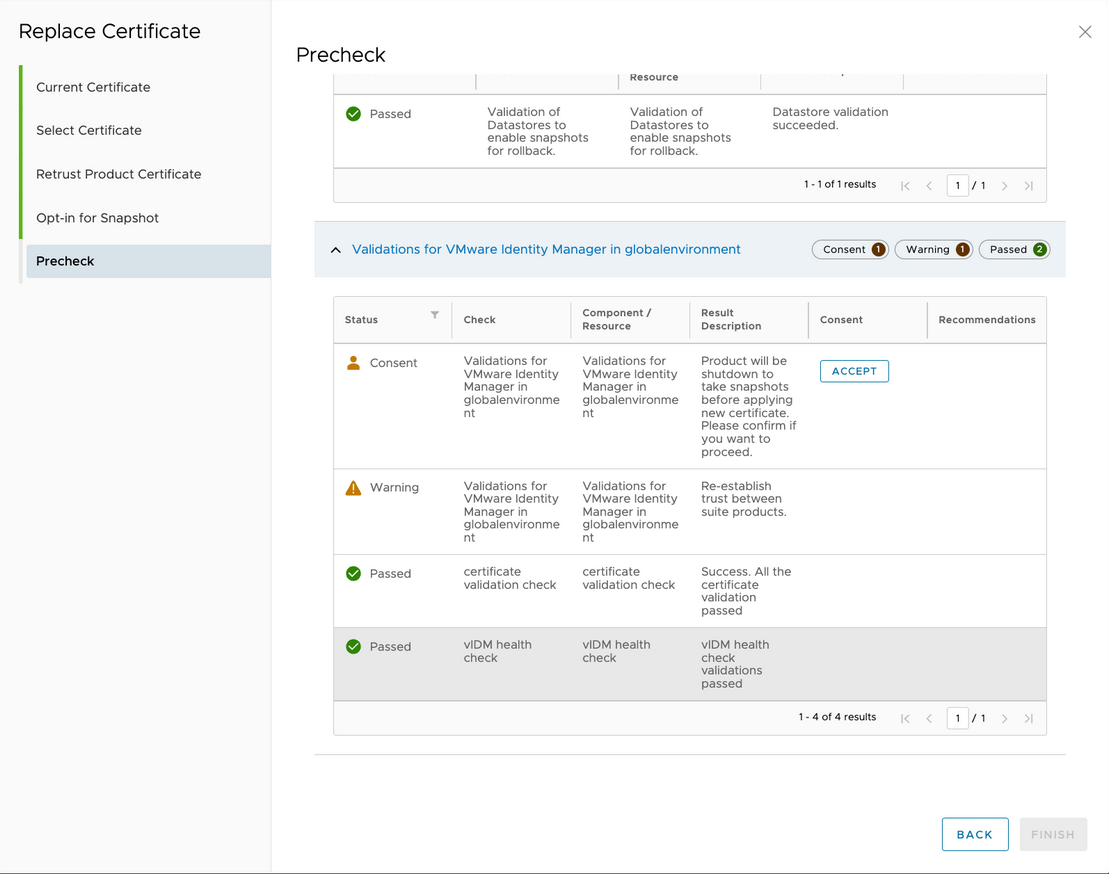
- When all pre-check validations are complete, click Finish to submit the request.
- You can monitor the request details status by selecting Requests in the Lifecycle Operations left pane menu. The stages of the replace certificate action are detailed below.
Stage-1 Gracefully Shut Down VMware Identity Manager Start Validate VMware Identity Manager Certificate Start graceful shutdown of VMware Identity Manager Prepare graceful shutdown of VMware Identity Manager nodes Check power states of VMware Identity Manager nodes Validate SSH credentials of VMware Identity Manager nodes Update VMware Identity Manager node types Extract vMoid of VMware Identity Manager nodes Verify Identity Manager Appliance Health Check Verify Identity Manager Postgres Health Check Validate VMware Identity Manager node types VMware Identity Manager stop horizon service VMware Identity Manager stop Elasticsearch / Opensearch service VMware Identity Manager stop pgpool service VMware Identity Manager stop postgres service Shutdown VMware Identity Manager nodes Final Stage-2 Create Node Snapshot Start Get vMoid using Virtual Machine Virtual Machine Snapshot using vMoid Final Stage-3 Power on VMware Identity Manager Node(s) Start Validate VMware Identity Manager Certificate Start Power On of VMware Identity Manager nodes Prepare required inputs to power on VMware Identity Manager Node(s) Extract vMoid Power On VMware Identity Manager Node Check Hostname/IP status of VMware Identity Manager Get node endpoint of VMware Identity Manager Final Stage-4 Remediate VMware Identity Manager Start Start remediation of VMware Identity Manager Prepare required inputs to remediate VMware Identity Manager Validate ssh credentials of VMware Identity Manager VMware Identity Manager start pgpool service Update VMware Identity Manager node types Check primary node status of VMware Identity Manager VMware Identity Manager Appliance Health Check Update VMware Identity Manager node details with VMware Aria Suite Lifecycle's inventory Final Stage-5 Product Health Check Start Product Health Check prepare vIDM health pre-Check Final Stage-6 Update Certificate on VMware Identity Manager Start Validate VMware Identity Manager Certificate Start update of Certificate on VMware Identity Manager nodes Update Certificate on VMware Identity Manager nodes Final Stage-7 Trust vIDM Certificate in LCM Start Add vIDM certificate to VMware Aria Suite Lifecycle trust store Final Stage-8 Revert to Node Snapshot Start Get vMoid Final Stage-9 Power On VMware Identity Manager Nodes Start Validate VMware Identity Manager Certificate Final Stage-10 Remediate VMware Identity Manager Nodes Start Start remediation of VMware Identity Manager Prepare required inputs to remediate VMware Identity Manager Validate ssh credentials of VMware Identity Manager VMware Identity Manager start pgpool service Update VMware Identity Manager node types Check primary node status of VMware Identity Manager VMware Identity Manager Appliance Health Check Update VMware Identity Manager node details with VMware Aria Suite Lifecycle's inventory Final Stage-11 Product Health Check Start Product Health Check prepare Final Stage-12 Delete Node Snapshot Start Get vMoid Delete Snapshot Delete Node Snapshot Final Stage-13 Locker Reference Update Start Locker reference update init Locker reference inventory update Final Stage-14 Product Replace Update Notification Start Start replace update notification Replace certificate notification Final Stage-15 Validate if VMware Identity Manager re-trust is required on products Start Start Validate if VMware Identity Manager re-trust is required on products Validate if VMware Identity Manager re-trust is required on products Final Stage-16 Update VMware Identity Manager Auth provider hostname Start Start update auth provider hostname Trust VMware Identity Manager Certificate in VMware Aria Suite Lifecycle Update VMware Identity Manager Auth provider hostname Final Stage-17 Retrust VMware Identity Manager on VMware Aria Automation Start Start VMware Identity Manager flow Check if vIDM root certificate is present on VMware Aria Automation Check for VMware Identity Manager availability Check for VMware Identity Manager Login Token Check for VMware Identity Manager Default Configuration User availability Configure VMware Identity Manager for VMware Aria Automation Configure Load Balancer for VMware Aria Automation Initialize VMware Aria Automation Update VMware Identity Manager allowed redirects Final VMware Aria Operations reconfigure vidm Start Start VMware Aria Operations - VMware Identity Manager reconfigure Reconfigure VMware Identity Manager Prepare Identity Manager catalog task Final VMware Aria Operations for Logs retrust vidm Start Start VMware Aria Operations for logs retrust vIDM Prepare Nodes Final VMware Aria Operations for Networks Reconfigure vidm Start Start VMware Aria Operations for Networks generic Validate and fetch VMware Aria Operations for Networks vidm client details vIDM get O Auth client details Reconfigure vIDM hostname Final Stage-18 Re-trust VMware Identity Manager on VMware Aria Automation Start Start VMware Identity Manager flow Check if vIDM root certificate is present on VMware Aria Automation Check for VMware Identity Manager availability Check for VMware Identity Manager Login Token Check for VMware Identity Manager Default Configuration User availability Configure VMware Identity Manager for VMware Aria Automation Configure Load Balancer for VMware Aria Automation Initialize VMware Aria Automation Update VMware Identity Manager allowed redirects Final VMware Aria Operations reconfigure vidm Start Start VMware Aria Operations - VMware Identity Manager reconfigure Reconfigure VMware Identity Manager Prepare Identity Manager catalog task Final - When complete, confirm that the certificate is in use by clicking Locker from the My Services page of VMware Aria Suite Lifecycle and then select .

You can also view VMware Aria Suite Lifecycle and VMware Identity Manager logs. The log statement
Applied certificate to vIDM..indicates that the VMware Identity Manager services are being restarted.