


The tab explains the basic settings for the pool. The exact options shown can vary depending on the types of clouds configured in Avi Load Balancer.
In Create Pool window, click General tab. You can set the following details in General tab while creating a pool.
Enable Pool: Check this box to enable the pool. If you do not enable this box, all open connections and pause health monitors will be terminated.
Name: Specify the name of the pool. The special character “$” is not allowed in the Name field.
Description: Specify the description of the pool.
Type: Select General Application option as type of the pool.
You can set the cloud and VRF context by clicking SET CLOUD & VRF button. Select the required cloud from Cloud drop-down menu and select the VRF Context that the pool is bound to. The pool inherits the VRF context of the virtual service. Click Set.
Once you set the cloud and VRF context, you cannot change it.
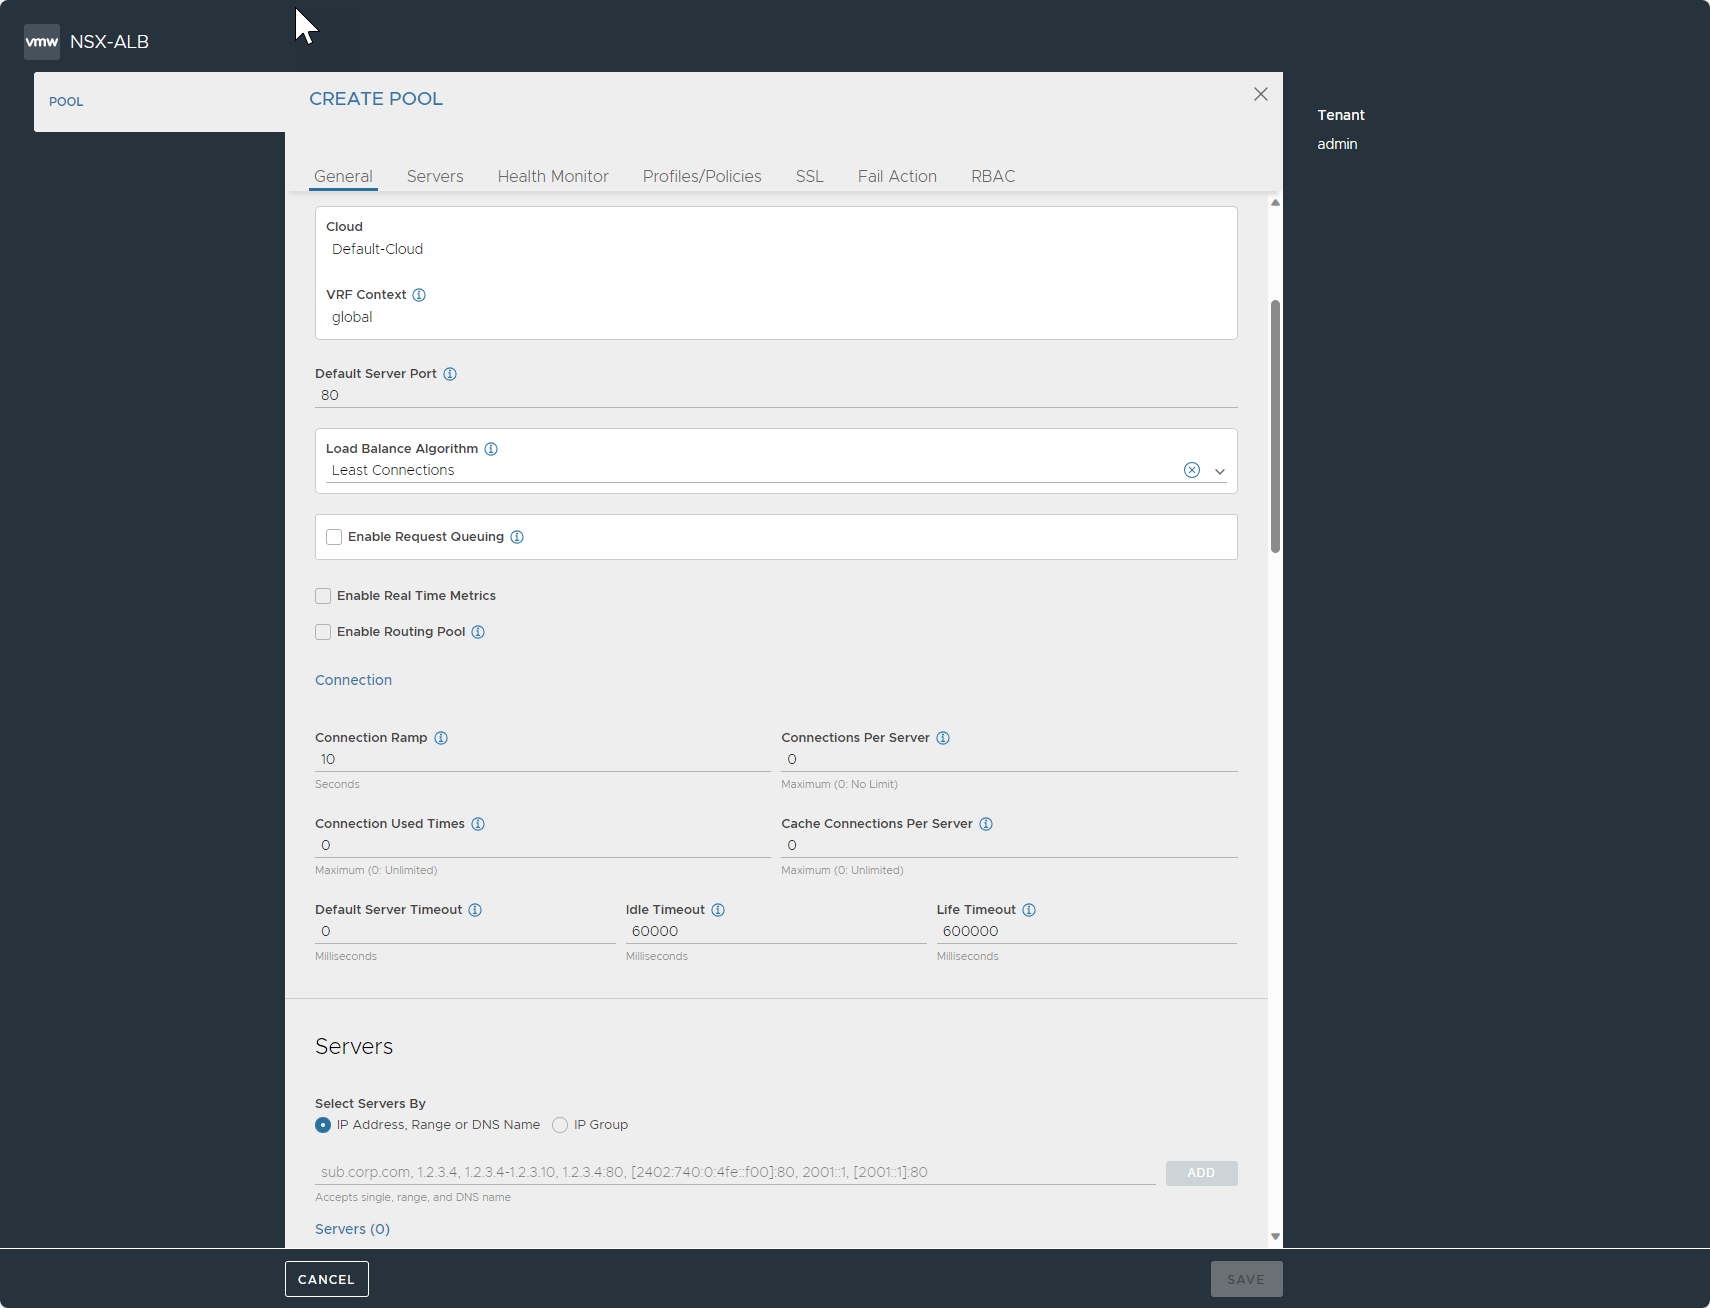
Default Server Port: If the server member has no pool defined, new connections to servers will use this destination service port. The default port is 80, unless it is either inherited from the virtual service (if the pool was created during the same workflow), or the port was manually assigned. The default server port setting may be changed on a per-server basis by editing the Service Port field for individual servers in the Step2: Servers tab.
Load Balance Algorithm: The load balancing algorithm will pick a server within the pool's list of available servers. You can select the required option from the drop-down menu:
Consistent Hash: If you select this option, you will have to select the criteria used as a key for determining the hash between the client and the server. New connections are distributed across the servers using a hash that is based on a key specified in the field that appears below the Load Balance field or (as of release 17.2.4) in a custom string. This algorithm inherently combines load balancing and persistence, which minimizes the need to add a persistence method. This algorithm is best for load balancing large numbers of cache servers with dynamic content. It is ‘consistent’ because adding or removing a server does not cause a complete recalculation of the hash table. For instance, for cache servers, it will not force all caches to have to re-cache all content. If a pool has nine servers, adding a tenth server will cause the pre-existing servers to send approximately 1/9 of their hits to the newly-added server based on the outcome of the hash. Hence persistence may still be valuable. The rest of the server’s connections will not be disrupted. The following are the options available in the drop-down menu:
Callid: This field specifies the call ID field within the SIP header. With this option, SIP transactions with new call IDs are load balanced using consistent hash, while existing call IDs are retained on the previously chosen servers. The state of existing call IDs are maintained for an idle timeout period defined by the ‘transaction timeout’ parameter in the application profile. The state of existing call IDs are relevant for as long as the underlying TCP/ UDP transport state for the SIP transaction remains the same.
Custom Header: Specify the HTTP header to use in the Custom Header field, such as referer. This field is case sensitive. If the field is blank or if the header does not exist, the connection or request is considered a miss, and will hash to a server.
Custom String: This is provided by the user through the
avi.pool.chashDataScript function.Source IP Address of the client.
Source IP Address and Port of the client.
URI: This includes the host header and the path, for instance, www.acme.com/index.htm.
Core Affinity: Each CPU core uses a subset of servers, and each server is used by a subset of cores. Essentially it provides a many-to-many mapping between servers and cores. The sizes of these subsets are parameterized by the variable
lb_algorithm_core_nonaffinityin the pool object. When it is increased, the mapping increases up to the point where all servers are used on all cores. If all servers that map to a core are unavailable, the core uses servers that map to the next (with wraparound) core.Fastest Response: New connections are sent to the server that is currently providing the fastest response to new connections or requests. This is measured as time to first byte. In the End-to-End Timing chart, this is reflected as Server RTT plus App Response time. This option is best when the pool’s servers contain varying capabilities or they are processing short-lived connections.
Note:A server that is having issues, such as a lost connection to the datastore containing images, will generally respond very quickly with HTTP 404 errors. While using the fastest response algorithm, you need to enable a passive health monitor, which recognizes and adjusts for scenarios like this by taking into account the quality of server response, not just speed of response. There are several other factors beyond the load balancing algorithm that can affect connection distribution, such as connection multiplexing, server ratio, connection ramp, and server persistence.
Fewest Servers: Instead of attempting to distribute all connections or requests across all servers, Avi Load Balancer will determine the fewest number of servers required to satisfy the current client load. Excess servers will no longer receive traffic and may be either de-provisioned or temporarily powered down. This algorithm monitors server capacity by adjusting the load and monitoring the server’s corresponding changes in response latency. Connections are sent to the first server in the pool until it is deemed at capacity, with the next new connections sent to the next available server down the line. This algorithm is best for hosted environments where virtual machines incur a cost.
Least Connections: New connections are sent to the server that currently has the least number of outstanding concurrent connections. This is the default algorithm when creating a new pool and is best for general-purpose servers and protocols. New servers with zero connections are introduced gracefully over a short period of time through the Connection Ramp setting, which slowly brings the new server up to the connection levels of other servers within the pool.
Note:A server that is having issues, such as rejecting all new connections, will have a concurrent connection count of zero and be the most eligible to receive all new connections that will fail. Use the Least Connections algorithm along with the Passive Health Monitor which recognizes and adjusts for scenarios like this.
Least Load: New connections are sent to the server with the lightest load, regardless of the number of connections that server has. For instance, if an HTTP request that will require a 200 kB response is sent to a server and a second request that will generate a 1 kB response is sent to a server, this algorithm will estimate that, based on previous requests, the server sending the 1 kB response is more available than the one still streaming the 200 kB of data. The idea is to ensure that a small and fast request do not get queued behind a very long request. This algorithm is HTTP specific. For non-HTTP traffic, the algorithm will default to the Least Connections algorithm.
Round Robin: New connections are sent to the next eligible server in the pool in sequential order. This static algorithm is best for basic load testing, but is not ideal for production traffic because it does not take the varying speeds or periodic hiccups of individual servers into account.
Topology: This directs traffic to the best server based on the topology policy.
Enable Request Queuing: Check this box to enable request queue when pool is full. This configures HTTP request queuing, which causes Avi Load Balancer to queue requests received after a back-end server has reached its maximum allowed number of concurrent connections. Queuing HTTP requests provides time for new connections to become available on the server, thus avoiding the configured pool-down action.
Queue Length: Specify the minimum number of requests to be queued when pool is full.
Enable Real Time Metrics: Check this box to enable real time metrics for server and pool metrics.
Enable Routing Pool: Check this box to enable routing when this pool is selected to send traffic.
Connection Ramp: Specify the duration for which new connections will be gradually ramped up to a server recently brought online. This is useful for LB algorithms that are least connection based. Default value is set to ten.
Enabling this option by entering a number larger than 0 results in a graceful increase in the number of new connections sent to a server over the specified time period. For instance, assume that the load balancing algorithm is set to least connections and a pool has two servers with 100 connections each. Adding a third server would immediately overwhelm that third server by immediately sending the next 100 consecutive connections to it. Setting a connection ramp adds traffic to a new server in a manner similar to using a ratio. Over the specified period of time, the new server will receive an ever-increasing ratio of traffic in relation to its peers. For instance, setting the ramp to 4 seconds means that the new server will receive 1/4 of the traffic it would normally be given for the 1st second. By the 2nd second, the server will be receiving 1/2 the traffic it might otherwise have been given. After the 4-second ramp time has elapsed, the server will receive the normal amount of traffic as determined by the load balancing algorithm.
Connections Per Server: Specify the maximum number of concurrent connections allowed to each server within the pool. Default value is set to zero.
If all servers in the pool reach this maximum the virtual service will send a reset for TCP connections or silently discard new UDP streams unless otherwise specified in the Pool Down Action. As soon as an existing connection to the server is closed, that server is eligible to receive the next client connection. A value of 0 deactivates the connection limit.
The applied value must not be less than the number of Service Engines that the pool is placed on. It it is set to zero, then no limit is applied.
Connection Used Times: Specify the maximum number of times a connection can be reused. Default value is set to zero.
Cache Connections Per Server: Specify the maximum number of connections a server can cache. Default value is set to zero.
Default Server Timeout: Specify the time within which a server connection needs to be established and a request-response exchange completed between Avi and the server. By default, the value is set to zero, indicating that the default timeout is set to 60 minutes.
Idle Timeout: Specify the connection idle timeout. Default value is set to 60000.
