OAuth in Avi Load Balancer is configured through several steps including setting up the pool, authentication profile, SSO policy, and OAuth settings for the virtual service.
To configure OAuth using the UI,
Configuring the Pool
Create a Pool with Type as OAuth and configure backend servers as shown below:
Navigate to .
Click CREATE POOL or edit the existing pools.
Enter the Name of the pool.
-
Select the Type as Oauth.
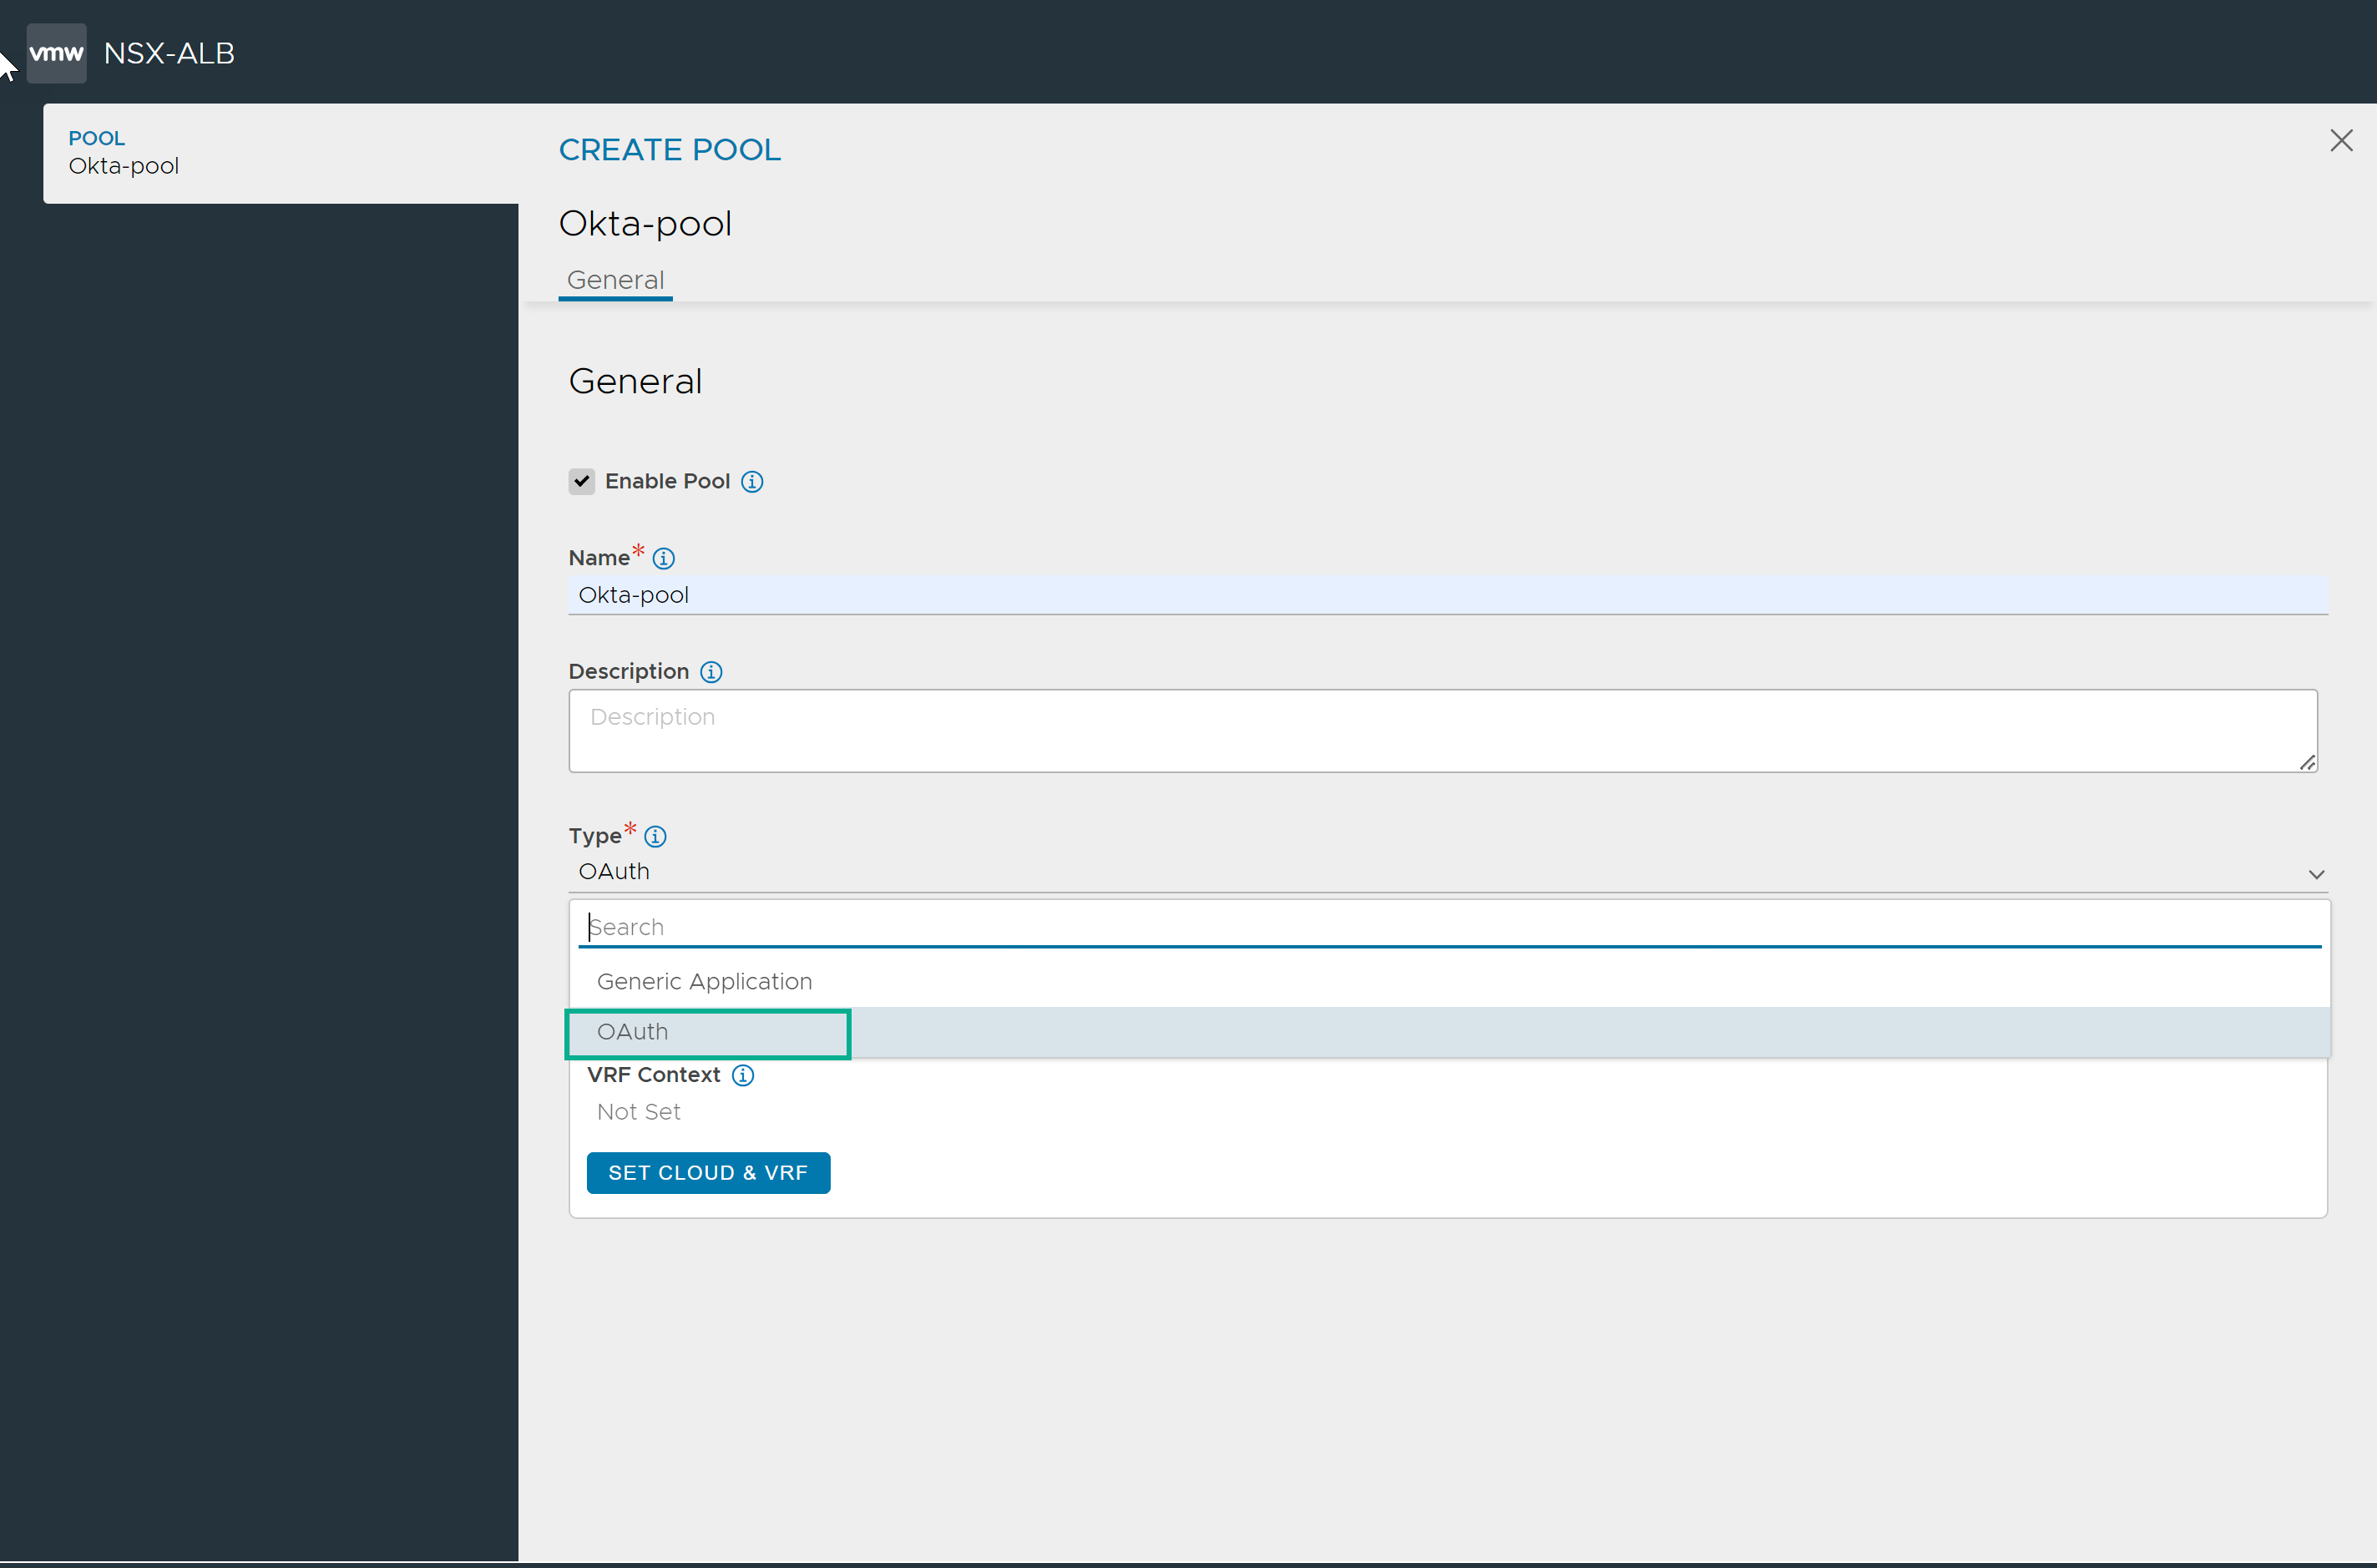
Configure the pool as required. For more information, see Create Pool.
Under the Servers tab, enter the details in the Select Servers By field and click ADD.
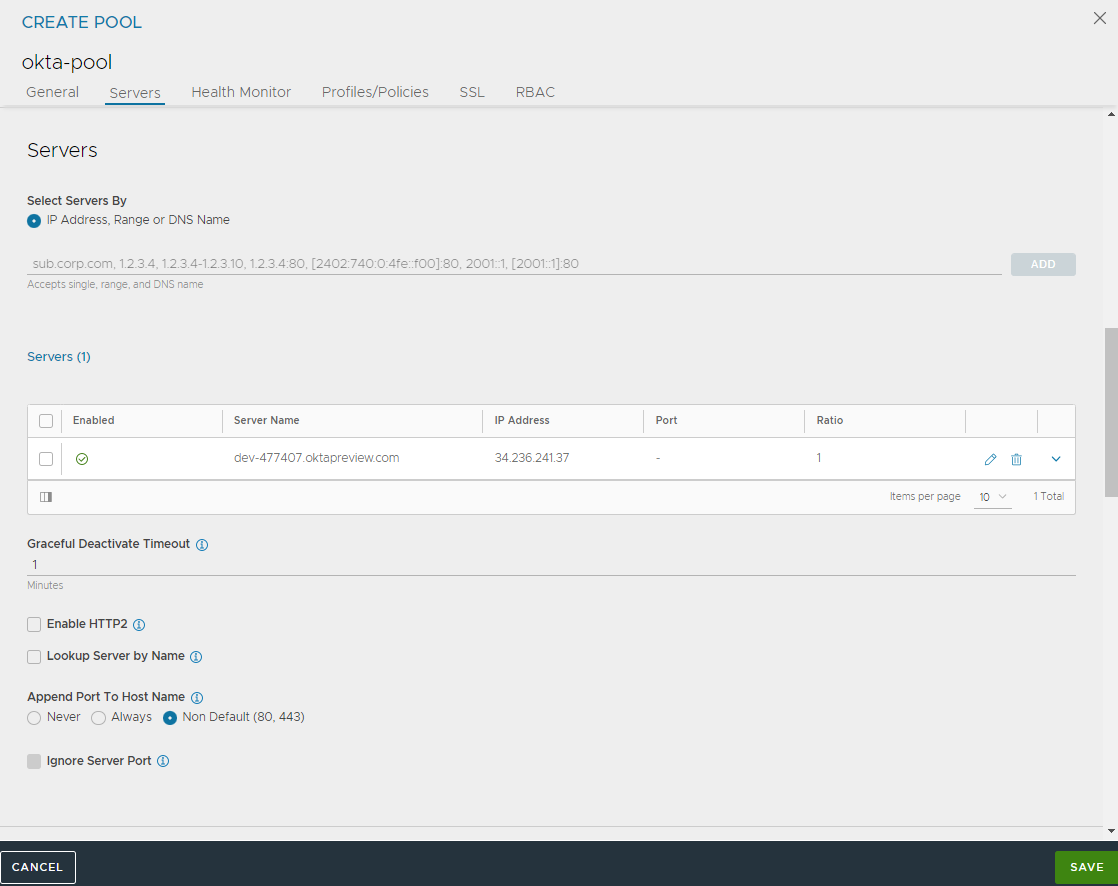
Click Save.
Configuring Authentication Profile
In the Authentication profile, configure the endpoints for OAuth authentication, including authorization and token endpoints. You can either import the endpoints or enter the details manually.
To configure the Authentication Profile,
Navigate to .
Click CREATE.
Enter the Name and select the Type as OAuth/OIDC.
Perform one of the following steps to configure the endpoints:
-
To configure and retrieve the endpoints automatically, enter the URL in the Import Endpoints and click IMPORT.
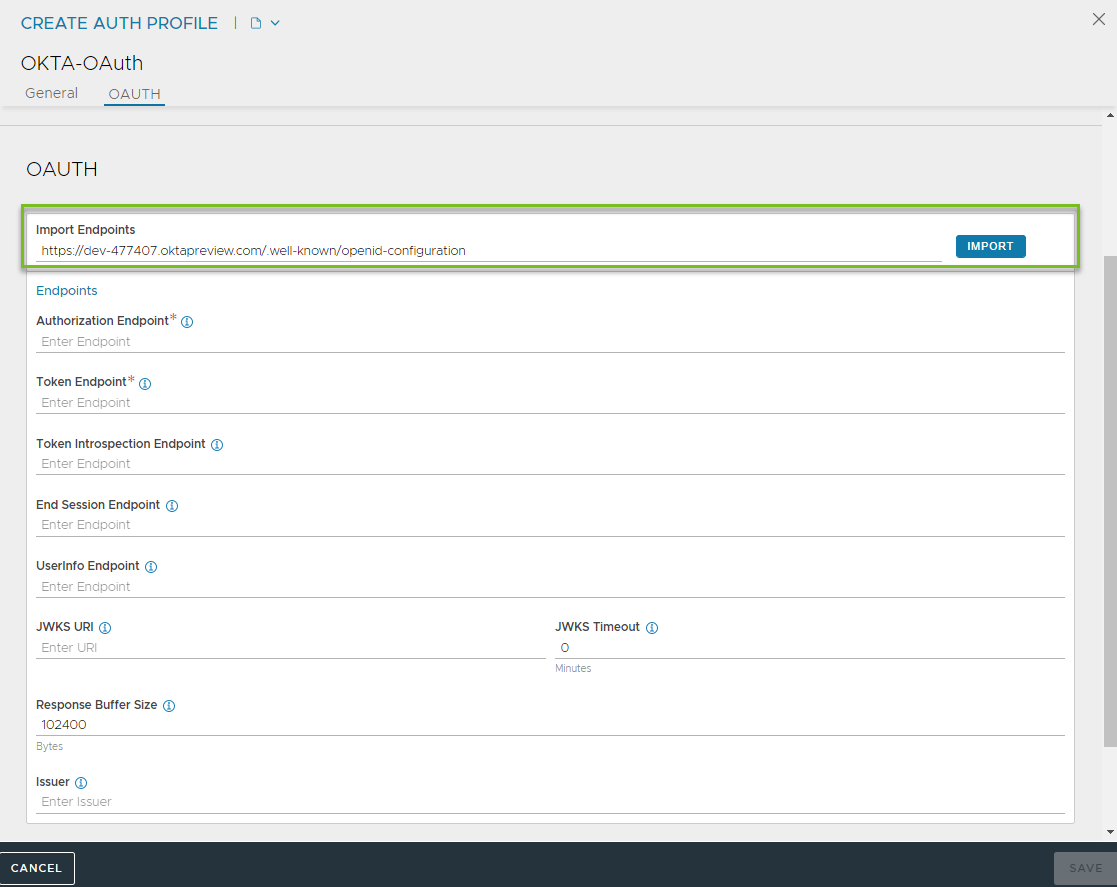
To configure the endpoints manually, enter the required details.
-
Click Save.
Configuring SSO Policy
Create an SSO Policy of type OAuth/OIDC as shown below,
Navigate to .
Click CREATE.
Enter the Name of the SSO Policy.
-
Select OAuth/OIDC as the SSO Policy Type.
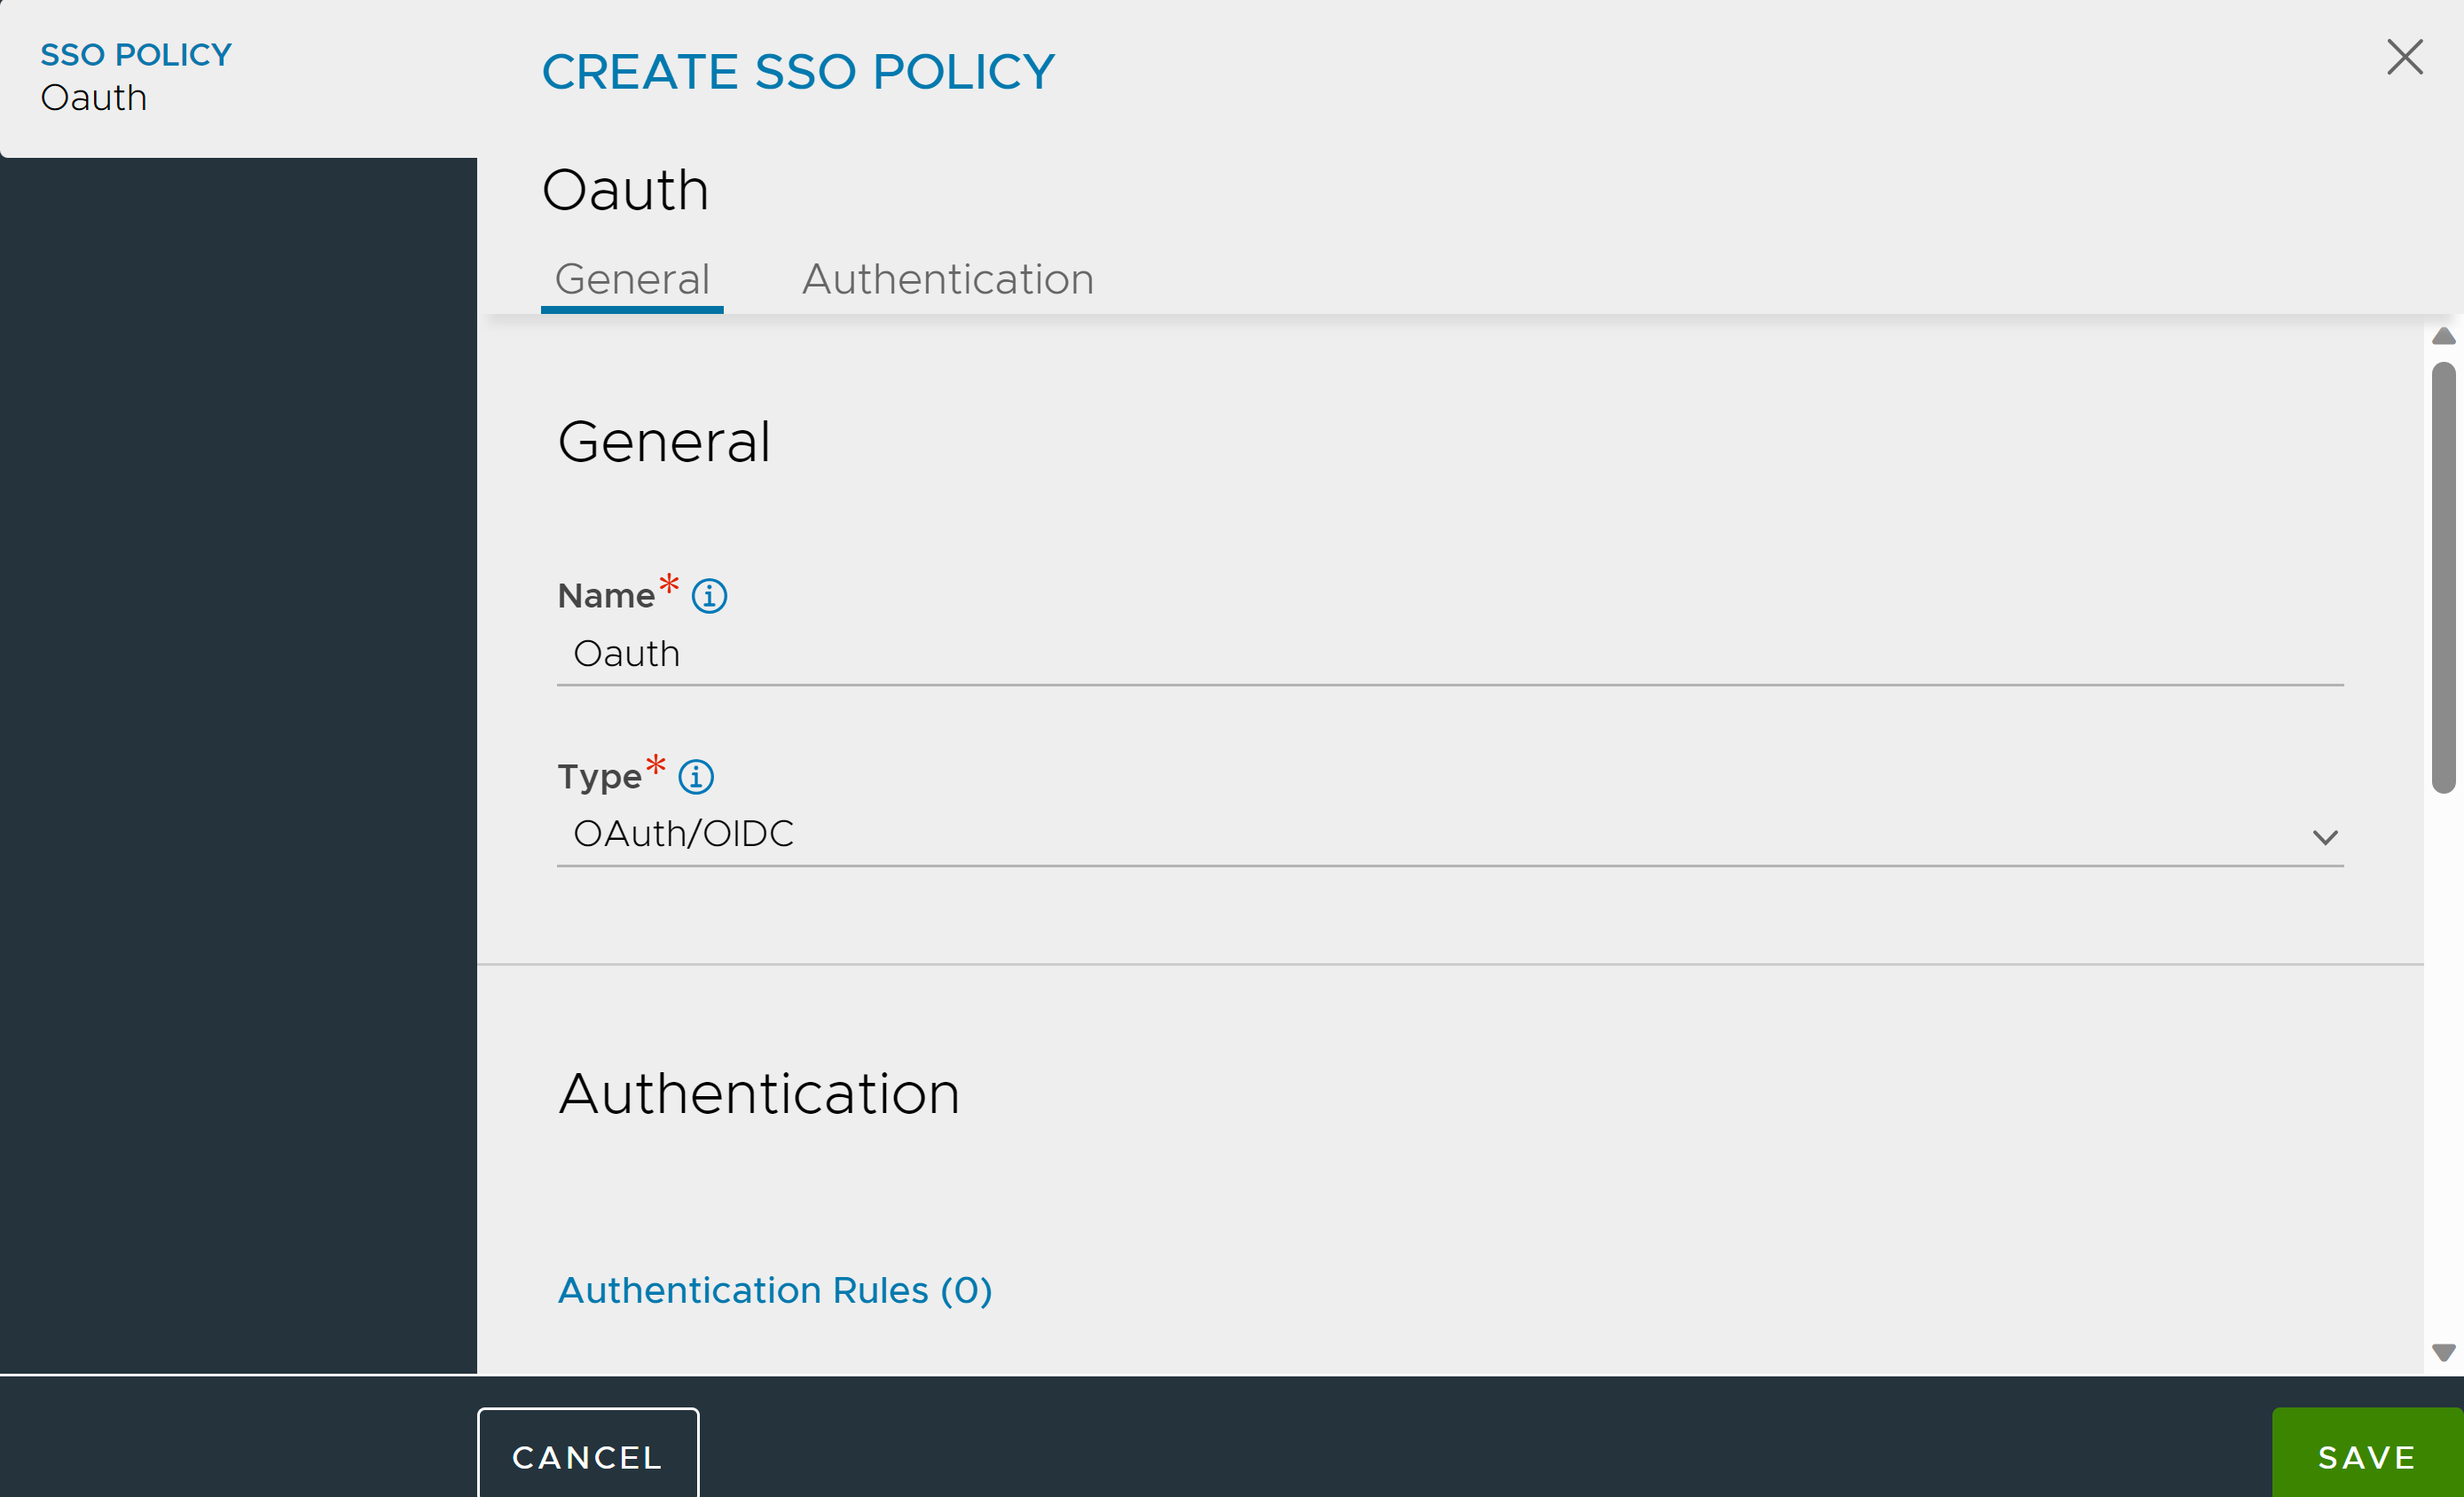
Under Authentication Rules, click Add and configure the Authentication Rules as required.
Under Authorization Rules, click Add and configure the Authorization Rules as required.
Click Save.
Configuring the Virtual Service for OAuth
Create a new virtual service or edit an existing one where you want to enable OAuth authentication,
Navigate to .
Click Create or edit the existing virtual service.
Under Settings, select the Pool created for OAuth.
Under Policies, click the Access tab and select OAuth
Select the SSO Policy created for OAuth.
Select the Authentication Profile created for OAuth.
To limit access to the app, click Add Scopes and enter the Scope Name.
-
Configure the other options as shown below:
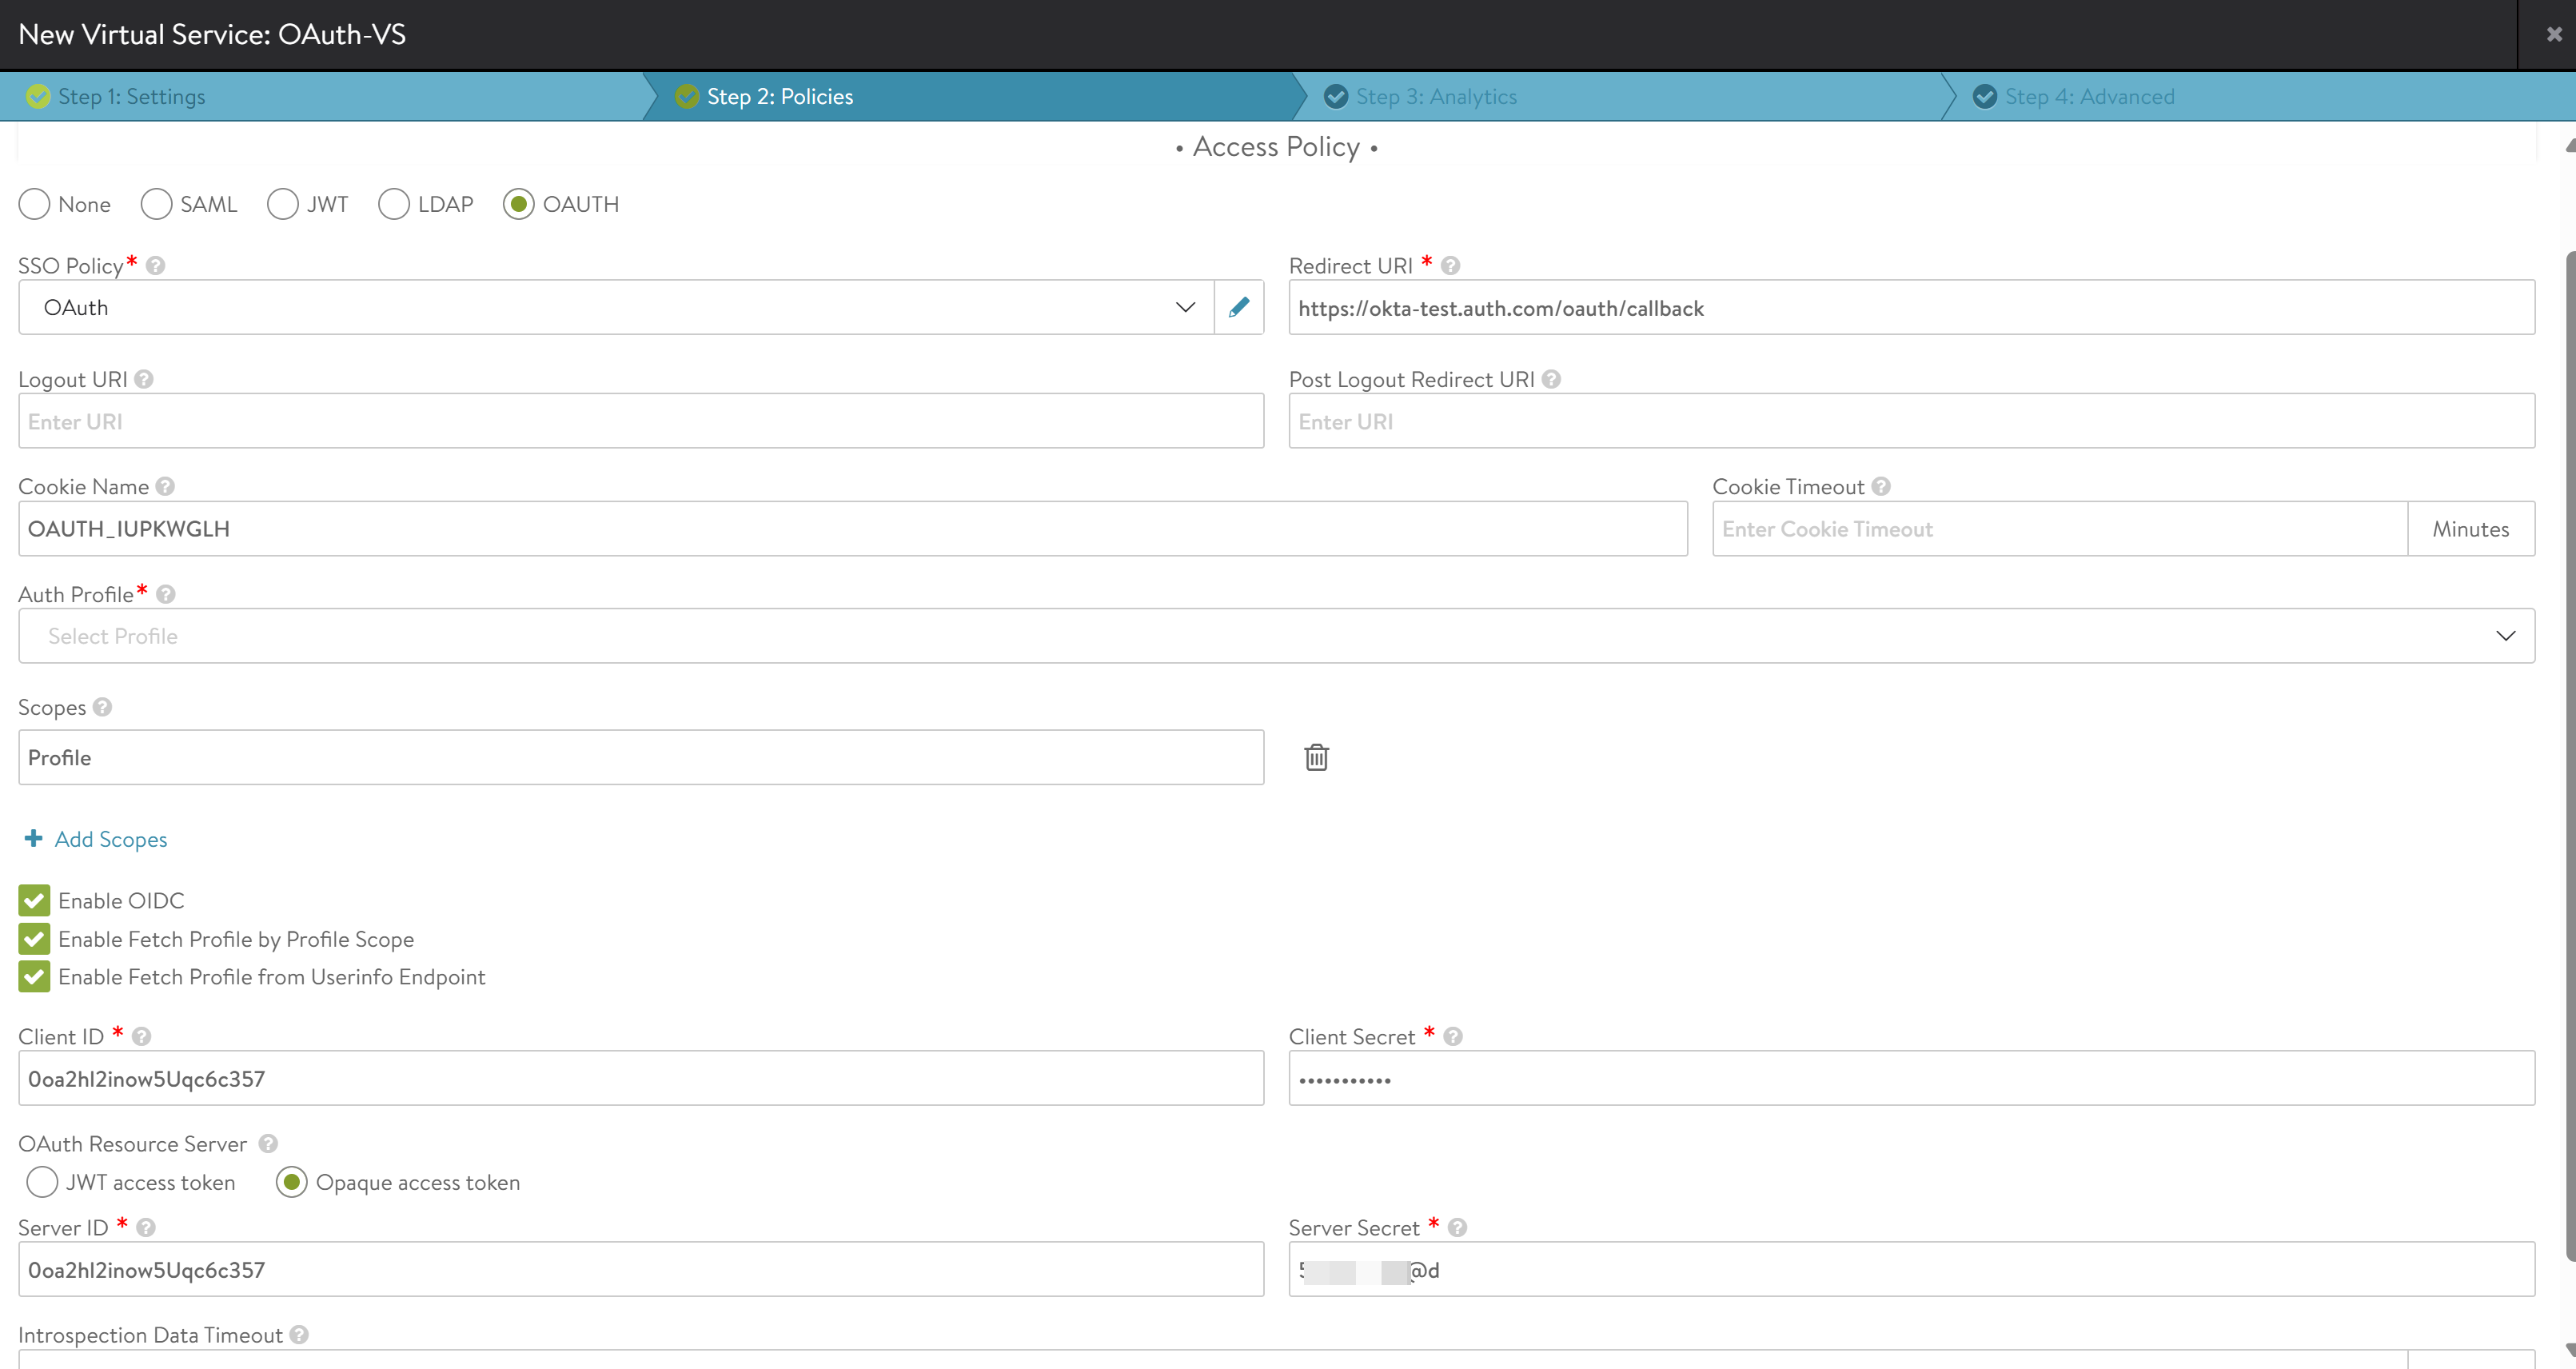
Click Save.
When configuring OAuth virtual services using the UI, at least one scope needs to be configured. If no scopes are required for the deployment, then configure a placeholder scope in the UI and remove it later using the CLI.