


To configure CSRF protection in Avi, the following are the main steps:
Creating a CSRF policy
Binding the CSRF policy to the Virtual Service
Enabling HTTP Session in advanced settings of the Virtual Service
Configuring Extra Shared Config memory in the Service Engine Group that is bound to the Virtual Service.
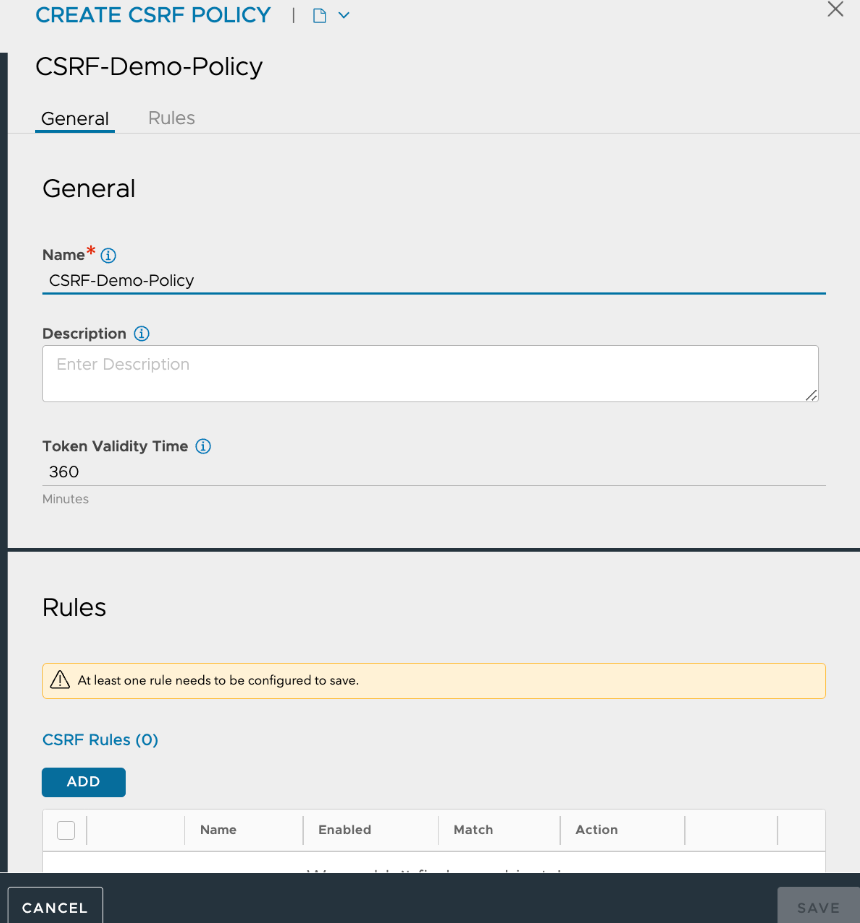
Creating CSRF Policy
Log in to Avi Load Balancer UI. Navigate to Templates > Security > CSRF policy , and click Create. Enter the following details:
Name: Enter Policy Name
Token Validity Time: This parameter controls how often the CSRF token should rotate, with tokens being acceptable for double this time. Token Validity time can be left as it is or changed as per the requirements.
2. Select the ADD option under CSRF Rules to add a rule. While creating rules, different options under match criteria can be used. For illustration purposes, the Client IP address is used in the sample configuration below.
The other options under the match criteria are the HTTP method and path.
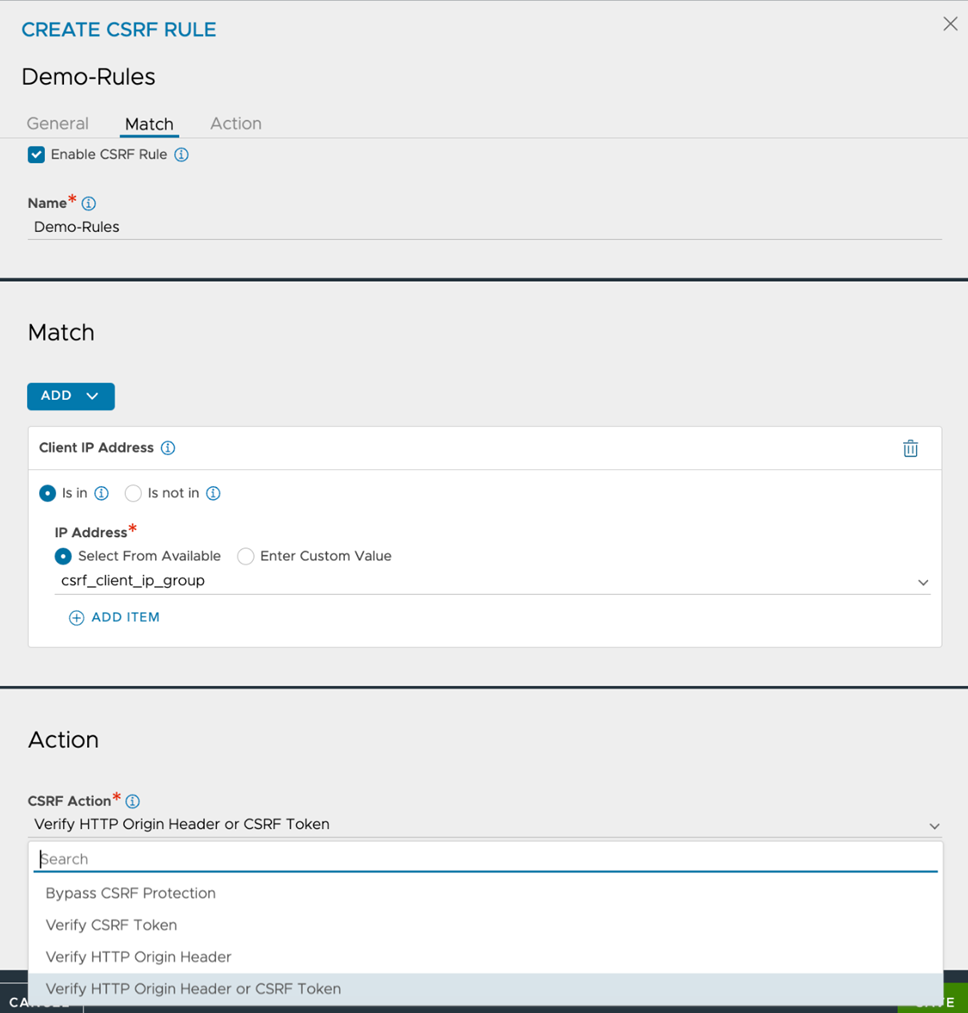
3. Select the required action to be taken if the request matches the match criteria. The various options available under CSRF Action are as follows (shown in the screenshot above):
Bypass CSRF protection: The request is allowed without CSRF verification.
Verify CSRF Token: Confirms that the request includes a valid CSRF token in the request body, which is essential for HTML form submissions.
Verify HTTP Origin Header: Checks the request's HTTP Origin header to ensure it matches the expected domain, commonly used for AJAX requests to validate their legitimacy.
Verify HTTP Origin Header or CSRF Token: Initially validates the HTTP Origin header; if it fails, the server then verifies the CSRF token. This is a combined approach for enhanced security.
4. Click Save.
5. Click Save.
Binding CSRF policy to Virtual Service
To bind the CSRF policy to the Virtual Service, follow the steps below:
Go to Applications> Virtual service.
Click Edit.
Bind the policy as shown below:
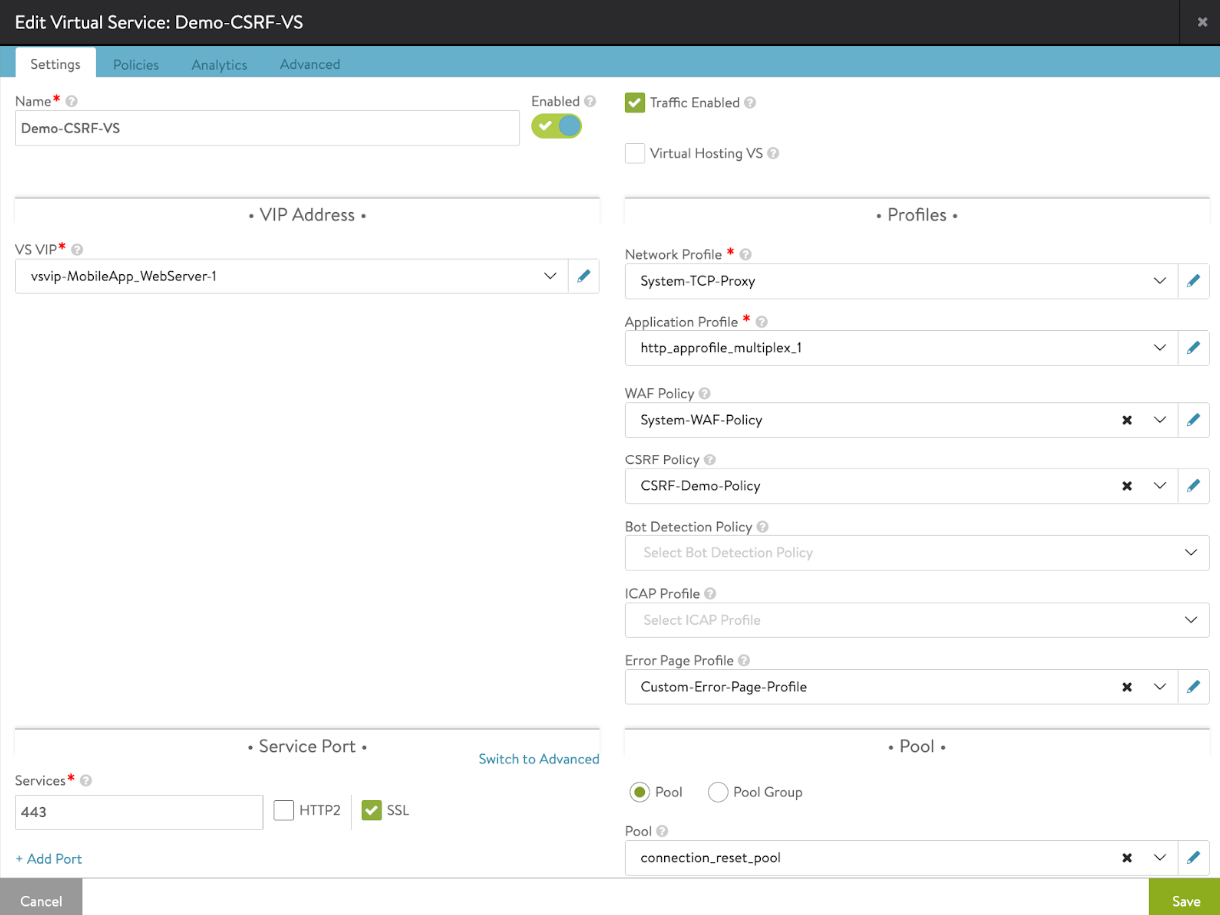
Click Save.
Enabling HTTP session in Virtual Service settings
If the HTTP session option is enabled, a session cookie will be added to HTTP responses and a persistent key-value store will be activated to store that session.
To enable the HTTP session option, follow the steps below:
Go to Applications> Virtual services.
Edit the Virtual Service using the pencil icon
Select the Advanced option and enable the Enable HTTP session option.
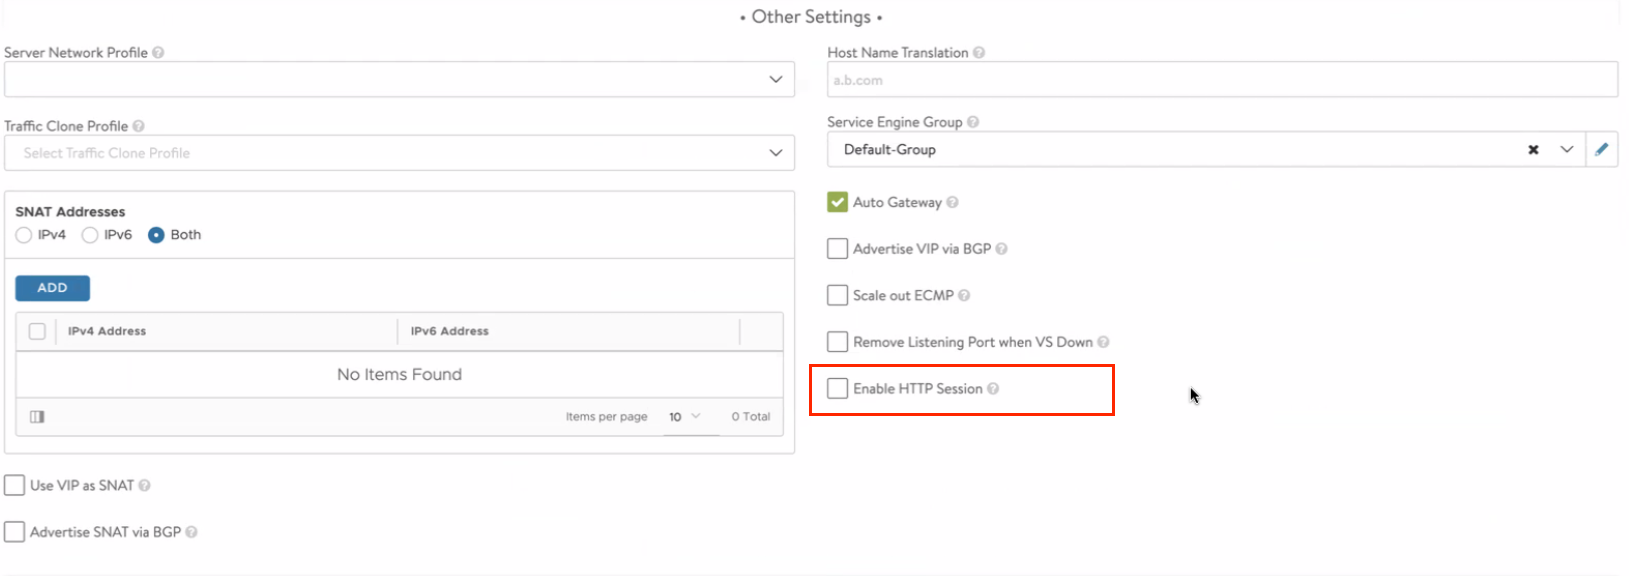
Click Save.
Configuring Extra Shared Config memory in the Service Engine Group
Follow the below steps to configure extra shared configuration memory in the Service Engine group that is bound to the Virtual Service.
Navigate to Applications> Virtual services and edit the Virtual Service using the pencil icon.
Click on the Advanced tab and edit the Service Engine Group.

Specify Extra Shared Config memory. It should be at least 500 MB for CSRF protection. For more information on Extra Shared Memory, see Extra Shared Memory.
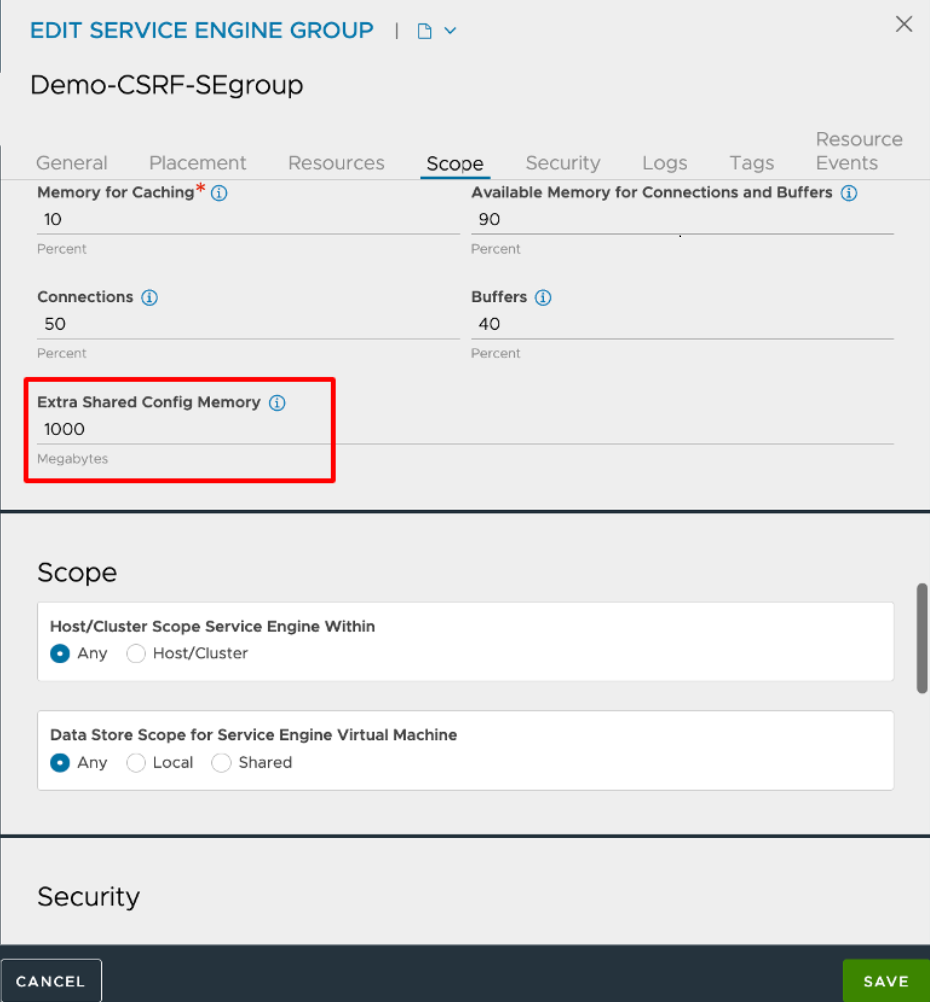
Click Save.
Click Save.
