


Let’s Encrypt is a free, automated (automates both issuing and renewing the certificate) and open certificate authority. This section elaborates the configuration summary for the Let’s Encrypt integration with the Avi Load Balancer.
The SSL/ TLS protocol helps to keep an internet connection secure. It safeguards any sensitive data sent between two machines, systems, or devices, preventing intruders from reading and modifying any information transferred between two machines/ systems/ devices. The SSL/ TLS Certificate facilitates secure, encrypted connections between the two machines, systems, or devices. However, there are some challenges around SSL/ TLS Certificate:
Manually getting a certificate
The cost associated with a certificate signed by CA
Let’s Encrypt resolves all the above challenges. For more information on this, see Let’s Encrypt.
Working with Let's Encrypt
Before issuing a certificate, Let’s Encrypt servers validate that the requester controls the domain names in that certificate using “challenges,” as defined by the ACME standard. Let’s Encrypt uses the ACME protocol to verify that you control a given domain name and issue you a certificate. There are different ways that the agent/ client can prove control of the domain:
Provisioning a DNS record under the domain (as per CSR’s common name).
Provisioning an HTTP resource under a well-known URI.
Avi Load Balancer supports HTTP-01 challenge for domain validation.
HTTP-01 Challenge
Let’s Encrypt gives a token to ACME client, and the ACME client puts a file on the web server at
http://<YOUR_DOMAIN>/well-known/acme-challenge/<TOKEN>. That file contains the token, plus a thumbprint of account key.Once the ACME client tells Let’s Encrypt that the file is ready, Let’s Encrypt tries retrieving it (potentially multiple times from multiple vantage points).
If validation checks get the right responses from the web server, the validation is considered successful, and certificate will be issued.
As Let’s Encrypt CA communicates on port 80 for HTTP-01 challenge, hence port 80 must be opened on the firewall and Let’s Encrypt CA must be able to reach to user’s network (network where Avi Load Balancer System is deployed, Let’s Encrypt CA connects through public network to user’s Avi Load Balancer System on port 80).
If there is a virtual service listening on port 80 at Avi Load Balancer, script does not create a virtual service else script would automatically create a virtual service listening on port 80 for the respective virtual service listening on port 443/ custom SSL Port.
For more information regarding domain validation see the below URLs:
Configuring Let’s Encrypt
The following is the configuration summary for the Let’s Encrypt integration with the Avi Load Balancer :
Get the script that will assist in getting and renewing the certificate.
Add the script as controller script on Avi Load Balancer system.
Add user account with customer (limited access only).
Create certificate management profile on Avi Load Balancer system.
Add virtual service on Avi Load Balancer system.
Ensure that FQDN resolves to public IP, port
80is open at Firewall.Create CSR and select the configured certificate management profile.
Review the list of certificates, Let’s Encrypt CA would push signed certificate.
Associate the certificate to the configured virtual service.
Steps 1, 2, and 4 are required only if DNS-01 Challenge is used. For HTTP-01 Challenge, the Certificate Management profile will be available already as a drop-down in Step 7. Also for DNS-01 Challenge, you must provide your own implementation of add_dns_text_record and remove_dns_text_record functions.
For the Let’s Encrypt ControlScript to work, FQDN has to be configured for vsvip. If the option is not available through the UI, use the CLI to configure an FQDN in the vsvip:
[admin:alert-ctlr]: > configure vsvip <vsvip name>
[admin:alert-ctlr]: vsvip> dns_info
[admin:alert-ctlr]: vsvip:dns_info>
[admin:alert-ctlr]: vsvip:dns_info> fqdn <fqdn>
[admin:alert-ctlr]: vsvip:dns_info> save
[admin:alert-ctlr]: vsvip> save
Configuring the Avi Load Balancer System
To configure Let’s Encrypt for Avi Load Balancer.
Download the script available at letsencrypt_mgmt_profile. To download the file, click Raw option. Copy the code available.
In the Avi Load Balancer Controller, navigate to and click Create.
Add a Name, paste the code copied in step 1 in the Import or Paste Control Script field, and Save the configuration.
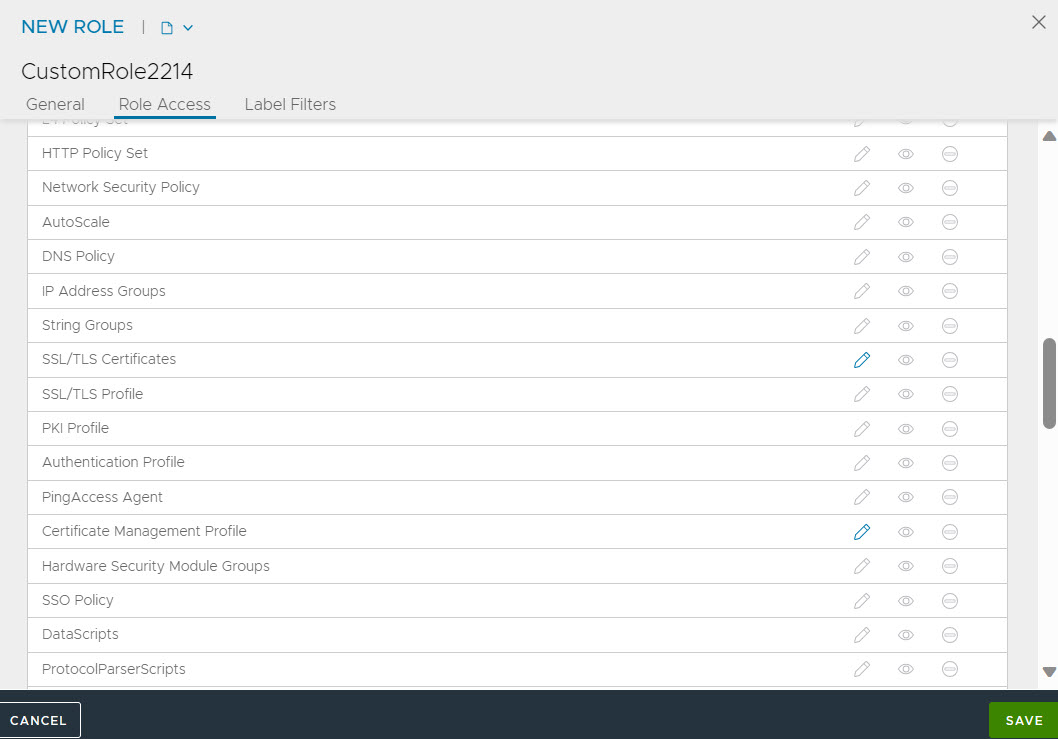
Configure a custom role by navigating to . Ensure that write access is enabled for Virtual Service, Application Profile, SSL/TLS Certificates and Certificate Management Profile, for this role.
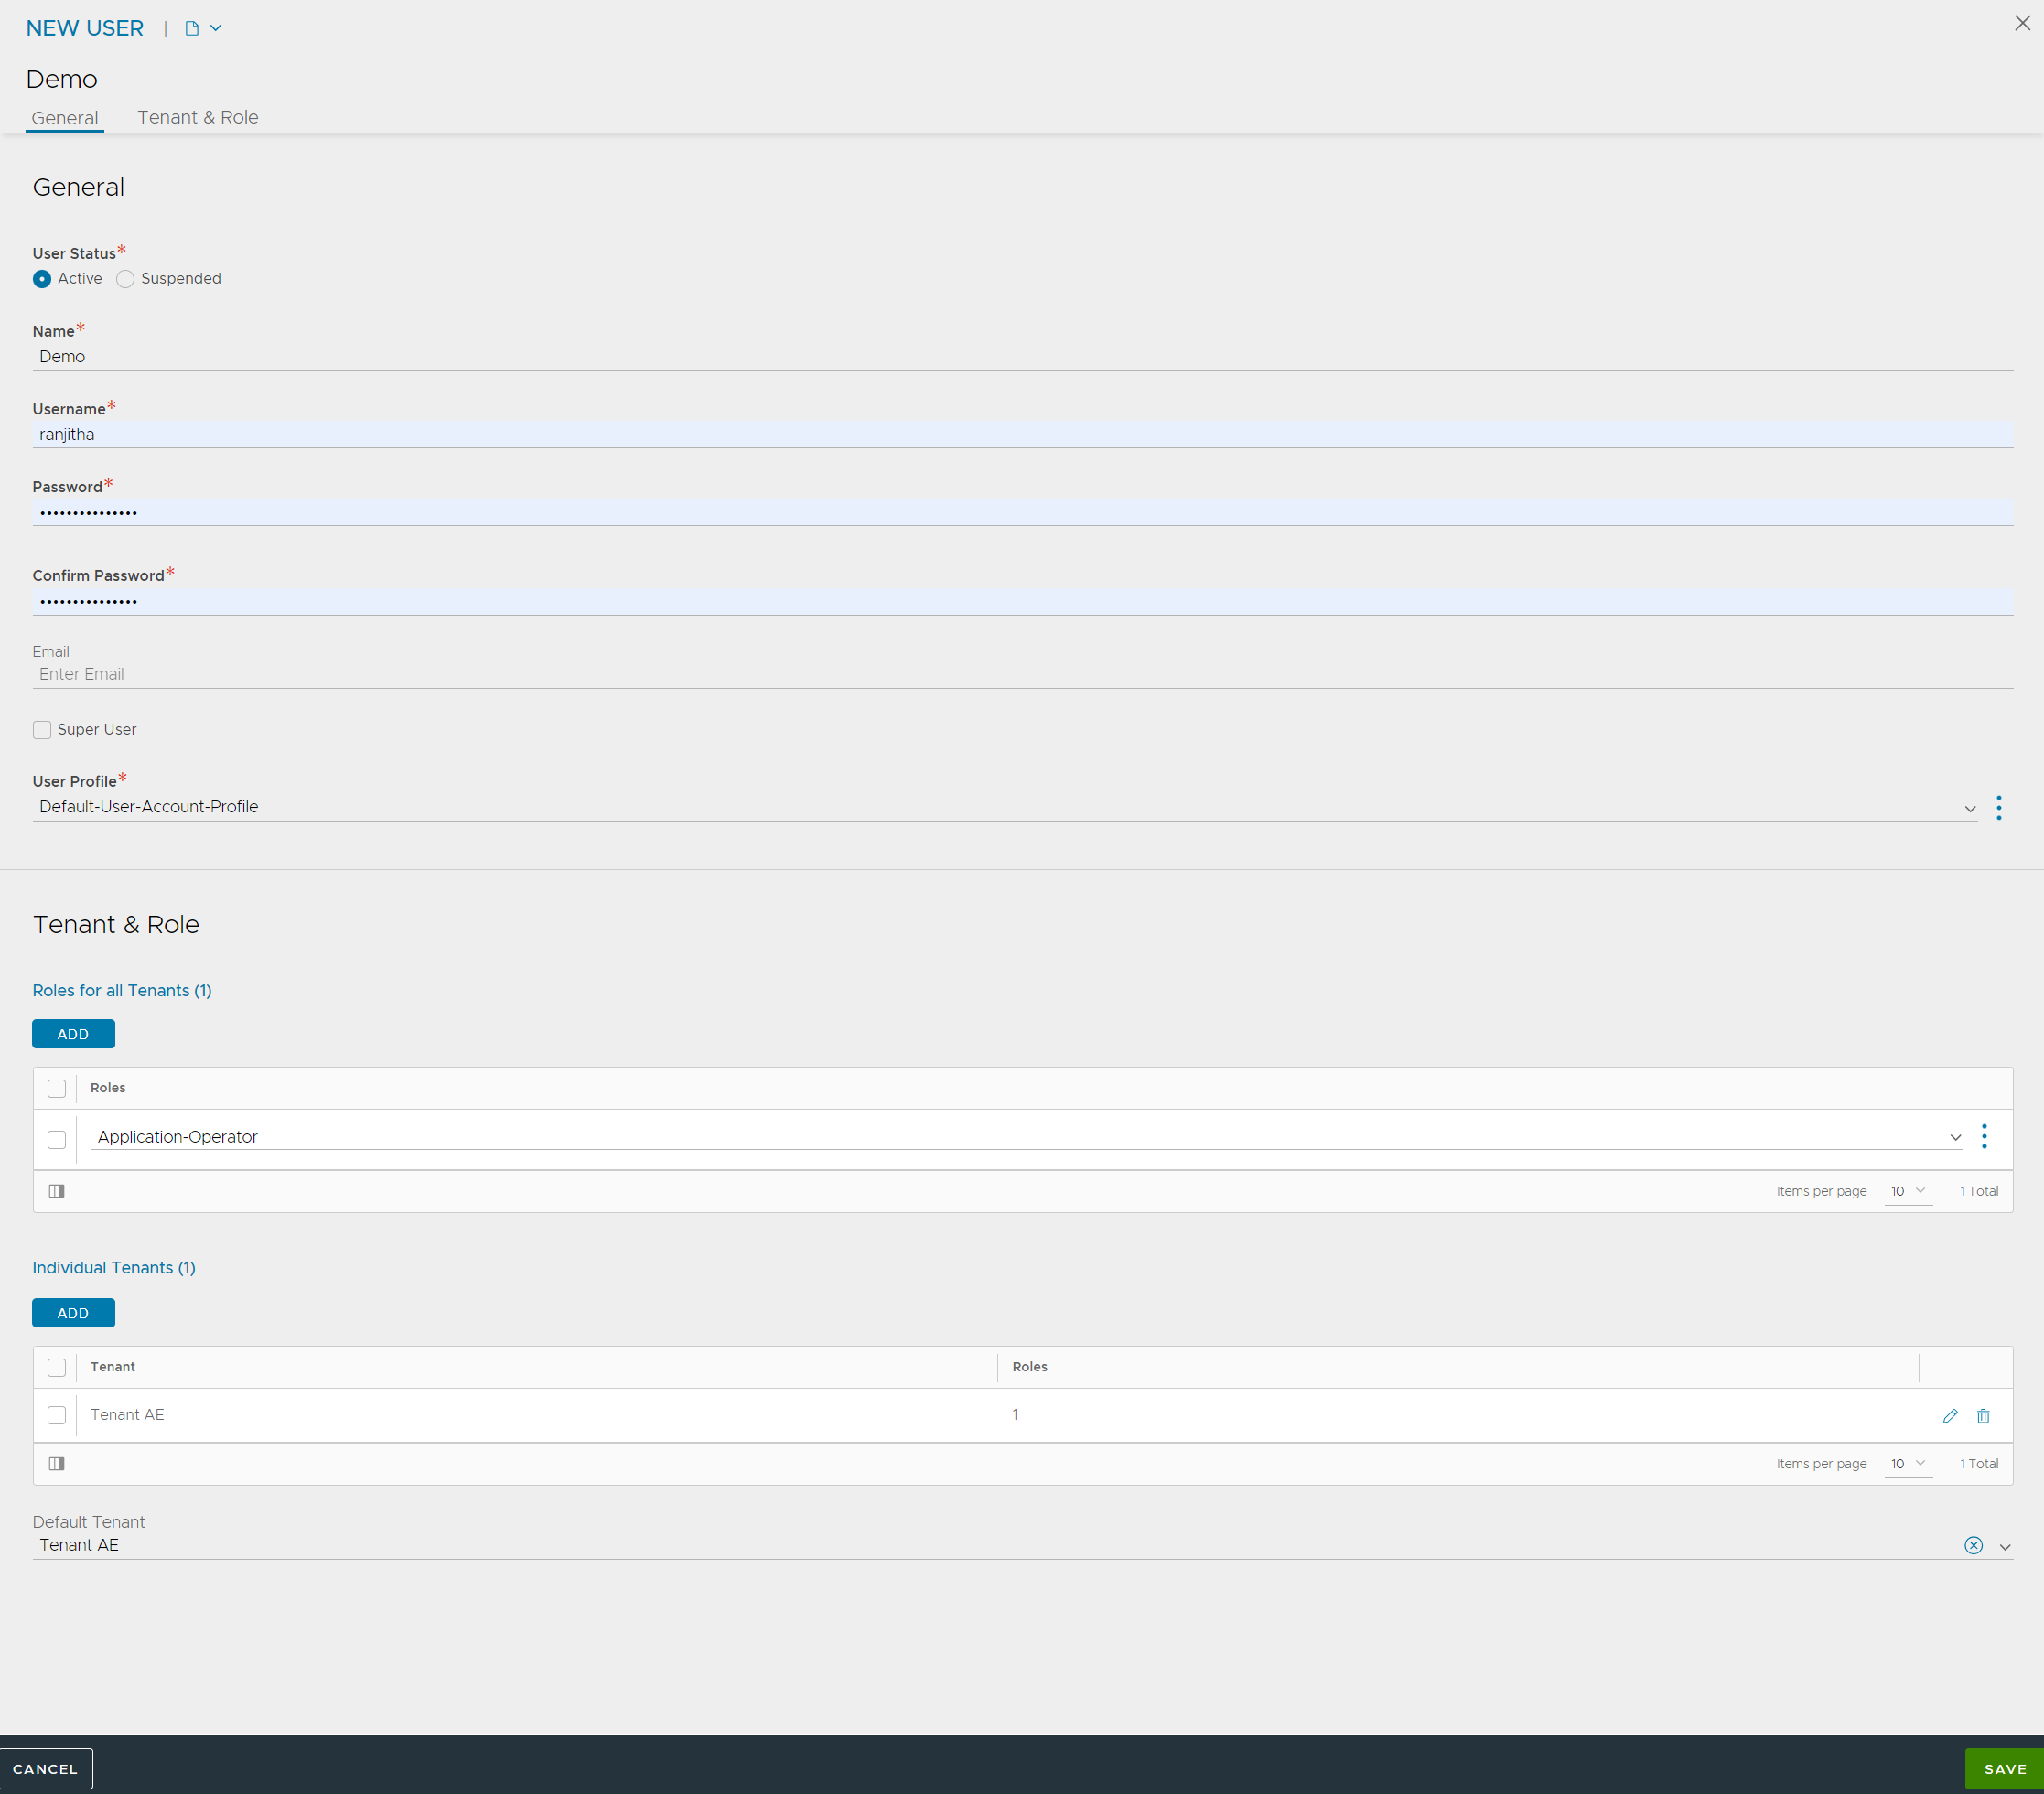
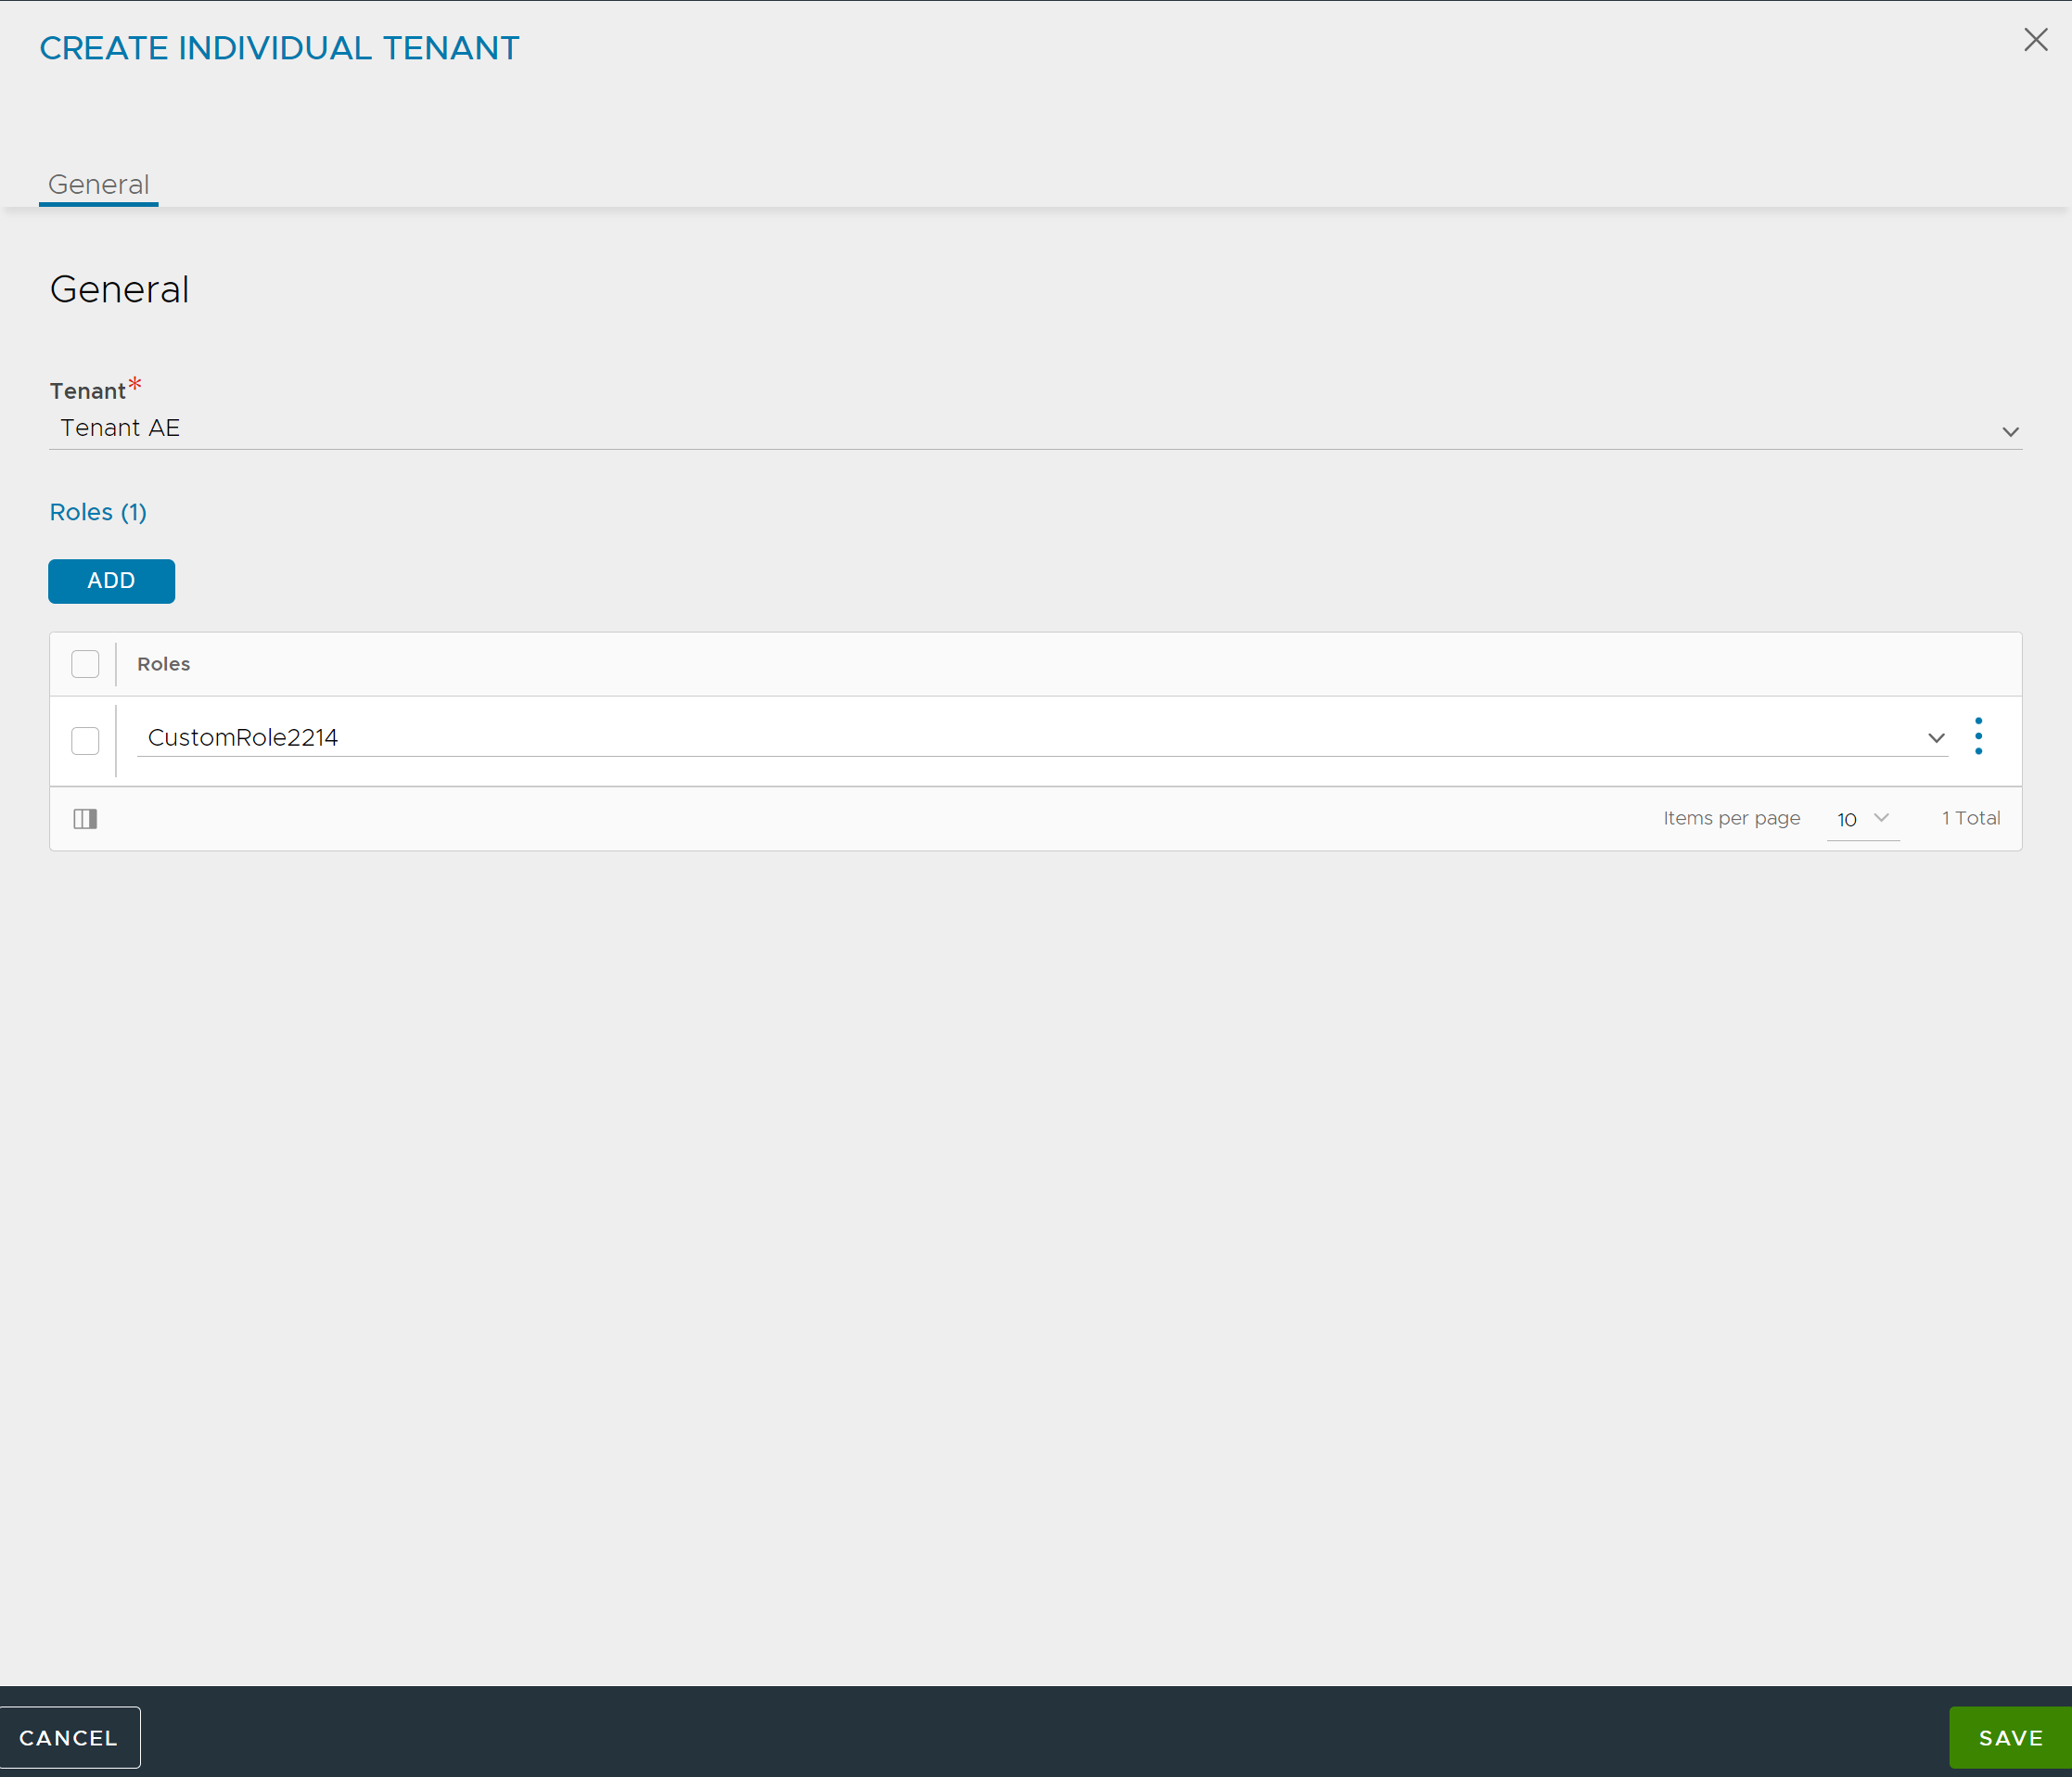
Navigate to . Create a user, enter all the required details, and select the configured custom role.
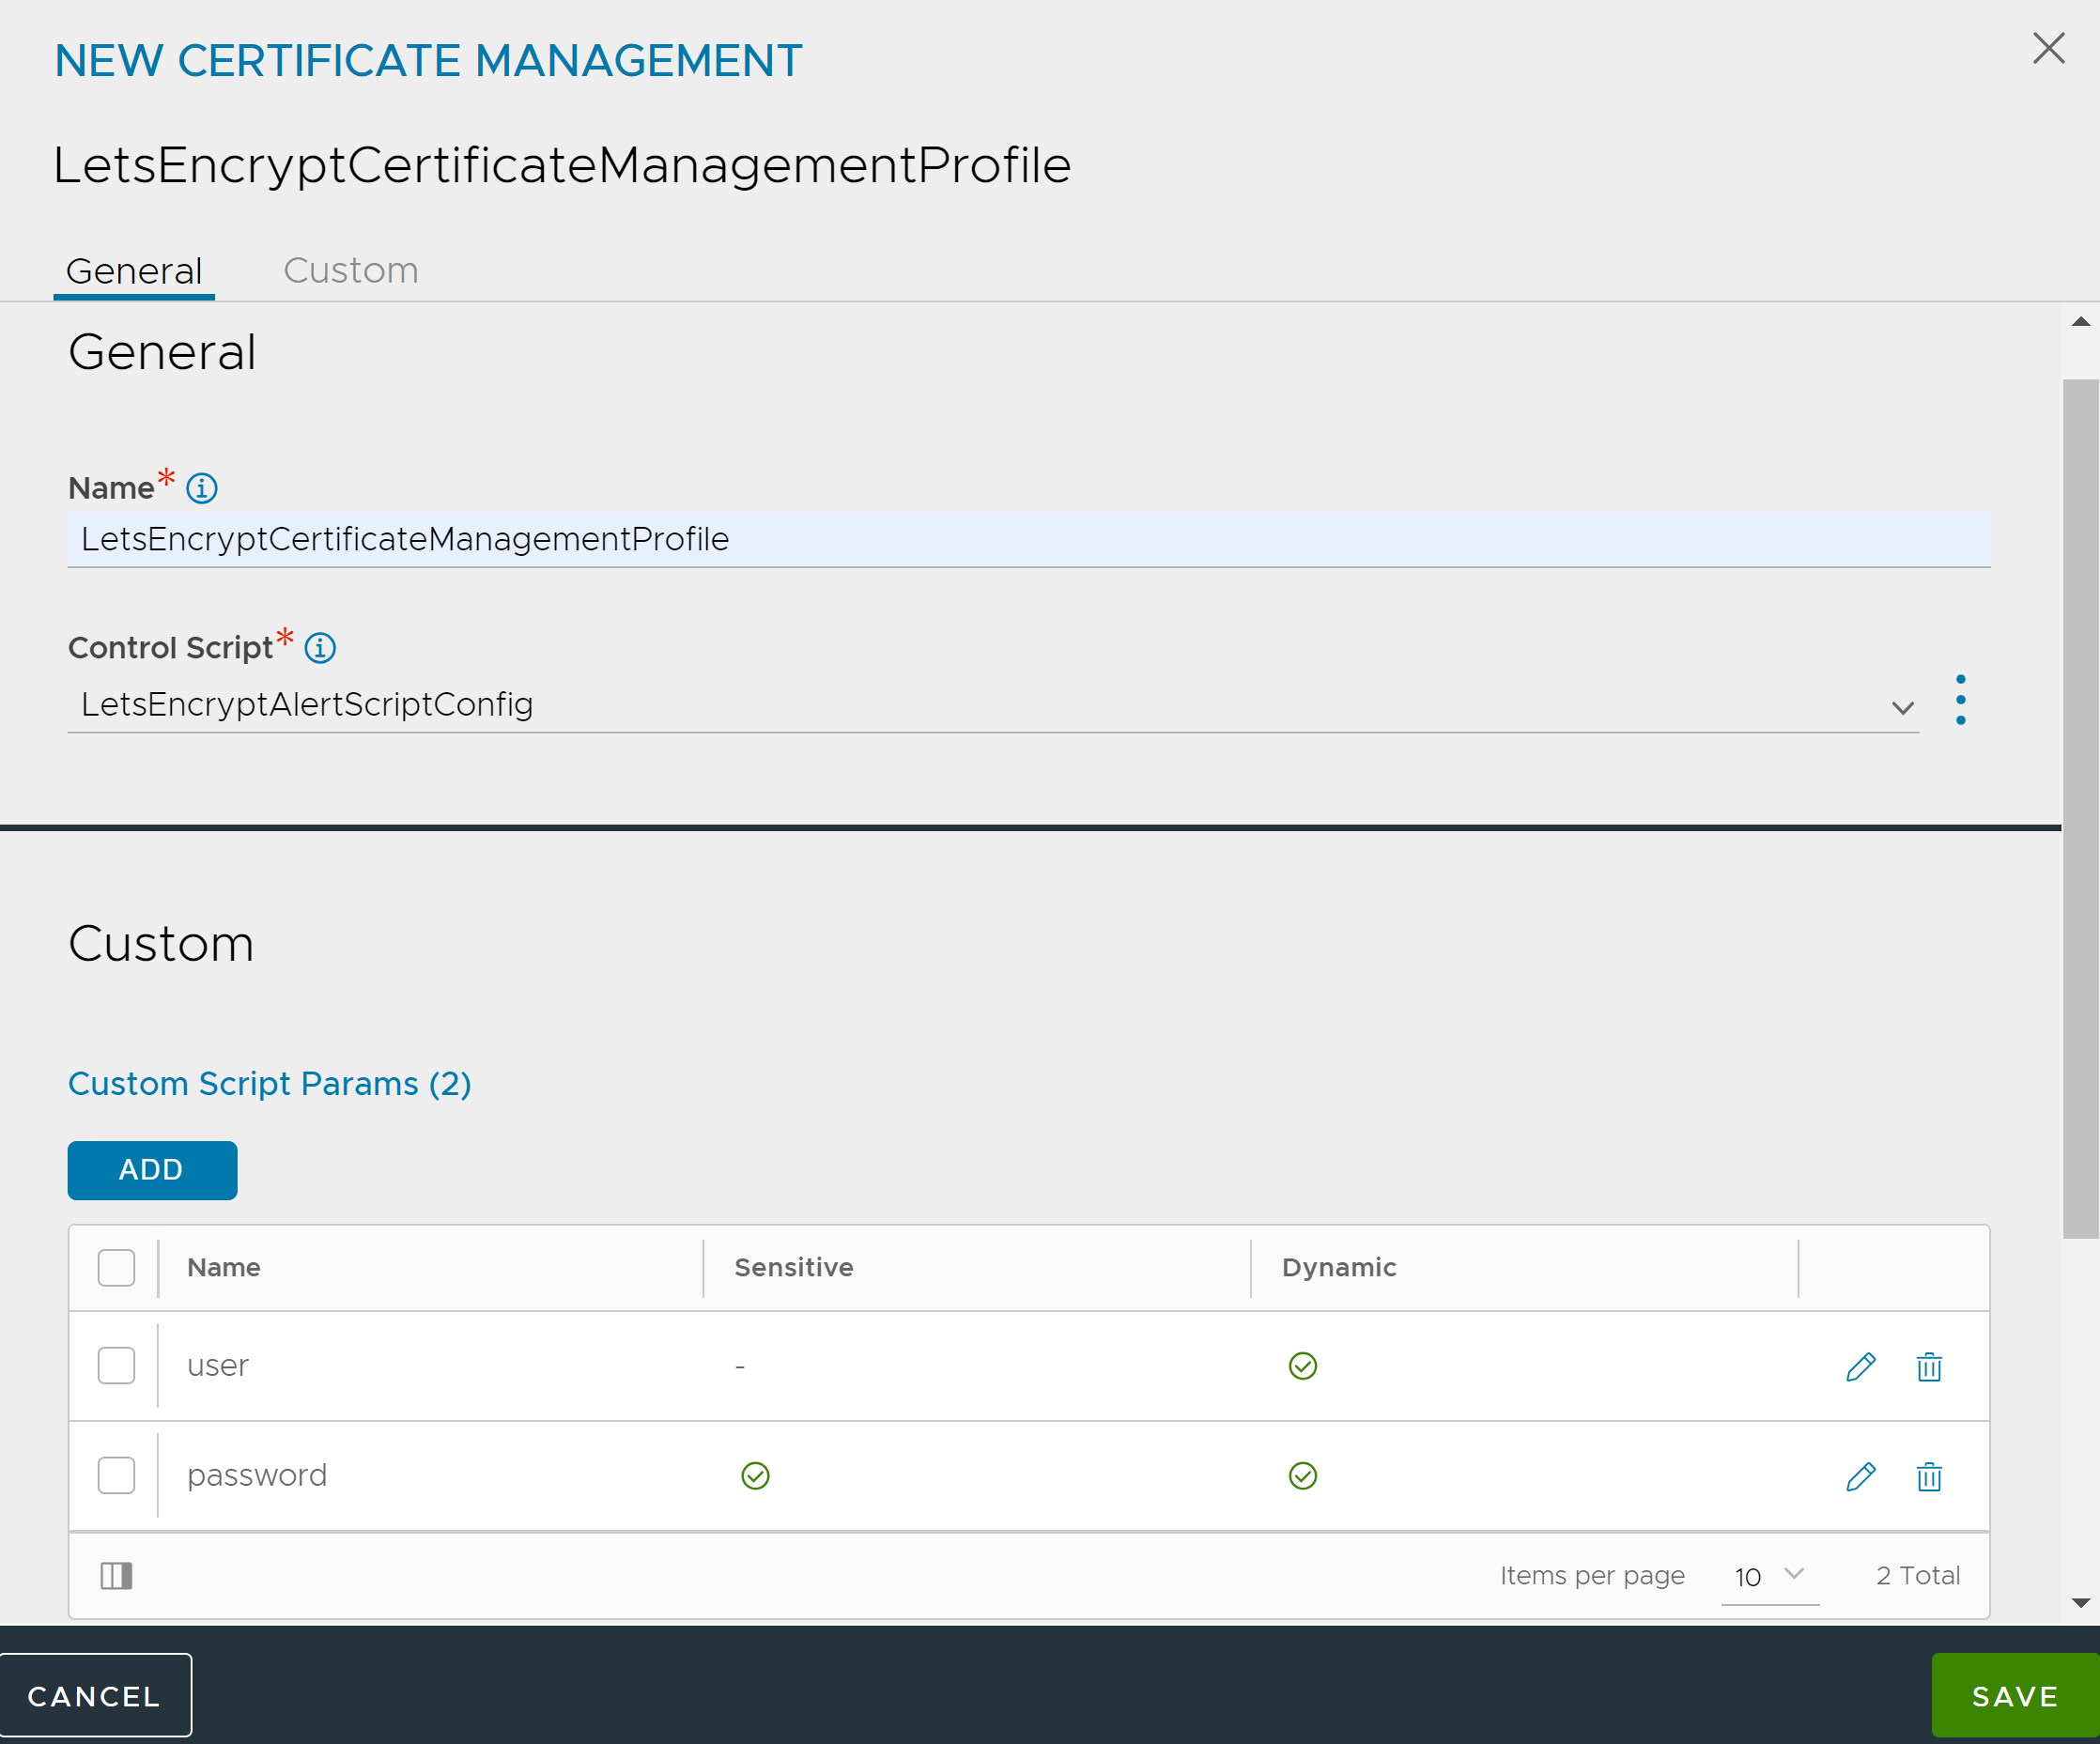
Navigate to and click Create.
Enter a Name, select the configured Control Script and Enable Custom Script Parameters, and add Custom Script Params as shown below:

Note:It is recommended not to use admin account. Always add a user account which has custom role (with limited access).
Navigate to , click Create and select Application Certificate.
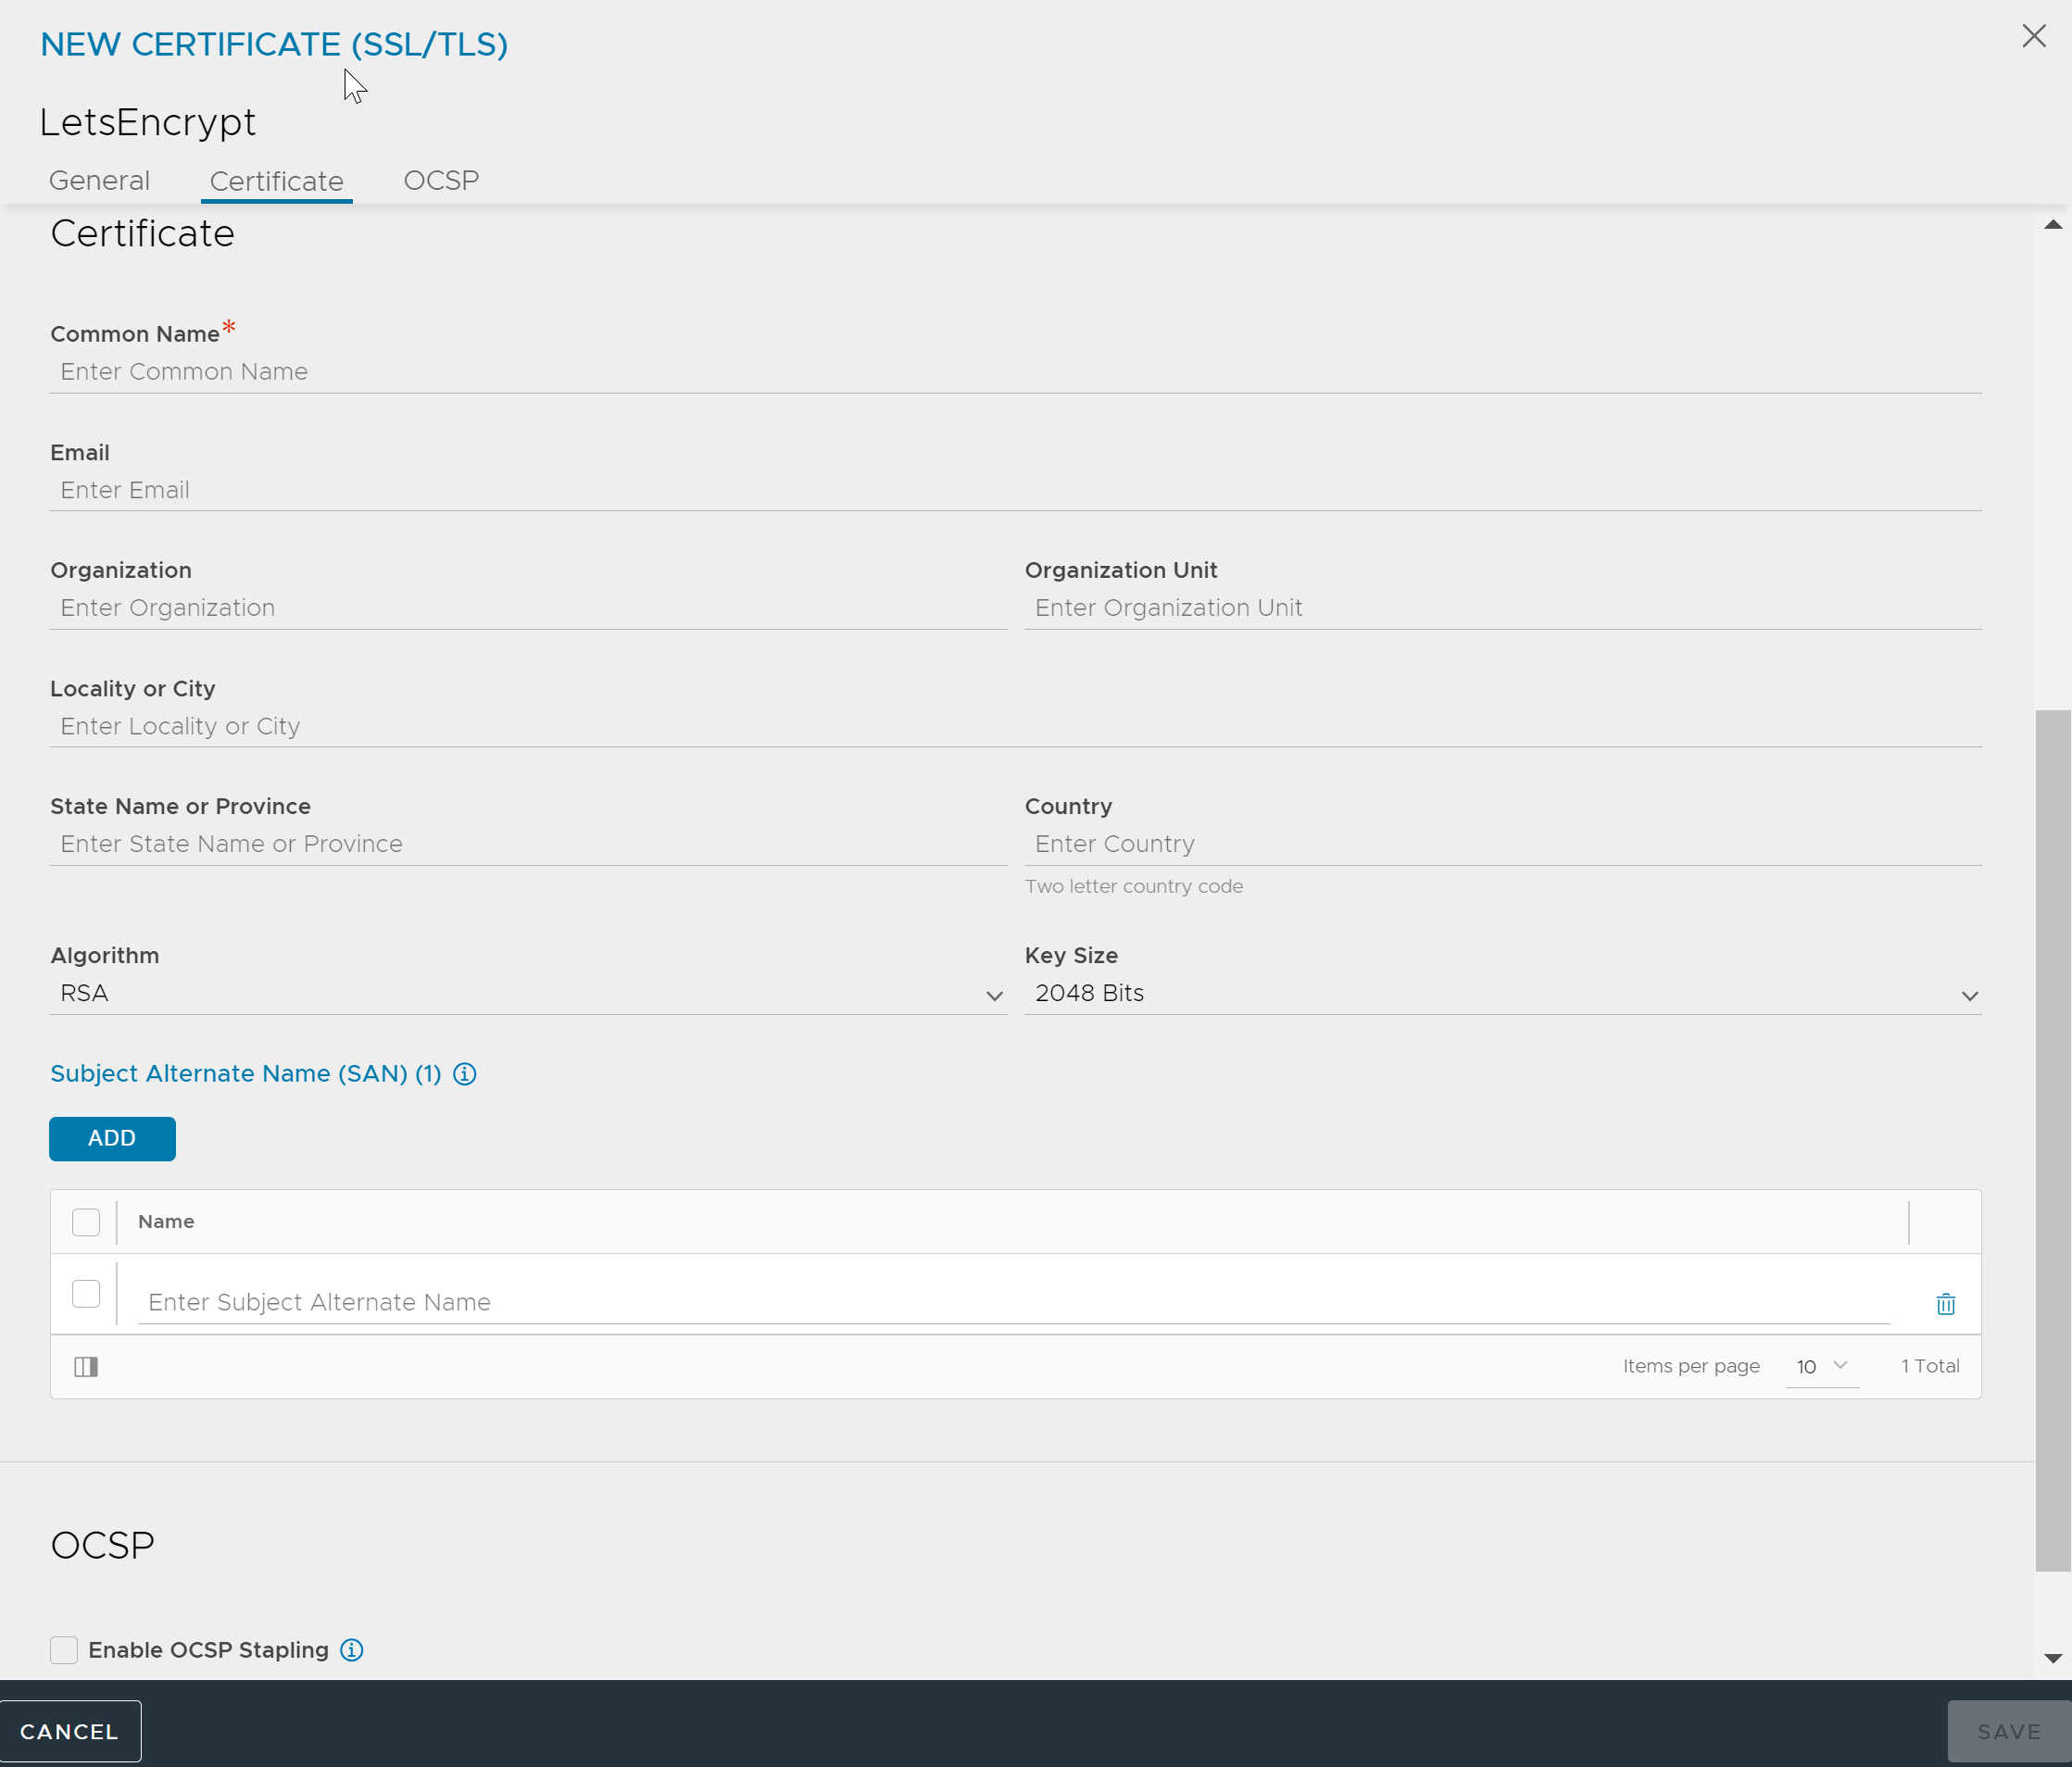
In the NEW CERTIFICATE (SSL/TLS) screen, enter all the details in the fields, select the Self Signed, CSR, or Import option from the Type drop-down menu as required, and select the configured Certificate Management Profile.

Under Certificate, enter Common Name, enter all relevant details and save the configuration. For more information on configuring OCSP Stapling, see OCSP Stapling.
Ensure that a virtual service is configured with the Application Domain Name as Common Name (CN) of certificate. CN of certificate must match with the Application Domain Name of the virtual service. FQDN (CN of certificate or Application Domain Name of virtual service must resolve to IP address and the domain must be reachable).
After few minutes, review the list of the certificates. You can see the certificate pushed by Let’s Encrypt CA. Associate the certificate to the configured virtual service.
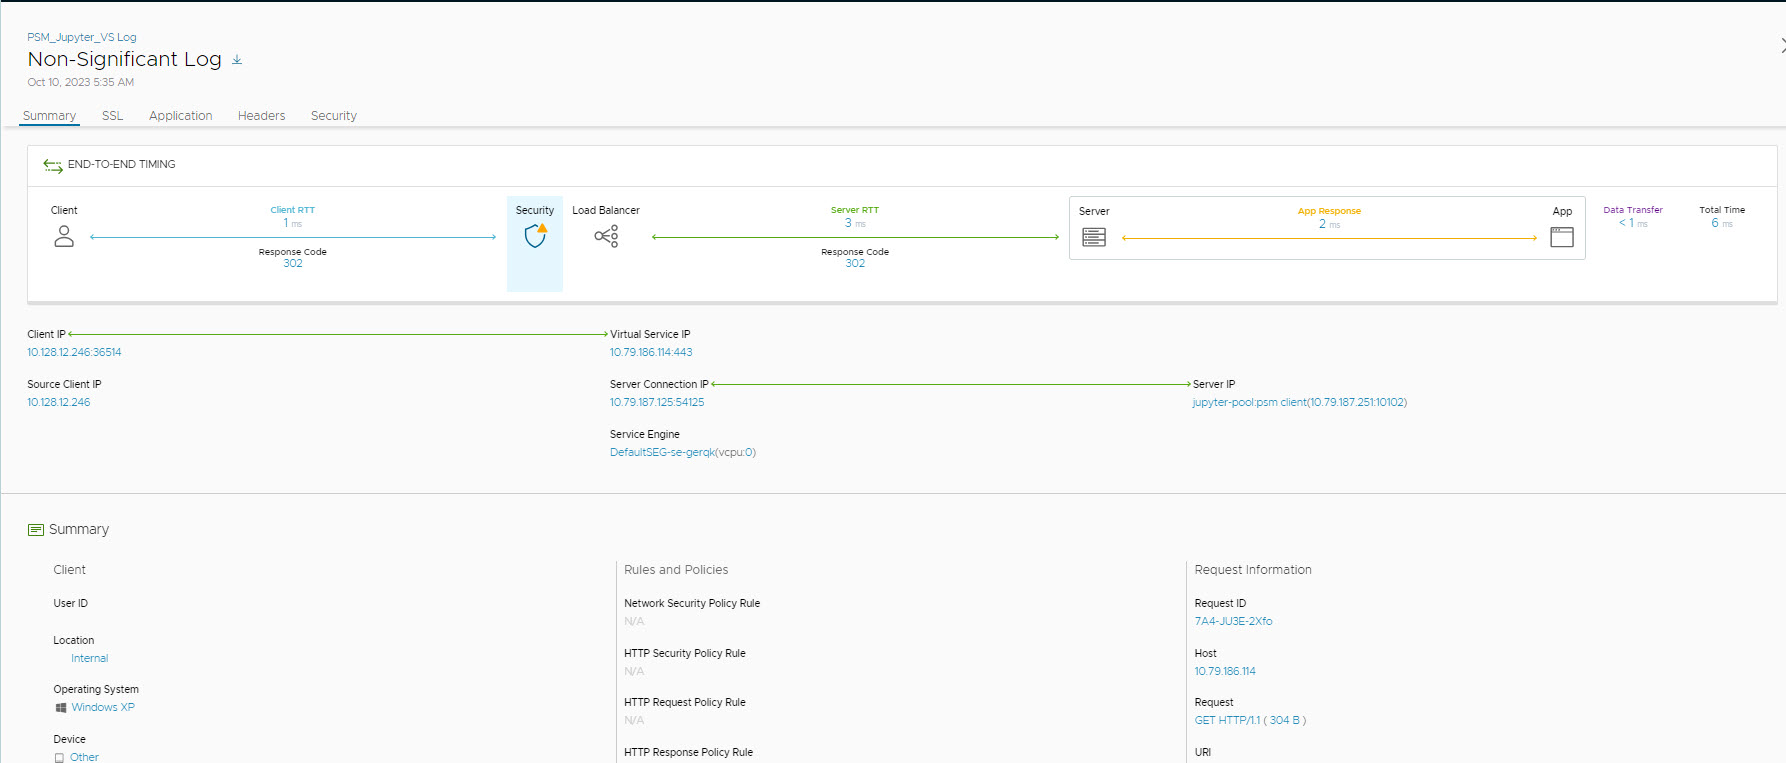
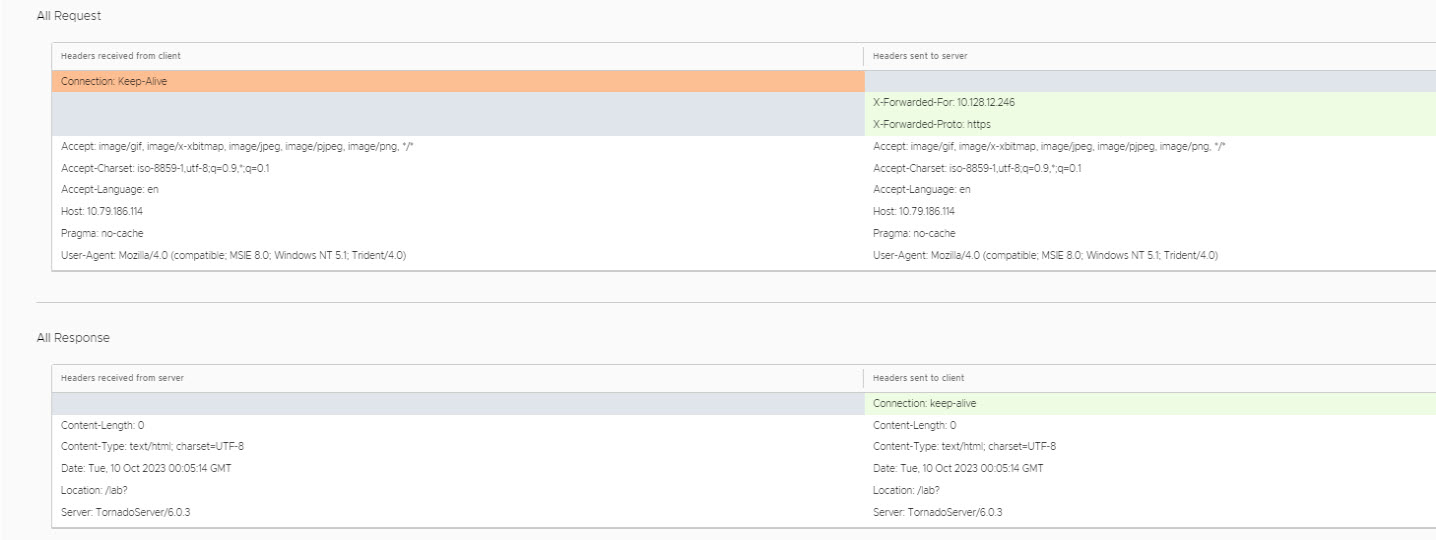
Logs
To view the logs, enable non-significant logs for the configured virtual service and generate the certificate. Following is an example of the log.
Automation of Certificate Renewal
From the Controller properties, ssl_certificate_expiry_warning_days can be configured. By default, ssl_certificate_expiry_warning_days can be 30 days, 7 days, and 1 day. This setting can be modified if required. When certificate renewal is required (based on configured settings), the script gets activated and automatically takes care of certificate renewal.
Let’s Encrypt CA imposes a rate limit. So ensure that the renewal of the certificate does not impact the rate limit.
Automatic Certificate Renewal for the Imported Certificate
Automatic certificate renewal for imported certificates can be done for:
CSR generated on Avi Load Balancer, signed by Let’s Encrypt and then imported on Avi Load Balancer. If the certificate management profile is configured for a certificate, a renewal is attempted in the last-but-one interval. By default, the Controller generates events 30 days, 7 days, and 1 day before expiry. In this setting, certificate renewal will be attempted 7 days before expiry.
Certificate (signed manually by Let’s Encrypt outside Avi Load Balancer) and key imported on Avi Load Balancer (CSR not created on Avi Load Balancer).
Once the CSR is generated and signed by Let’s Encrypt CA, update the certificate uploaded by the user by this newly generated certificate. This certificate goes to automatic default renewal cycle.
Configuring Force Certificate Renewal
You can configure on-demand force certificate renewal for:
CSR generated on Avi Load Balancer, manually signed by Let’s Encrypt and then imported on Avi Load Balancer Certificate renewal is done from the backend using the API endpoint:
/api/sslkeyandcertificate/{uuid}/renew
Starting with Avi Load Balancer version 22.1.3, force certificate renewal is supported through the UI.
To configure force certificate renewal,
From the Avi Load Balancer UI, navigate to the certificate required, and click the Renew icon.
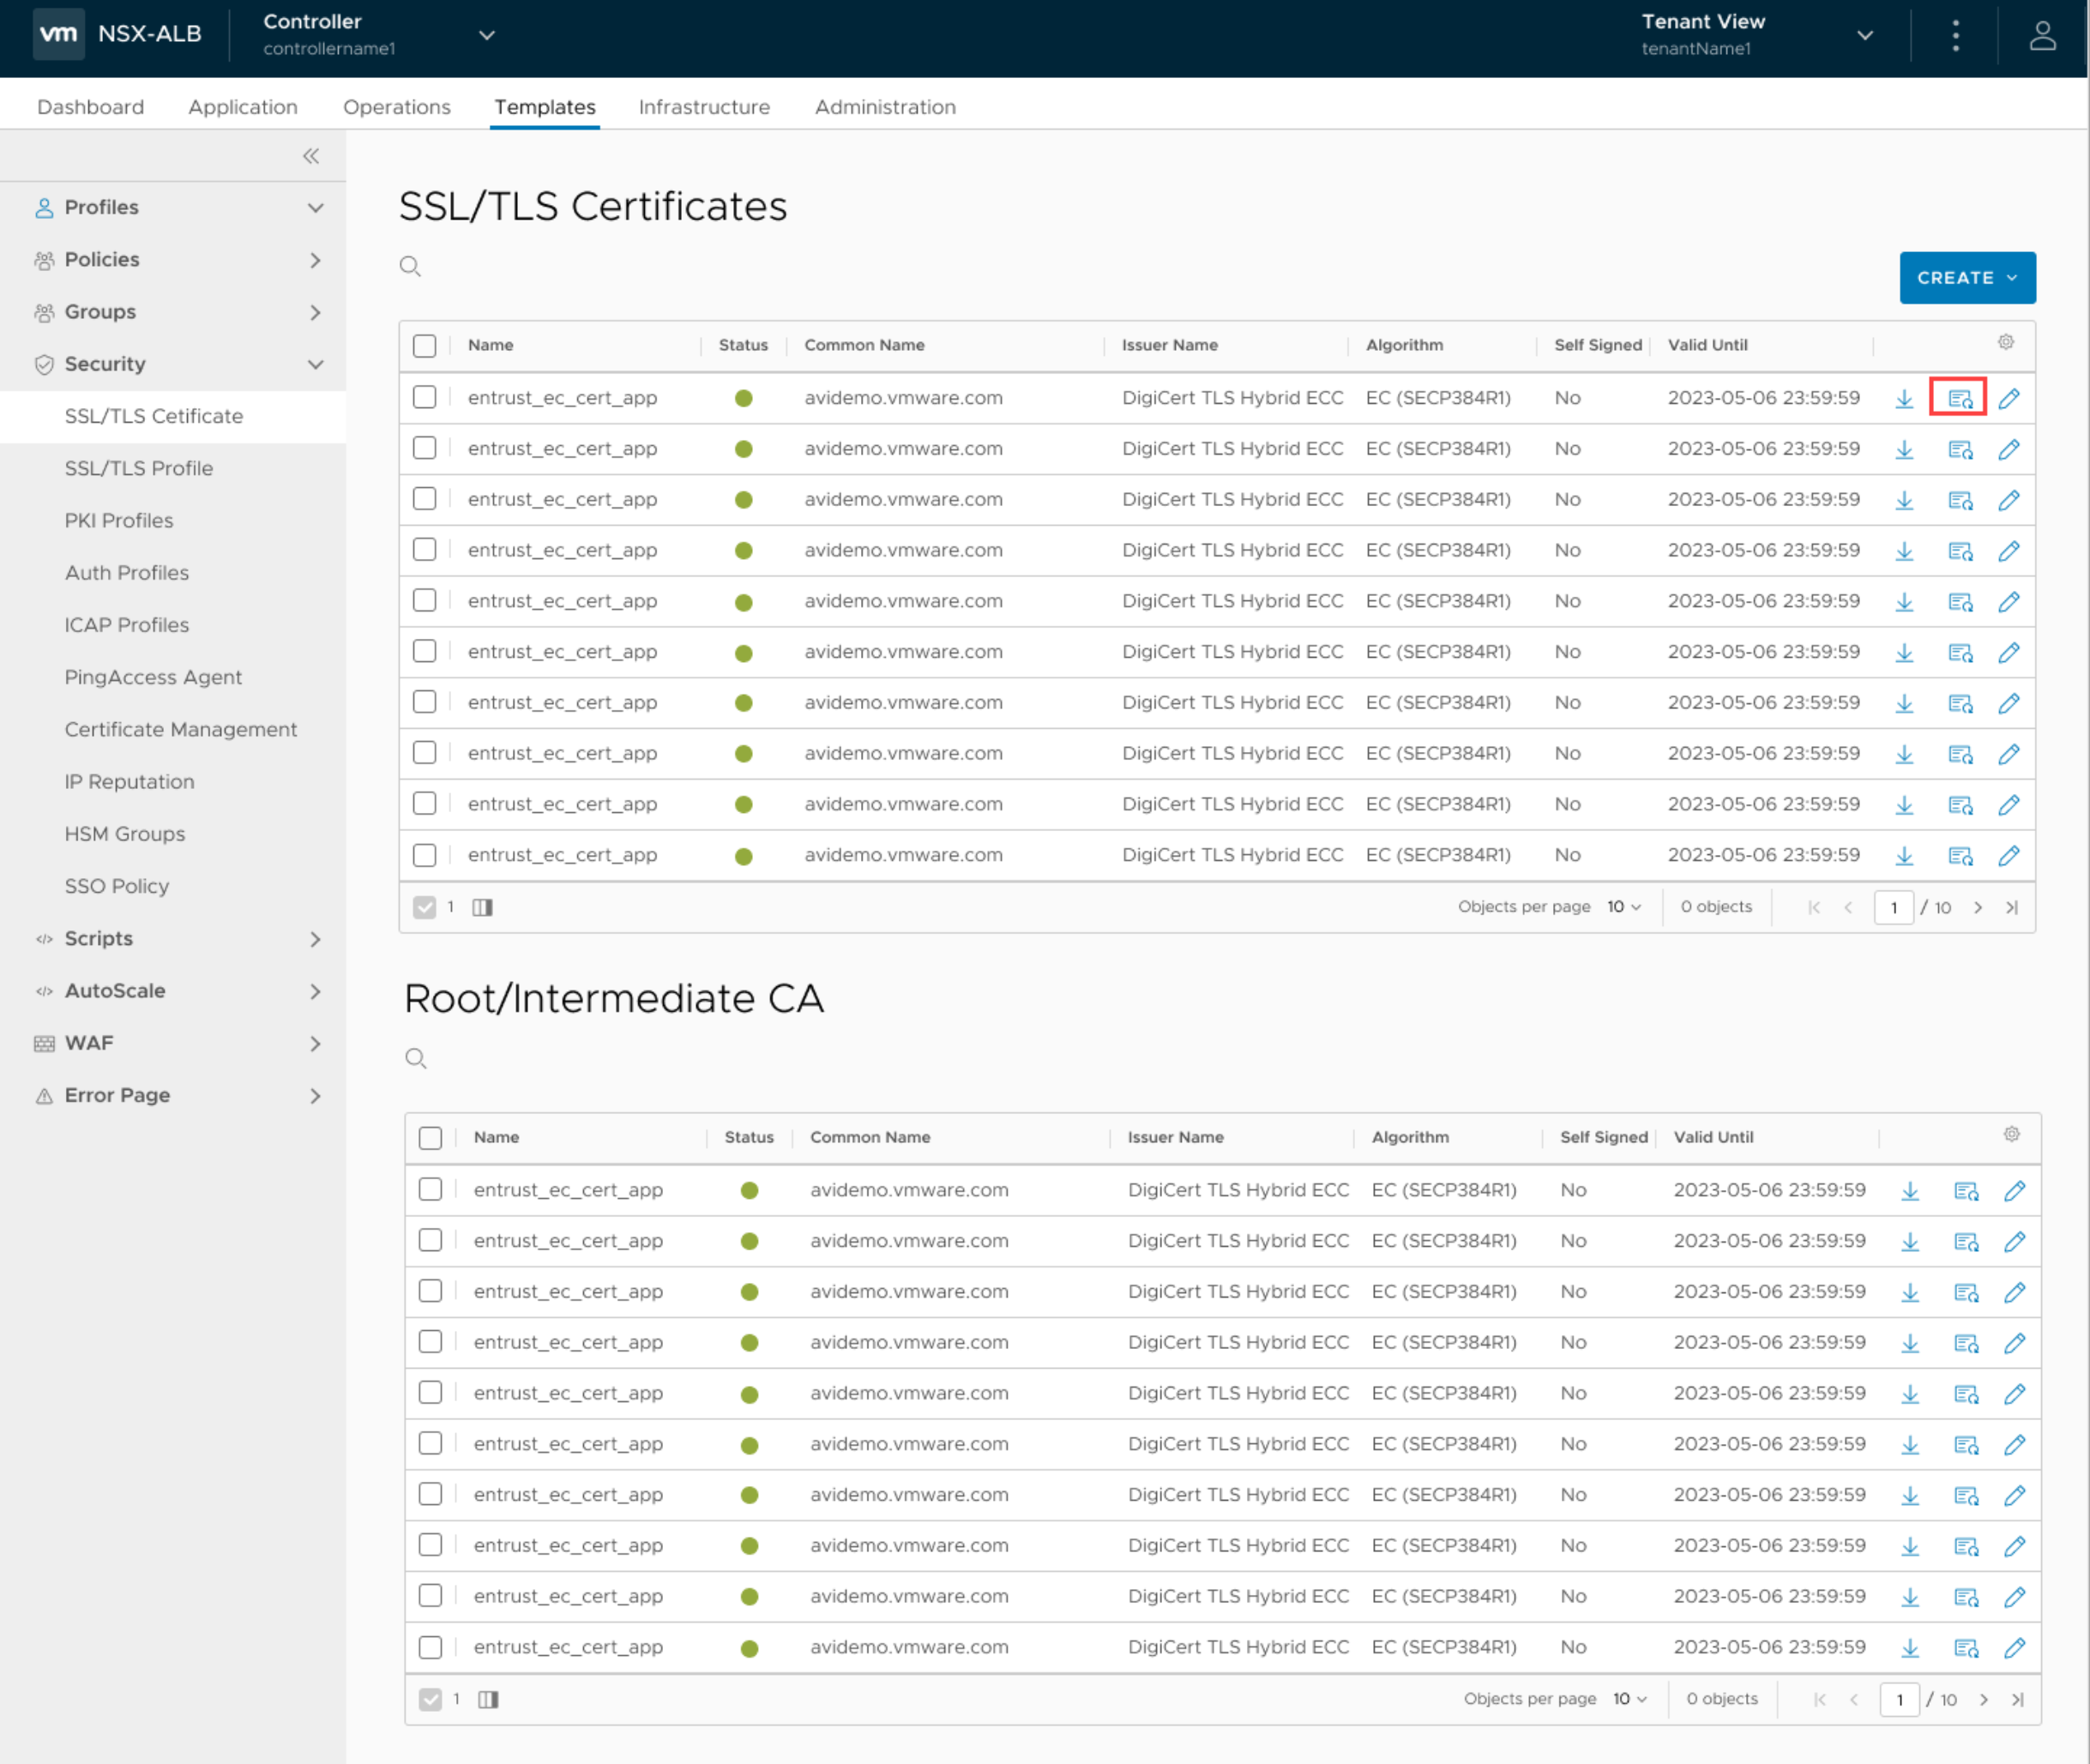
Click YES, CONTINUE in the confirmation prompt that appears.
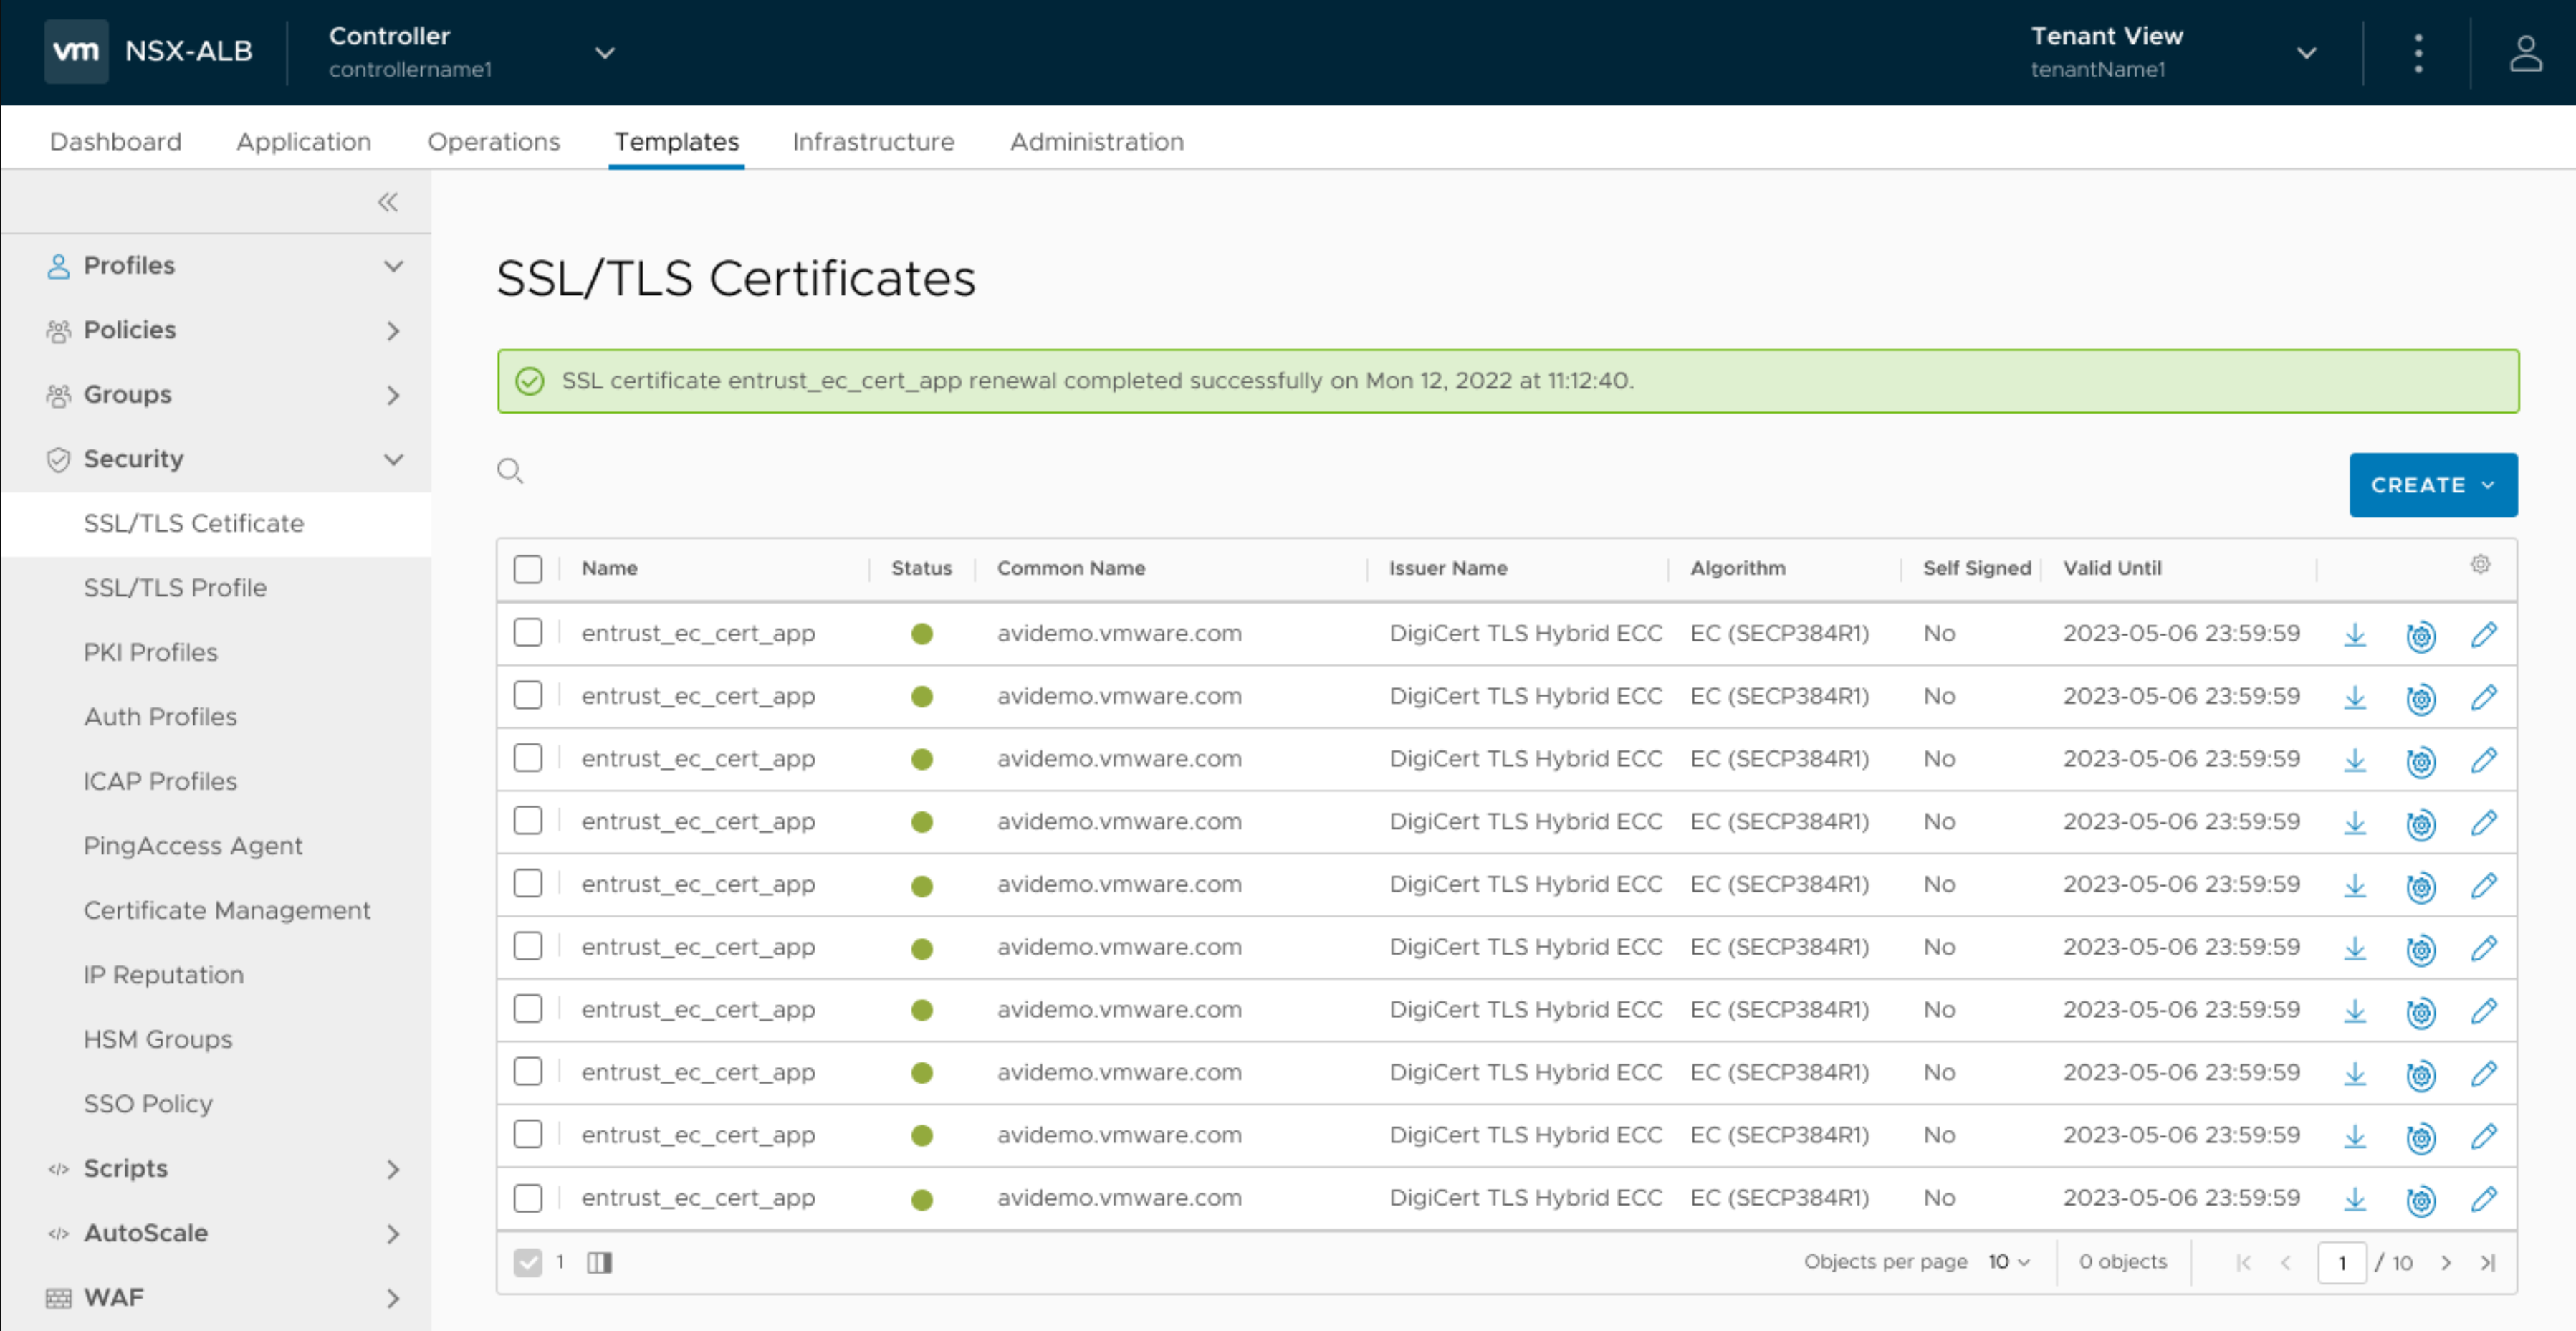
On successful certificate renewal, the following message is displayed:
Auto-renewal and Issuance of Certificate through Let's Encrypt using DNS-01 Challenge
Starting with Avi Load Balancer version 30.2.1, auto-renewal and issuance of the certificate through Let's Encrypt using DNS-01 challenge through Infoblox DNS can now be accomplished using ControlScript.
For more information on ControlScript, see Let's Encrypt using Infoblox DNS.
Configuring Let's Encrypt using Infoblox DNS for Avi Load Balancer
Import the script available at letsencrypt_mgmt_profile_infoblox_dns to the controller by navigating to .
In the NEW CERTIFICATE MANAGEMENT screen, enter the Name and select the desired Control Script.
-
Select Enable Custom Script Parameters and click ADD. This option is deselected by default. The user must add all the required parameters shown in the table below:
Parameter
Description
user
Avi Load Balancer user name (Default: None).
password
Password of the above user (Default: None).
tenant
Avi Load Balancer tenant name (Default: admin).
dryrun
True/False (Default: False). If this flag is set to true, Let's Encrypt's staging server will be used. The main purpose is to avoid Let's Encrypt ratelimiting during testing.
contact
E-mail address sent to letsencrypt for account creation (Default: None). Set this only once until updated, otherwise, an update request will be sent every time.
directory_url
Change the ACME server, e.g., for using an in-house ACME server. (Default: Let's Encrypt Production)
overwrite_vs
Specify the name or UUID of the Virtual Server to be used for validation and httpPolicySet (Default: Not set). It is useful for scenarios where VS cannot be identified by FQDN/hostname, for instance, when VS is only listening on IP.
Note:Export and import of Avi Load Balancer configuration causes the UUID to change.
letsencrypt_key
Let's Encrypt Account Key (Default: None).
infoblox_username
Infoblox login user name (required).
infoblox_password
Infoblox login password (required).
infoblox_host
Infoblox host ip (required).
infoblox_wapi_version
Infoblox WAPI version (Default: 2.0).
infoblox_dns_view
Infoblox DNS View (Default: default).
infoblox_verify_ssl
Infoblox API HTTPS server certificate verify (default: False).
In the NEW CUSTOM PARAM screen, enter the Name and Value.
Select Is Sensitive and Is Dynamic as required. This options are deselected by default.
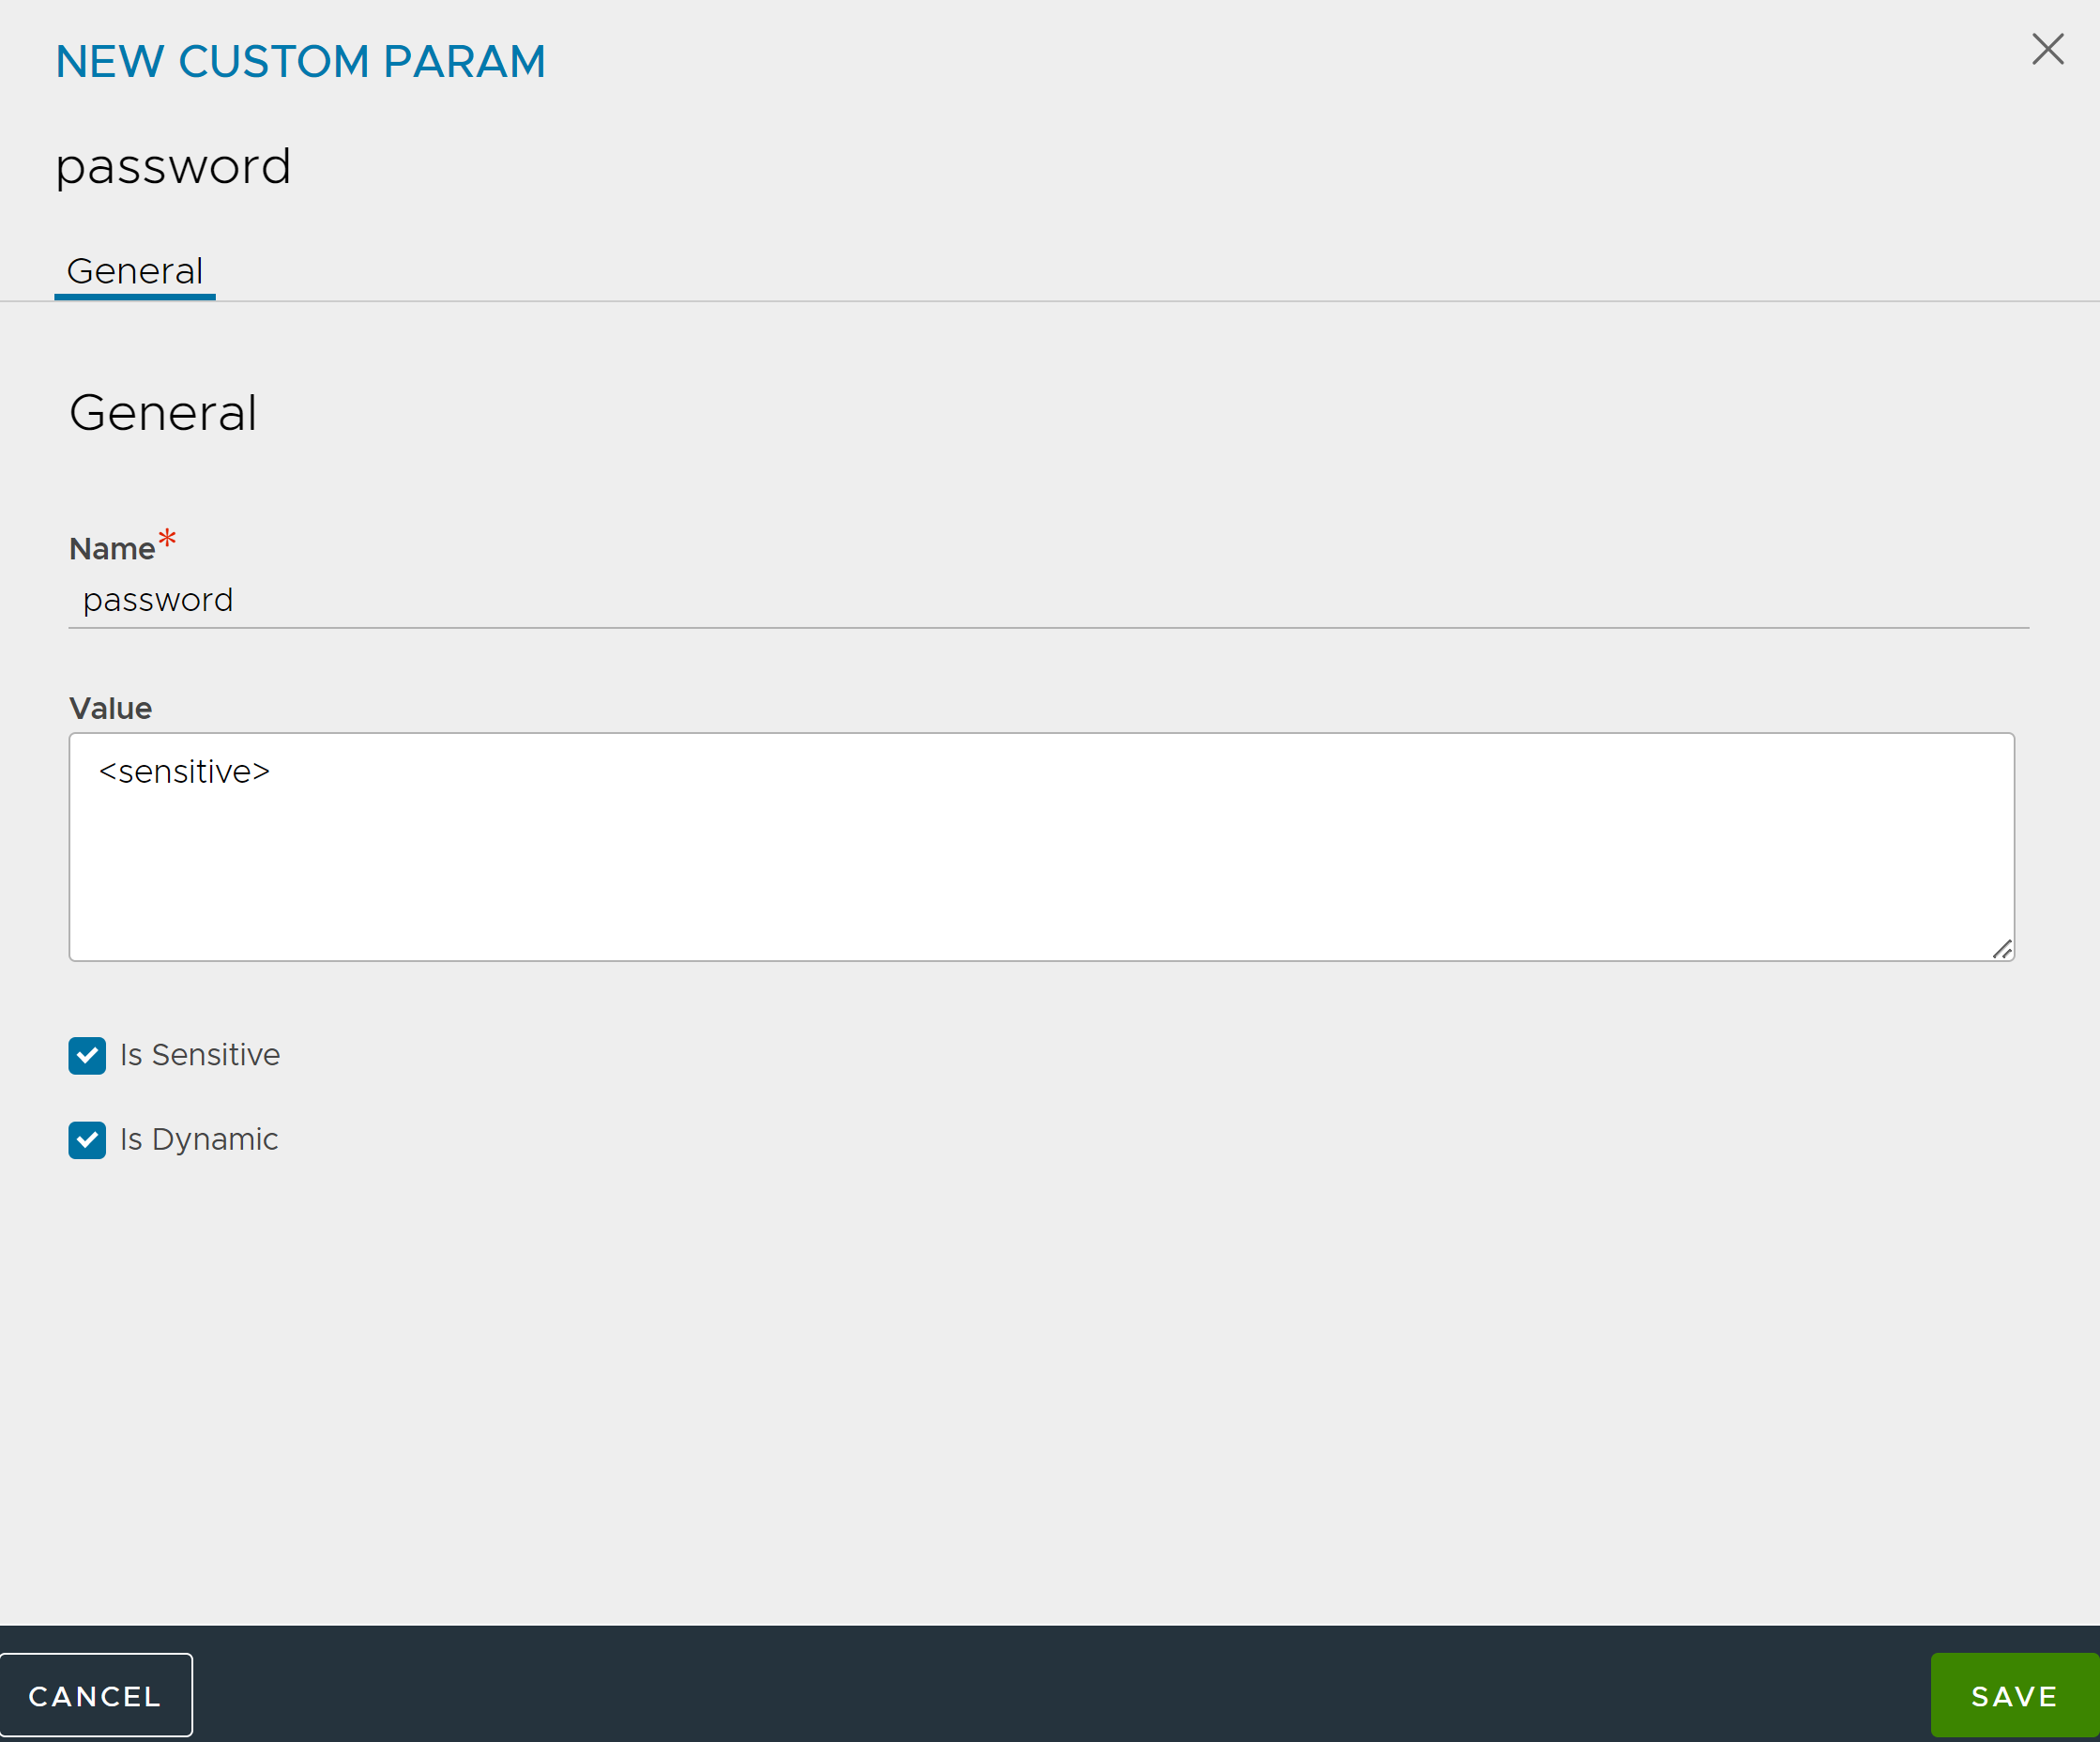
Save the configuration by clicking SAVE.
Navigate to .
Click CREATE and select Application Certificate.
In the NEW CERTIFICATE (SSL/TLS) screen, enter all the details in the fields, select CSR option as Type, and select the configured Certificate Management Profile.
Under Certificate, enter Common Name, enter all relevant details, and save the configuration for the certificate to be imported. For more information on configuring OCSP Stapling, see OCSP Stapling.
Native support for Life-Cycle-Management for Let’s Encrypt Certificate
Starting with Avi Load Balancer version 22.1.3, a Let’s Encrypt Certificate Management profile is available by default for attaching while creating a CSR. When the Controller boots up, the Certificate Management profile for Let’s Encrypt is available by default. Configure the name, tenant, and password.
The Let’s Encrypt Management profile will be available for selection in the Certificate Management Profile field in the application profile.
For native support, only the HTTP-01 challenge is currently addressed in Avi Load Balancer, and the DNS-01 challenge is not supported.
Additional Information
For more information on rate limit, see Rate Limits.
For more information on SSL/TLS Certificate, see SSL Certificates.
