


This section describes the post-installation process.
Configuring an Infoblox DNS Profile on the Controller
Navigate to . Select DNS Profile option from CREATE drop-down menu.
Specify the name the profile.
Select Infoblox DNS option from the Type drop-down menu.
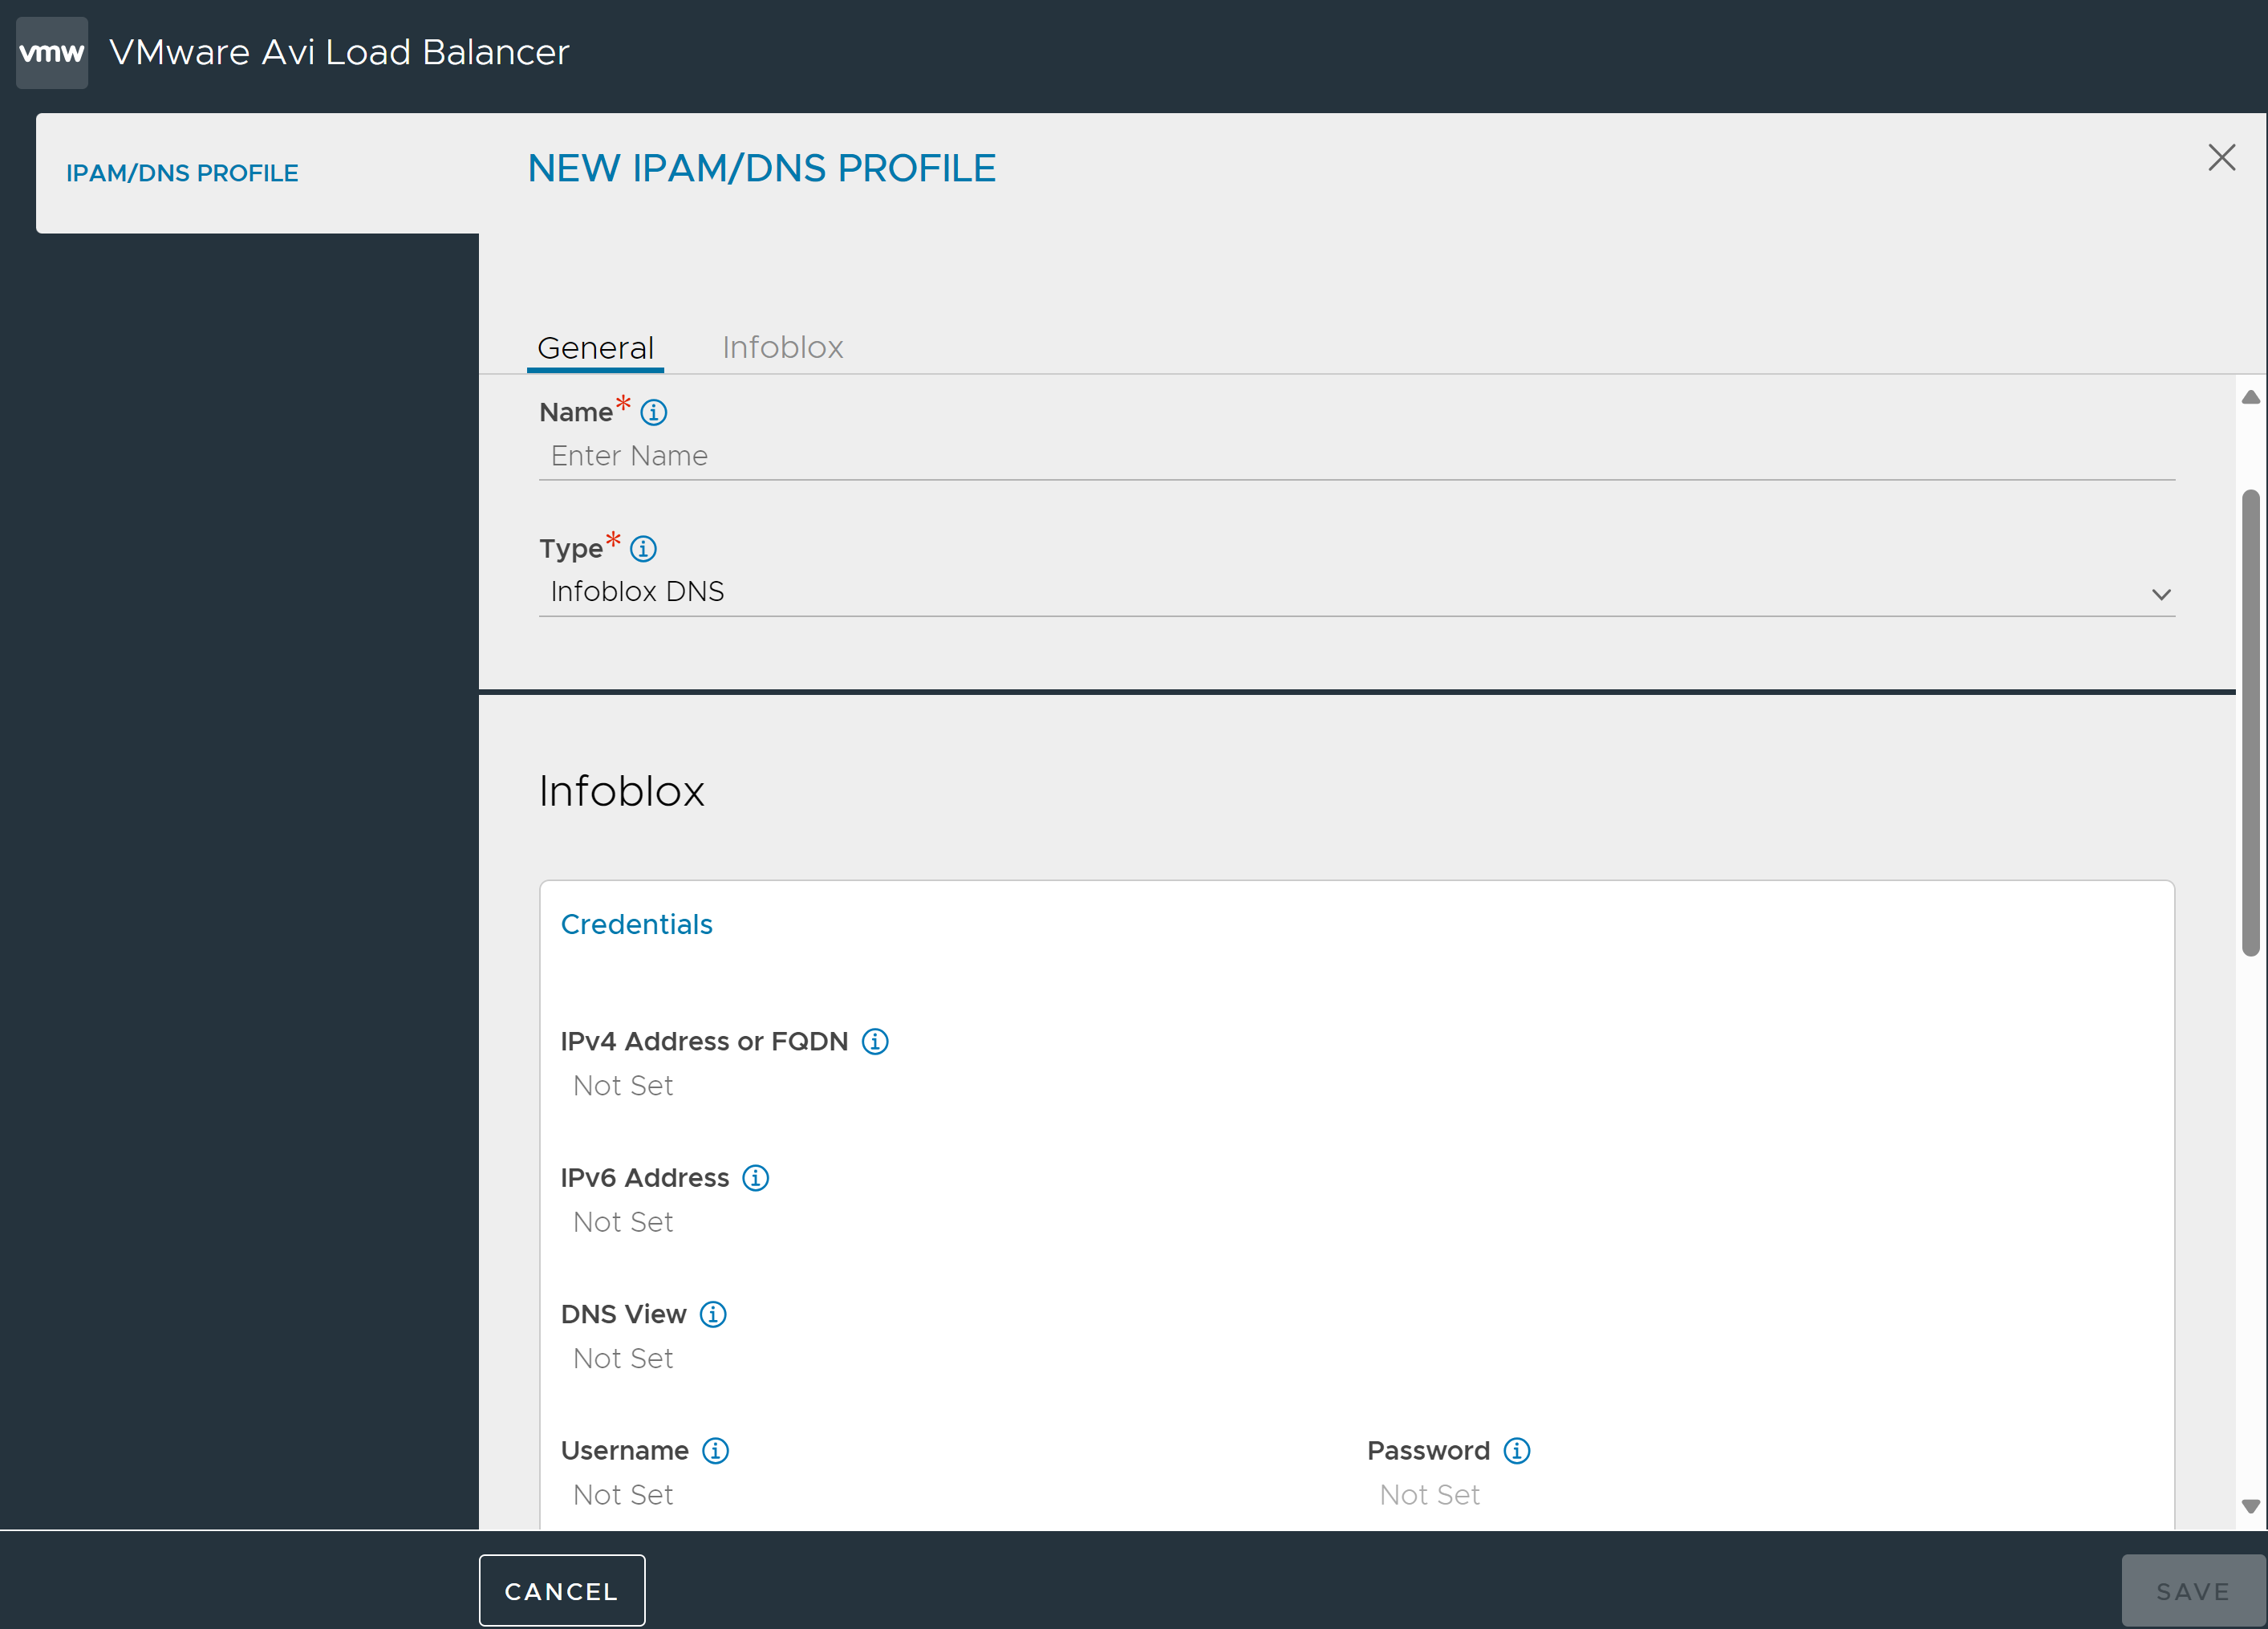
You can set Infoblox DNS credentials by clicking CHANGE CREDENTIALS button.
IPv4 Address or FQDN: Specify IPv4 address or FQDN details of Infoblox.
IPv6 Address: Specify IPv6 address of Infoblox.
Note:If the credentials contain FQDN instead of IPv4 address, then you cannot specify IPv6 address.
DNS View: Specify DNS view used for Infoblox host record creation.
Username: Specify the user name for API access for Infoblox.
Password: Specify the password fir API access for Infoblox.
Specify the following details in Settings section:
WAPI Version: The WAPI version is independent of the version of the Infoblox appliance’s operating system, known as NIOS. To determine the API version being used by Infoblox, access the following URI on the Infoblox Grid Master:https:///wapidoc/.
Usable Domain: Select all or a subset of the domains configured in Infoblox to be used for DNS purposes from the drop-down menu. If none is specified, all domains are available during virtual service creation.
Extensible Attributes: You can send extensible attributes in the data while requesting an IP from Infoblox in the Extensible Attributes section. You can input these attributes as key-value pairs in the Infoblox profile. Click ADD to specify the extensible attributes.
After specifying the necessary details, click Save.
Configuring an Infoblox IPAM Profile on Avi Load Balancer Controller
Navigate to Select IPAM Profile option from CREATE drop-down menu.
Specify the name the profile.
Select Infoblox IPAM from the Type drop-down menu.
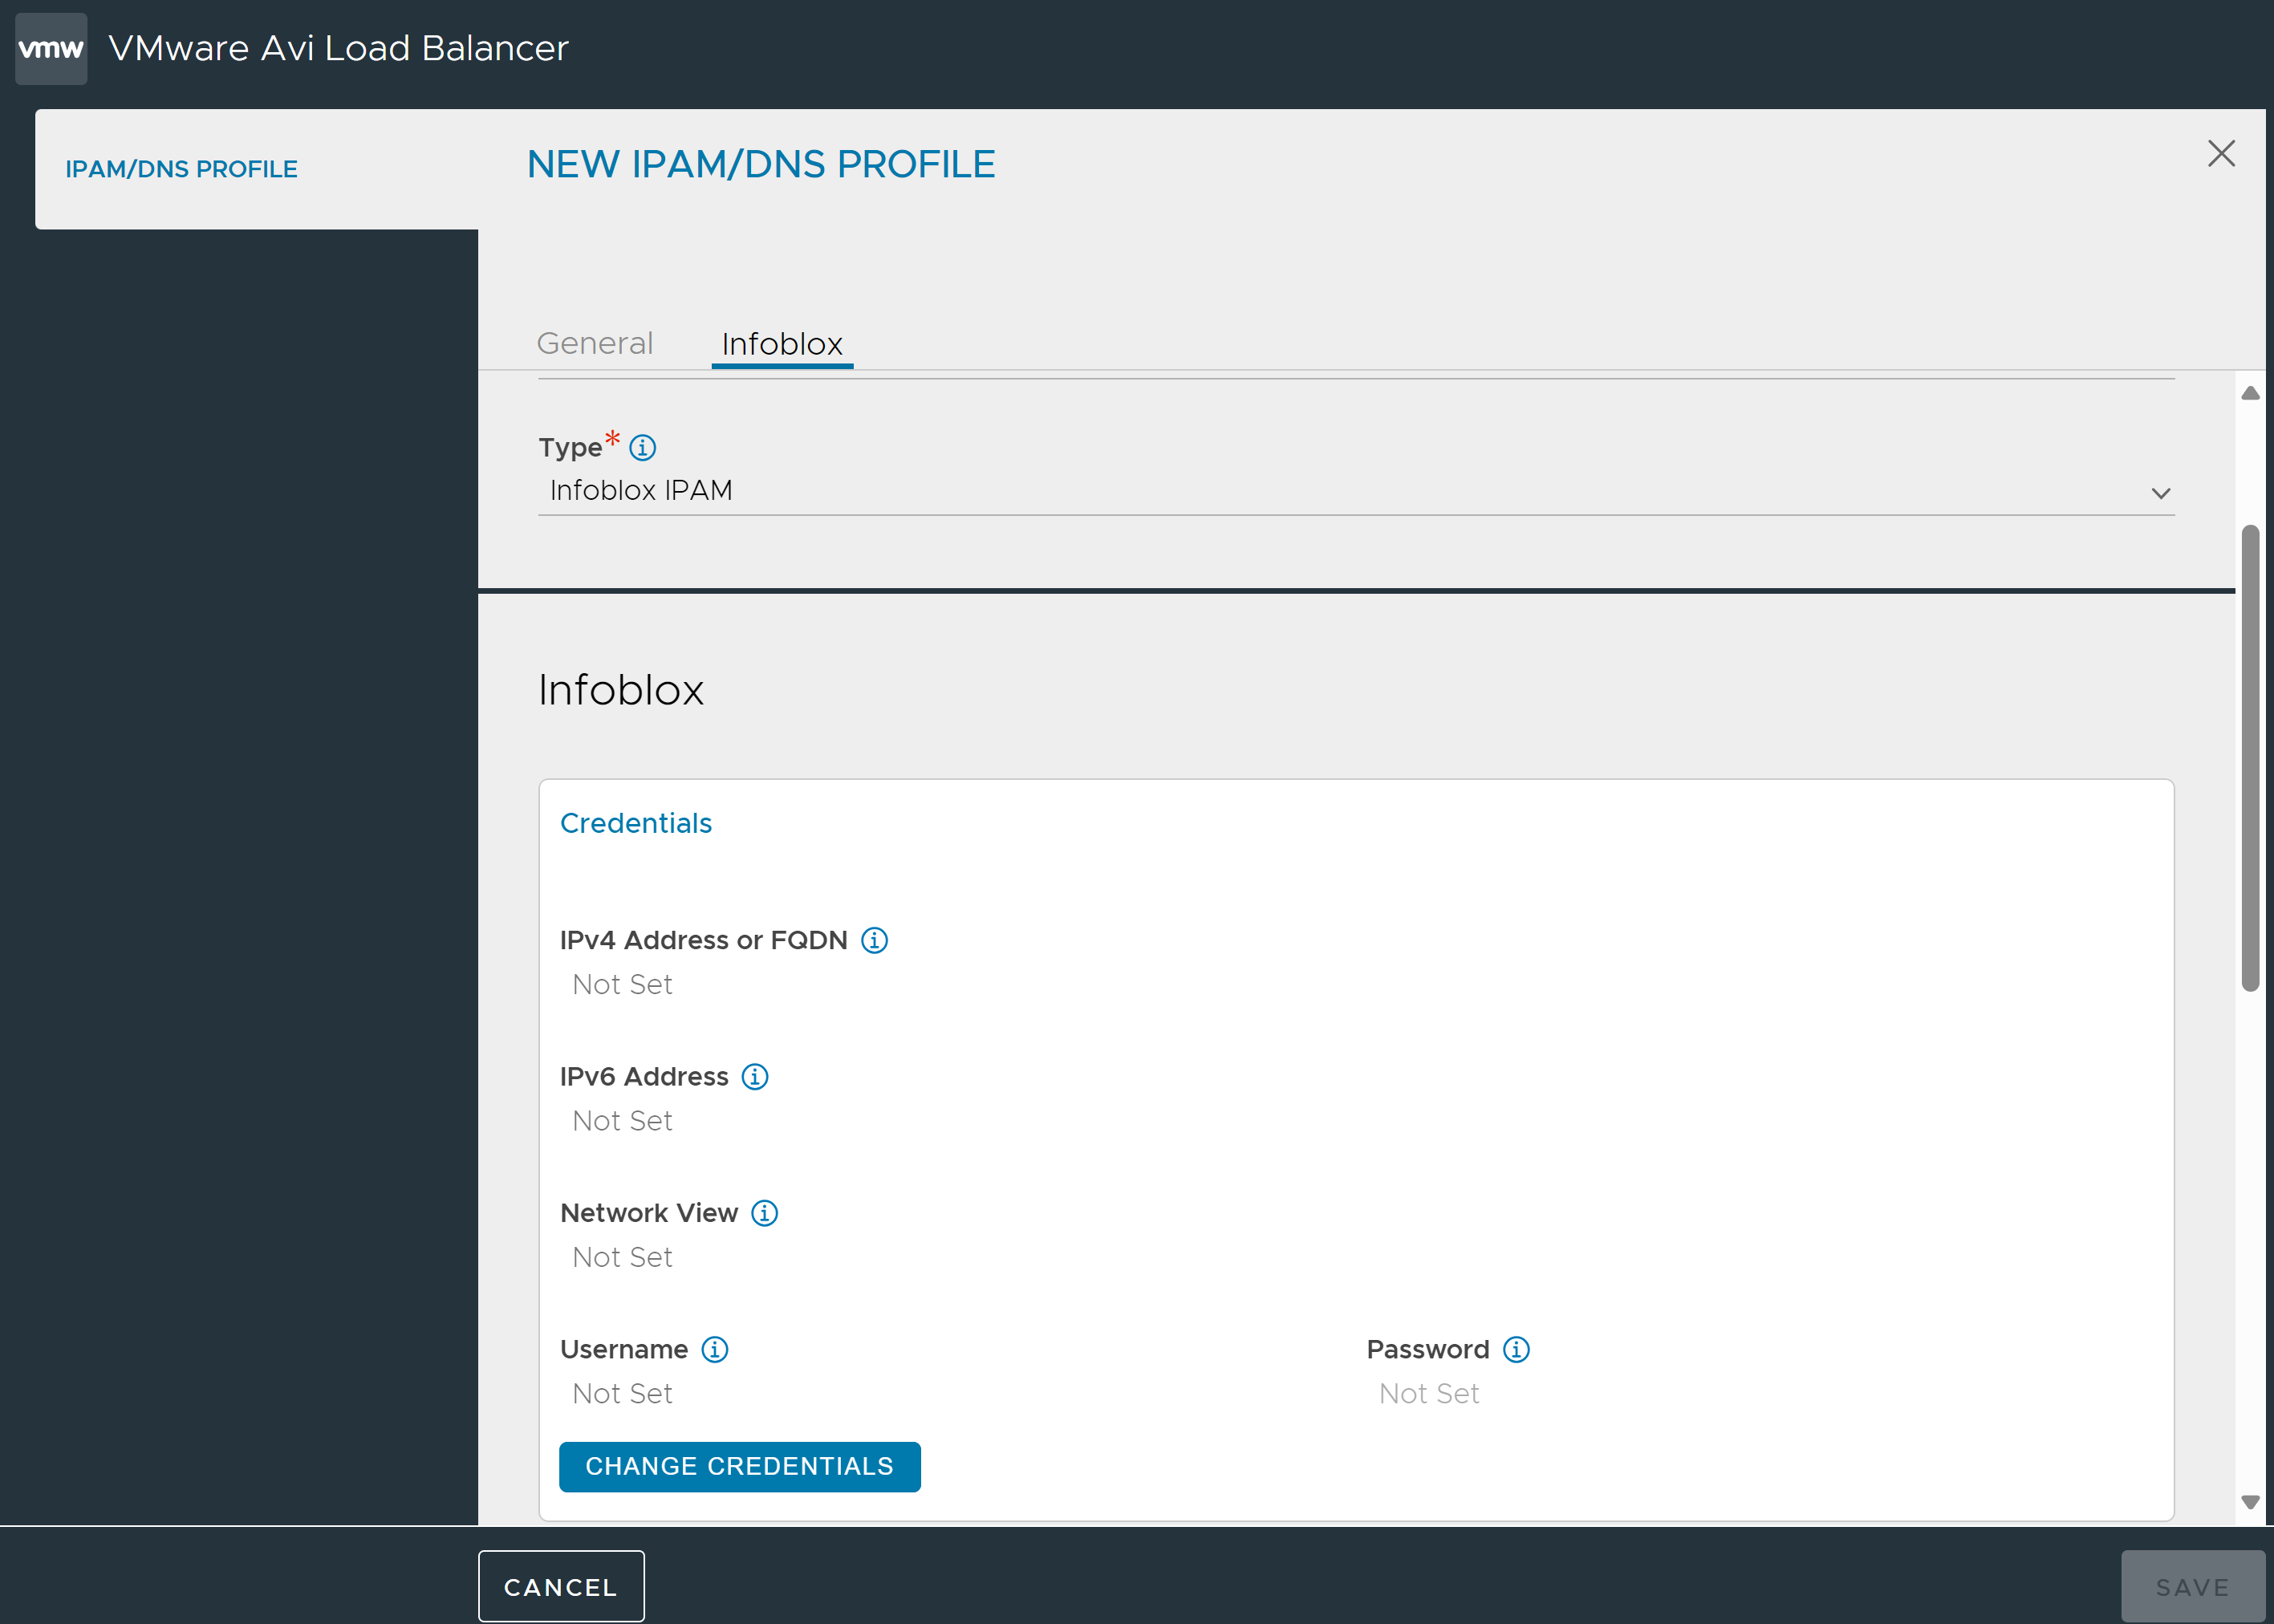
You can set Infoblox IPAM credentials by clicking CHANGE CREDENTIALS button.
IPv4 Address or FQDN: Specify IPv4 address or FQDN details of Infoblox.
IPv6 Address: Specify IPv6 address of Infoblox.
Note:If the credentials contain FQDN instead of IPv4 address, then you cannot specify IPv6 address.
DNS View: Specify DNS view used for Infoblox host record creation.
Username: Specify the user name for API access for Infoblox.
Password: Specify the password fir API access for Infoblox.
Specify the following details in Settings section:
WAPI Version — The WAPI version is independent of the version of the Infoblox appliance’s operating system, known as NIOS. To determine the API version being used by Infoblox, access the following URI on the Infoblox Grid Master: https:///wapidoc/.
Usable Subnet — Select the usable subnet from the drop-down menu to pick all or a subset of the networks configured in Infoblox to be used for IPAM purposes. If none is specified, all networks are available during virtual service creation.
You can add IPv4 and IPv6 subnet details by clicking Add Usable Subnet option.
You can select either a IPv4, IPv6 or both for each row. If both IPv4 and IPv6 subnets are populated on a given row, they are paired up for VIP allocation. For instance, if a VIP needs both v4 and v6, then you need to specify both IPv4 and IPv6 details.
Extensible Attributes: You can send extensible attributes in the data while requesting an IP from Infoblox in the Extensible Attributes section. You can input these attributes as key-value pairs in the Infoblox profile. Click ADD to specify the extensible attributes.
Both IPv4 and IPv6 must be a part of the same underlying port-group/ VLAN for virtual service traffic to not fail.
If you do not specify any value, then all networks will be available during virtual service creation.
After specifying the necessary details, click Save.
Credential Verification and Infoblox Network/ Domain Selection
When configuring/ editing Infoblox DNS or IPAM profiles, the Avi Load Balancer first verifies credentials.
This verification is only applied to Infoblox and Azure profiles.
Configuring an Infoblox IPAM Profile
If you have entered invalid credentials and clicked Connect button, the system displays an error message. If the credentials are correct, the new screen is displayed, confirming that the entered credentials are correct. The Connect button will change to a Change Credentials button, enabling you to change the credentials.
User Permissions Required in Infoblox
For the Avi Load Balancer Controller to properly select the next available IP address from available subnets and register host objects in the correct DNS zones, the user-defined in the Infoblox IPAM/ DNS profile must have Read/ Write WAPI access to Infoblox. In real production environments, it is recommended to create a new user account that will have the minimum required access to Infoblox.
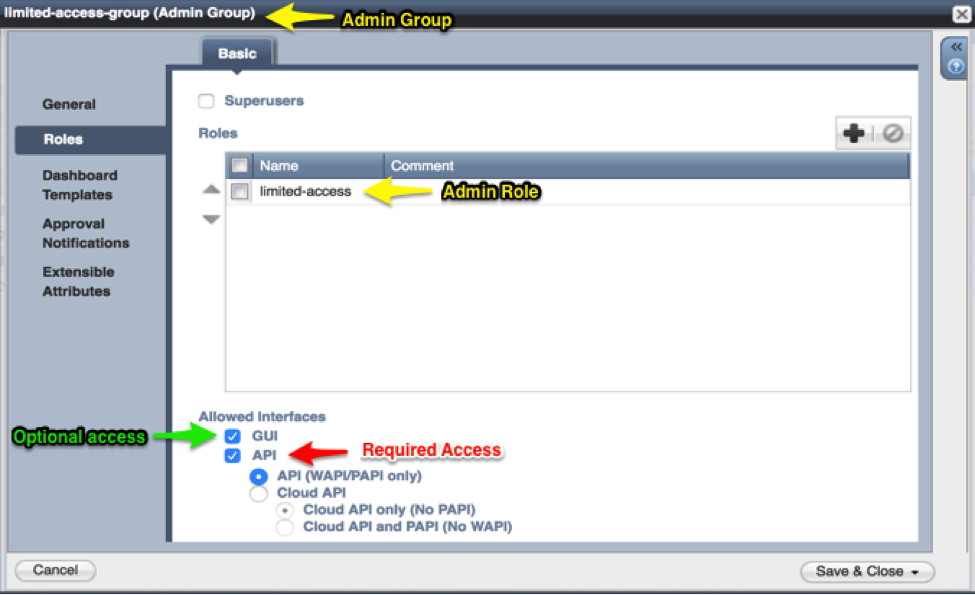
Granular access control can be defined using object-level permissions within the Infoblox permissions model for the specific DNS zones and IPAM networks that Avi Load Balancer will be modifying through the Infoblox WAPI. In addition, one can set the 'API Only' bit as an allowed interface for configuring Infoblox so that you cannot log into the admin UI but is instead restricted solely to API access. In the sample screenshot below, a new user group called ‘limited-access-group’ and a new role called ‘limited-access’ has been created. Object-level permissions are then applied to the ‘limited-access’ role and inherited by users that are added to the ‘limited-access-group’.
Although API access is all that is required for Avi Load Balancer-to-Infoblox integration to function correctly, it is recommended to enable the Avi Load Balancer UI access while testing so that the results of the granular, object-level permissions can be visually verified. After the desired results have been achieved, you can safely deactivate UI access for the user defined in IPAM or DNS profiles.
