


This section explains provisioning and configuring Avi Load Balancer in Google Cloud Platform (GCP) with public IP support for Network Load Balancing.
Linux Server Cloud and GCP IPAM on GCP are not supported by the Avi Load Balancer.
About Google Cloud Platform (GCP)
Google Cloud Platform is a cloud computing service that offers hosting services on the same supporting infrastructure that Google uses internally for end-user products such as search and YouTube. Cloud Platform provides developer products to build a range of programs, from simple websites to complex applications.
GCP is a part of the Google Cloud enterprise services suite that provides a set of modular cloud-based services with a host of development tools that includes hosting and computing, cloud storage, data storage, translation APIs, and prediction APIs.
About Avi Load Balancer
The Avi Load Balancer provides enterprise-grade distributed ADC solutions for on-premise and public-cloud infrastructure. It also provides built-in analytics to diagnose and improve the end-user application experience, helping in easy operations for network administrators.
Avi Load Balancer is a complete software solution which runs on commodity x86 servers or as a virtual machine and is entirely accessible through REST API calls.
Network Load Balancing
Network Load Balancing is used to balance the load on the systems based on incoming IP protocol data such as address, port, and protocol type.
Features of Network Load Balancing
Network load balancing uses forwarding rules that point to target pools, which list the instances available for load balancing and define which type of health check that must be performed on these instances.
Network load balancing is a regional, non-proxied load balancer. You can use it to load balance UDP traffic and TCP, and SSL traffic on ports that are not supported by the SSL proxy and TCP proxy load balancers.
A network load balancer is a pass-through load balancer. It does not proxy connections from clients.
Limitations of Network Load Balancing
Protocol update is not supported.
No health checks. This results in increased failovers. Network Load Balancing health check supports HTTP only, hence cannot be used against all types of applications.
Subnet routes scheme does not work with Network load balancers.
Configuring IPAM
Configure the region name (region_name) and project (project_name), where the Service Engines reside and the Network load balancer will be created.

To edit the IPAM Profile:
On Avi Load Balancer UI, navigate to .
Click the edit icon against the IPAM profile (with the Type, Google Cloud Platform IPAM) to be edited. The Edit IPAM/DNS Profile screen appears.
Select Manual Configuration and enter the Project and Region details as shown in the following image:
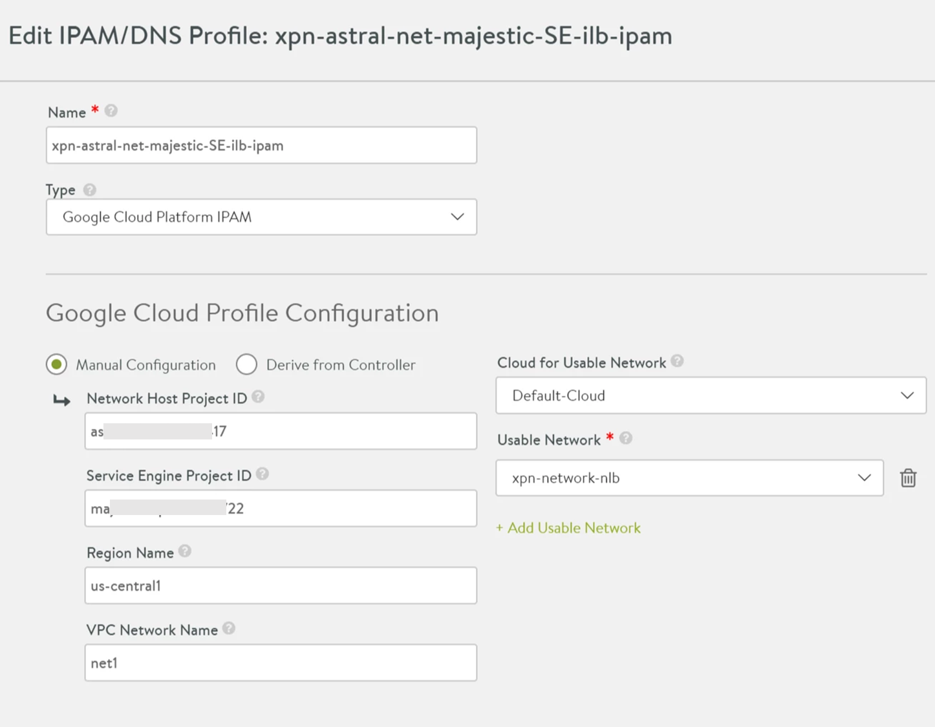
Click Save.
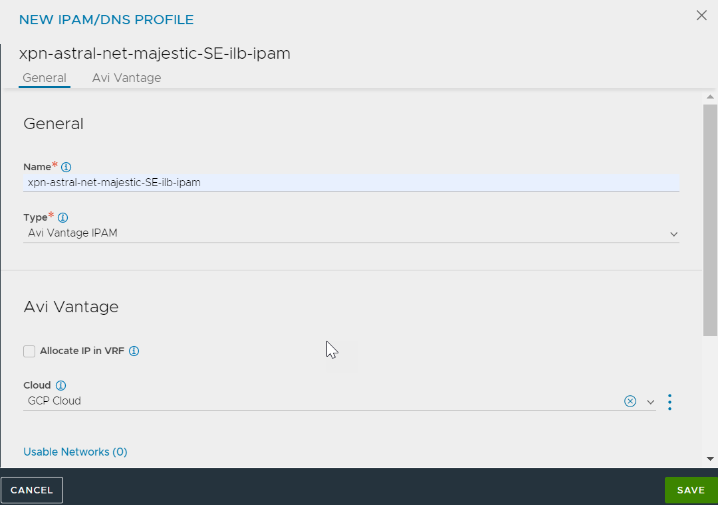
Starting with Avi Load Balancer version 22.1.3, the following UI is available:
Service Engine Project ID - Project A (Project Name of the SEs)
Service Engine Region - Region A (Region Name of the SEs)
Zones
VPC Project ID
VPC Network Name
VPC Subnet Name
Cloud Storage Project ID
Cloud Storage Bucket Name
2. Select Avi Vantage IPAM for the Type field.
3. Add Usable Networks and click SAVE.
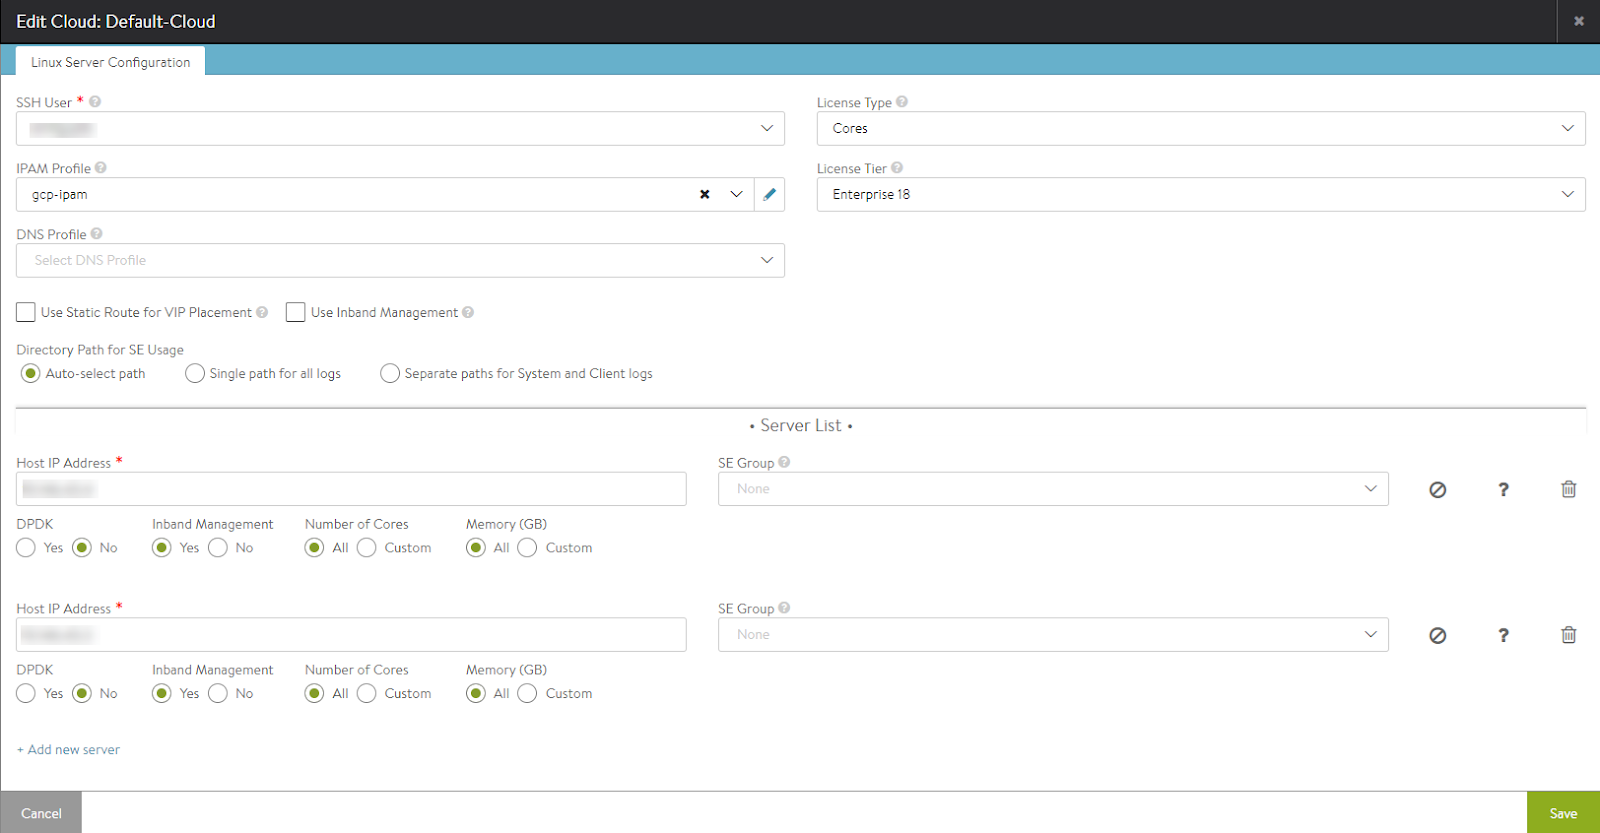
Editing the Cloud to Add IPAM Profile
To add GCP IPAM to a Linux Server cloud, edit the Default-Cloud and choose the IPAM provider that was created as the GCP IPAM provider.
Starting with Avi Load Balancer version 22.1.3, the following UI is available:
You can add the IPAM profile while editing a cloud as follows:
Navigate to IPAM/DNS tab. In the IPAM Profile field, select the created IPAM profile from the drop-down menu.
Complete the Cloud configuration by clicking SAVE in the EDIT CLOUD screen.
Edit an existing cloud.
Forwarding Rule
One virtual service will be one Network load balancer in GCP. This means one virtual service will have a front end forwarding rule with the GCP external IP and one target pool with the Service Engines as the back end.
++Truncated Output++
+------------------------------------+-----------------------------------------------------+
[admin:10-146-43-2]: virtualservice> vip index 1
[admin:10-146-43-2]: virtualservice:vip> auto_allocate_floating_ip
Overwriting the previously entered value for auto_allocate_floating_ip
[admin:10-146-43-2]: virtualservice:vip> save
[admin:10-146-43-2]: virtualservice> save
++ Truncated Output++

Assigning floating IP is currently supported through the CLI only. UI support will be scoped-in in the future releases.
Auto-allocating FIP
All GCP resources for NLB will be created in the SEs project. Only auto-allocate of Floating IP will be supported.
++Truncated Output++
[2018-07-16 06:48:08,717] INFO [gcp_nlb.allocate_vip:63] old_vip_info: vip {
addr: "55.55.55.100"
type: V4
}
alloc_fip: false
|| new_vip_info: vip {
addr: "55.55.55.100"
type: V4
}
alloc_fip: true
Swagger APIs can be used to auto-allocate a Floating IP for Network load balancing VIP/virtual service through a PUT request using the same as below:
"vip" : [ {
"availability_zone" : "aeiou",
"ip6_address" : "",
"subnet" : "",
"port_uuid" : "aeiou",
"subnet_uuid" : "aeiou",
"avi_allocated_vip" : true,
"vip_id" : "aeiou",
"ip_address" : "",
"auto_allocate_floating_ip" : true, *
"enabled" : true,
"floating_subnet6_uuid" : "aeiou",
"auto_allocate_ip" : true,
"subnet6" : "",
"floating_ip" : "",
"floating_subnet_uuid" : "aeiou",
"avi_allocated_fip" : true,
"subnet6_uuid" : "aeiou",
"floating_ip6" : "",
"ipam_network_subnet" : "",
"network_ref" : "aeiou",
"discovered_networks" : [ "" ]
For more information on accessing OpenAPI (Swagger 2.0) from Avi Load Balancer API Documentation, see OpenAPI (Swagger 2.0) Specification Integration.
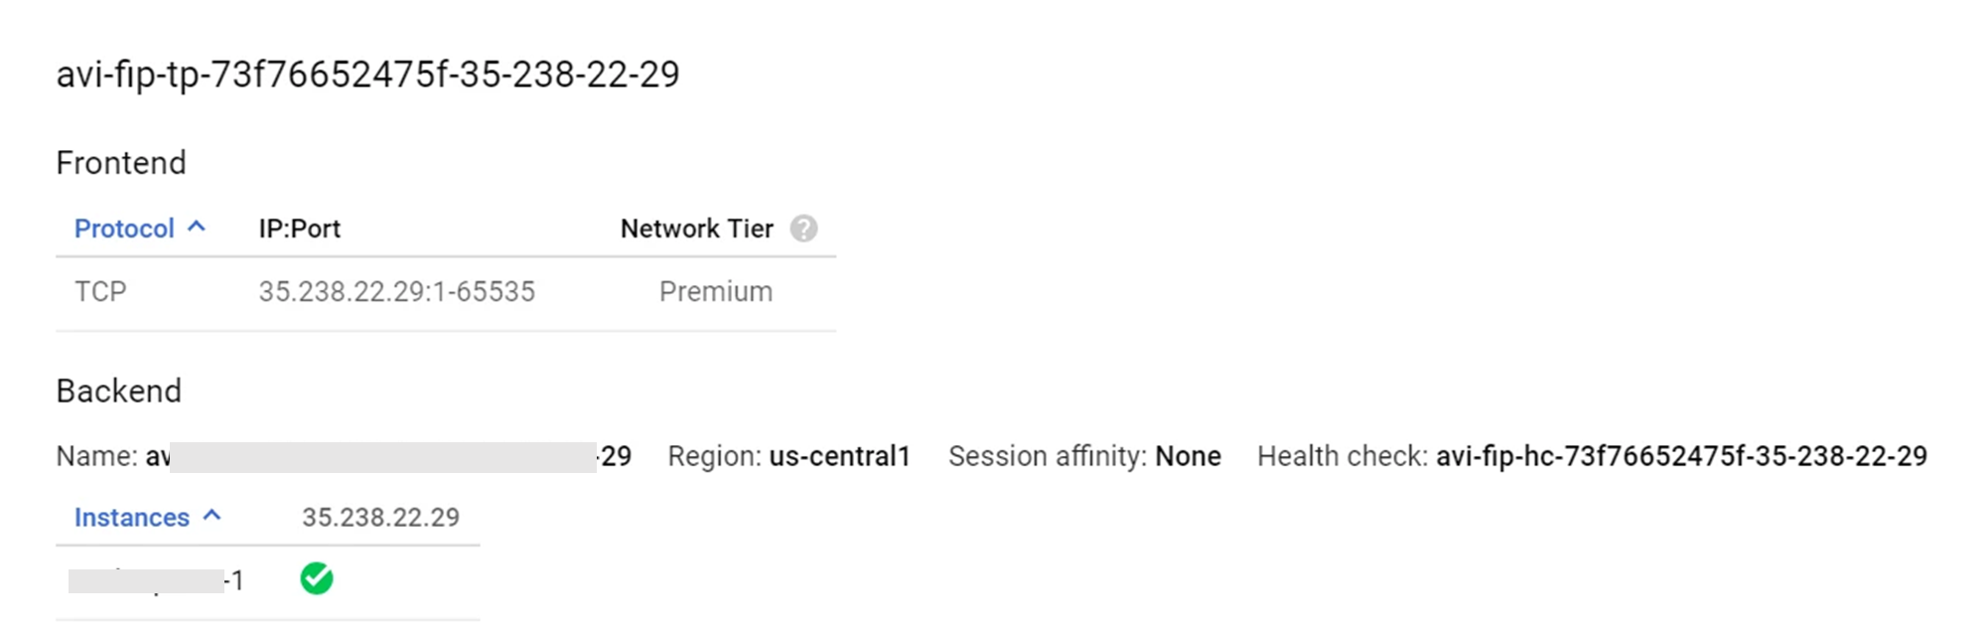
To know if the floating IP is UP,
On Avi Load Balancer UI, click the Virtual Services tab.
Click the virtual service for which the floating IP is allocated, to select it.
On pointing to the selected virtual service, a pop-up screen will display that the floating IP is
UP:
Virtual Service scale out to two different Service Engines is as follows:

Sharing VIP with Network Load Balancer
Since the Network load balancer is created with ports 1-65535, shared VIPs can be created on the same IP as follows:

