This section explains the steps to perform initial configuration of the Controller using its deployment wizard. You can change or customize settings following initial deployment using the Controller’s web interface.
While the system is booting up, a blank web page or 503 status code may appear. In this case, wait for 5 to 10 minutes; then follow the instructions for the setup wizard.
Procedure
- Configure basic system settings, such as administrator account details, DNS and NTP server information along with email and SMTP information.
- Navigate to Infrastructure > Clouds. Select OpenStack from the CREATE drop-down menu.
Specify the tenant user credentials by clicking SET CREDENTIALS in OpenStack section of NEW CLOUD window. If you are using Keystone V3 and want to provide a user in the non-default domain, then use the notation user@domain-name in the Username field.
If you create a username test as a Keystone v3 user in a domain named default, then you must explicitly specify test@testdomain while logging into the Controller. If the domain name is not specified, Keystone looks for a domain with UUID testdomain and not the name testdomain. Since no domain with a UUID of testdomain exists, Keystone fails, thereby returning the error as invalid user/ password.
Use the full value in the Keystone Auth URL field. Avi Load Balancer determines the Keystone API version automatically. When the auth URL is a secure URL (HTTPS), the system will display an option to either allow or disallow self-signed certificates. You can deactivate the check box in a production environment, since OpenStack services must use proper, trusted certificates.
Check the Use Keystone Auth check box and click CONNECT button.
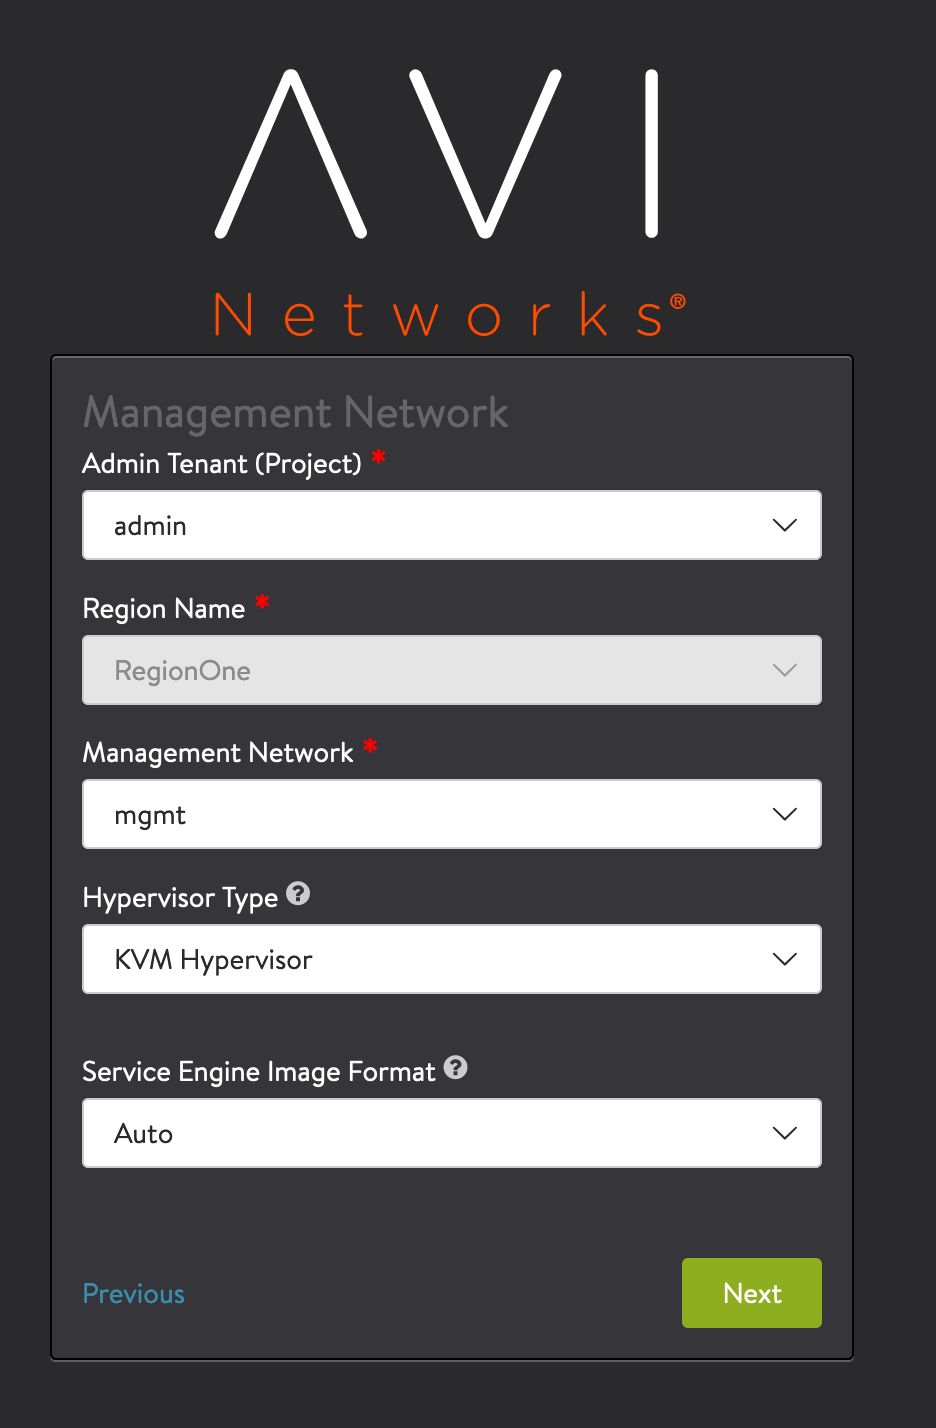
- In Management Network window, select a tenant. In this deployment, it should be the same tenant into which the Controller is deployed. Choose the management network created previously. Also specify the Hypervisor Type and Service Engine Image Format. Click Next button.
Figure 1. Controller Setup Management 
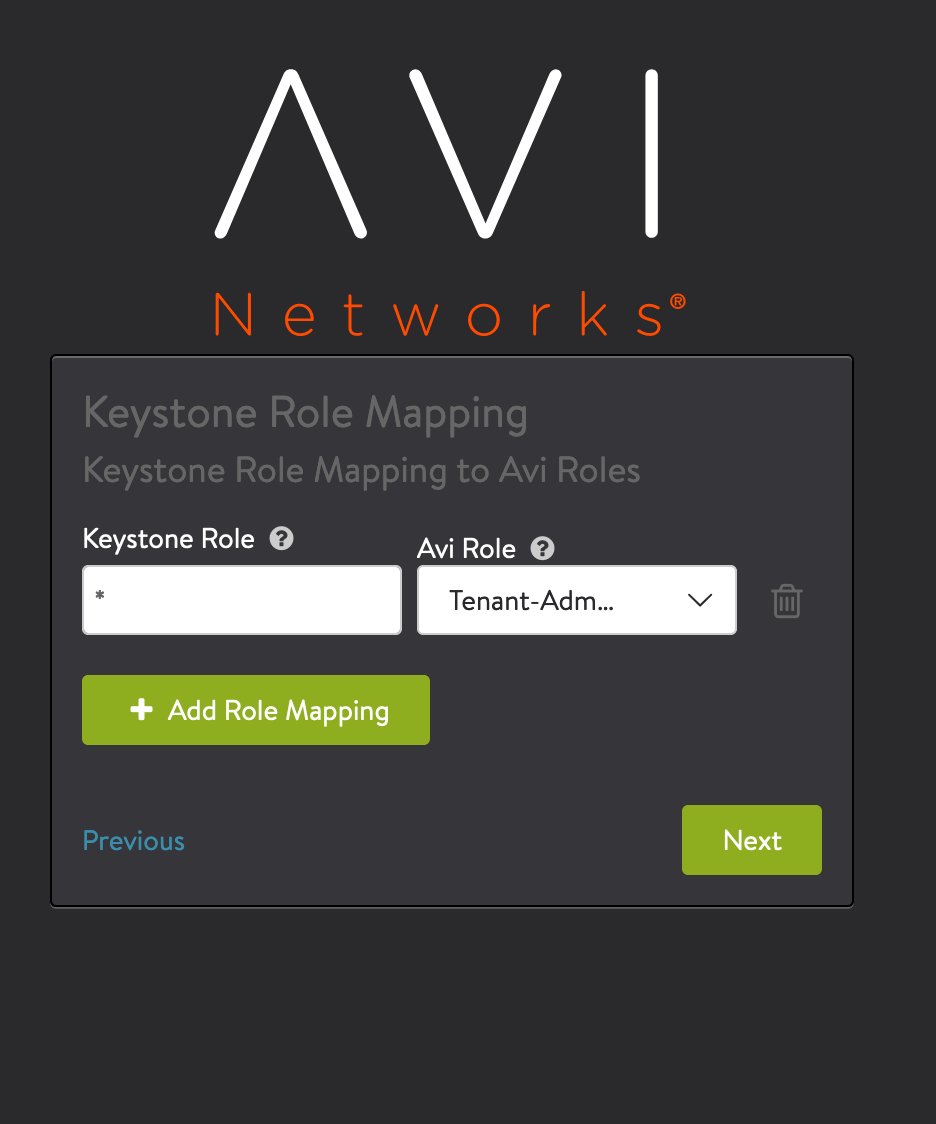
- In Keystone Role Mapping window, select an Avi Load Balancer user role as the default user role. If a Avi Load Balancer user logs in with valid Keystone credentials, but with a role that does not have the same name as any of the user roles defined on the Controller, the default role is assigned to the user. You can skip this option to disallow access for any user who does not have a role that is defined on the Controller. Click Next button.

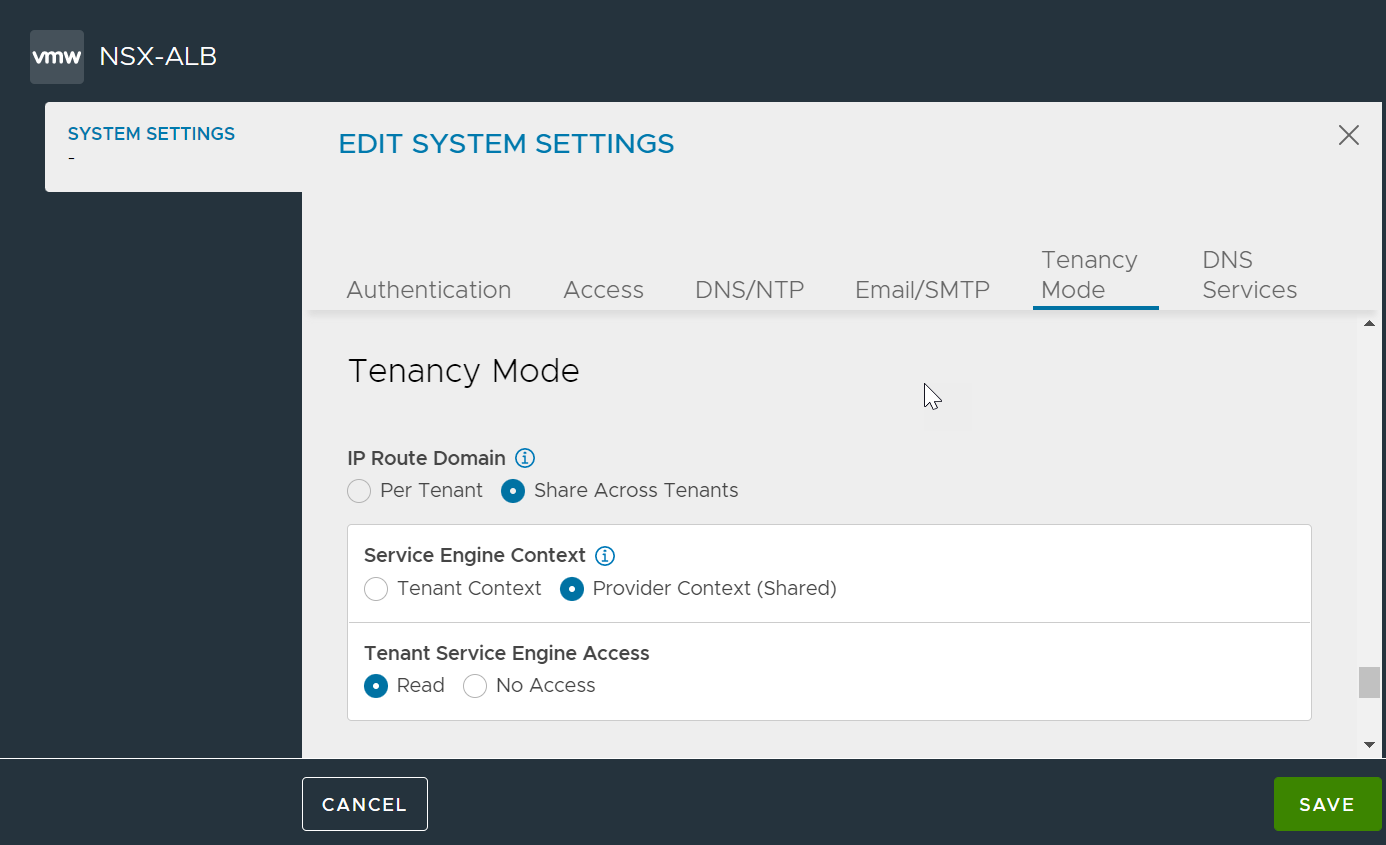
- You can configure tenant settings by navigating to Administration > System Settings. Click edit icon. Navigate to Tenancy Mode tab.
Specify the following details:
IP Route Domain: This option allows you to select tenant’s IP route domain.
Per Tenant: If you select this option, each tenant gets its own routing domain that is not shared with any other tenant.
-
Share Across Tenants: If you select this option, all tenants share the same routing domain.

Service Engines Context: This option controls the ownership of Service Engines. Service Engines can either be exclusively owned by each tenant or owned by the administrator and shared by all tenants. When Service Engines are owned by the administrator, each tenant can have either read access or no access to their Service Engines. You can select one of the options.
Tenant Context - Service Engines are managed within the tenant context, not shared across tenants.
Provider Context (Shared) - Service Engines are managed within the provider context, shared across tenants. If you select this option, you also need to select access rights of the tenant to Service Engine by choosing either Tenant has Read Access to Service Engines or Tenant has No Access to Service Engines options.
Tenant Service Engine Access: Select Read or No Access option.
After specifying the necessary details, click Save option.