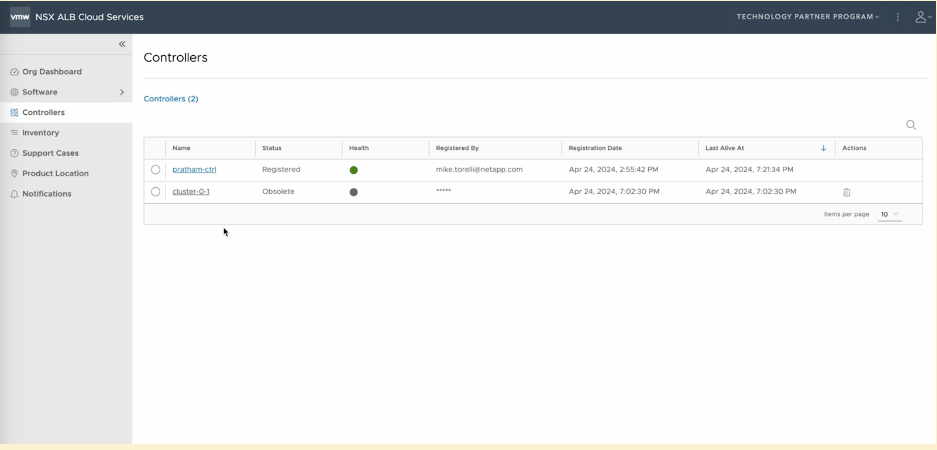
This topic is to outline the process to re-register your Controllers to Avi Cloud Console (formerly Avi Pulse) after the migration to Broadcom systems has been completed.
After the scheduled maintenance window ends on May 11, 2024, follow the below steps to re-register your Controller to Avi Cloud Console. For more details on the operational changes occuring due to IT transition, see Operational Changes Following Broadcom Integration.
Before attempting to de-register and re-register a Controller,
Ensure that you have activated your Broadcom Support Portal account, for the user/ email used to register the Controller.
Ensure that you can access https://portal.avipulse.vmware.com with these credentials.
-
Check that you are able to see a Broadcom Site ID in the top right corner, near the user profile:
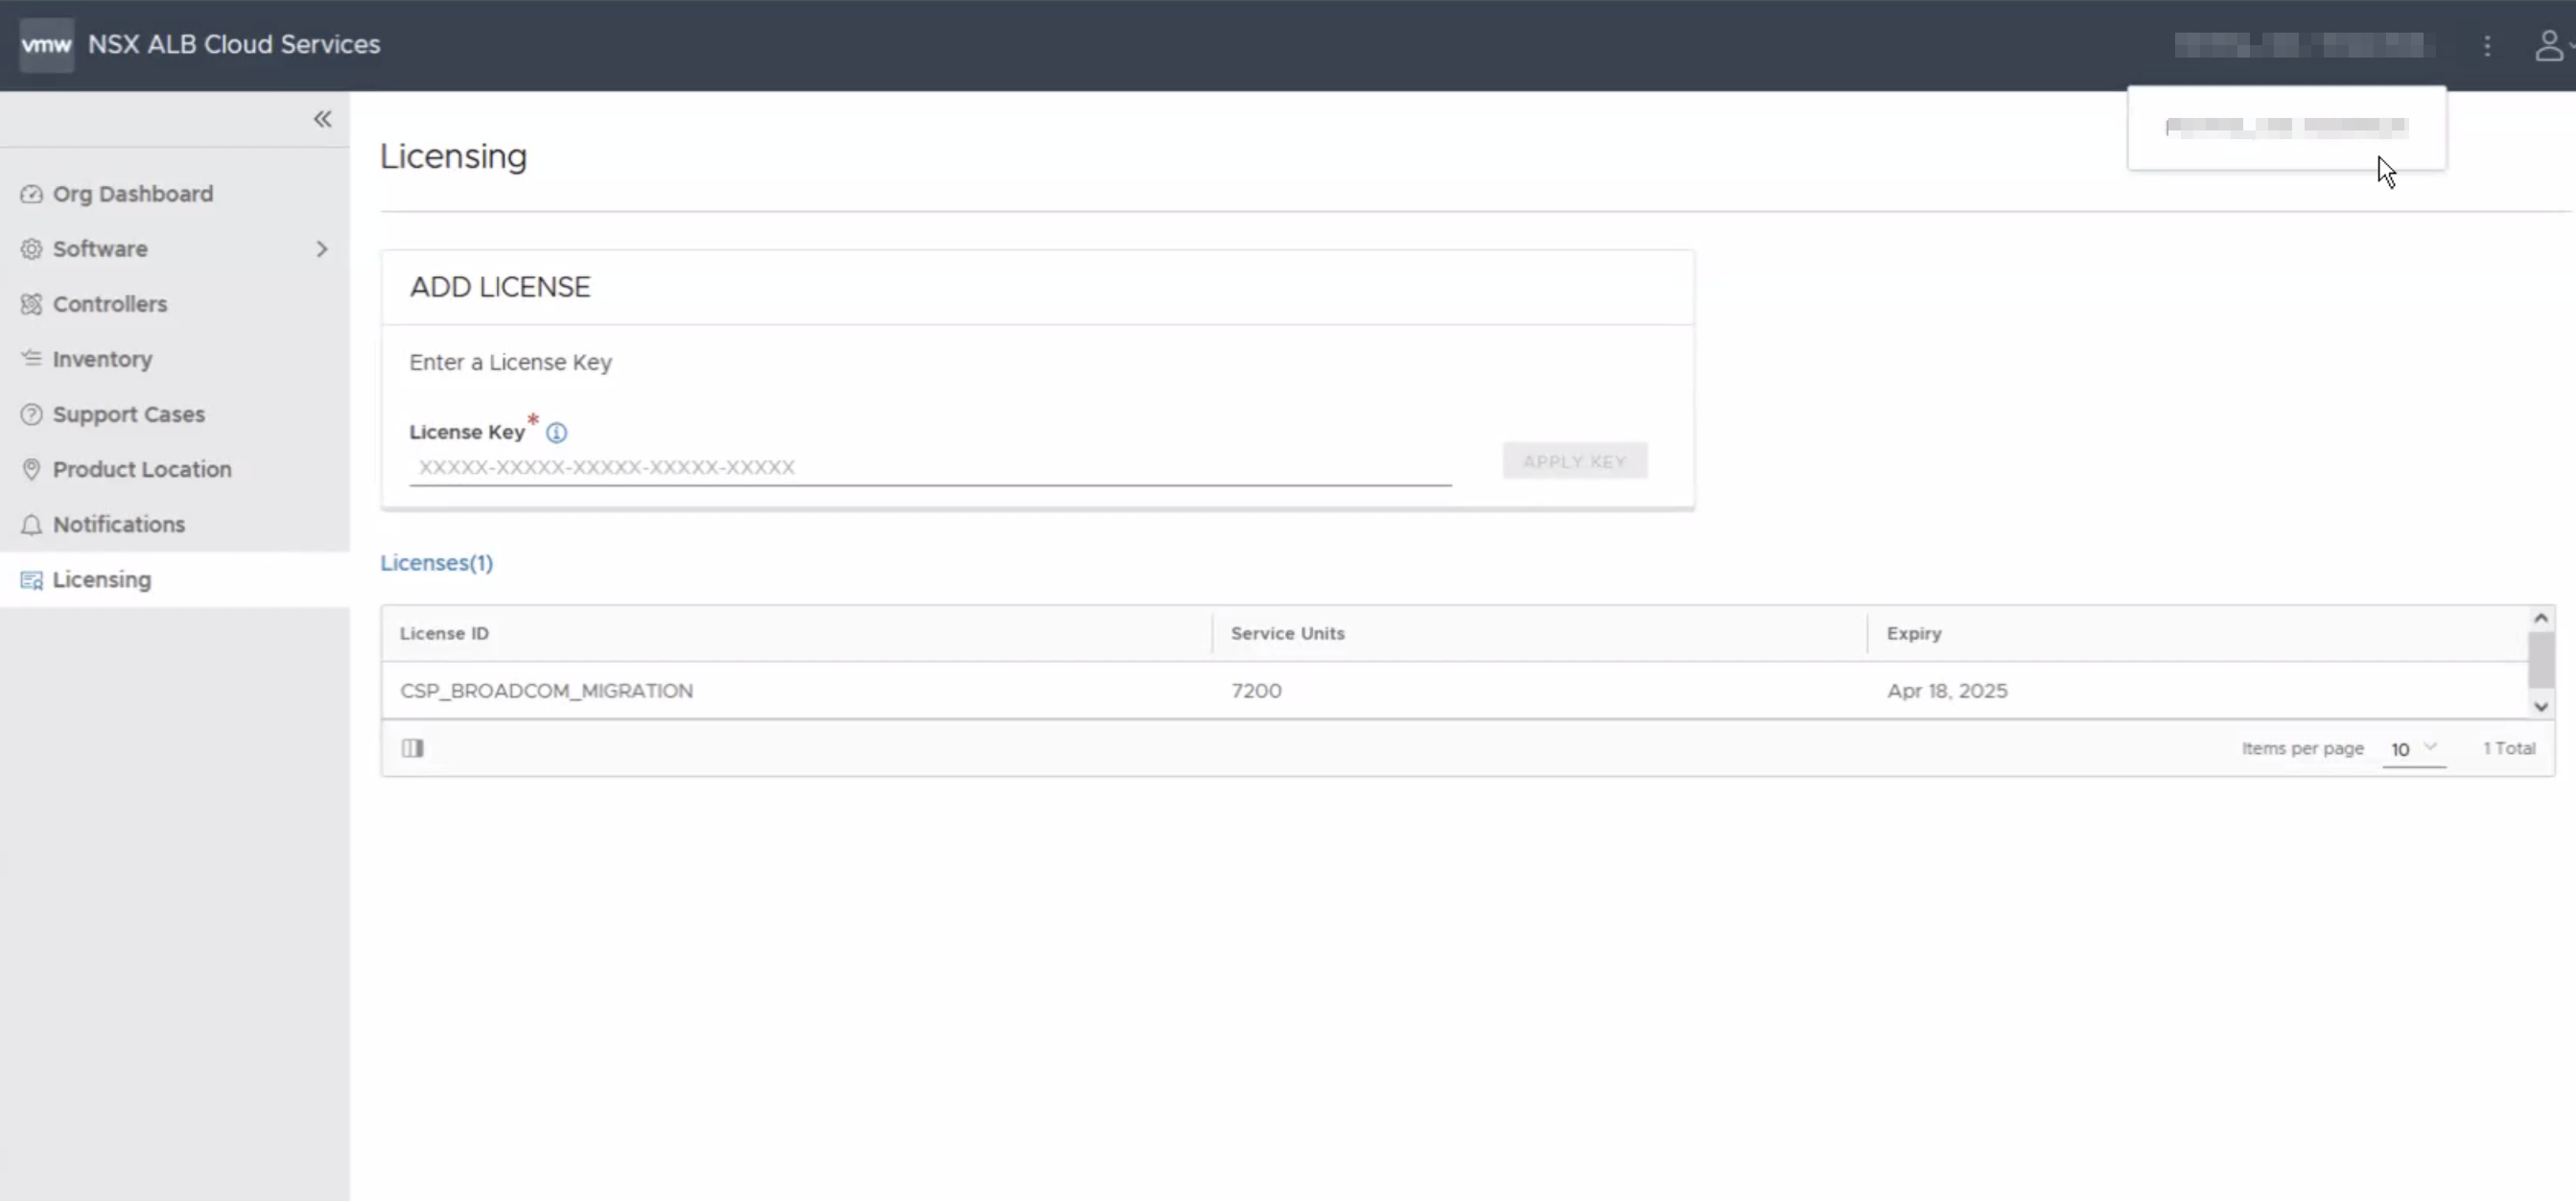
If you cannot locate your Broadcom Site ID refer to the article Broadcom Support Site ID Request Form.
If you have any queries, contact Avi Support through a case on Broadcom Support Portal, before proceeding.
The Controller will be able to run in a disconnected state for 90 days since the last time it was connected. This is tentatively upto August 5, 2024.
During this disconnected state:
Data-plane services will continue to function.
The Controllers will be able to perform configuration changes such as virtual service creation, and so on.
The Controllers will be able to create new Service Engines, as long as they have available capacity as last seen before the Controller disconnected.
The following key features will not be available when in disconnected state:
Security Feeds will not be updated. The Controllers will continue to operate with security feed data such as IP reputation score, as of the last update before disconnect. These security feeds can continue to be applied to WAF and other relevant Virtual Service Policies.
Central Licensing and Licensing mobility will not be available.
Inventory dashboard will not be updated.
Avi Load Balancer Controller 22.1.3 version or later
Follow the steps to re-register Avi Load Balancer Controller 22.1.3 or later version:
Login to the Controller and navigate to . This will be showing as red as below. Do not click Reconnect Now.
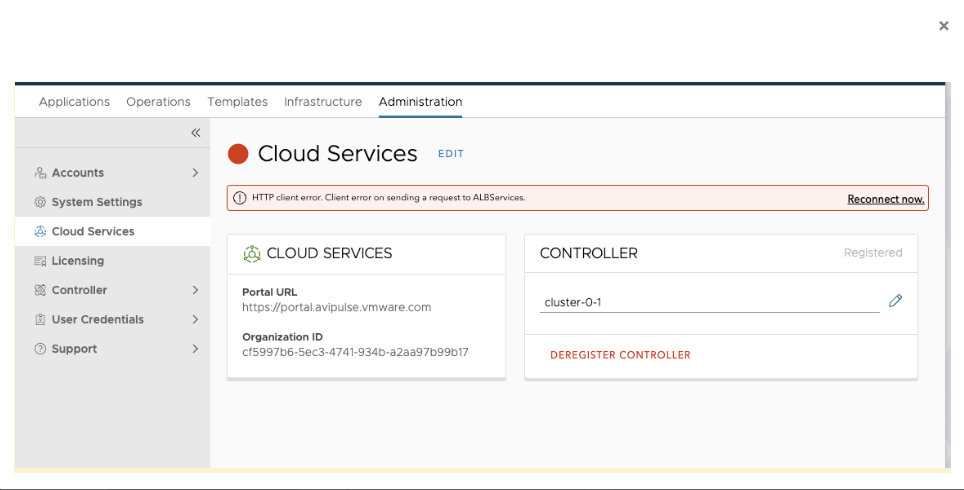
Click DEREGISTER CONTROLLER.
Click REGISTER CONTROLLER.
You would have received an email to activate your Broadcom Support Portal account. Once you have followed those steps, authentication to Avi Cloud Console through these credentials.
On the below screen select your relevant Organization and Default Contact. Note that the Organization now displays the Organization Name, followed by a Broadcom Site ID. On Avi Cloud Console, all licenses for a given Organization Name are aggregated, irrespective of the Site ID.
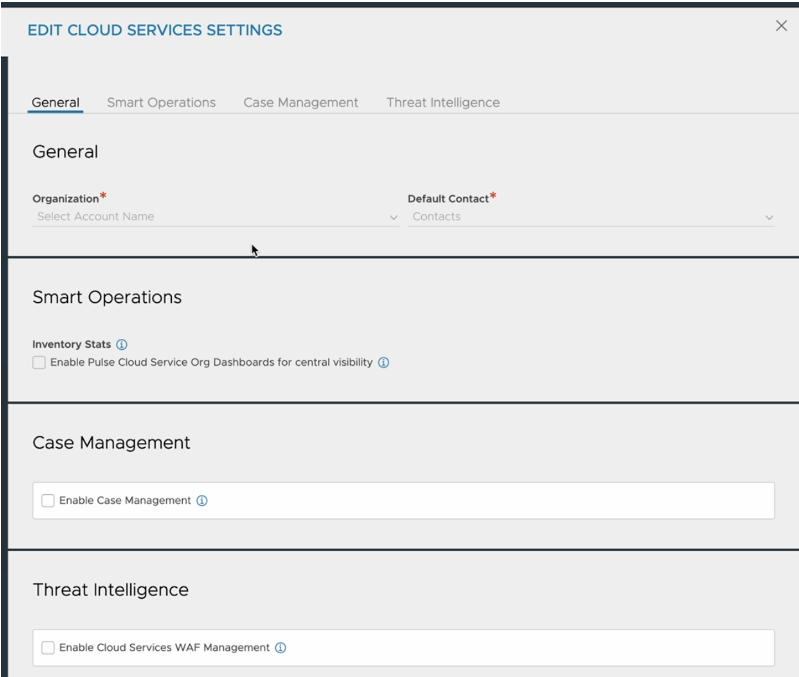
Click Save.
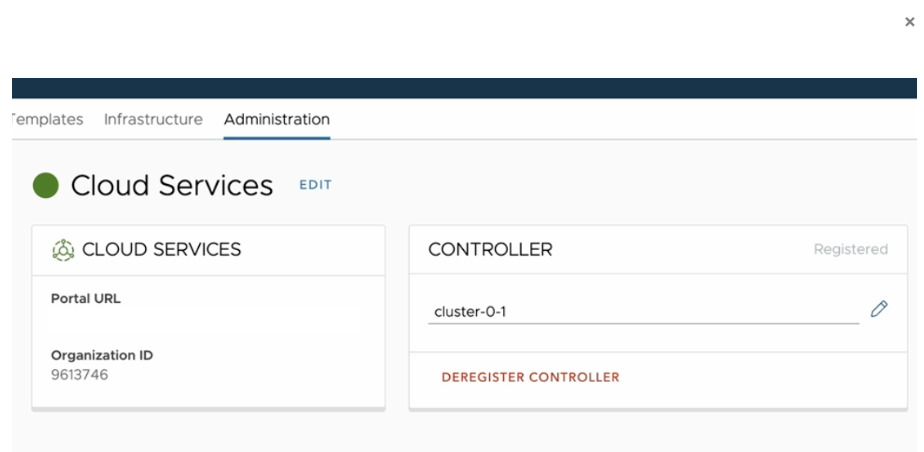
You will see the following screen confirming connectivity.
Avi Load Balancer Controller 22.1.2 version or earlier
For Controller versions 22.1.2 or earlier, you need to run a script to complete the de-registration successfully:
Download the Python script from the avinetworks/devops repository:
Copy or upload script to one of the following Controller directory (
CONTROLLER_DIR),/home/adminor/tmpor/opt/avi/scripts. Optionally rename the script tocleanup_registration.py.<CONTROLLER_DIR>/cleanup_registration.pySSH to Avi Load Balancer Controller using 'admin' user ID and credentials. For a Controller cluster, ensure that the SSH connection is to the cluster leader node.
Run the following command from the bash prompt:
“sudo python3 <CONTROLLER_DIR>/cleanup_registration.py”admin@controller:` sudo python3
</cleanup_registration.py [sudo] password for admin:CONTROLLER_DIR>Once the script is successfully completed access the Controller UI and navigate to .
Click Register Controller.
On the below screen select your relevant Organization and Default Contact.
Note:The Organization now displays the Organization Name, followed by a Broadcom Site ID. On Avi Cloud Console, all licenses for a given Organization Name are aggregated, irrespective of the Site ID.
The Cloud Services Settings window is displayed as shown:

Click Save.
You will see the following screen confirming connectivity.

After re-registering the Controller, navigate in your browser to the Avi Cloud Console Portal at https://portal.avipulse.vmware.com and click Controllers. This will list all registered Controllers.
