


Prerequisites
- Helm charts for the VMware BMA Core platform from VMware download page.
- Container images for VMware BMA Core platform.
- An environment that has enough resources to accommodate the minimum requirements of the VMware BMA.
- A machine (with minimum 30 GB disk space) with Docker installed to push VMware BMA container images to your container registry.
- A mapped domain name in a DNS service for your VMware BMA FQDN.
- A default storage class available on the Kubernetes cluster.
- Loadbalancer installed on the Kubernetes cluster. VMware has validated against MetalLB and VMware NSX Advanced Load Balancer. This document explains usage of MetalLB loadbalancer as an example.
Procedure
- Configure container server or registry.
You need a container registry to store the container images of VMware BMA.
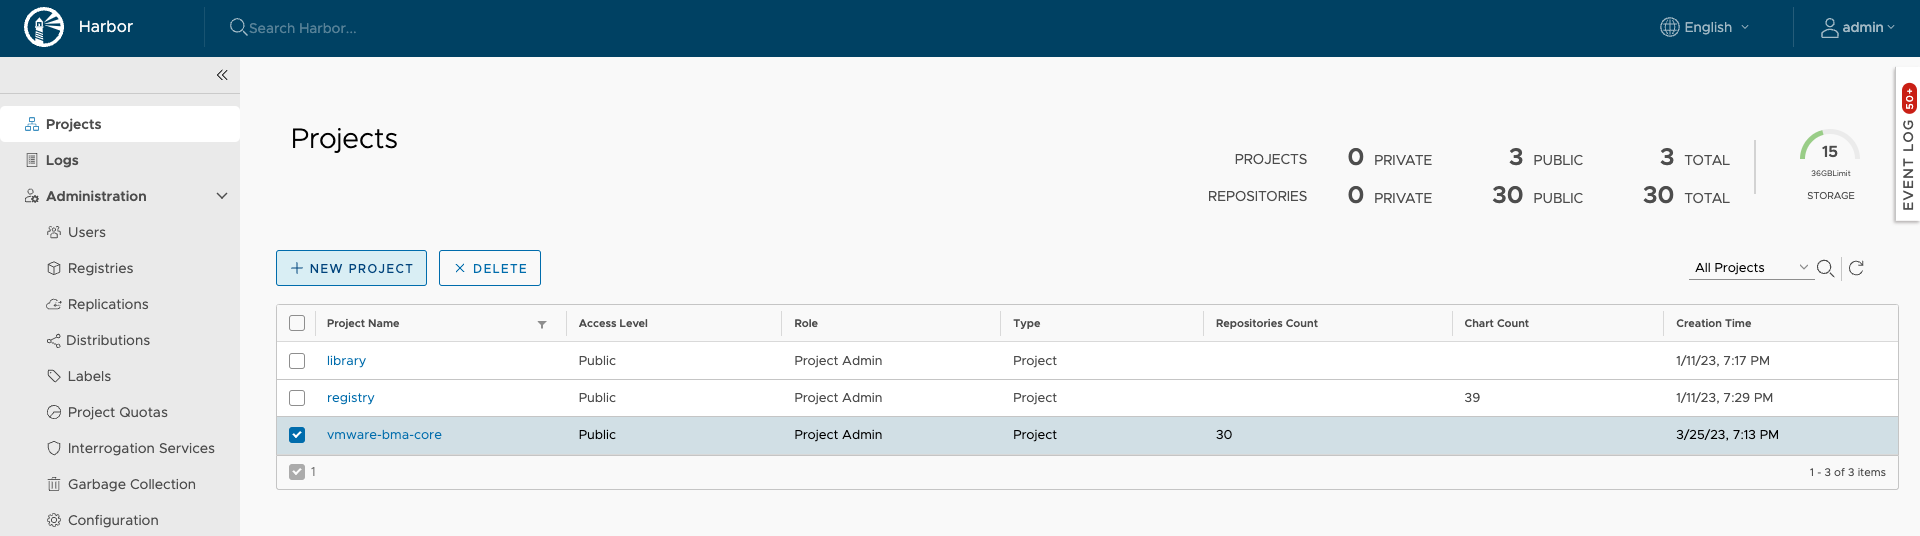
VMware verified with Harbor container registry. For more information on Harbor installation, see Configuring an Airgap Repository topic in VMware Telco Cloud Automation Deployment Guide in VMware Telco Cloud Automation Documentation. - Create a public project in Harbor server for VMware BMA Core.
- Set up a Kubernetes cluster.
Note: VMware has validated against VMware Kubernetes cluster.
For more information, see Minimum Requirements.
- Download the Container images and the Helm charts from the VMware Downloads section.
- Copy the Helm charts to the Kubernetes cluster.
- Run the following command to extract the VMware BMA Core tar bundle VMware-Bare-Metal-Automation-Core-<version number>.tar.gz (for example: VMware-Bare-Metal-Automation-Core-4.0-v2024.1.497-b7.tar.gz) in your machine from where you want to push the container images.
gunzip VMware-Bare-Metal-Automation-Core-<version number>.tar.gz
- Push the container images to your container registry in the public project.
You can push container images to Harbor server or registry in different ways. The below example explains pushing container images using Docker.
If Docker is not installed,
- Run the following command to start and enable the docker service as sudo if Docker is not installed.
sudo yum install docker
sudo systemctl start docker
sudo systemctl enable docker
- Run the following command to log in to Harbor via Docker.
docker login harbor_sever_ip -u username -p password
Example:docker login 192.168.10.25 -u admin -p Harbor12345
In the above example, 192.168.10.25 is the harbor_server_ip, Harbor12345 is the password and admin is the username.
If Docker login fails, see Docker Login Failure section in Troubleshooting.
- Run the following command to load Docker.
Currently, the repository for VMware BMA Helm charts is 423562884727.dkr.ecr.us-east-1.amazonaws.com.
docker load -i vmware-images-bma-core-<version number>.tar
- Run the following command to start and enable the docker service as sudo if Docker is not installed.
- Run the following command to tag the container images through docker. Obtain location of all the loaded images from previous step and use those values as inputs to the docker tag command.
docker tag <loaded_image_location> <registry_image_location>
In the following example, 192.168.10.25 is the IP address of the Harbor server and vmware-bma-core is the public project created in the Harbor server.docker tag 423562884727.dkr.ecr.us-east-1.amazonaws.com/pliant-api-radius-master:v1.14.0 192.168.10.25/vmware-bma-core/pliant-api-radius-master:v1.14.0 docker tag 423562884727.dkr.ecr.us-east-1.amazonaws.com/pliant-worker-nodejs-config-master:v1.27.0 192.168.10.25/vmware-bma-core/pliant-worker-nodejs-config-master:v1.27.0 docker tag 423562884727.dkr.ecr.us-east-1.amazonaws.com/pliant-api-master:v1.159.0 192.168.10.25/vmware-bma-core/pliant-api-master:v1.159.0 docker tag 423562884727.dkr.ecr.us-east-1.amazonaws.com/addon-mqws-master:v1.11.0 192.168.10.25/vmware-bma-core/addon-mqws-master:v1.11.0 docker tag 423562884727.dkr.ecr.us-east-1.amazonaws.com/addon-toolbox-develop:v0.1.1 192.168.10.25/vmware-bma-core/addon-toolbox-develop:v0.1.1 docker tag 423562884727.dkr.ecr.us-east-1.amazonaws.com/pliant-proxy-master:v1.35.1 192.168.10.25/vmware-bma-core/pliant-proxy-master:v1.35.1 docker tag 423562884727.dkr.ecr.us-east-1.amazonaws.com/pliant-app-gateway-master:v1.25.1 192.168.10.25/vmware-bma-core/pliant-app-gateway-master:v1.25.1 docker tag 423562884727.dkr.ecr.us-east-1.amazonaws.com/pliant-compiler-master:v1.28.0 192.168.10.25/vmware-bma-core/pliant-compiler-master:v1.28.0 docker tag 423562884727.dkr.ecr.us-east-1.amazonaws.com/pliant-flow-converter-master:v1.29.0 192.168.10.25/vmware-bma-core/pliant-flow-converter-master:v1.29.0 docker tag 423562884727.dkr.ecr.us-east-1.amazonaws.com/addon-napalm-master:v3.7.0 192.168.10.25/vmware-bma-core/addon-napalm-master:v3.7.0 docker tag 423562884727.dkr.ecr.us-east-1.amazonaws.com/infra-influxdb-master:v1.8.10005 192.168.10.25/vmware-bma-core/infra-influxdb-master:v1.8.10005 docker tag 423562884727.dkr.ecr.us-east-1.amazonaws.com/pliant-front-master:v2.10.4 192.168.10.25/vmware-bma-core/pliant-front-master:v2.10.4 docker tag 423562884727.dkr.ecr.us-east-1.amazonaws.com/addon-ansible-master:v1.17.0 192.168.10.25/vmware-bma-core/addon-ansible-master:v1.17.0 docker tag 423562884727.dkr.ecr.us-east-1.amazonaws.com/addon-themes-master:v1.72.0 192.168.10.25/vmware-bma-core/addon-themes-master:v1.72.0 docker tag 423562884727.dkr.ecr.us-east-1.amazonaws.com/pliant-faas-image-builder-master:v1.5.0 192.168.10.25/vmware-bma-core/pliant-faas-image-builder-master:v1.5.0 docker tag 423562884727.dkr.ecr.us-east-1.amazonaws.com/pliant-python-pipreqs-master:v1.6.0 192.168.10.25/vmware-bma-core/pliant-python-pipreqs-master:v1.6.0 docker tag 423562884727.dkr.ecr.us-east-1.amazonaws.com/pliant-scheduler-master:v1.23.0 192.168.10.25/vmware-bma-core/pliant-scheduler-master:v1.23.0 docker tag 423562884727.dkr.ecr.us-east-1.amazonaws.com/addon-pdf-master:v1.5.0 192.168.10.25/vmware-bma-core/addon-pdf-master:v1.5.0 docker tag 423562884727.dkr.ecr.us-east-1.amazonaws.com/bma-utils-master:v1.11.4_2024.1.497 192.168.10.25/vmware-bma-core/bma-utils-master:v1.11.4_2024.1.497 docker tag 423562884727.dkr.ecr.us-east-1.amazonaws.com/pliant-image-registry-master:v2.8.3006 192.168.10.25/vmware-bma-core/pliant-image-registry-master:v2.8.3006 docker tag 423562884727.dkr.ecr.us-east-1.amazonaws.com/pliant-worker-nodejs-master:v1.118.0 192.168.10.25/vmware-bma-core/pliant-worker-nodejs-master:v1.118.0 docker tag 423562884727.dkr.ecr.us-east-1.amazonaws.com/pliant-worker-nodejs-remote-master:v1.53.0 192.168.10.25/vmware-bma-core/pliant-worker-nodejs-remote-master:v1.53.0 docker tag 423562884727.dkr.ecr.us-east-1.amazonaws.com/pliant-versioning-master:v1.23.0 192.168.10.25/vmware-bma-core/pliant-versioning-master:v1.23.0 docker tag 423562884727.dkr.ecr.us-east-1.amazonaws.com/infra-rabbitmq-master:v3.12.12004 192.168.10.25/vmware-bma-core/infra-rabbitmq-master:v3.12.12004 docker tag 423562884727.dkr.ecr.us-east-1.amazonaws.com/pliant-db-migration-master:v1.42.0 192.168.10.25/vmware-bma-core/pliant-db-migration-master:v1.42.0 docker tag 423562884727.dkr.ecr.us-east-1.amazonaws.com/addon-textfsm-master:v1.9.0 192.168.10.25/vmware-bma-core/addon-textfsm-master:v1.9.0 docker tag 423562884727.dkr.ecr.us-east-1.amazonaws.com/infra-minio-master:v2024.1.13004 192.168.10.25/vmware-bma-core/infra-minio-master:v2024.1.13004 docker tag 423562884727.dkr.ecr.us-east-1.amazonaws.com/infra-redis-master:v6.2.14003 192.168.10.25/vmware-bma-core/infra-redis-master:v6.2.14003 docker tag 423562884727.dkr.ecr.us-east-1.amazonaws.com/addon-faas-master:v1.11.1 192.168.10.25/vmware-bma-core/addon-faas-master:v1.11.1 docker tag 423562884727.dkr.ecr.us-east-1.amazonaws.com/infra-m
- Run the following command to perform docker push to Harbor registry.
docker push <registry_image_location>
In the below example, 192.168.10.25 is the IP address of the Harbor server and vmware-bma-core is the public project created in the Harbor server.docker push 192.168.10.25/vmware-bma-core/pliant-api-radius-master:v1.14.0 docker push 192.168.10.25/vmware-bma-core/pliant-worker-nodejs-config-master:v1.27.0 docker push 192.168.10.25/vmware-bma-core/pliant-api-master:v1.159.0 docker push 192.168.10.25/vmware-bma-core/addon-mqws-master:v1.11.0 docker push 192.168.10.25/vmware-bma-core/addon-toolbox-develop:v0.1.1 docker push 192.168.10.25/vmware-bma-core/pliant-proxy-master:v1.35.1 docker push 192.168.10.25/vmware-bma-core/pliant-app-gateway-master:v1.25.1 docker push 192.168.10.25/vmware-bma-core/pliant-compiler-master:v1.28.0 docker push 192.168.10.25/vmware-bma-core/pliant-flow-converter-master:v1.29.0 docker push 192.168.10.25/vmware-bma-core/addon-napalm-master:v3.7.0 docker push 192.168.10.25/vmware-bma-core/infra-influxdb-master:v1.8.10005 docker push 192.168.10.25/vmware-bma-core/pliant-front-master:v2.10.4 docker push 192.168.10.25/vmware-bma-core/addon-ansible-master:v1.17.0 docker push 192.168.10.25/vmware-bma-core/addon-themes-master:v1.72.0 docker push 192.168.10.25/vmware-bma-core/pliant-faas-image-builder-master:v1.5.0 docker push 192.168.10.25/vmware-bma-core/pliant-python-pipreqs-master:v1.6.0 docker push 192.168.10.25/vmware-bma-core/pliant-scheduler-master:v1.23.0 docker push 192.168.10.25/vmware-bma-core/addon-pdf-master:v1.5.0 docker push 192.168.10.25/vmware-bma-core/bma-utils-master:v1.11.4_2024.1.497 docker push 192.168.10.25/vmware-bma-core/pliant-image-registry-master:v2.8.3006 docker push 192.168.10.25/vmware-bma-core/pliant-worker-nodejs-master:v1.118.0 docker push 192.168.10.25/vmware-bma-core/pliant-worker-nodejs-remote-master:v1.53.0 docker push 192.168.10.25/vmware-bma-core/pliant-versioning-master:v1.23.0 docker push 192.168.10.25/vmware-bma-core/infra-rabbitmq-master:v3.12.12004 docker push 192.168.10.25/vmware-bma-core/pliant-db-migration-master:v1.42.0 docker push 192.168.10.25/vmware-bma-core/addon-textfsm-master:v1.9.0 docker push 192.168.10.25/vmware-bma-core/infra-minio-master:v2024.1.13004 docker push 192.168.10.25/vmware-bma-core/infra-redis-master:v6.2.14003 docker push 192.168.10.25/vmware-bma-core/addon-faas-master:v1.11.1 docker push 192.168.10.25/vmware-bma-core/infra-mysql-master:v8.0.36006
If Docker push fails, see Docker Push Failure in Troubleshooting.
In Total, container registry public project, here Harbor project, must contain 25 container images for VMware BMA Core.
- Trust the insecure registry.
For https based Harbor, you must download the Harbor certificate and save it under /etc/ssl/certs so that Docker trusts the self-signed certificate.
- Establish certificates trust between Harbor server and Kubernetes cluster.
Add Harbor as partner systems in VMware TCA and associate it with the Kubernetes cluster on top of which VMware BMA runs. This step is required to avoid any certificate related issues while the pods come up.
For more information, see Add a Partner System to VMware Telco Cloud Automation topic in VMware Telco Cloud Automation User Guide in VMware Telco Cloud Automation Documentation.
- Place the file VMware-Bare-Metal-Automation-Core-Chart-<version number>.tgz (for example, VMware-Bare-Metal-Automation-Core-Chart-4.0-v2024.1.497-b7.tgz) on your Kubernetes cluster.
- Validate Certificate.
Certificate validation is the process of establishing the trust between VMware BMA Remote Workers and:
- VMware BMA Core
- Any third party TLS communication (Example: iDRAC servers)
Note: Once the VMware BMA Core installation is complete, the default embedded workers have certificate validation enabled by default. You can disable certificate validation from the VMware BMA Web UI, if it is not required. For more information, see step 14.For any external remote worker groups, see Deploy VMware BMA Remote Worker.
All the servers shipped by Hardware vendors such as Dell, HPE can have certificates signed by one Enterprise CA and customer can add this CA certificate as Trusted CA in VMware BMA Web UI to get the authentication working. For more information, see Create Trusted Certificate topic in VMware Bare Metal Automation for VMware Telco Cloud Platform User Guide in VMware BMA Documentation. If this is not done, workflow authentication fails while trying any TLS communication.
- Create the overrides values YAML file, bma-core-values.yaml, with the following content.
VMware BMA Helm charts installation with Signed certificates
bma-core-values.yaml
# if true, will delete all the PVs and PVCs, created by StatefulSets, during helm uninstall
deletePersistentVolumes: true
# if exists - tries to install license, specified by parameter
# if license is not set here then customer will have to update the license information from the BMA Core UI post installation.
license: '<copy your license key>'

# required - sets the registry for this chart's images. Does not have default value.
# example, imageRegistry: 192.168.10.25/vmware-bma-core
imageRegistry: <FQDN/IP>/<VMware BMA Core project name in harbor>

# if set, used as value of imagePullSecrets directive for all images pulled from imageRegistry
# imagePullSecretName:
usePublicRegistry: false # optional; used with the public images in the common section; if not enabled - the imageRegistry is used

bma:
  instance:
    # admin_password: "..."
    # scheduler_password: "..."
    worker_group_name: default
    # worker_group_secret_key: "..."
    address: "https://telco-baremetal-automation.local" #; sets the host address (with https:// protocol prefix) of this instance, ex. "https://my.host.com". - certificate must match the hostname part of the address
  certificates:
    tls:
      autogen:
        cn: "telco-baremetal-automation.local"
        daysValid: 1826
      # explicitly set TLS certificate and key in plain PEM format or Base64 encoded PEM; if both set, these values override existing TLS cert
      cert: |
            -----BEGIN CERTIFICATE-----
            MIID6jCCAtKgAwIBAgIEPJ/xUjANBgkqhkiG9w0BAQsFADCBjTELMAkGA1UEBhMC
            VVMxKTAnBgNVBAMMIHRlbGNvLWJhcmVtZXRhbC1hdXRvbWF0aW9uLmxvY2FsMRMw
            EQYDVQQIDApDYWxpZm9ybmlhMRIwEAYDVQQHDAlQYWxvIEFsdG8xFDASBgNVBAoM
            C1ZNd2FyZSwgSW5jMRQwEgYDVQQLDAtUZWxjbyBDbG91ZDAeFw0yMjExMDkwNjIz
            MDFaFw0yNzExMDgwNjIzMDFaMIGNMQswCQYDVQQGEwJVUzEpMCcGA1UEAwwgdGVs
            Y28tYmFyZW1ldGFsLWF1dG9tYXRpb24ubG9jYWwxEzARBgNVBAgMCkNhbGlmb3Ju
            aWExEjAQBgNVBAcMCVBhbG8gQWx0bzEUMBIGA1UECgwLVk13YXJlLCBJbmMxFDAS
            BgNVBAsMC1RlbGNvIENsb3VkMIIBIjANBgkqhkiG9w0BAQEFAAOCAQ8AMIIBCgKC
            AQEApCG9nv+a1/IWTzeIiCG74sww1bFeF3z6phYnryve0Y17SOSAZ9LbE4sdi4Db
            l5rzGmaIiiZcJer7pIqseaApscRicujzn5iMM8l9k0XQQAez7DIqs9UR64kQghxb
            X0KVSvLoJup4B/8WLBbom2Udqctzo6VPvlbZy1md8w9byBe89SfspgMkJBumvZ4A
            55Wos42EUJC6g7QmroFDgqZCdimT2E7XPCbDhu3wPywUbeuqRoasgNsirpuyL/LX
            w4nC/sdsPzSOyfJrWcmZHPiEnH54DdUGGIkt2Unxyi3hRbmYmsNHLQW8sQM+LbwN
            +5Gik2t5q3TUzRpKz2dJDUdlHQIDAQABo1AwTjAdBgNVHQ4EFgQUZ26/Lr/TSa25
            +2XrjygBL45Hv6UwHwYDVR0jBBgwFoAUZ26/Lr/TSa25+2XrjygBL45Hv6UwDAYD
            VR0TBAUwAwEB/zANBgkqhkiG9w0BAQsFAAOCAQEAWBA30D6GNSHXRO8RExGzf8DC
            KkpBGEBmYGC0oiq1hsr3q+360E7Sf8YvgC/7t0OKISrrkUg1CRn5qruQJ+dh3sWA
            5Rfer9wInARrzxhgusIFxaUBl/A35WmpCtDkAs3vWKo3qWMdny1EZDwpbsyiUYrT
            KQtezAzM940s80lmju2FXAPx/MZZTIu9X0bbBrxpzHtV9egjfkn2beOn6LQnATua
            jq7hqjm3jzVIwIH1ciDOESww78F8OfZyXuVqVqqgYmRgTY8iVgV0KxNUFB/K4lBy
            fMbN9w5lXsHOwB0dVrrgJuyZfuX3VXr6taTnADWPfAFPjjyhojHQsn/x+n06WA==
            -----END CERTIFICATE-----
      key:  |
            -----BEGIN PRIVATE KEY-----
            MIIEvwIBADANBgkqhkiG9w0BAQEFAASCBKkwggSlAgEAAoIBAQCkIb2e/5rX8hZP
            N4iIIbvizDDVsV4XfPqmFievK97RjXtI5IBn0tsTix2LgNuXmvMaZoiKJlwl6vuk
            iqx5oCmxxGJy6POfmIwzyX2TRdBAB7PsMiqz1RHriRCCHFtfQpVK8ugm6ngH/xYs
            FuibZR2py3OjpU++VtnLWZ3zD1vIF7z1J+ymAyQkG6a9ngDnlaizjYRQkLqDtCau
            gUOCpkJ2KZPYTtc8JsOG7fA/LBRt66pGhqyA2yKum7Iv8tfDicL+x2w/NI7J8mtZ
            yZkc+IScfngN1QYYiS3ZSfHKLeFFuZiaw0ctBbyxAz4tvA37kaKTa3mrdNTNGkrP
            Z0kNR2UdAgMBAAECggEBAIJ3q6J67hwf/Knlq+sCXbavt1X2UqP7HcbuL4doKQuM
            Gmbb9FITYz/KwqaEvIlrizj+LiUazv75JiUqcmWP8fSz9cn/8MB5Y2E7Fk3+Hcb4
            GIZ1bkpa4Y7H+k5iuiMj60aThgSBNv6sP3S2lRoJK6Yv6nE31AaqRSAG0a5HFB8d
            sZ01N4ryUFDg1xuuiRZeAbwL80Tx9I81z4Uikzi72KAl6dDOr8kXialk64bOofLf
            u8fsqGclJ1EPFPDDLn6zCp/mdEdtfR09h5N8M622BM5afVBjtiRyDfBD4Ht286Mk
            ooc3h67/nS+57uuuSp0n5A4F2QVotMM/73KYb+37KOECgYEAzTPBSezCiLukOX+8
            TZqLdJkJfviHyUZP0KZ6tbXs3crNTKTfauoB8YIaLjt1Q5e216macxRdx3yRY71e
            LtGp72Ulf+QFzqgrD95rP3qoyMTTJqG7M/FibA7F2d+p8ZBmKUKN+VSoDkgKNJBq
            9ujY3gZcGBW9fskwhvsH+f6A5qkCgYEAzMM9V/v7TBz8NKxHVHve6iuyaxI4HsDd
            6YX8/UPDU+mOOad0ZK43vGgv+essHdQPeOroSBajO1nfOrzmo/3zVr91+wK3GW/s
            q8c5Qzsn+ydk5Ay827hMVU5MXSYuI/5tPZDCZzHFh7CwRraiFniukeqjxuXF6Q4g
            SdMa4yHYt1UCgYEAu5L6tduRu7FinhjQhVOm9I9L6d+/J9J49S6o7t98xQU0A0KW
            48FCw4P88JPzTjUpsxvbDiTo0Ihi0nxw0nVfVHDuBWjnkg+RRXE4Mg+qp9ObfC3M
            1N9q64HZg557V1B6wm6PHwIumNdrVL9Kt6cDTnkbx/xferzn+gsQMIpfQ/kCgYEA
            vycg1EtjXLnOZGnUKTV+c4OZi0U16NfKEqBH/jNNXL+zS3VdPkQ5ugRVjW0TAUGf
            tBUwBWREvDp5H7+LXNrNWVVhkZQGVJPdELvqZC4Mc/VhxVdy03eooxZ2SZtEBcwW
            NRw3r9iR+8thtJH4nRvKdGPkwuBsMtZCJEkUV6eYRgUCgYAlKKlhq9pIIsEOWceE
            OSzdjvScfrmnK+eEnsCMVOH+2whXOu8jK3/ONMMRXvkstl4akjAqO9CWpLAwqYzm
            Hn30r1Ptp5Q1HCjDaVOegweK3Ld8XLTAGhlz5wdTtMxp4ay+1zA2JeHMGzSzatp7
            6i1k0/eUinLv9e2pJITGQwuzXw==
            -----END PRIVATE KEY-----
VMware BMA Helm charts installation with Self-Signed or auto-generated certificates- Enter licence key in licence.
Note: If you do not enter licence during installation, you can enter licence key later through VMware BMA UI.
- You must enter image registry information in imageRegistry.
- Enter password in admin_password
# if true, will delete all the PVs and PVCs, created by StatefulSets, during helm uninstall
deletePersistentVolumes: true
# if exists - tries to install license, specified by parameter
# if license is not set here then customer will have to update the license information from the BMA Core UI post installation.
license: '<copy your license key>'

# required - sets the registry for this chart's images. Does not have default value.
# example, imageRegistry: 192.168.10.25/vmware-bma-core
imageRegistry: <FQDN/IP>/<VMware BMA Core project name in harbor>

# if set, used as value of imagePullSecrets directive for all images pulled from imageRegistry
# imagePullSecretName:
usePublicRegistry: false # optional; used with the public images in the common section; if not enabled - the imageRegistry is used

bma:
  instance:
    # admin_password: "..."
    # scheduler_password: "..."
    worker_group_name: default
    # worker_group_secret_key: "..."
    address: "https://telco-baremetal-automation.local" #; sets the host address (with https:// protocol prefix) of this instance, ex. "https://my.host.com". Certificate must match the hostname part of the address
  certificates:
    tls:
      autogen:
        cn: "telco-baremetal-automation.local"
        daysValid: 1826
      # explicitly set TLS certificate and key in plain PEM format or Base64 encoded PEM; if both set, these values override existing TLS cert
      cert: "" # ex. "-----BEGIN CERTIFICATE-----\n..."
      key: "" # ex. "-----BEGIN PRIVATE KEY-----\n..."
If self-signed certificate attribute is empty in the Helm chart, then a default auto-generated certificate is assigned. If an external self-signed certificate is assigned, then the Common Name (CN) used in the certificate must be assigned to bma.instance.address field in the helm chart values yaml file.
Example: If the Common Name used in the certificate is telco-baremetal-automation.local then the value of address must be https://telco-baremetal-automation.local
- Enter licence key in licence.
- Install Loadbalancer.
VMware has validated against MetalLB and VMware NSX Advanced Load Balancer. This document explains usage of MetalLB loadbalancer as an example.
- Download Metallb tar bundle.
- Create a namespace to install Loadbalancer.
- Run the following command to install the metallb service using the helm-charts provided.
helm install metallb ./metallb-0.13.7.tgz -n metallb-system --create-namespace
The example given below uses metallb-system namespace.capv@wc-dev-master-control-plane-fcg4g [ ~ ]$ helm install metallb ./metallb-0.13.7.tgz -n metallb-system --create-namespace NAME: metallb LAST DEPLOYED: Fri Apr 10 12:38:50 2023 NAMESPACE: metallb-system STATUS: deployed REVISION: 1 TEST SUITE: None NOTES: MetalLB is now running in the cluster.
- Run the following command to verify if the pods are running.
kubectl get pods -n metallb-system
The example given below uses metallb-system namespace.capv@wc-dev-master-control-plane-fcg4g [ ~ ]$ kubectl get pods -n metallb-system NAME READY STATUS RESTARTS AGE metallb-controller-7567fb574-65hcg 1/1 Running 0 21s metallb-speaker-7l7f8 1/1 Running 0 21s metallb-speaker-8nmbc 1/1 Running 0 21s metallb-speaker-m5w9n 1/1 Running 0 21s metallb-speaker-s4kbj 1/1 Running 0 21s metallb-speaker-v5xqj 1/1 Running 0 21s
- Create two files ippool.yaml and l2ad.yaml with the following content.
Note: You must specify the same namespace you created for Metallb loadbalancer.
l2ad.yaml
apiVersion: metallb.io/v1beta1
kind: L2Advertisement
metadata:
  name: example
  namespace: metallb-system
ippool.yaml
apiVersion: metallb.io/v1beta1
kind: IPAddressPool
metadata:
  name: first-pool
  namespace: metallb-system
spec:
  addresses:
  - 192.168.10.1 - 192.168.10.3
Enter your IP Address Pool range in ippool.yaml file. Among the range provided, one IP address is assigned to the loadbalancer. - Run the following command to apply ippool.yaml and l2ad.yaml files.
kubectl apply -f l2ad.yaml
kubectl apply -f ippool.yaml
- Run the following command to install VMware BMA.
helm install <name of the service> -n bma-core --create-namespace -f <overrides Helm chart values file> ./<name of the Helm chart zipped tar bundle.>
helm install vmware-bma-core -n bma-core --create-namespace -f bma-core-values.yaml ./VMware-Bare-Metal-Automation-Core-Chart-<version number>.tgz

NAME: vmware-bma-core
LAST DEPLOYED: Fri Apr  10 12:31:07 2023
NAMESPACE: bma-core
STATUS: deployed
REVISION: 1
TEST SUITE: None
- vmware-bma-core is the name of the service
- bma-core is the name of the namespace
- bma-core-values.yaml is the overrides Helm chart values file.
- VMware-Bare-Metal-Automation-Core-Chart-<version number>.tgz is the name of the Helm charts zipped tar bundle.
- Run the following command to verify if all the pods are running.
kubectl get pods -n bma-core
In total, 27 pods are operational after installation. - Run the following command to verify if VMware BMA services are running.
kubectl get services -n bma-core
An external IP address is assigned to the load balancer. You can access the VMware BMA Web UI using this IP address.
Run the following command to retrieve the VMware BMA Load Balancer FQDN or IP.kubectl get service -n bma-core pliant-proxy -o jsonpath='{.status.loadBalancer.ingress}'Example:capv@wc-dev-master-control-plane-fcg4g [ ~ ]$ kubectl get service -n bma-core pliant-proxy -o jsonpath='{.status.loadBalancer.ingress}' [{"ip":"192.168.10.1"}]
What to do next
- Verify Signed Certificate through VMware BMA Core UI if an external certificate was assigned during installation.
- Disable Validate Certificates option from VMware BMA Core UI for the default remote worker before executing any workflows.
- Access VMware BMA Web UI.
- Click Global Settings
 > Worker Groups.
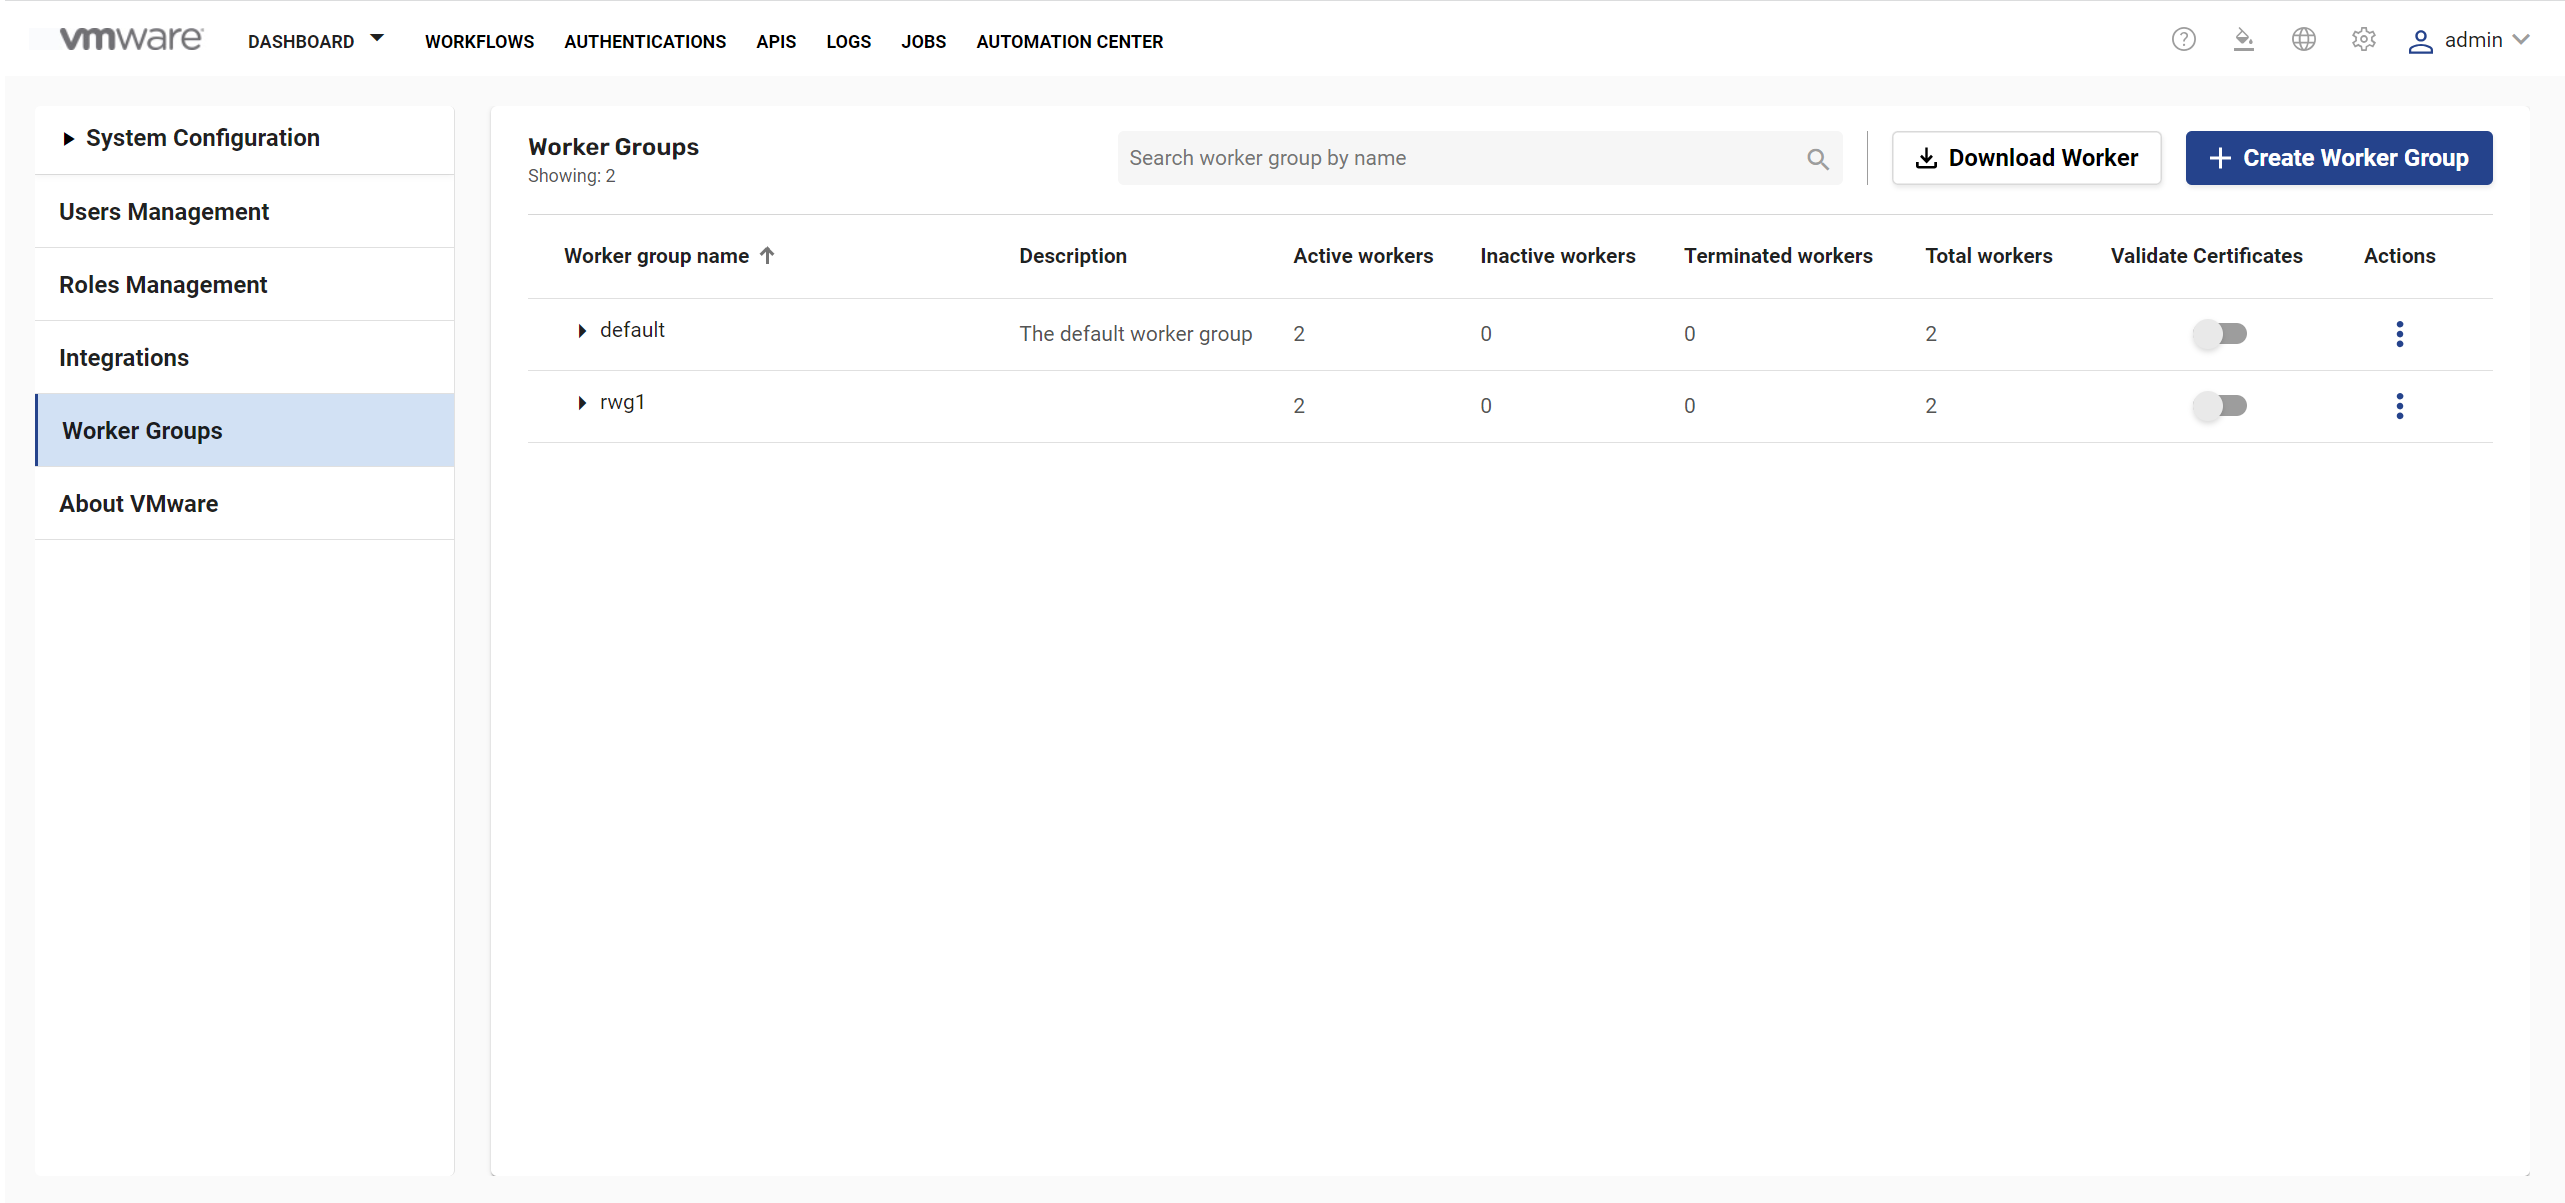
- Click Validate Certificate toggle button corresponding to the remote worker.
- If you do not want to disable certificate, you can add the Certificate of IPMI, against which the workflows must be executed to the Trusted certificates list in VMware BMA Core UI.
- Access VMware BMA Web UI.
- Click Global Settings > System Configuration > Trusted Certificates .
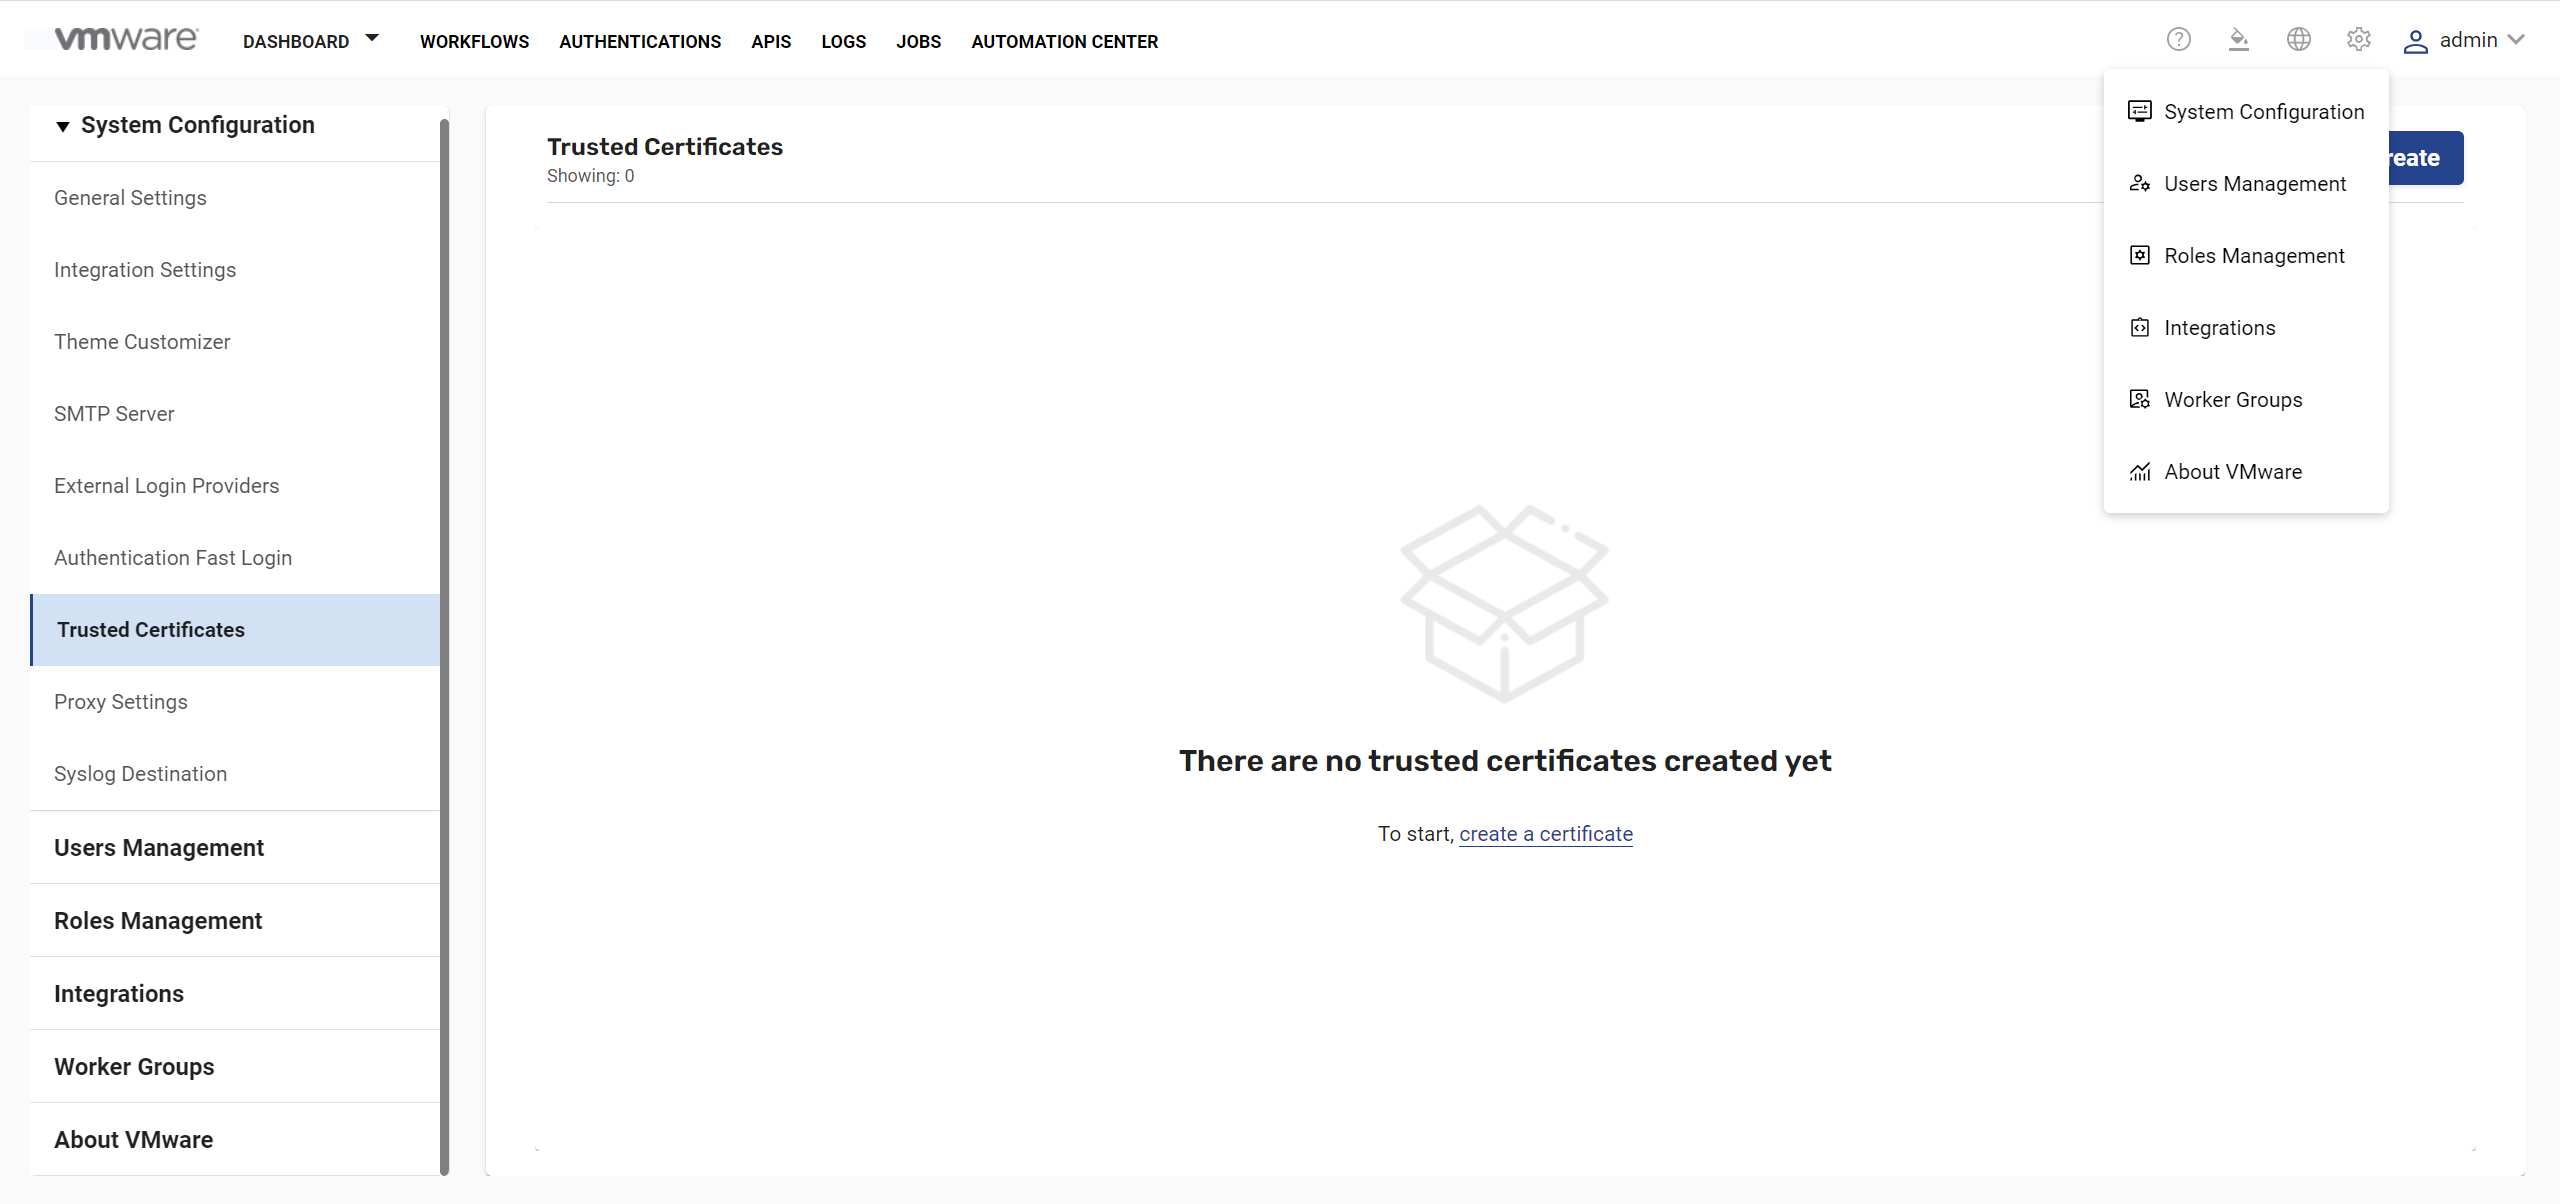
- Click Create and add the certificate.
You can retrieve the password from the VMware BMA Core UI. For more information, see Retrieve VMware BMA Administrator Password.
