You might need to modify an existing template for all users, for example, to install new operating system updates. Another possibility is that you might need to keep the original template image but create a new template that is slightly modified to be appropriate for a different purpose or a different group of users.
To modify an existing template, you will have to bring the template computer back online. When it is online, it will be treated as a new clone computer of the original template. You can install updates and make any other needed modifications on the computer while it is considered a clone. When you are finished, you can convert the “clone” into a template. New templates made from an existing template computer automatically inherit the clone cleanup parameters from the original template.
Clones of original template are not automatically deleted – they are still valid as long as they remain online. You can use your virtualization/imaging infrastructure to manage these clones as you see fit.
What you do with the old template depends upon why you updated it and whether there are still online clones associated with it. If the new template was truly an update and the old version is obsolete, you could delete the old template, preferably after any of its clones are offline. See Deleting a Template for more information.
If the new template was a variation, and not necessarily a replacement of the old template, you might want to keep both templates available.
Update a Template Computer
Follow this procedure to update a Template Computer.
Procedure
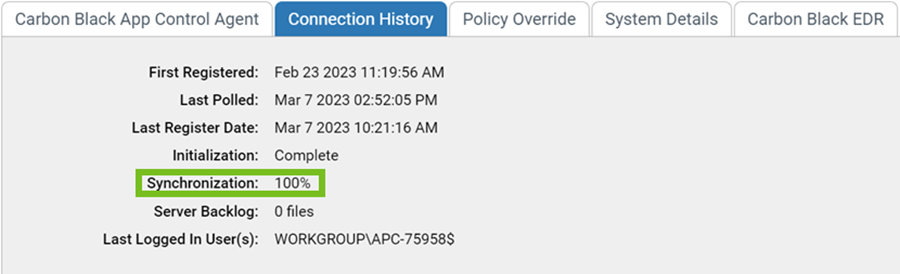
- Wait for the file inventory of the clone to be fully synchronized. You can monitor synchronization progress by choosing Assets > Computers on the console menu and clicking on the View Details button next to the name of the computer. Synchronization progress is on the Connection History tab of the Computer Details page.