


The App Control Server installation program provides the option of reconnecting to an existing database. In addition, you can restore a database from backup, if necessary, and then reconnect to that.
Consider the following information before you begin:
- If your database server and the App Control Server are on the same machine, you can reconnect to an existing database or restore the database from backup using the procedure below. The installation program prompts you for all necessary information.
- If you have a remote App Control database and that database is operational, you can reconnect to it using the procedure below. The installation program prompts you for all necessary information.
- To restore your database from a local backup created using the native App Control backup feature, you can choose the Restore option in the installation dialogs. If you used any other backup mechanism, use that mechanism to restore the database first and then use the Reconnect option in the App Control installation dialogs.
- Restore is not an option for remote databases. If you want to restore a App Control database on a remote system, contact Carbon Black Support.
- To upgrade from a previous version of the App Control Server, see Upgrading from a Previous App Control Version instead of this section. You may also receive supplemental field upgrade instructions from Carbon Black Support.
- When you reinstall or upgrade the App Control Server, system backup and automatic agent uprades are disabled. External event logging may also be disabled. You can re-enable them on the console System Configuration page Advanced Options and Events tabs.
- When restoring from or reconnecting to a database, if you imported any certificates as part of your original installation, those certificates are in the database, and can be used when you restore or reconnect. You will need the password for each certificate to reuse them.
- You will have a choice during installation to use Windows authentication or SQL authentication for access to the SQL Server by the App Control Server. For either choice, the account used to access the database must be added to SQL Server with “sysadmin” checked in the Server Roles.
- If you left a App Control Agent on the system where you are installing the App Control Server, the agent could block installation of the new server or cause faulty installation. Disable tamper App Control on this agent, which will require you to have the access password or user account you provided for client management during the previous server installation or configuration. Although the installation program warns you if an agent is present in some cases, the agent is not always detected. Check the Windows Control Panel to see if a App Control (or Bit9) agent is present.
- If you are running AppLocker on the system where the App Control Server will be installed, either temporarily disable AppLocker or be sure it uses only default rules.
To install the App Control Server and reconnect to (or restore a backup of) a database:
- Log in using an account with local Windows administrator credentials. If you plan to use Windows Authentication to login to a remote App Control database, install the App Control Server logged in with an account that has been added to SQL Server with “sysadmin” checked in the Server Roles. Carbon Black strongly encourages using a specific Domain account for installing and logging in to the App Control Server, and for database access, to simplify control of both database and Active Directory permissions.
Important:
Do not change the privileges of the account used to install the App Control Server after installation. This account must continue to have local administrator privileges for the server to function properly, and will also be used for server upgrades.
- Make the server installation file available to the installation computer (either by download or inserting media in an accessible location).
- Run the installer in either of the following ways:
- To install on a local server, double-click the ParityServerSetup.exe file to start the installation program. Continue to the next step.
-
To install from a remote desktop, copy the ParityServerSetup.exe file to the installation computer and execute the file. Continue to the next step.
- From the Welcome page, click Next . The License Agreement screen appears.
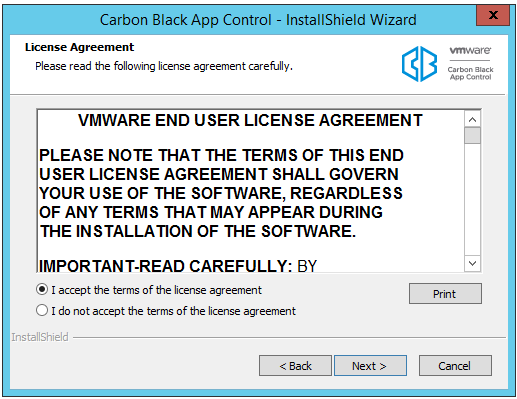
- Review the software license agreement. You must agree to the license terms to install the server. When you click the I accept button and continue, you agree to all terms of use. To continue, click the Next button. The Select Features dialog appears.
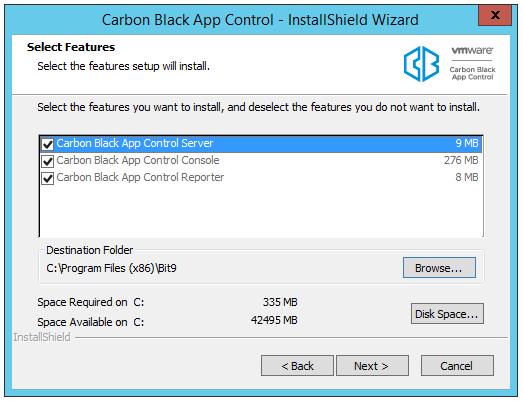
- Although they have checkboxes, App Control Server, App Control Console, and App Control Reporter are always installed — they cannot be deselected. The console is the web interface to the server. The reporter is the service that connects the server to Carbon Black File Reputation, which provides access to a database of information about files and threats. Reporter, which runs as a Windows service, also provides other essential reporting capabilities, including collection of support information for the server.
- Either keep the default installation folder (which differs from 32-bit to 64-bit systems) or click Browse and navigate to the folder in which you want to install the server. If you don’t choose the default, use a path that has only valid ASCII characters, not Unicode. When you have chosen the folder, click Next.
- At this point, the installation program checks that the server environment meets the requirement for App Control Server installation. If no issues are found, you will not see any additional dialogs, and the Database Server screen will appear (step 8). Warning dialogs appear under the following conditions:
- If files are detected in the installation directory, you will see a warning dialog. You can continue the installation without removing the files, but should examine the files to see whether you want to copy and/or remove them. In most cases, these will be log files from App Control Connector appliances or services.
- If a App Control Agent is detected on the App Control Server computer, you will see a dialog stating:
“The system is protected by the Carbon Black App Control Agent.
The installer will verify the necessary permissions to updat the Carbon Black App Control Server. You might see Carbon Black Notifiers if required permissions are not available.”
If this dialog appears, click OK to dismiss it and initiate the system check that determines whether the agent and/or other factors would prevent successful installation of the server.
- If the system check finds any issues that would prevent successful server installation, a dialog box appears describing those issues. If this happens, correct the issues and then click Next (you do not need to exit the installation while you remediate the problems). When you click Next, the system check runs again, and if all issues are remedied, the installation moves to the next step. If there are still outstanding issues, they will be listed again and you will have another opportunity to correct them. If necessary, click Cancel to exit the installation dialogs.
Note:
If you did not disable tamper App Control in advance and are prompted to do so here, you must have a client management access password or user account from the previous server installation or configuration. In the reconnect/restore case, you cannot disable tamper App Control through the console.
- The Database Server screen appears next. It includes two configuration choices:
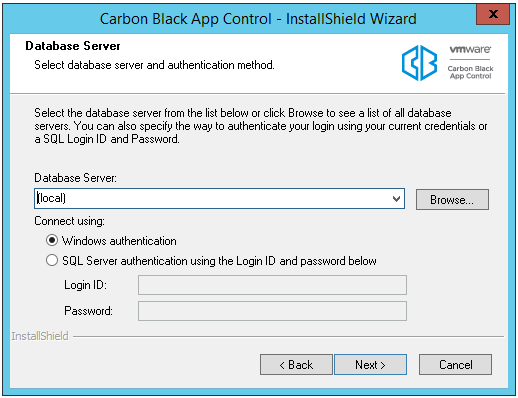
- Database Server is the name of the SQL server, and optionally, its instance. Enter the server name and instance name (if any) you use to connect to the server. If the database server is local, you will be able to reconnect, and if necessary, restore from backup files you have on the server. If the database server is remote, you will be able to reconnect only.
- With the Connect Using radio buttons, choose Windows Authentication (i.e. authenticate with the user doing the App Control Server installation) or SQL Server Authentication. If you choose SQL Server Authentication, provide the Login ID and Password. Your choice here determines how access to the SQL Server by the App Control Server will be authenticated, both during and after the installation.
- When you are finished entering database information, click Next.
For either authentication method, the user must have been given the “sysadmin” Server Role in SQL Server.
- The App Control Database Configuration Options screen appears. The options on the screen depend upon whether a App Control database was detected at the location you provided on the previous screen:
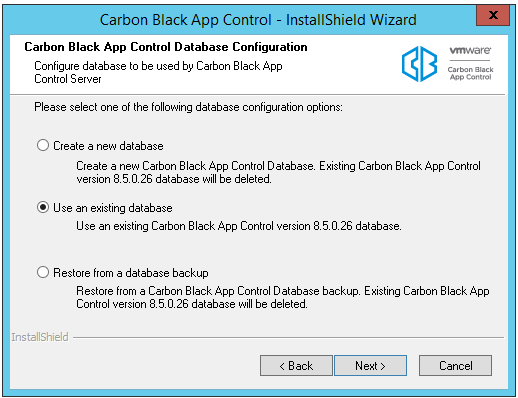
- If the installation program detects a usable App Control database, your choices are to create a new database (and delete the existing database) or use an existing database and upgrade it to this release. Choose Use an existing database to preserve your App Control (including previous Bit9 Platform and Parity) data and upgrade the database, and then click Next. If you choose this option, a warning appears reminding you to backup your App Control database before proceeding. If you have recent backups, click Yes to continue, and skip to step 12.
- If the database location you provided is local, the Restore from a database backup option is enabled. Choose this option to restore your previous database from a backup file, and click Next to continue. This option can be used only to restore backup files created by App Control.
- If you chose Restore from a database backup, the App Control Backup Restoration screen appears.
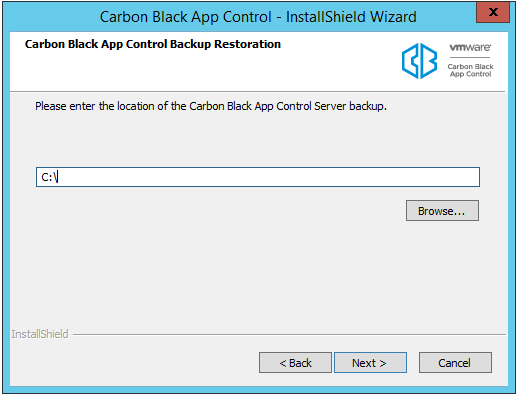
- On the Backup Restoration screen, enter the path to the folder containing the backup database, or use the Browse button to locate it. Click Next. If the backup is from a previous version, a message box appears explaining that the database will be upgraded. When you click OK on this box (or if it doesn’t appear), another message box appears telling you that backups will be disabled after the database restoration. When you have clicked OK on each of the message boxes, the App Control Server Backup Information screen appears.
- Examine the information on the Server Backup Information screen. Note that if you are restoring from a backup from a previous version of App Control (including Bit9 Platform or Parity), that database will be updated to the version matching your installer if you proceed. Use the Back button if you want to use a backup other than the one described on this screen.
- When the information on the Server Backup Information screen is correct, click Next to proceed. If there are certificates stored in the database, you are prompted to decide whether to re-use any stored certificates. The dialog will specify whether there is a console certificate only or certificates for both the console and the server.
- If you want to re-use the certificate(s), click Yes in the dialog.
-
If you are restoring a database from backup, you will be prompted for the certificate passwords after the database is restored.
-
If you are reconnecting to a database, the Restore Pre-Existing X.509 Certificate for the App Control Console screen appears.
-
- The database can contain either one or two certificate files, and there will be a dialog for each one found. Enter a password and click Next in each dialog. By default, the verified password from the first dialog is pre-populated in the second dialog (if there is one). If there is a password problem, an error message will indicate that immediately and give you the chance to re-enter the password. If a valid password is provided but another certificate restoration problem occurs during the installation, an error message appears and a self-signed certificate is generated instead so that installation may continue.
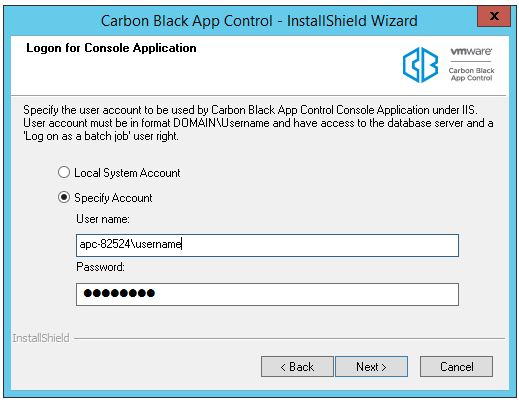
- After you complete the certificate dialogs, the Logon Information screen appears. On this screen, choose the logon account to be used by the App Control Server. You can choose one of two modes of logging in:
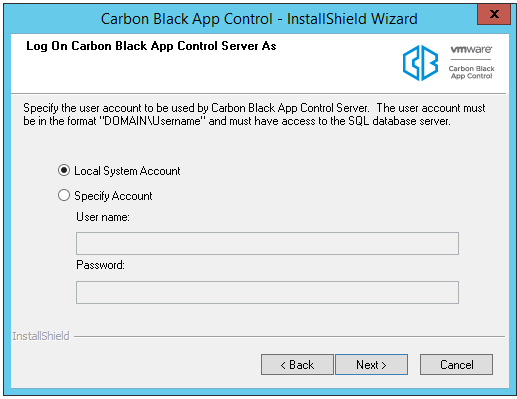
- The Local System Account radio button instructs the installation to configure the server to use the built-in Windows system account.
- The Specify Account radio button activates the Username and Password fields so that you can provide account information. As the screen notes, the account you provide must be in the format DOMAIN\Username and have full access to the SQL database server. The default for this choice is the currently logged in user. You must include a a domain name or a dot before “\Username”.
Note:-
Carbon Black strongly encourages using a specific Domain account and the Specific Account option to simplify control of both database and Active Directory permissions. In general, the installer should be run by this same Domain account.
-
In this release, an SSL certificate is automatically generated to protect communications between the server and its agents. If the Common name of the server does not match the configured server name (or one of the names if the certificate used SAN), then server and agents will be unable to communicate correctly.
-
For local SQL Server Express databases, the currently logged in user must be the same as the user specified in the Login Account installation dialog. If you attempt to enter a different user, an error message appears and you must re-enter the current user. The logged in user must have been given the “sysadmin” Server Role in SQL Server.
-
In the case of remote databases, the installation program cannot confirm the validity of the account you provide. Note that if you provide an invalid login account, server installation will be unsuccessful and you will need to reinstall.
- When you have provided logon information, click Next. The Server Configuration Options screen appears.
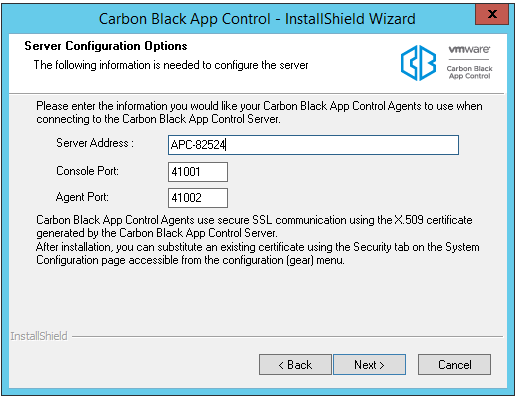
- From the Server Configuration Options screen, review the configuration settings. In the Server Address field, the preferred address is a fully qualified DNS name (or alias) that is resolvable by all computers running the App Control Agent. Although not recommended, if the server is assigned a static IP address that will not change at reboot time, you can keep the default IP address selected for the App Control Server. The installation program automatically supplies the correct information for the installation machine. Console Port, which is used for communications between the server and its user interface, is 41001. Agent Port, which is used for communication with agents, is 41002.
Note:
-
Carbon Black strongly recommends the use of a fully qualified DNS name for Server Address whenever possible. Use of a CNAME (alias) may provide even more flexibility and reliability.
-
If you use multiple NICs , make sure the FQDN you use in the Server Configuration screen refers to the address of the card(s) you want the agents to connect to.
-
If you are reconnecting to an existing App Control database,and you enter a Server Address other than the one you used previously, a dialog appears asking you to choose one of the two. If the new address is actually a different server, click Yes to modify the database with the new name. If the new address is an alias for the address currently in the database, click No to use the existing address. If you use the new address (i.e. click Yes), existing agents will not be able to reconnect to the server unless you create a DNS alias between the new and old names. If you are unsure of your choice or you made an error entering the name, click Cancel to return to the configuration screen.
-
- If you are reconnecting to an existing App Control database and you enter a Server Address other than the one you used previously, a dialog appears asking you to choose one of the two:
-
If the new address is a different server, click Yes to modify the database with the new name. Note, however, that if you use the new address (i.e. click Yes), existing agents will not be able to reconnect to the server unless you create a DNS alias between the new and old names.
-
If the new address is an alias for the address currently in the database, click No to use the existing address.
-
- If you are reconnecting to an existing database and you had Carbon Black File Reputation (Formally CB Collective Defense Cloud) activated, another dialog appears if you are not using the same App Control Server name as previously used with this database. You will be asked, “Do you want to generate a new key for CB Threat Intel?”
-
If you are cloning this database as a new instance for a new server, click Yes . This might be the case if you have been using an early version of a release and want to use the same database for a newer version.
-
If you are reinstalling the same server as previously connected to the database, and if no other server is using the same database server name, choose No .
-
- If you chose Specify an Account in the (App Control Server) Logon Information screen (step 12), another Logon Information screen appears next, for the App Control Console under IIS. Otherwise, go to step 21.
This screen allows you to specify a different logon for the App Control Console, the web-based user interface for the server.
- Choose Local System Account to configure the server to use the built-in Windows system account for console logons.
- Choose Specify Account to activate the Username and Password fields so that you can provide account information. As the screen notes, the account you provide must be in the format DOMAIN\Username. You cannot use “\Username” without a domain or a dot before the backslash.
Note:
If you use a logon other than the current user, a warning dialog will be shown: “The App Control Server installer is unable to validate whether the specified account is able to access the SQL database server. Are you sure you want to continue?” If you are certain the account you provided is valid, choose Yes.
- When you have provided console logon information, click Next. If you restored certificates in a previous step, skip to step 24.
- If there were no certificates stored in the database, or if you chose not to restore them in a previous step, the Certificate Options screen appears. From the Certificate Options screen, choose the digital certificate that will appear to console users. You either create a certificate using a template provided by Carbon Black or substitute your company’s certificate.
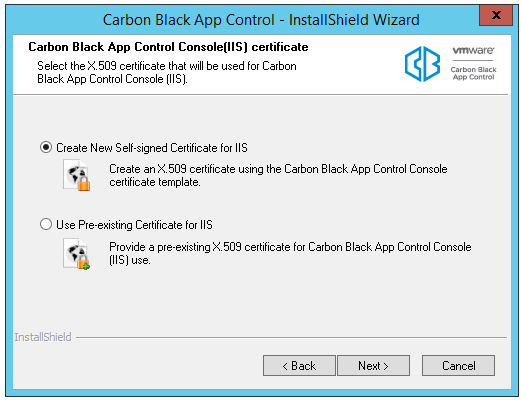
- If you do not have your own certificate, choose Create Certificate. This allows you to create a Carbon Black self-signed certificate. Self-signed certificates will generate warning boxes when you log in to App Control Console using Internet Explorer or Firefox, although Firefox will allow you to permanently accept the certificate to eliminate future warnings. To create a certificate, choose Create Certificate, click the Next button, and skip to Step 22.
- To substitute your own certificate, choose Use Pre-existing Certificate, click the Next button, and skip to Step 23.
- If you chose Create Certificate, the Create X.509 Certificate screen appears.
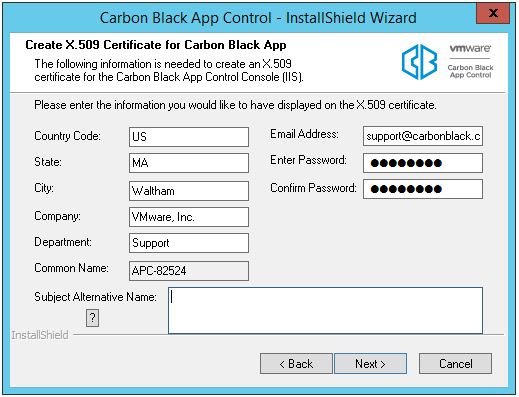
- By default, all certificate details correspond to Carbon Black name and address data. Please replace them with details of your company. The default password is ‘password’. Carbon Black recommends that you change it, and keep a record of your new password so it can be retrieved for later use. The Common Name field defaults to the IP Address or DNS Name of the App Control Server; it cannot be changed. If the App Control Server is reachable by multiple DNS names, you can use the Subject Alternate Name field to specify the alternate names. When the certificate is validated against a computer, it is validated against the Common Name or one of the Subject Alternative Name entries (if they exist). If both are present, names in the Subject Alternative Name field have priority.
- When the information you want is in all fields, click Next to create the certificate and skip to step 24.
- If you chose Use Pre-existing Certificate, the Use Pre-existing X.509 Certificate screen appears. Enter the required information.
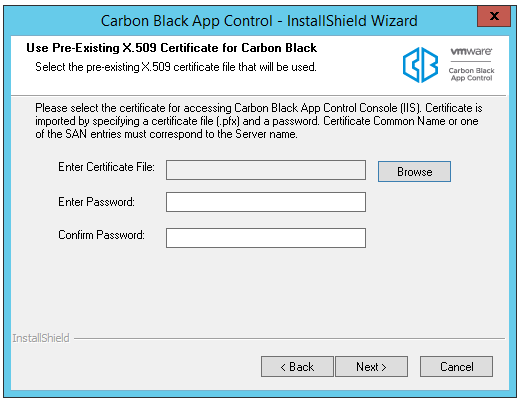
- Click the Browse button next to the Enter certificate file field, navigate to the PFX (PKCS.12) certificate file you want to use, and click Open when you have located the file. The filename appears in the certificate file box.
- Enter the password for the certificate, and re-enter it in the confirmation field.
- When you have entered the certificate file and the password, click Next. The Ready to Install screen appears.
- If you are satisfied with your installation choices, click the Install button.
- App Control Server installation commences, and an installation status bar shows progress. When the InstallShield Wizard Complete screen appears, the installation is complete.
- In some cases, you will need to restart the server computer after installation is completed, and the dialog will include an option to restart now. Choose to restart now unless you need to complete some other activity on this computer.
- Click the Finish button. App Control Server, which runs as a service, begins to operate after you click this button. Installation logs are placed in the App Control installation folder (for example, C:\Program Files (x86)\Bit9 ).

Note: Agent installers and rules are distributed separately from the App Control Server. Check the Carbon Black User Exchange to get the latest packages and upload them to your server once it is installed.
