To create a snapshot (or add to one) from a file table, perform the following procedure.
Procedure
- Go to the console page from which you want to create the Snapshot. For example, click Assets > Files on the console menu to go to the Files page, and then click on File Catalog.
- Select the tabs, filters, columns, or Saved View from which to get the list of files for the snapshot.
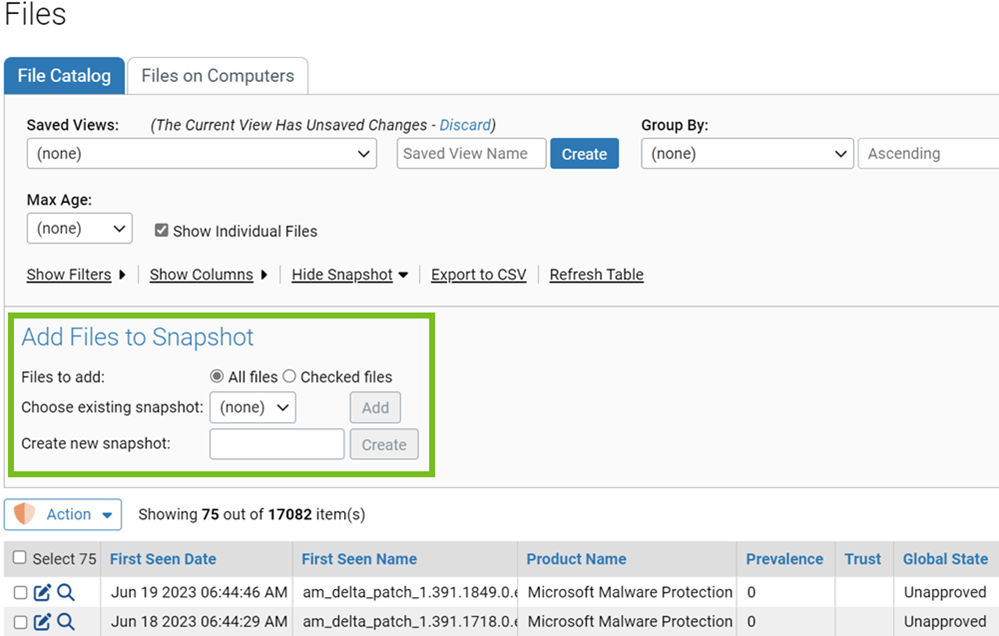
- Click the Show Snapshots link to show the Snapshot panel.
- To individually select the files being added to the snapshot, check the box to the left of the file for each file to add, and click the Checked files radio button in the Files to add line of the Add Files to Snapshot panel. Otherwise, all files on the page are added to the snapshot.
- To create a new snapshot, in the Snapshot text box, type in the name for the snapshot and click Create. A new snapshot is created from the current table of files – it includes the files on all pages in the table, not just the currently displayed page.
-or-
To add all of the files in the current table to an existing snapshot, select an existing snapshot from the Choose existing snapshot menu and click Add.
- If you select Checked files, you must select and add files for each page in the table – only the files selected on the currently visible page are added.
- To confirm that a new snapshot was created, click Reports > Baseline Drift on the console menu and then click the Snapshot tab. Your new snapshot displays in the Snapshots table.