


The Carbon Black App Control console allows you to assign notifiers on the Edit Policy page and the Add/Edit rule page.
- On the Edit Policy page, for each policy setting
- On the Add Rule or Edit Rule page for custom, registry, and memory rules; a rule can be configured to use the notifier assigned by a computer’s policy or to use a custom notifier specified in the rule details
Assign Notifiers to Policy Settings
A default, setting-specific notifier is assigned to each policy setting, so notifier configuration is not required. However, you can choose a different notifier for each rule and setting in a policy. This section describes how you assign existing notifiers to settings.
For information about modifying notifiers or creating new ones, see Customizing and Creating Notifiers.
Procedure
What to do next
Policy Settings with Notifiers
There are policy settings that have their own separately assigned notifier.
Each of the following policy settings, which appear in the Device Control Settings and Advanced settings lists on the Edit Policy page, has its own separately assigned notifier, except where noted:
Device Control Settings with Notifiers:
- Block writes to unapproved removable devices
- Block writes to banned removable devices
- Report reads from unapproved removable devices (will never display notifier)
- Report reads from banned removable devices (will never display notifier)
- Block executions from unapproved removable devices
- Block executions from banned removable devices
Advanced Settings with Notifiers:
- Block unanalyzed scripts and executables
- Block unapproved scripts
- Block unapproved executables
- Block banned file names
- Block banned file hashes
- Block executables run from a network drive
- Block files with banned publishers or certificates
- Enforce memory rules
- Enforce registry rules
- Enforce custom (file and path) rules
- Enforce tamper protection
- Terminate processes with banned images
Assigning Notifiers to Custom, Registry, and Memory Rules
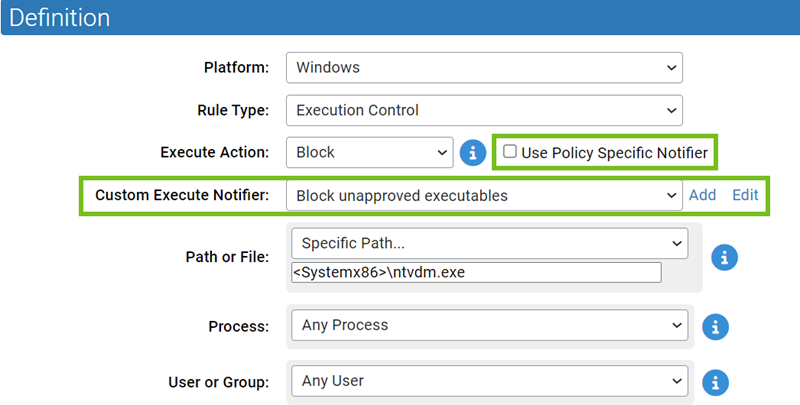
A notifier can be displayed when a custom, registry, or a memory rule blocks an action, or prompts the user for a decision to allow or block an action.
For each rule, you can choose from two sources for the notifier:
- Use Policy Specific Notifier – Each policy includes an advanced setting for each rule type. Each of these policy settings has a Notifier field in which you can specify the notifier that appears on agent computers when that type of rule blocks an action. Also, you can select <none> to allow a rule to block an action without displaying any notifier. By default, rules that block or prompt use the policy-specific notifier.
- Custom Notifier – If you do not want to use the policy-specific notifier, you can assign any available notifier to any rule. The notifier choices appear on a menu on the add/edit page for the rule. You can also add a new notifier or edit a notifier. For more details, see Customizing and Creating Notifiers.
When you select Prompt as the rule action, Custom Notifier menu does not include <none> as an option because a prompt rule requires a notifier to appear.
When you select Block as the rule action, you can choose <none> on the Notifier menu for a rule since it is possible you want the rule to block actions without notification.
If you select Use Policy Specific Notifier for a rule, it is possible that the policy specifies <none> as the Notifier for one of its rule types. In this case, a notifier is not shown, even for a Prompt rule. Unless you are certain that you never want to prompt the user for a response to a rule, choosing <none> for the rule notifier in a policy is not recommended.
Assigning Notifiers to Rapid Configs
Rapid Configs are sets of rules, possibly including Custom, Memory, or Registry rules. Some of the rules in a Rapid Config may block actions a user takes. If a Rapid Config can block an action, a Notifier field appears next to the setting that specifies the conditions under which that block takes place.
When a Rapid Config contains more than one action that can be blocked, you can choose different notifiers for each action you block or use the same one for all. You also can choose Block for some actions in one Rapid Config and Report or Do Nothing for others. For more details, see Rapid Configs.
