Use these instructions for a completely new installation of App Control, with a new database (no restorations of or reconnections to an existing database).
To install a new App Control Server:
- Log in using an account with local Windows administrator credentials. If you plan to use Windows Authentication to login to a remote App Control database, install the App Control Server using an account that has been added to SQL Server with “sysadmin” checked in the Server Roles. Carbon Black strongly encourages using a specific Domain account for installing and logging in to the App Control Server, and for database access, to simplify control of both database and Active Directory permissions.
Important: Do not change the privileges of the account used to install the server after installation. This account must continue to have local administrator privileges for the server to function properly, and will also be used for server upgrades.
- Make the server installation file available to the installation computer (either by download or inserting media in an accessible location).
- Run the installer in either of the following ways:
- To install on a local server, double-click the ParityServerSetup.exe file to start the installation program. Continue to the next step.
- To install from a remote desktop, copy the ParityServerSetup.exe file to the installation computer and execute the file.
- If the installer detects that required Microsoft redistributable packages are not present, a dialog box listing those packages appears. Click Install on the dialog to install the packages and continue with the App Control installation.
Note: Installation of redistributable packages may require a reboot.
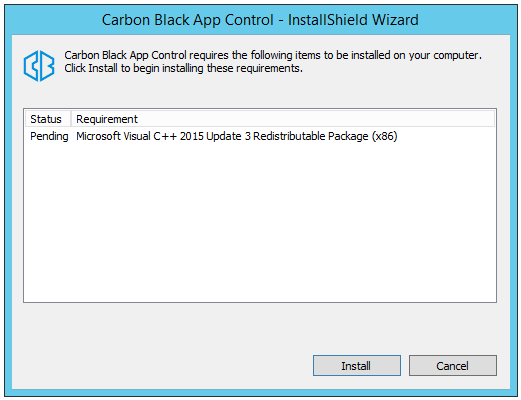
If no missing packages were detected, or when the installation is completed, the Welcome dialog appears.
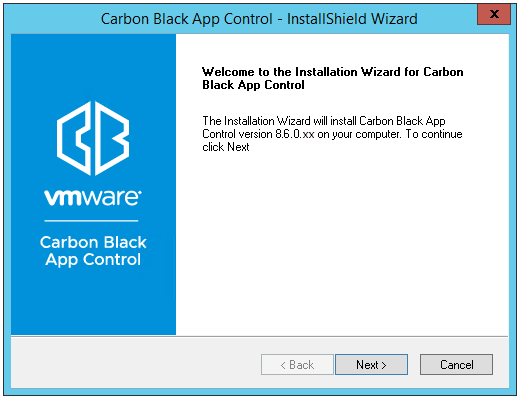
- On the Welcome page, click Next . The License Agreement screen appears.
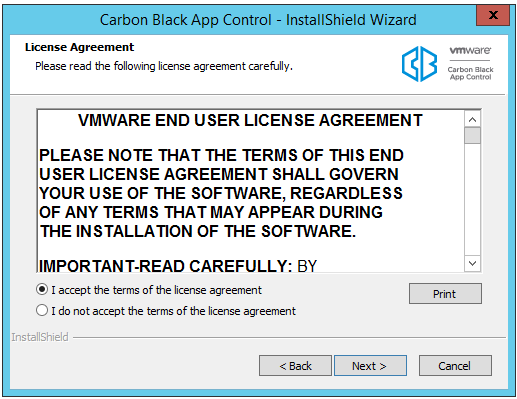
- Review the software license agreement. You must agree to the license terms to install the App Control Server. When you click I accept and continue, you agree to all terms of use. To continue, click the Next button. The Select Features dialog appears.
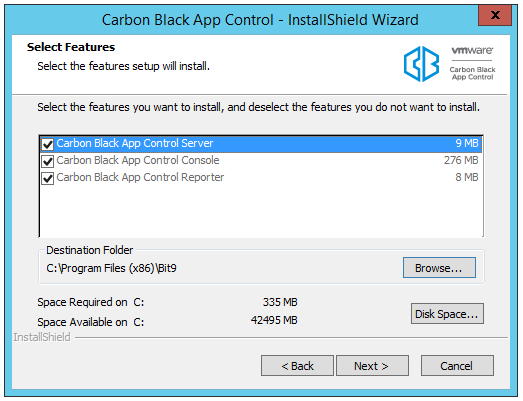
- The Select Features screen provides information about the App Control features being installed, the installation folder, and the space required and available for installation:
- App Control Server, App Control Console, and App Control Reporter are always installed — they cannot be deselected. The console is the web interface to the server. The reporter is the service that connects the server to Carbon Black File Reputation, which provides access to a database of information about files and threats. Reporter, which runs as a Windows service, also provides other essential reporting capabilities, including collection of support information for the server.
- Either keep the default installation folder (which differs from 32-bit to 64-bit systems) or click Browse and navigate to the folder in which you want to install the server. If you don’t choose the default, use a path that has only valid ASCII characters, not Unicode. When you have chosen the folder, click Next.
Note: At this point in the installation, the installer program checks to be certain that it can write to the folders and registry locations needed. If any issues are found, they (and their paths) are listed in a dialog, and you must resolve them before continuing the App Control installation. - The Database Server screen appears next. It includes two configuration choices:
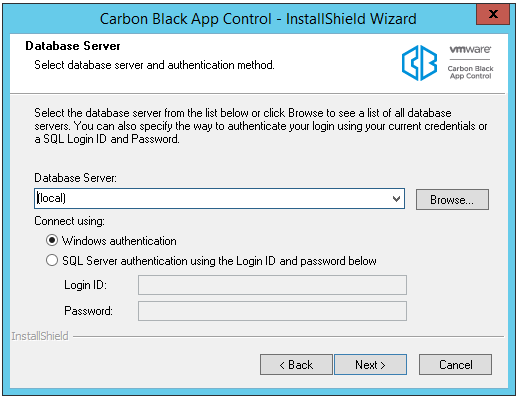
- In the Database Server field, enter the name of the SQL server, and (if any), its instance name, you are using for App Control data. If the SQL Server and App Control Server are on the same system, use a local name (not an FQDN) to allow use of shared memory for the connection between the two. See SQL Server Memory Configuration for more details.
- Specify the database connection method using one of the following:
Note:
Your choice here determines how access to the SQL Server by App Control will be authenticated, both during and after the installation.
- Windows Authentication (i.e. with the user doing the App Control installation)
- SQL Server Authentication
If you choose SQL Server Authentication, provide the Login ID and Password.
- When you have entered all database information, click Next.
Important: For either authentication method, the user must have been given the “sysadmin” Server Role in SQL Server.Note:If the Database Server field points to a remote SQL Server, the following prompt displays.
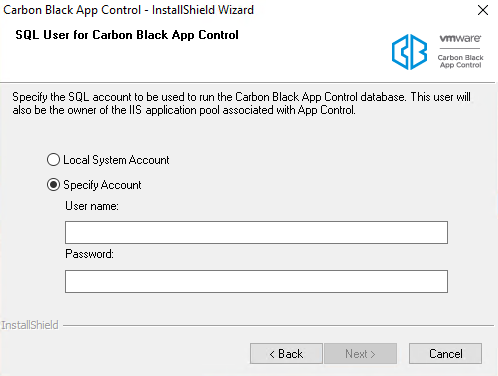
You must specify an account that both this server and the remote SQL Server can authenticate.
This account will be used by IIS to access SQL Server for all required database operations by the console and API. Consequently, this account should not have sysadmin privileges on SQL Server. If it does, a confirmation prompt displays requiring you to confirm that decision.
- The App Control Database Configuration Options screen appears next.
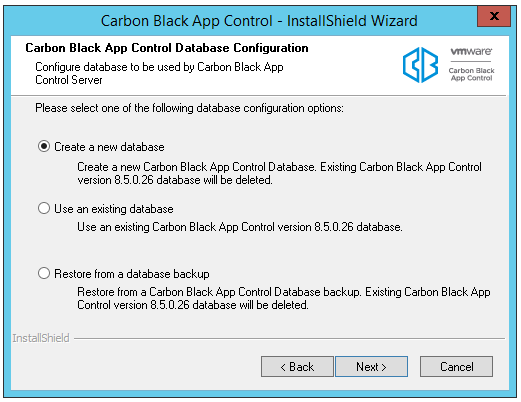
On this dialog, choose Create a new database if you are installing the App Control Server for the first time, then click Next.
Note: The other database configuration options, Use an existing database and Restore from a database backup, are described in Installing the Server with a Restored or Reconnected Database. - On the Logon Carbon Black App Control Server As screen, choose the logon account to be used by the App Control Console. This will also be the account used to install future patches and upgrades. You can choose one of two modes of logging in:
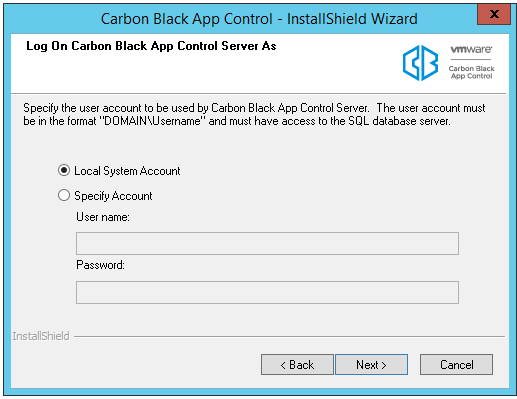
- Local System Account:
Selecting this option configures App Control to use the built-in Windows System account.
- Specify Account:
Selecting this option activates the Username and Password fields so that you can provide account information. As the screen notes, the account you provide must be in the format DOMAIN\Username and have full access to the SQL database server. The default for this choice is the currently logged in user. You cannot use “\Username” without a domain or a dot before the backslash
Note:- Carbon Black strongly encourages using the Specific Account option to simplify control of database and Active Directory permissions. In general, the installer should be run by this same Domain account.
- For local SQL Server Express databases, the currently logged in user must be the same as the user specified in the Logon Information installation dialog, and the user must have the “sysadmin” Server Role. If you enter a different user, an error message appears and you must re-enter the current user.
- To use a Domain account to access a remote SQL database, you must use that account to run the installer and enter it as a Specific Account in the dialog above. The account must have the “sysadmin” Server Role in SQL Server. Use of an invalid login account causes server installation to fail later in the process; you will need to reinstall.
When you have provided logon information, click Next.
- Local System Account:
- The Server Configuration Options screen displays next.
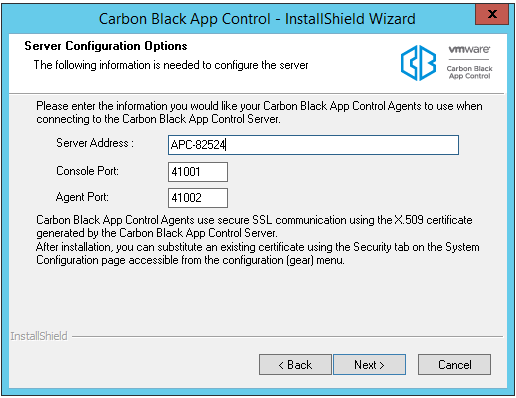
From the Server Configuration Options screen, review the configuration settings. In the Server Address field, the preferred address for the server is a fully qualified DNS name or alias that is resolvable by all computers running App Control Agent. Although not recommended, if the server is assigned a static IP address that will not change at reboot time, you can keep the default IP address selected for the server. The installation program automatically supplies the correct information for the installation computer. The Console Port, which is used for communications between the server and its browser console, is 41001. The Agent Port, which is used for SSL communication with App Control Agents, is 41002.
Note:- Carbon Black strongly recommends the use of a fully qualified DNS name or alias for Server Address whenever possible. Use of a CNAME (alias) may provide more flexibility and reliability.
- If you use multiple NICs , make sure the FQDN you use in the Server Configuration screen refers to the address of the card(s) you want the agents to connect to.
- An SSL certificate is automatically generated to protect communications between the server and its agents. If the Common name of the server does not match the server name configured here, server and agents will be unable to communicate correctly. After installation is complete, you can replace this certificate with an existing certificate on the Security tab of the System Configuration page in the console.
After reviewing the server configuration and made any necessary changes, click Next.
- If you selected Specify Account in the (App Control Server) Logon Information screen (step 10), another Logon Information screen appears next, for Login for Console Application . This screen allows you to specify different user credentials to start the IIS process for App Control Console, the web-based user interface for the server.
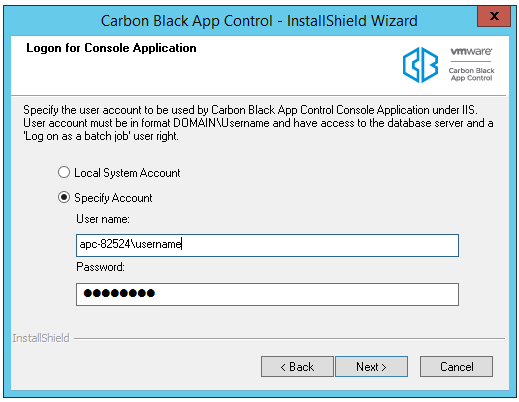
- Local System Account: Choose this option to configure the server to use the built-in Windows system account to start the IIS process for the console.
- Specify Account: Choose this option to activate the Username and Password fields so that you can provide account information. As the screen notes, the account you provide must be in the format DOMAIN\Username. You cannot use “\Username” without a domain or a dot before the backslash.
Note:If you use an account other than the current user, a warning dialog will be shown: “The App Control Server installer is unable to validate whether the specified account is able to access the SQL database server. Are you sure you want to continue?” If you are certain the account you provided is valid, choose Yes.
Click Next.
-
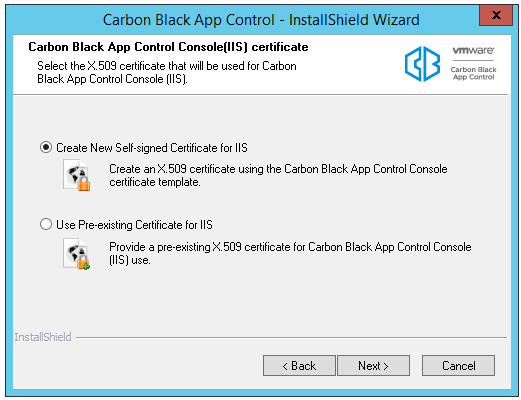
The App Control Console (IIS) Certificate screen appears next. Choose the digital certificate that will appear to App Control Console users. You either create a certificate using a template provided by Carbon Black or substitute your company’s certificate.
-
If you do not have your own certificate, choose Create Certificate. This allows you to create a Carbon Black self-signed certificate. You can either leave Carbon Black’s default information or supply certificate information that identifies your own organization instead. Self-signed certificates will generate warning boxes when you log in to the App Control Console using Internet Explorer or Firefox, although Firefox will allow you to permanently accept the certificate to eliminate future warnings. To create a certificate, choose Create Certificate, click the Next button, and skip to Step 14.
-
To substitute your own certificate, choose Use Pre-existing Certificate, click the Next button, and skip to Step 15.
Note:-
The Carbon Black self-signed certificate cannot be universally trusted because it is not created through a trusted provider such as Verisign or Thawte. This is why it generates a warning on login. While this doesn’t interfere with App Control operation, you may want to acquire your own, trusted certificate to avoid the warning.
-
Self-signed certificates with a validity period greater than 20 years are not usable. If necessary, create and use a new certificate with a shorter validity.
-
-
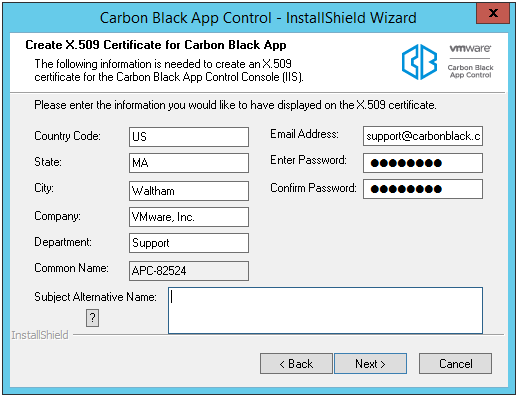
If you chose Create Certificate, the Create X.509 Certificate screen appears.
-
By default, all certificate details correspond to Carbon Black name and address data. Please replace them with details of your company. The default password is ‘password’. Carbon Black recommends that you change it, and keep a record of your new password so it can be retrieved for later use. The Common Name field defaults to the IP Address or DNS Name of the server; it cannot be changed. If the server is reachable by multiple DNS names, you can use the Subject Alternate Name field to specify the alternate names. When the certificate is validated against a computer, it is validated against a Common Name or one of the Subject Alternative Name entries (if they exist). If both are present, names in the Subject Alternative Name field have priority.
-
When all fields are filled in as you want, click Next to create the certificate and move to the License Key screen (step 16).
-
- If you chose Use Pre-existing Certificate, the Use Pre-existing X.509 Certificate screen appears. Enter the required information:
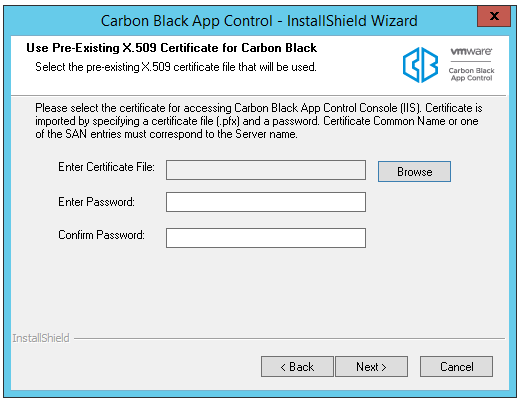
- Click the Browse button next to the Enter Certificate File field, navigate to the PFX (PKCS.12) certificate file you want to use, and click Open when you have located the file. The filename appears in the certificate file box.
- Enter the password for the certificate, and re-enter it in the confirmation field.
- When you have entered the certificate file and the passwords, click Next to validate the certificate file with the password.
- A dialog box appears allowing you to use the same certificate for Agent-Server communications. Choose Yes to use the same certificate or No if you want the App Control installer to generate a different, self-signed certificate for Agent-Server communications (you can modify this certificate or choose a new one through the App Control Console later). After you make your choice, the License Key screen appears.
- On the License Key screen, you enter the license key provided by Carbon Black. This key determines how many agents you can run at each of the two fundamental feature levels: Visibility-Only or Visibility-and-Control. It may also include permission for optional features.
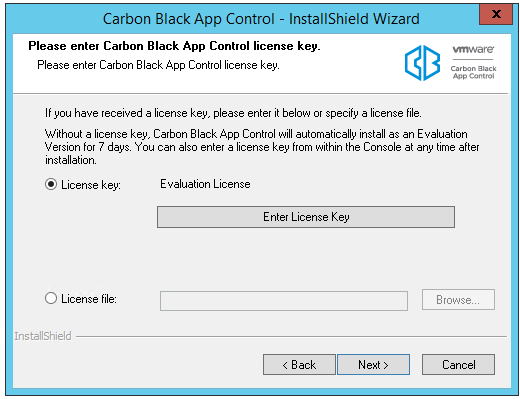
You have two options for entering the key:
When you have provided either the license key text or a license file, or have chosen not to enter a key, click Next. The App Control Agent Management screen appears.- License key: Select this option to cut and paste the license key into a window (for example, from an email message or other communication).
- License file: Select this option to provide the name and path to a license file containing the key. License key files have the file extension .lic. When you select this option, the Browse button is activated so that you can locate and select the license file using the standard Windows Choose File dialog.
Note: If no license key is entered here, the server is installed with a 7-day evaluation license. After installation, you can update the license at any time from the System Configuration page of the console.
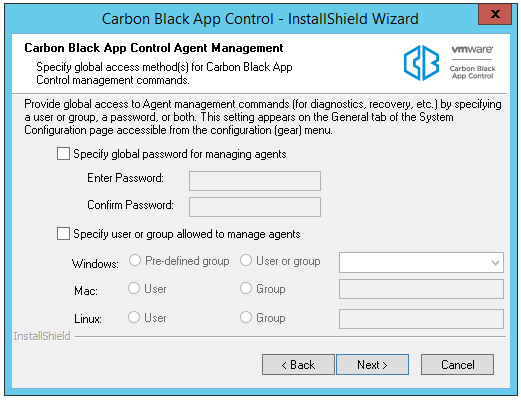
- On the App Control Agent Management screen, you can enable global access to agent management commands used for diagnostics, recovery, and other special situations. Although you can configure this after installing the server, it is highly recommended that you configure this feature before installing agents since your choice (or lack of one) is built into the agents when you install them. It is especially important to set up a global access method if you will have agents that are offline frequently or at all times. The choices are:
- Specify a global password for managing agents: Check this box, then enter and confirm a password, if you want to enable access to agent management commands on all agents via a single password. Password must be between 1 and 64 characters long, be in the ASCII character set, and must not contain the following DOS special characters: | > < & % ( ) @ . [ ] { } : ; ^ = ! ' " ` ~ ,
- Specify a user or group allowed to manage agents for each platform (Windows and Mac are supported at this time): Check this box if you want to enable access to agent management commands by choosing a pre-defined group from a menu (for Windows) or by entering a user or group name used at your site. Provide a user or group for each agent platform you have in your environment.
Note:
- If you define both a user/group and a password, either access method is sufficient on its own.
- If you plan to manage clients from computers running Vista or Windows 7, use of pre-defined Windows groups for access privileges is not recommended because Windows UAC may not provide the expected membership in a group.
- See “Configuring Agent Management Privileges” in the VMware Carbon Black App Control User Guide guide for more information about configuring agent management access.
- Click Next.
- You must specify the admin account password for the console user interface, and then click Next.
- You can use any combination of letters, numbers, or English-keyboard characters.
- Must have a minimum of 12 characters.
- Maximum limit of 64 characters.
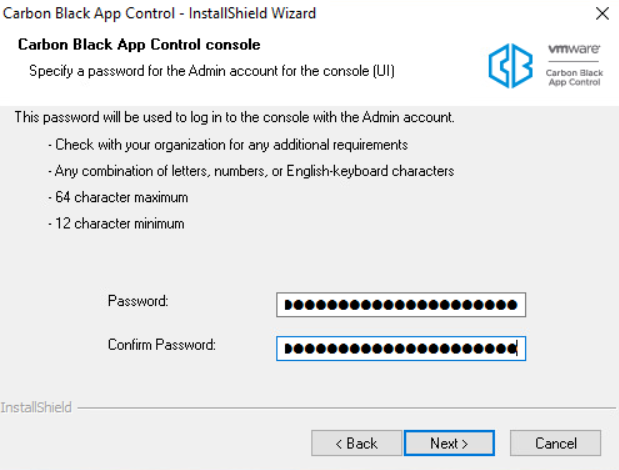 Note: Use this password to log onto the console for the first time.
 - If you are satisfied with your installation choices, click the Install button on the Ready to Install screen:
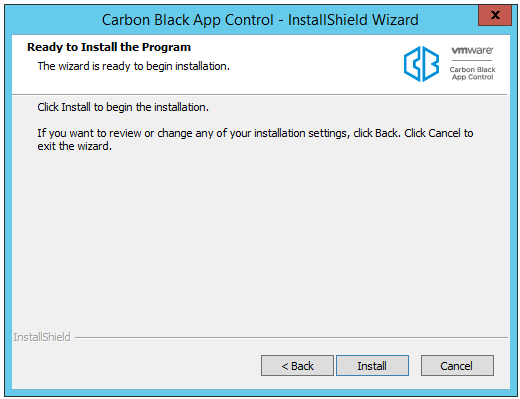
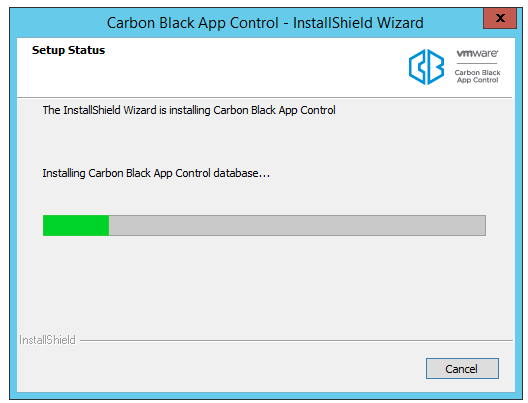
- App Control Server installation begins. There is a status box overlaying the main dialog to show the progress of SQL script execution. The main dialog also has a status indicator for the overall installation.
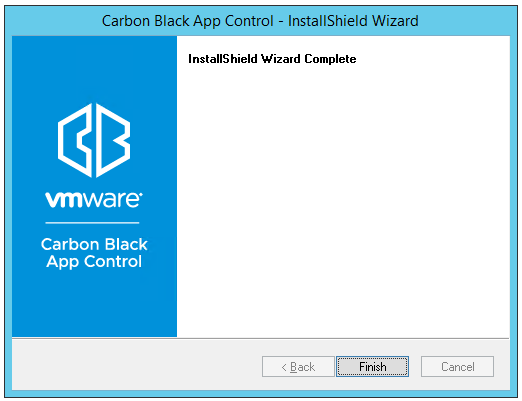
- When the InstallShield Wizard Complete screen appears, the installation is complete.
- In some cases, you will need to restart the server computer after installation is completed, and the dialog will include an option to restart now. Choose to restart now unless you need to complete some other activity on this computer.
- Click the Finish button. App Control Server, which runs as a service, begins to operate after you click this button. Installation logs are placed in the App Control installation folder (for example, C:\Program Files (x86)\Bit9 ).
Once you have finished installing the server, you can log in via the console, upload rules and agent installers from the User Exchange, configure security policies and rules, and install agents on your endpoints. Login basics are described in this document in The App Control Console Other topics are covered in VMWare Carbon Black App Control User Guide which is available as a PDF download or through the console as context-sensitive help.