Use this procedure to manually grant Full Disk Access to macOS sensors.
Procedure
- In System Settings, open the Security & Privacy pane and scroll down to Full Disk Access.
If
com.vmware.carbonblack.cloud.se-agent.extensionis listed but shows as Disabled, then set the slider to Enabled.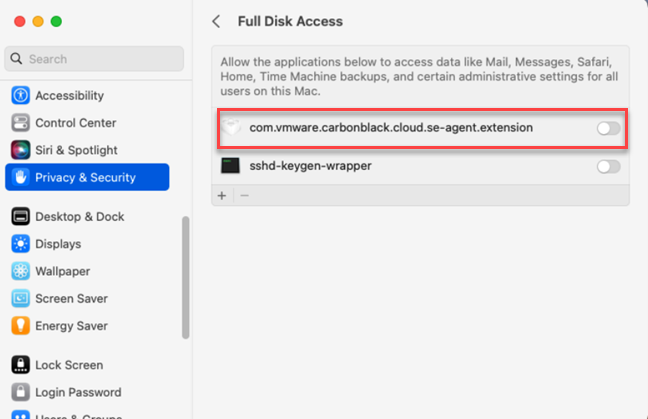 Note: If the extension is not listed, you can manually add the extension and then enable it (or, do nothing).
 - Position this Finder window next to the previously opened Privacy & Security > Full Disk Access pane.
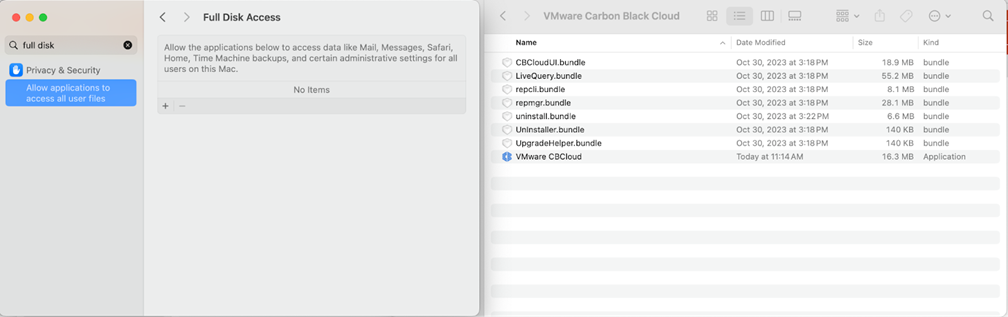 Important: Due to the pane limitation, you must open the separate Finder window from which to drag-and-drop sensor bundles instead of clicking + to add them. The latter method may not support granting by individual binaries.
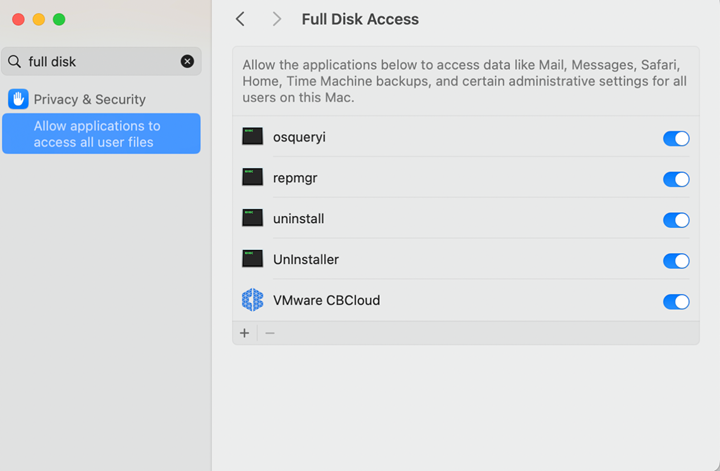
 - Starting with the
repmgrbundle, navigate to the binary by using the Finder right-click Show Package Contents menu option.
- Navigate to the binary within the bundle
Contents/MacOSfolders and select the binary file.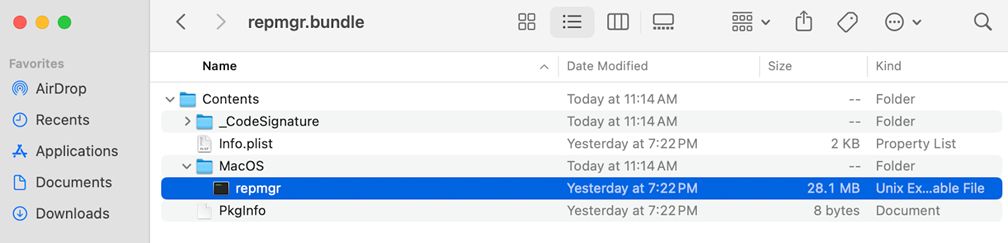
- Drag-and-drop the binary to the Full Disk Access pane and set the slider to
Enabled.
- Repeat Steps 8 through 9 for the remaining three bundle binaries. The end result should depict the following pane view:
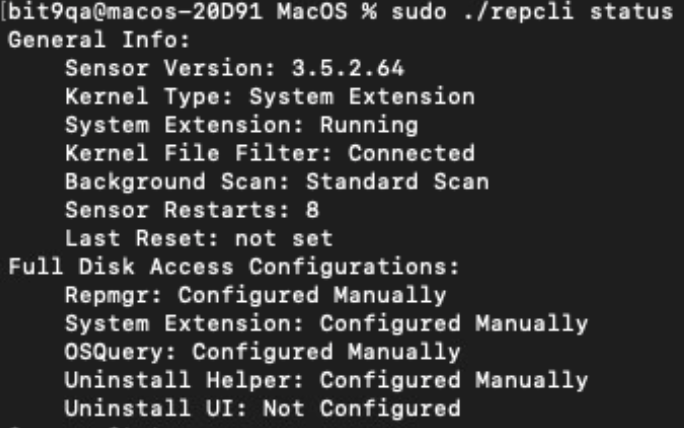
- Open a Terminal window and run the RepCLI status command (requires admin password):
sudo /Applications/VMware\ Carbon\ Black\ Cloud/repcli.bundle/Contents/MacOS/repcli status
RepCLI displays a sensor information report that includes Full Disk Access. Expected output in the Full Disk Access Configuration section should read "Configured Manually" for the five sensor items.