If you want to import users and groups from a SAML identity provider to your VMware Cloud Director system organization, you must configure your system organization with this SAML identity provider. Imported users can log in to the system organization with the credentials established in the SAML identity provider.
When an imported user attempts to log in, the system extracts the following attributes from the SAML token, if available, and use them for interpreting the corresponding pieces of information about the user.
email address = "EmailAddress"user name = "UserName"full name = "FullName"user's groups = "Groups"user's roles = "Roles"(this attribute is configurable)
Group information is used if the user is not directly imported but is expected to log in by virtue of membership in imported groups. A user can belong to multiple groups, so can have multiple roles during a session.
If an imported user or group is assigned the Defer to Identity Provider role, the roles are assigned based on the information gathered from the Roles attribute in the token. If a different attribute is used, this attribute name can be configured using API and only the Roles attribute is configurable. If the Defer to Identity Provider role is used, but no role information can be extracted, the user can log in but has no any rights to perform any activities.
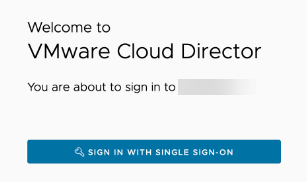
For version 10.4.2 and later, if an organization in VMware Cloud Director has SAML or OIDC configured, the UI displays only the Sign in with Single Sign-On option. To log in as a local user, navigate to https://vcloud.example.com/tenant/tenant_name/login or https://vcloud.example.com/provider/login.

For versions 10.3.3 through 10.4.1, if an organization in VMware Cloud Director has SAML or OIDC configured, to log in with your identity provider, select the Sign in with Single Sign-On option.

Prerequisites
- Verify that you have access to a SAML 2.0 compliant identity provider.
- Obtain an XML file with the following metadata from your SAML identity provider.
- The location of the single sign-on service
- The location of the single logout service
- The location of the service's X.509 certificate
For information on configuring and acquiring metadata from a SAML provider, consult the documentation for your SAML provider.