


VMware Cloud Foundation supports two ways to install third-party certificates. This procedure describes the legacy method of using a certificate bundle. To use the legacy method, you must modify your preferences and then use this procedure to generate CSRs, sign the CSRs with a third-party CA, and finally upload and install the certificates.
Prerequisites
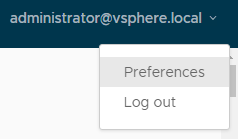
- In the SDDC Manager UI, click the logged in user and select Preferences.
- Use the toggle to switch to legacy certificate management.

Uploading CA-signed certificates from a third-party Certificate Authority using the legacy method requires that you collect the relevant certificate files in the correct format and then create a single .tar.gz file with the contents. It's important that you create the correct directory structure within the .tar.gz file as follows:
-
The name of the top-level directory must exactly match the name of the workload domain as it appears in the list on the . For example, sfo-m01.
The PEM-encoded root CA certificate chain file (must be named rootca.crt) must reside inside this top-level directory. The rootca.crt chain file contains a root certificate authority and can have n number of intermediate certificates.
For example:-----BEGIN CERTIFICATE----- <Intermediate1 certificate content> -----END CERTIFICATE------ -----BEGIN CERTIFICATE----- <Intermediate2 certificate content> -----END CERTIFICATE------ -----BEGIN CERTIFICATE----- <Root certificate content> -----END CERTIFICATE-----
In the above example, there are two intermediate certificates, intermediate1 and intermediate2, and a root certificate. Intermediate1 must use the certificate issued by intermediate2 and intermediate2 must use the certificate issued by Root CA.
- The root CA certificate chain file, intermediate certificates, and root certificate must contain the
Basic Constraintsfield with value CA:TRUE. -
This directory must contain one sub-directory for each component resource for which you want to replace the certificates.
-
Each sub-directory must exactly match the resource hostname of a corresponding component as it appears in the Resource Hostname column in the tab.
For example, nsxManager.vrack.vsphere.local, vcenter-1.vrack.vsphere.local, and so on.
-
Each sub-directory must contain the corresponding .csr file, whose name must exactly match the resource as it appears in the Resource Hostname column in the tab.
-
Each sub-directory must contain a corresponding .crt file, whose name must exactly match the resource as it appears in the Resource Hostname column in the tab. The content of the .crt files must end with a newline character.
For example, the nsxManager.vrack.vsphere.local sub-directory would contain the nsxManager.vrack.vsphere.local.crt file.
-
- All certificates including rootca.crt must be in UNIX file format.
- Additional requirements for NSX certificates:
- Server certificate (NSX_FQDN.crt) must contain the
Basic Constraintsfield with value CA:FALSE. - If the NSX certificate contains HTTP or HTTPS based CRL Distribution Point it must be reachable from the server.
- The extended key usage (EKU) of the generated certificate must contain the EKU of the CSR generated.
- Server certificate (NSX_FQDN.crt) must contain the
All resource and hostname values can be found in the list on the tab.
Procedure
- In the navigation pane, click .
- On the Workload Domains page, from the table, in the domain column click the workload domain you want to view.
- On the domain summary page, click the Certificates tab.
- Generate CSR files for the target components.
- From the table, select the check box for the resource type for which you want to generate a CSR.
- Click Generate CSRs.
The Generate CSRs wizard opens.
- On the Details dialog, configure the settings and click Next.
Option
Description
Algorithm
Select the key algorithm for the certificate.
Key Size
Select the key size (2048 bit, 3072 bit, or 4096 bit) from the drop-down menu.
Email
Optionally, enter a contact email address.
Organizational Unit
Use this field to differentiate between divisions within your organization with which this certificate is associated.
Organization Name
Type the name under which your company is known. The listed organization must be the legal registrant of the domain name in the certificate request.
Locality
Type the city or locality where your company is legally registered.
State
Type the full name (do not abbreviate) of the state, province, region, or territory where your company is legally registered.
Country
Type the country name where your company is legally registered. This value must use the ISO 3166 country code.
- (Optional) On the Subject Alternative Name dialog, enter the subject alternative name(s) and click Next.
You can enter multiple values separated by comma (,), semicolon (;), or space ( ). For NSX, you can enter the subject alternative name for each node along with the Virtual IP (primary) node.Note: Wildcard subject alternative name, such as *.example.com are not recommended.
- On the Summary dialog, click Generate CSRs.
- Download and save the CSR files to the directory by clicking Download CSR.
- Complete the following tasks outside of the SDDC Manager UI:
- Verify that the different .csr files have successfully generated and are allocated in the required directory structure.
- Request signed certificates from a Third-party Certificate authority for each .csr.
- Verify that the newly acquired .crt files are correctly named and allocated in the required directory structure.
- Create a new .tar.gz file of the directory structure ready for upload to SDDC Manager. For example: <domain name>.tar.gz.
- Click Upload and Install.
- In the Upload and Install Certificates dialog box, click Browse to locate and select the newly created <domain name>.tar.gz file and click Open.
- Click Upload.
- If the upload is successful, click Install Certificate. The Security tab displays a status of Certificate Installation is in progress.
