The following are the perquisites for the Cloud Web Security Web Proxy configuration.
SSL Certificate
When users first connect to the Web Proxy, users would open their browser and navigate to a website for example, an HTTPS site. The Web Proxy performs an SSL intercept of this traffic and returns a redirect to the authentication service. So, it is recommended to have the VMware Root Certificate installed on the endpoint instead of instructing users to accept the security warning.
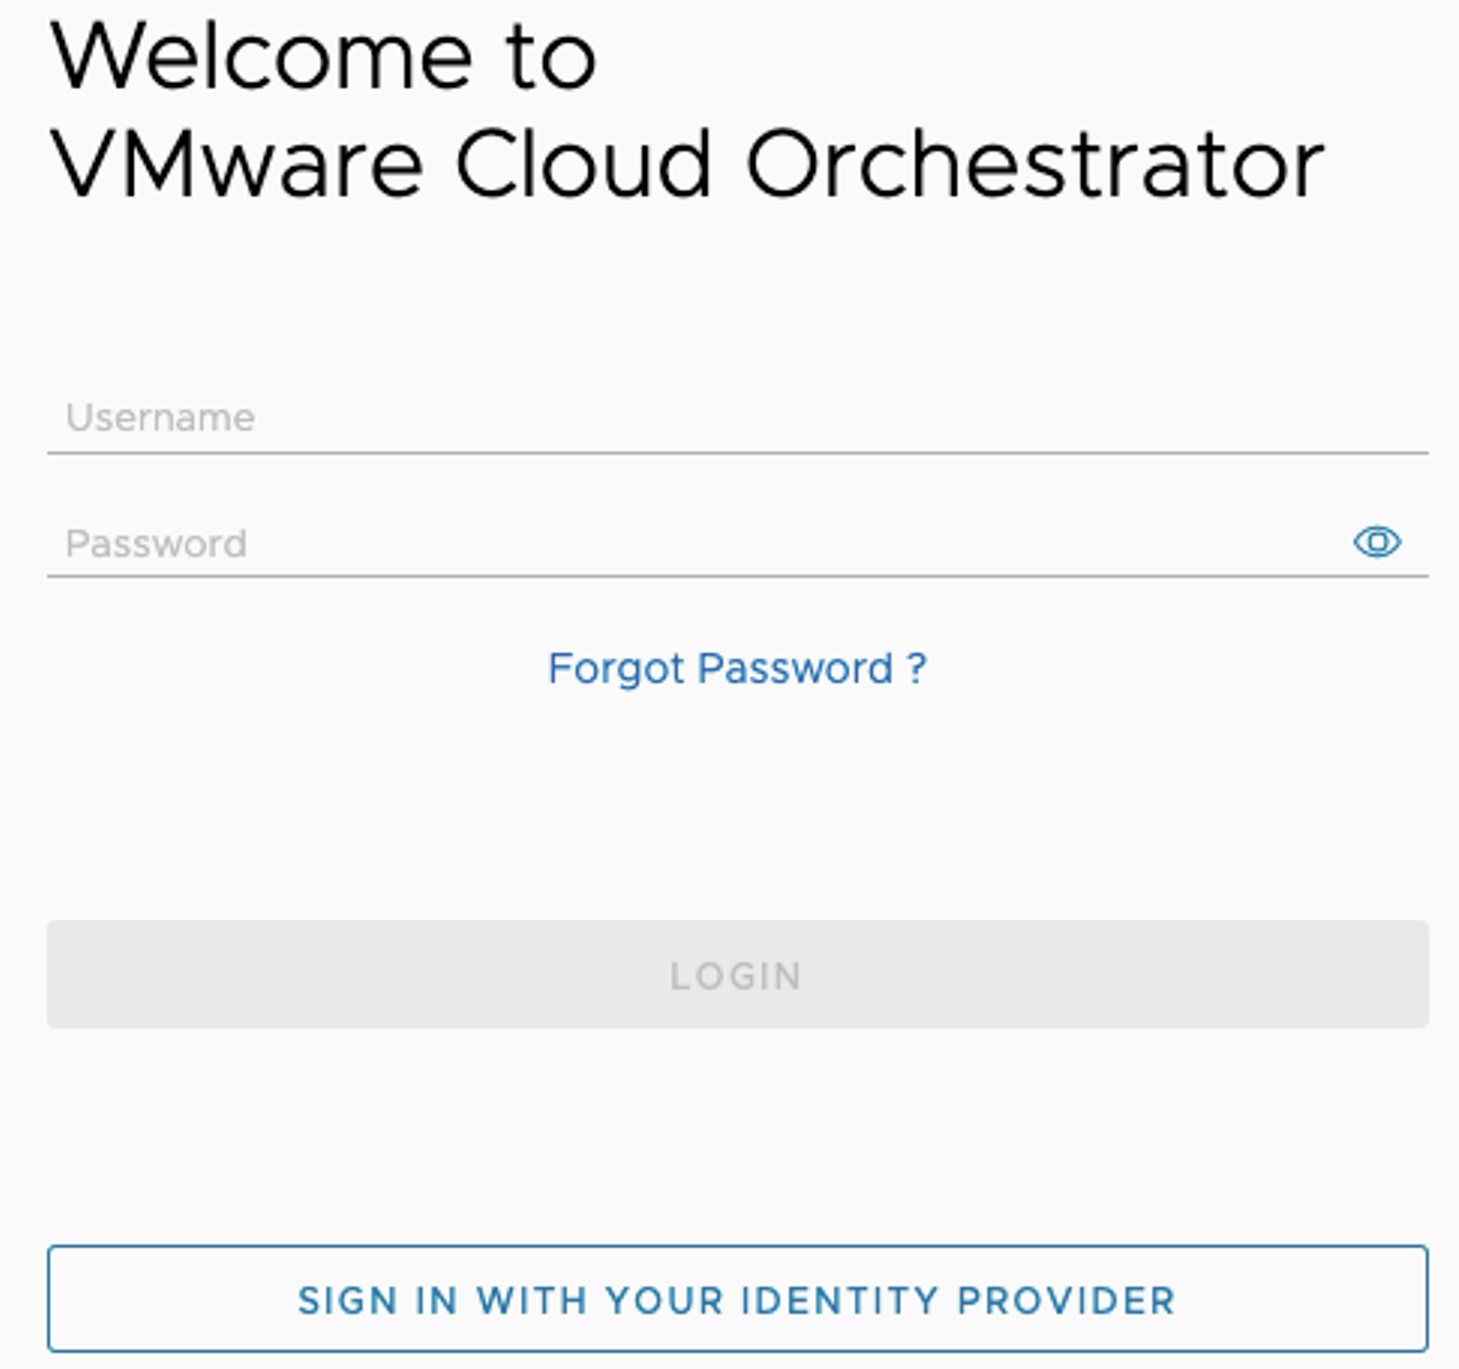
- Open a web browser and navigate to VMware Cloud Orchestrator.
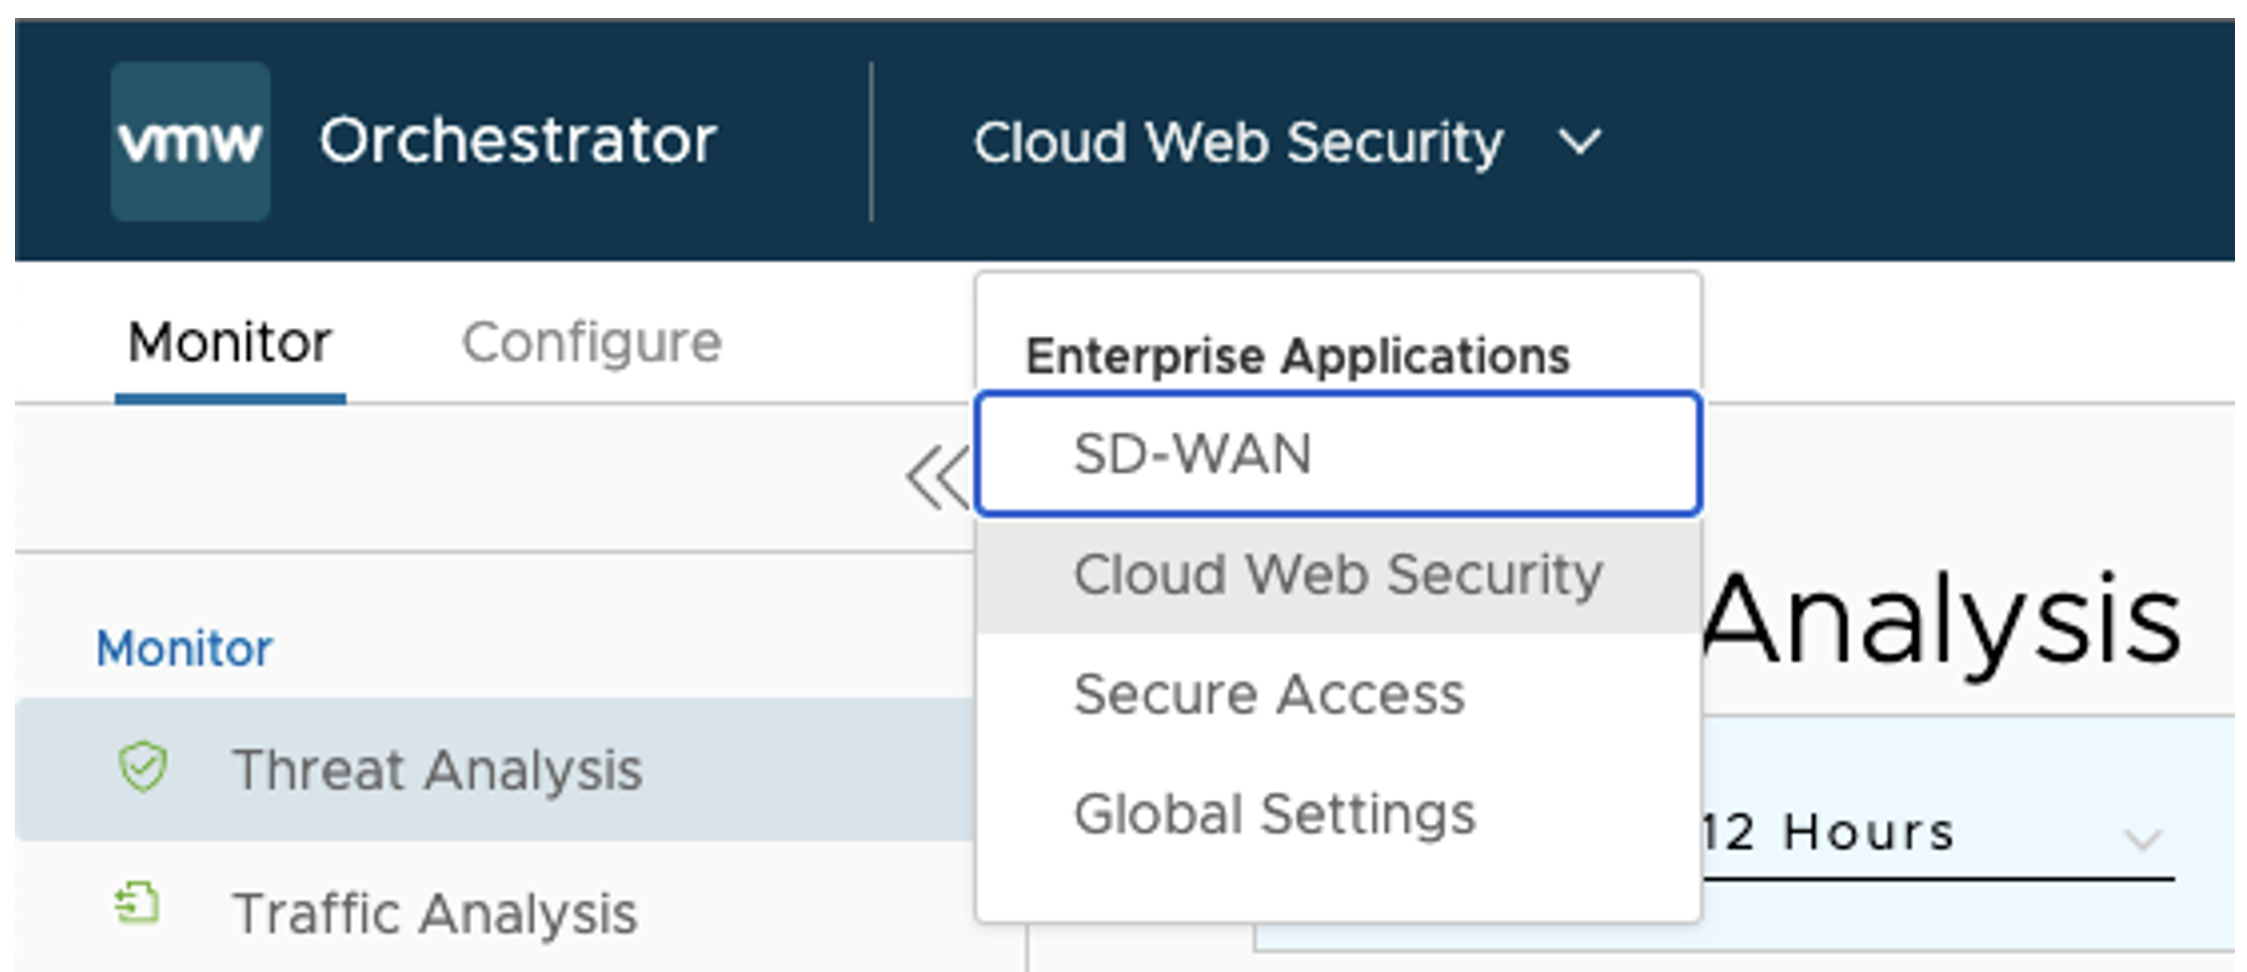
- From the top navigation bar, go to Enterprise Applications > Cloud Web Security.
- Click on the Configure tab and under Enterprise Settings, select SSL Certificate. The SSL Certificate Settings screen appears.

- Click on Download Certificate and save the file to the host machine.
- (Optional) Use a utility, such as OpenSSL, to verify the downloaded root certificate has not been tampered with during transmission. This is done by computing the certificate fingerprint and comparing against what is shown in Orchestrator. For testing purposes, this step can be optional, but in production environments this should not be skipped.
The following are the OpenSSL Commands to Compute Certificate Fingerprint:
$openssl x509 -noout -fingerprint -sha1 -inform pem -in certificate.cer
$openssl x509 -noout -fingerprint -sha256 -inform pem -in certificate.cer
Figure 1. OpenSSL Commands in Terminal 
Figure 2. SSL Certificate SHA1, SHA256 Fingerprints 
The following external links provide instructions on how to install a private root certificate on common endpoint devices:
Alternatively, a root certificate can be installed at the browser level. This is useful for testing purposes, but not recommended for production use. The following external links provide instructions on how to install a private root certificate on popular Web browsers:
SAML Provider
A SAML provider is necessary to authenticate users to the Cloud Web Security Proxy service. This requirement ensures only authenticated users are connected to Cloud Web Security and provides operational insight into the activity of those using the Web proxy.
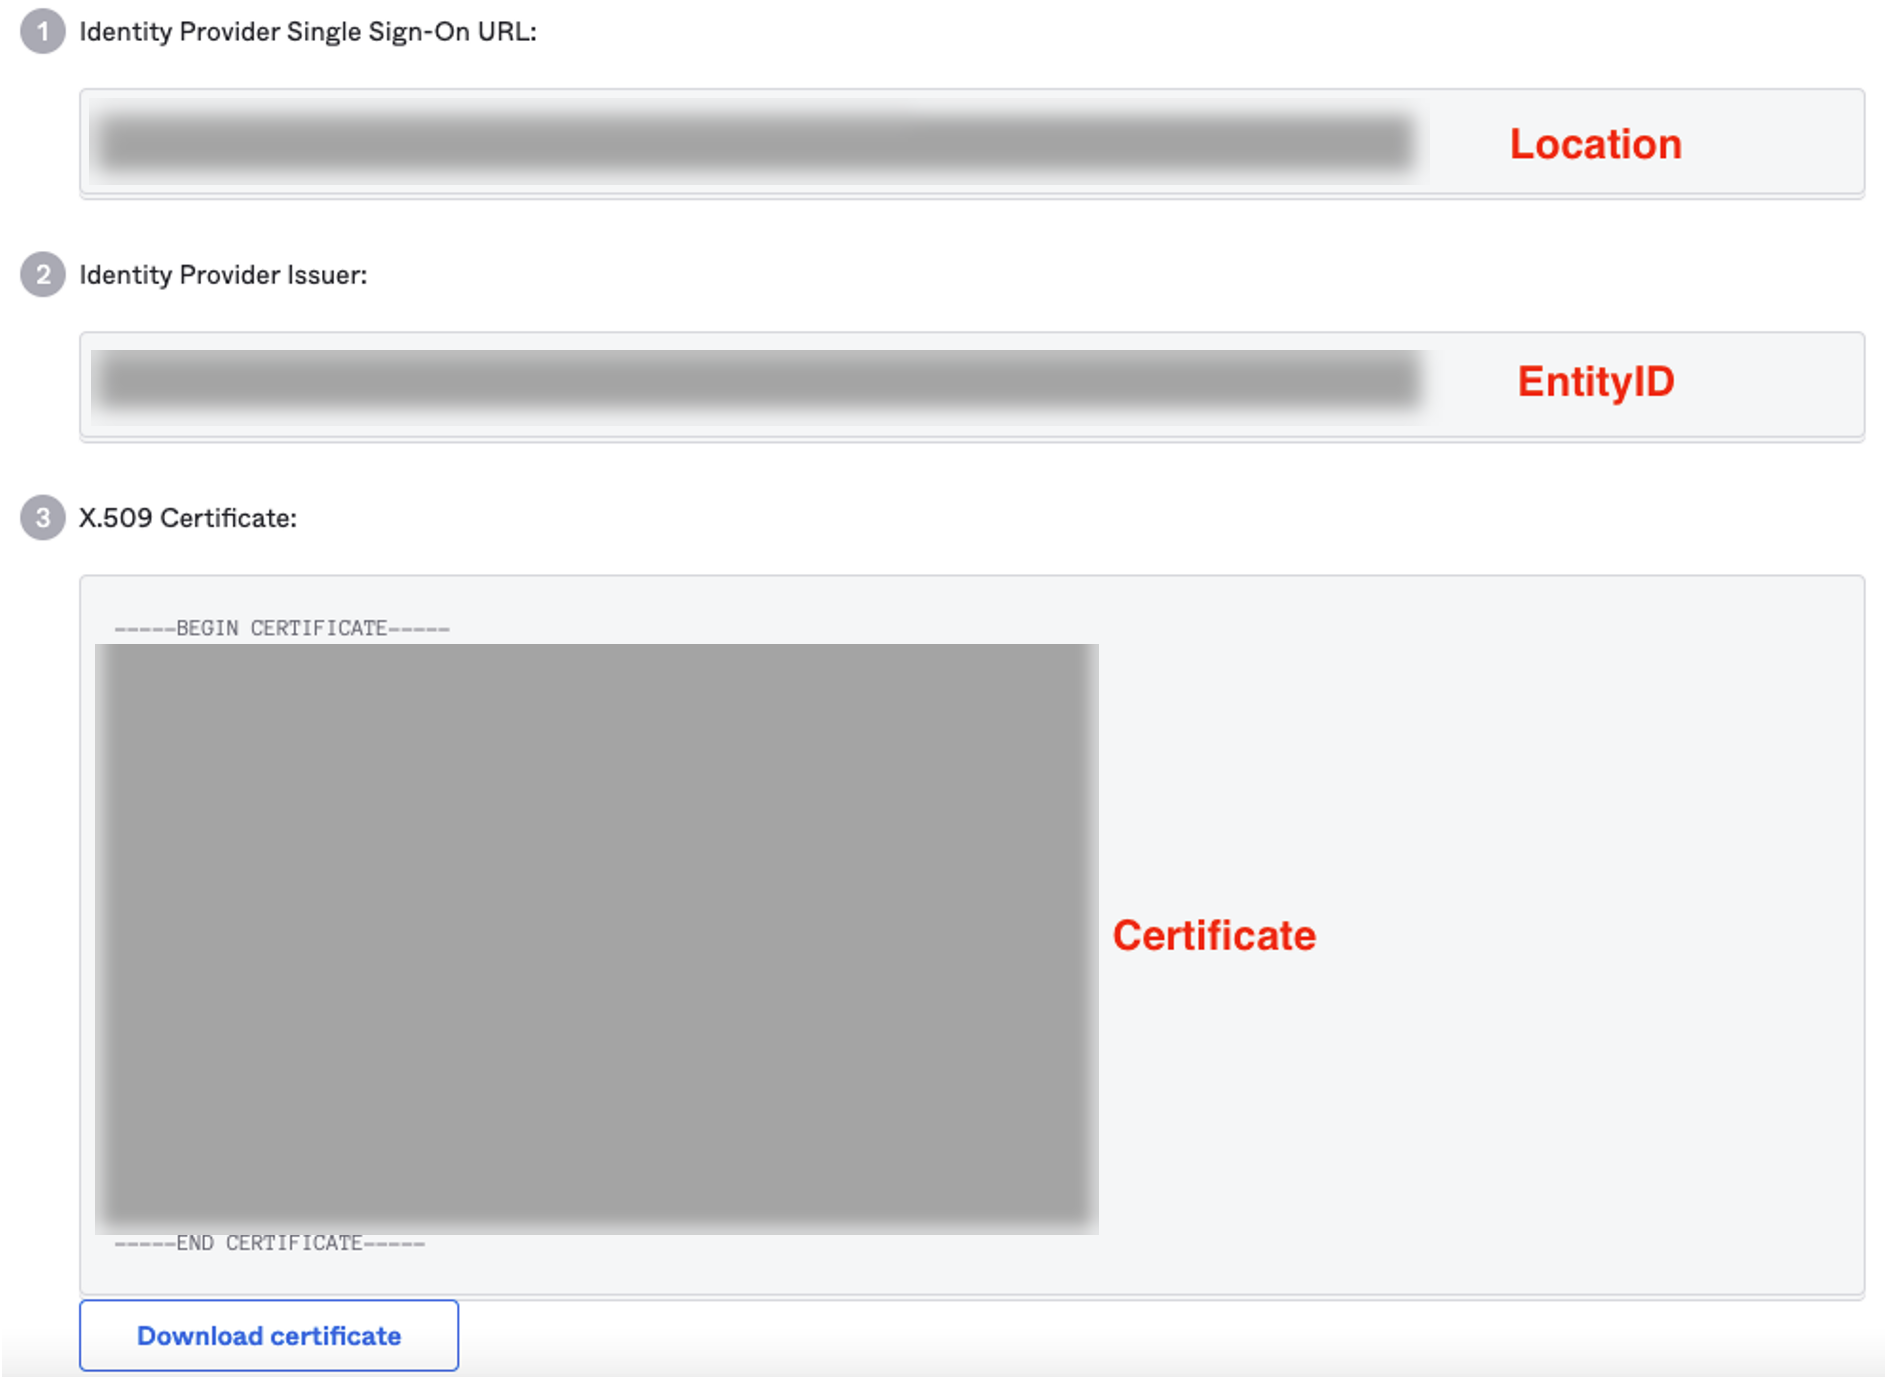
- Location – This is the single sign on (SSO) URL provided by the IdP for the defined SAML application. In this case, that application is Cloud Web Security.
- EntityID – The EntityID or “Issuer” is part of the verification process for validating the IdP.
- Certificate – This is the x.509 certificate the IdP is used to authenticate and authorize the SAML service.
Activating Single Sign On (SSO)
- Navigate to . The following screen appears.
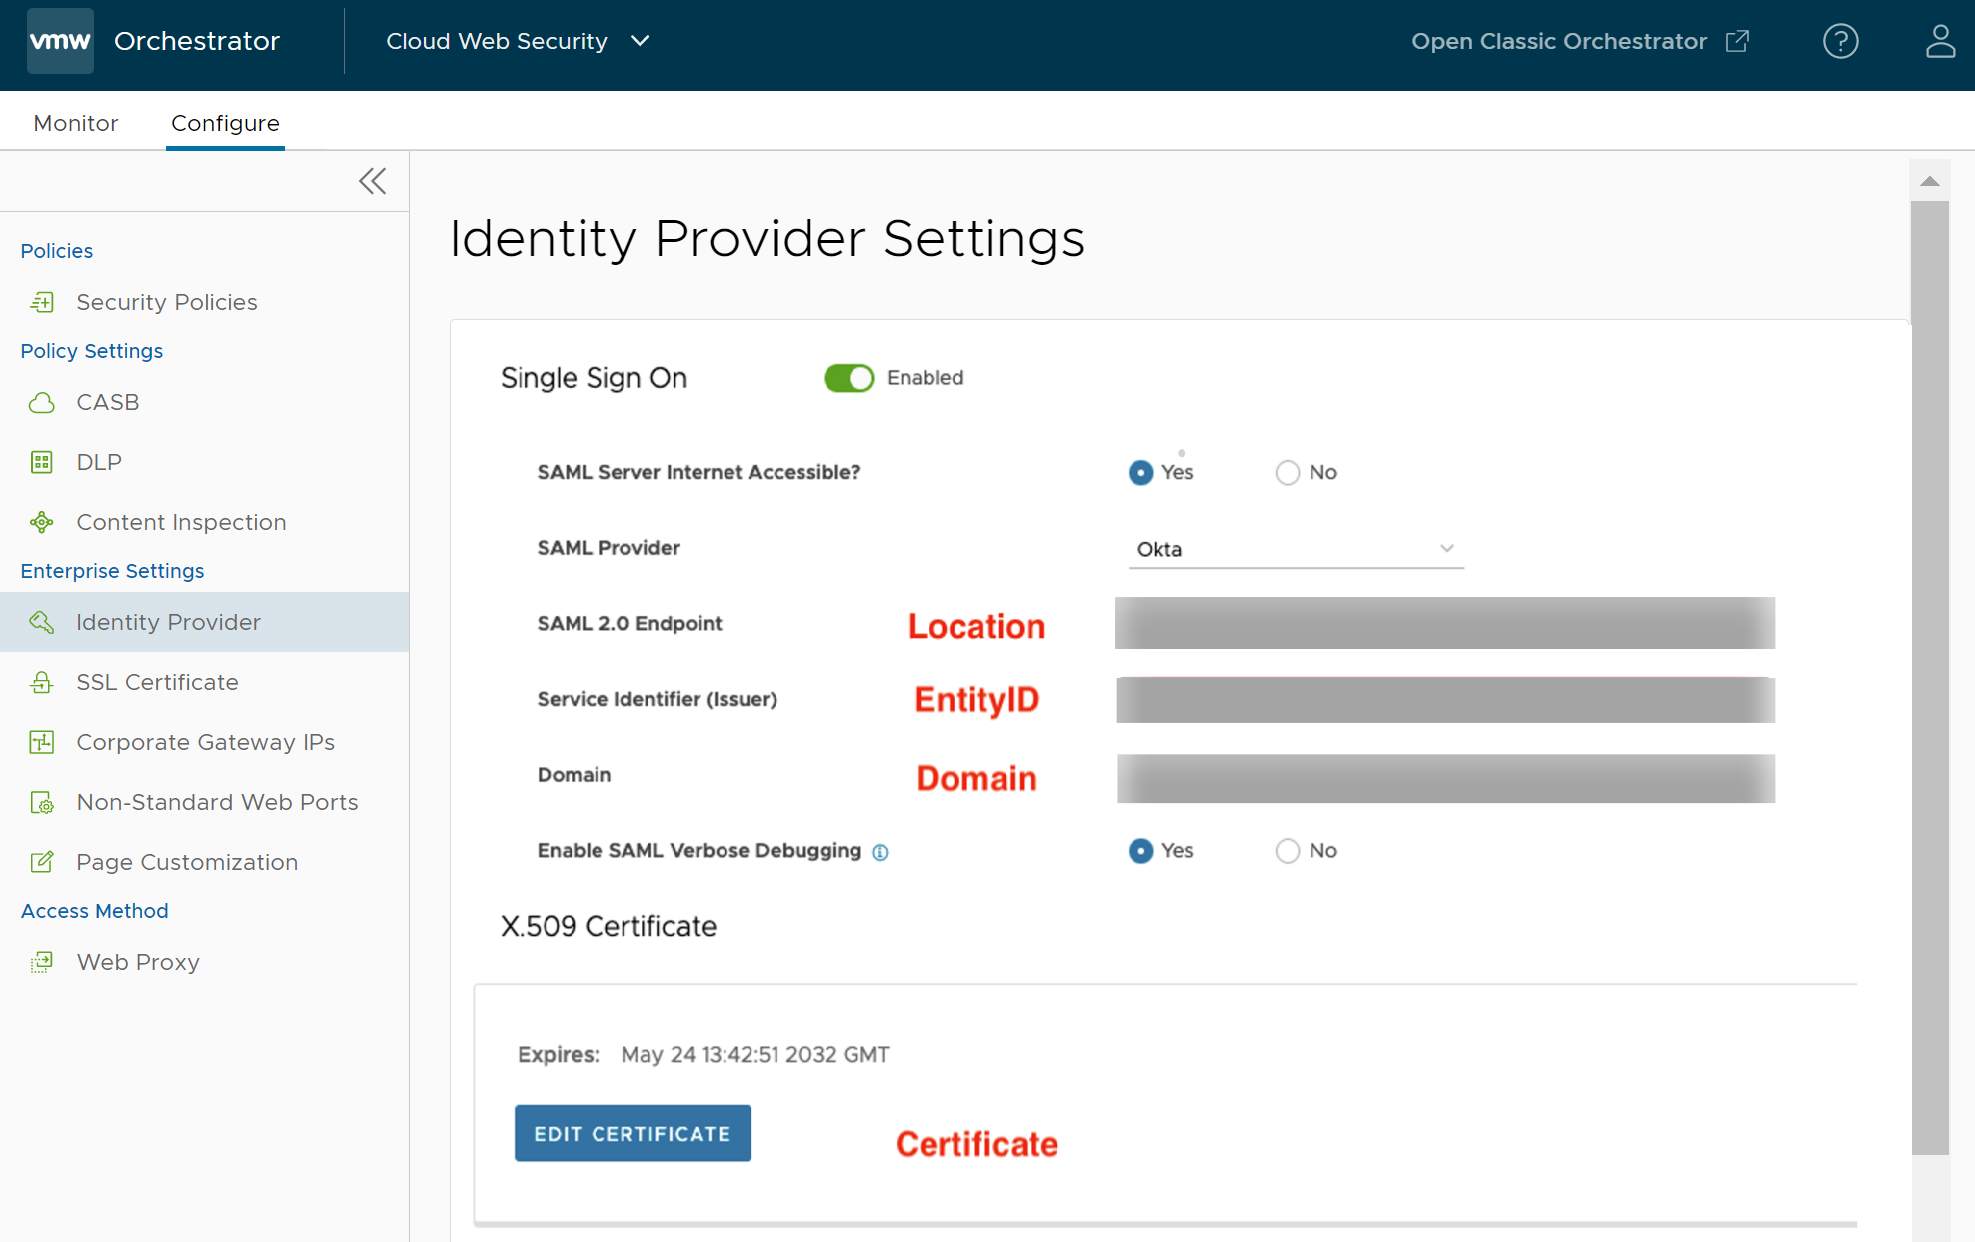
- Turn on the Single Sign On toggle button and enter the following details:
Field Description SAML Server Internet Accessible Select Yes to access SAML Server Internet. SAML Provider Select Okta from the list. SAML 2.0 Endpoint Copy and paste the Location information from the IdP. Service Identifier (Issuer) Copy and paste the EntityID information from the IdP.
Domain Enter your company’s domain (for example, vmware.com). Note: Users will authenticate to the service using their email address. The user’s email domain must match what is configured here.Enable SAML Verbose Debugging Select Yes or No depending on whether you want to activate SAML Verbose Debugging. By default, SAML debugging is deactivated unless troubleshooting SAML login issues. - After setting the above attributes, ensure to save the changes by clicking the Save Changes button.
- Click the Edit Certificate button to configure the IdP certificate information in CWS. The Certificate Detail pop-up window appears.
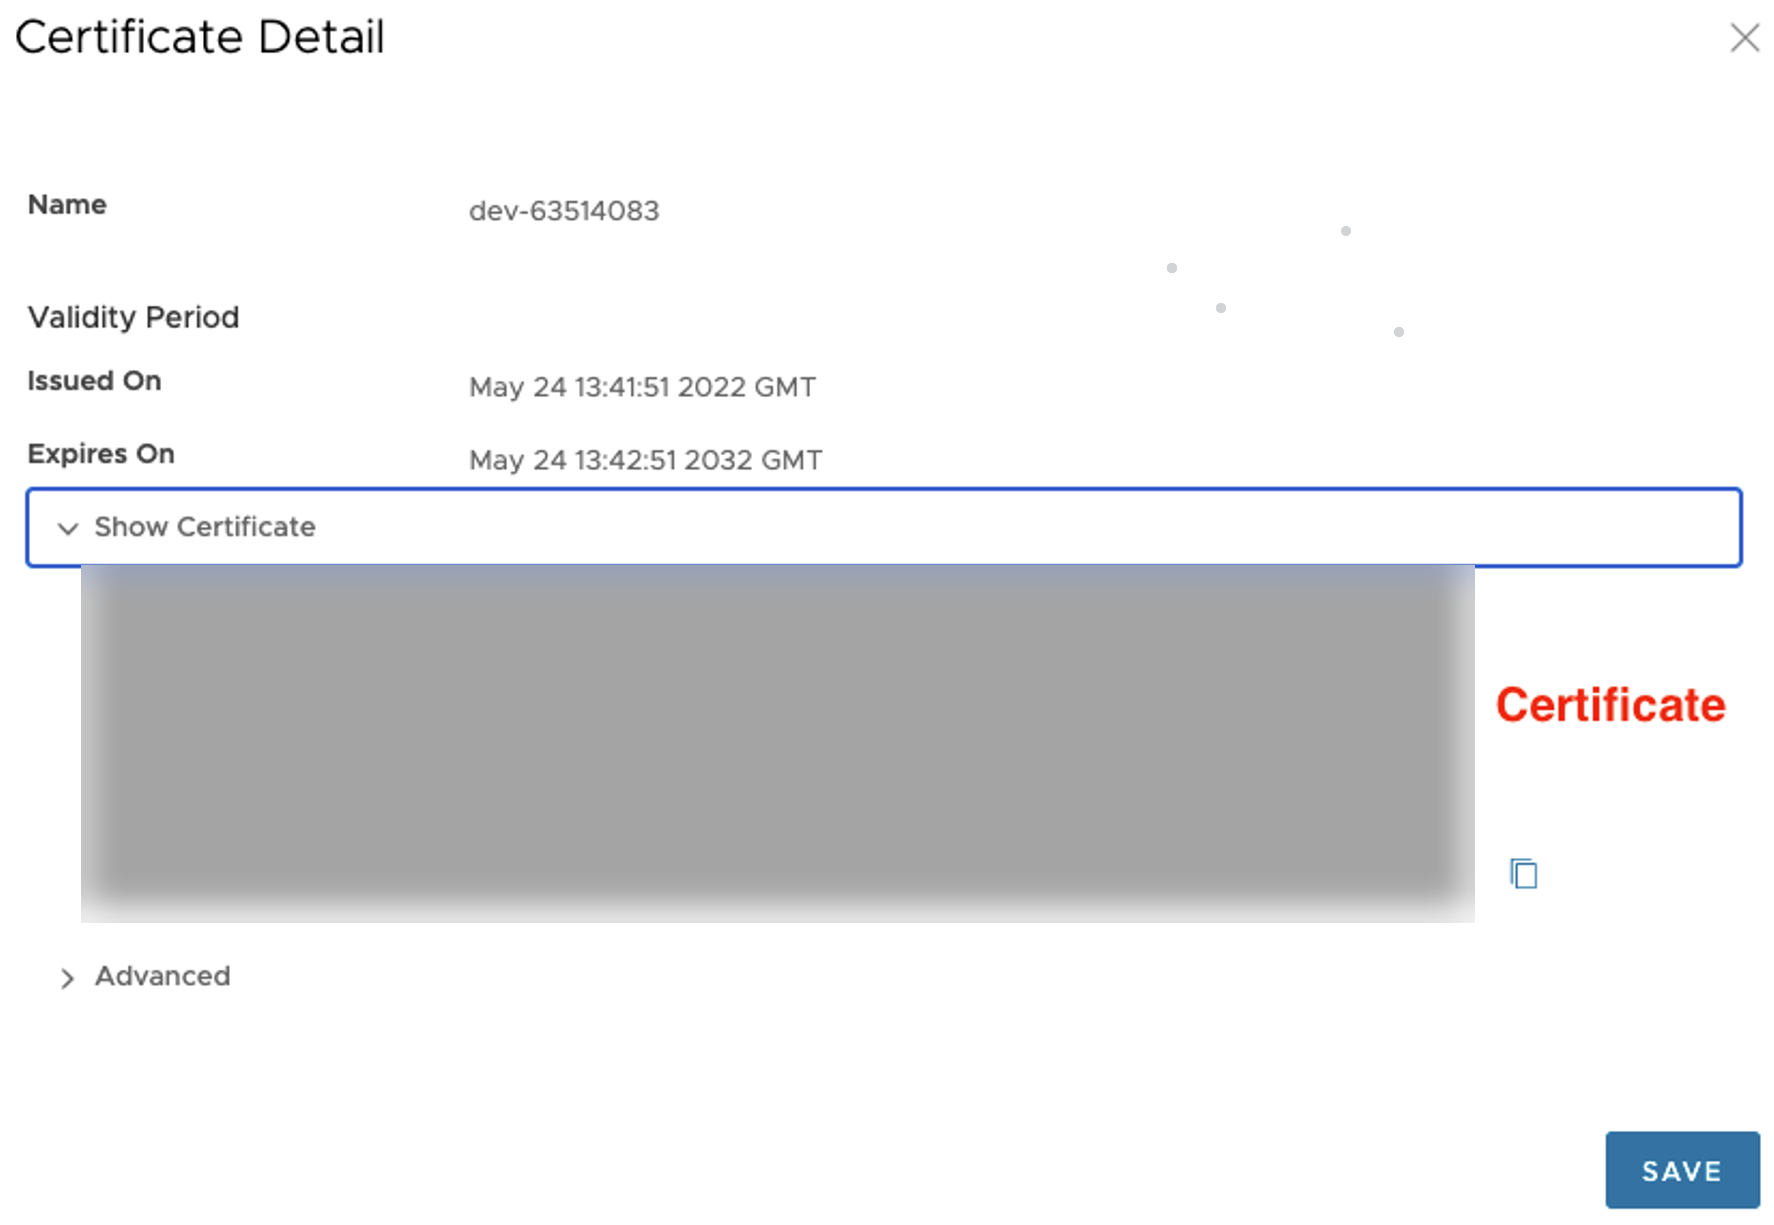
- Under the Show Certificate section, paste the Certificate information copied from the IdP and click Save.
- After configuring all the required IdP information, click Save Changes.