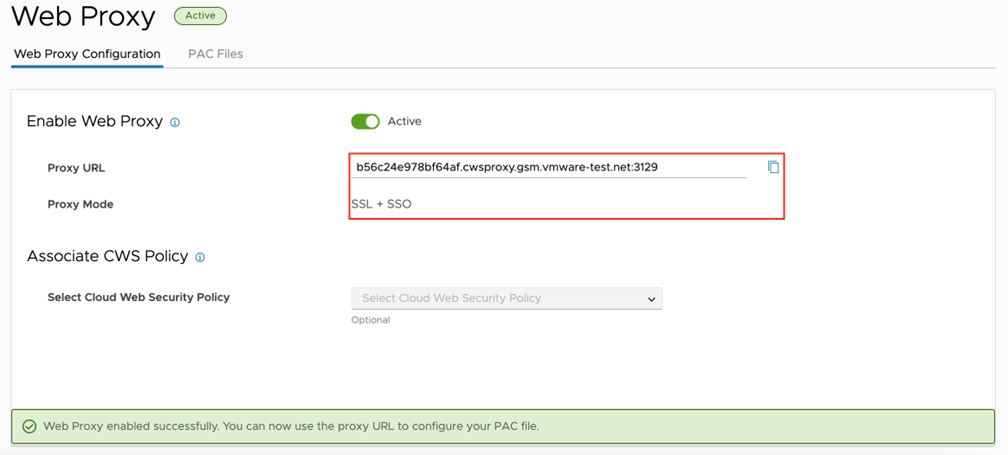
Users can activate the Web Proxy service, associate a Cloud Web Security policy, and generate a PAC file from the Web Proxy configuration screen.
Note: Before activating Web Proxy service, ensure Single Sign On (SSO) is activated.
To activate the Web Proxy service, perform the following the service:
- Navigate to . The Web Proxy screen appears.

- In the Web Proxy Configuration tab, turn on the Enable Web Proxy toggle button.
- The Web Proxy service changes from the Inactive state to the Active state.
- After the service is activated, the Proxy URL and Proxy Mode information are auto populated and appears in the Web Proxy Configuration screen:

- Proxy URL - This is an autogenerated URL that compromises a unique user identifier (UUID) followed by cwsproxy.gsm.vmware.com and the port number 3129. For manual proxy configuration on a host, this will be the URL and port users will need to supply to the system.
- Proxy Mode - Only one proxy mode is available for Cloud Web Security. This mode requires the use of SSL and SSO to connect to the proxy service.
The Web Proxy is activated, and users can use the Proxy URL to configure Proxy Auto-Config (PAC) file. For more information, see Proxy Auto-Config Files.
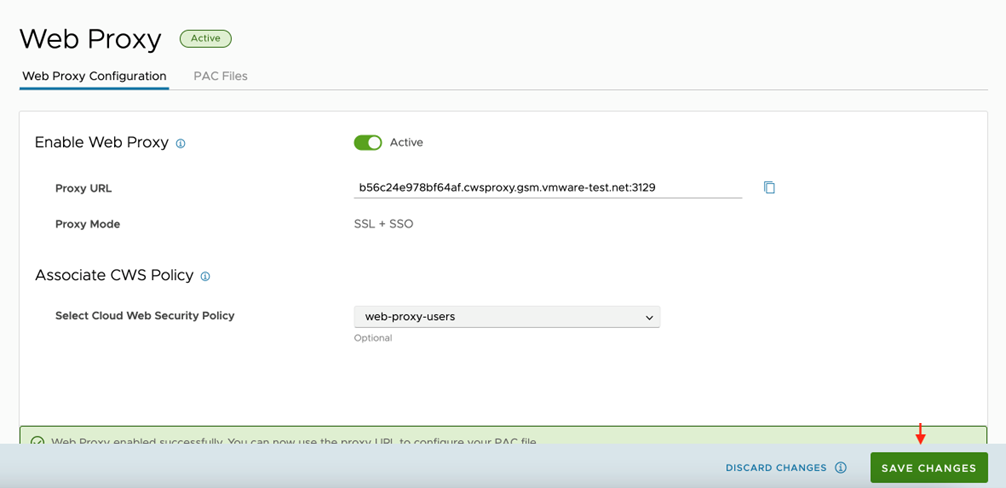
- Upon activation of the Web Proxy service no security policy is set. Although the Web Proxy is useable in this state it does not offer any security. To associate a Cloud Web Security policy for Web Proxy users, select a policy from the Select Cloud Web Security Policy drop-down menu.

- Click Save Changes.