Adding Elastic File System to your VMware Virtual Machines
VMware Cloud on AWS comes with 16TB NVMe (raw) per host, which equates to 64TB raw when you create a 4-node cluster. Granted, vSAN configurations will consume part of that so the usable space is roughly 10TB/host. That being said, there may be specific criteria of application data that you want running on your NVMe drives, and other data that is classified as ‘lower tier’. If that is the case, one of the options you have with VMware Cloud on AWS is to leverage Amazon Elastic File System (EFS) for additional data. You can think of EFS as a very simple and easy to use Network File Share. A single EFS can be added to multiple VMs if you choose to do so, or to single VMs.
Prerequisites:
- Configure Compute Gateway Firewall Rules for Elastic Network Interface (ENI) traffic
- Configure AWS Security Groups to allow traffic to/from VMware Cloud on AWS (VMC)
- Amazon supports this for Linux operating systems only at this time.
Compute Gateway Firewall Rules
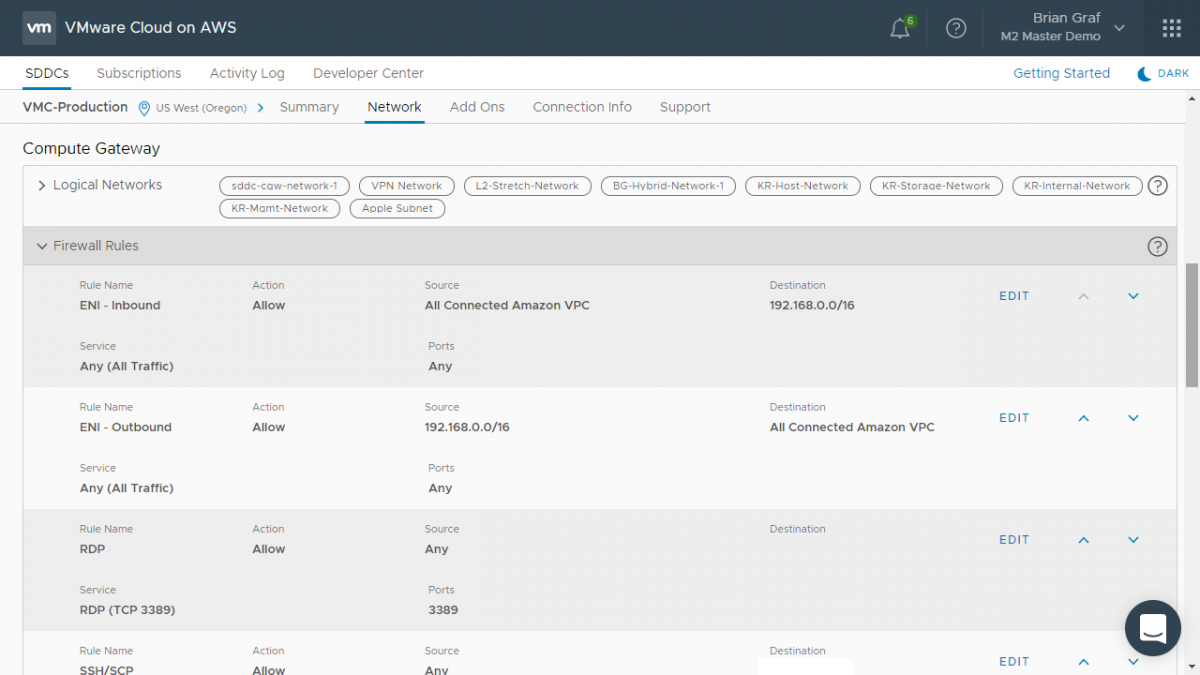
As discussed in previous sections, you will need to allow traffic between your AWS services and your VMware Cloud on AWS SDDC. To do that you'll need to enable two rules in the Compute Gateway firewall. For the purposes of this post, we are allowing all traffic types to flow in and out of my SDDC. If you are doing the same, you will need to mimic the first two firewall rules, adding the ‘All Connected Amazon VPC’ as this covers the ENI traffic.
AWS Security Groups
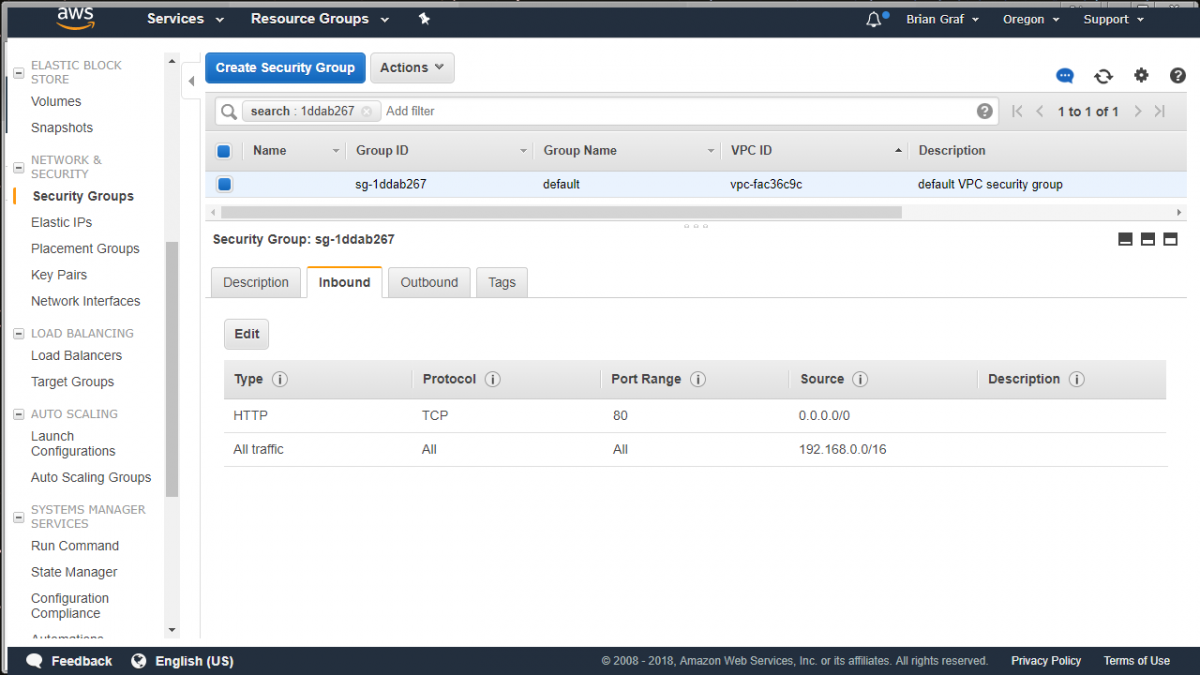
Similar to the SDDC firewall rules, you will need to enable traffic from the security group that will be associated with the Elastic File System. In this example, we kept this rule simple as well and have it set to all traffic types from VMware Cloud on AWS.
Create the Elastic File System
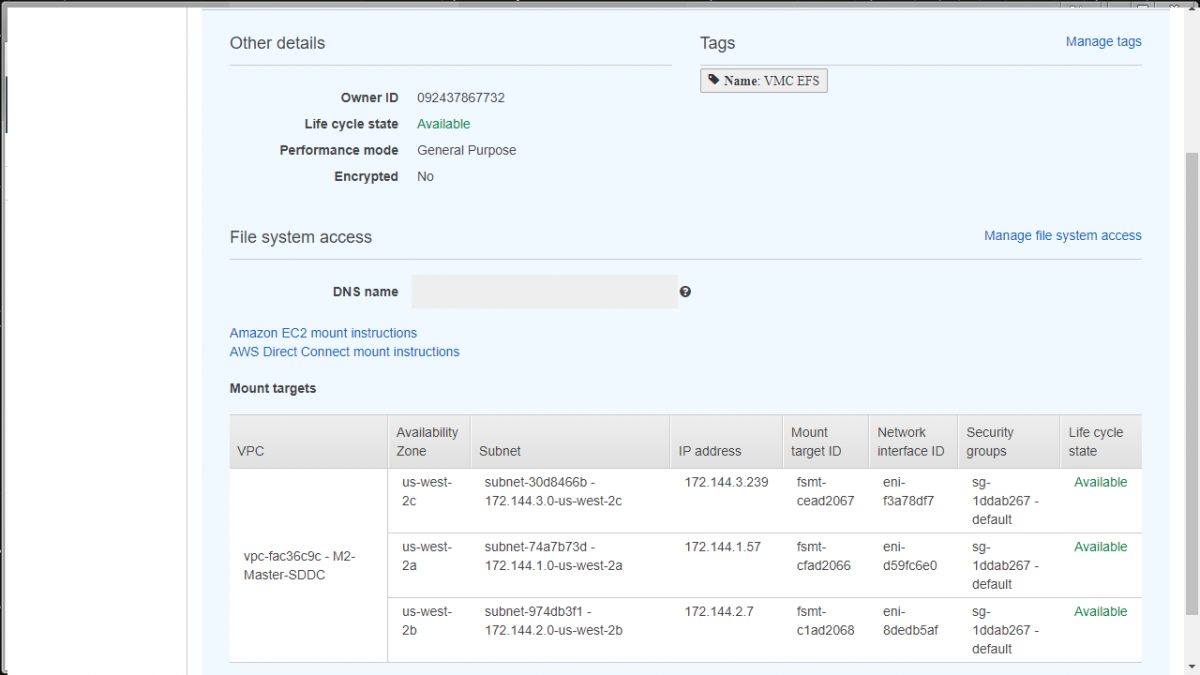
Now that the prerequisites are out of the way, you can go create your EFS that will be attached to your VMs. Once you've created an EFS, you will take the IP address of the mount in the same Availability Zone as your SDDC and use that. The reason you don’t use the DNS name is because your VMs are not pointing to the same DNS servers as your EC2 instances are, hence, trying to mount from the DNS name would fail. Using this internal IP address will also ensure that the traffic goes across the ENI rather than potentially across the Internet Gateway.
From within the virtual machine, run the command to mount your new EFS. This code can be found on the EFS page of AWS by clicking on the ‘Amazon EC2 mount instructions’ link. The code, for simplicity, is:
‘sudo mount -t nfs4 -o nfsvers=4.1,rsize=1048576,wsize=1048576,hard,timeo=600,retrans=2 <<IP_ADDRESS_OF_MOUNT>>:/ efs’
As you can see, you are using an internal IP address from AWS (172.144.1.57) within your VMware Cloud on AWS SDDC Ubuntu VM, which is then routed over the Elastic Network Interface.
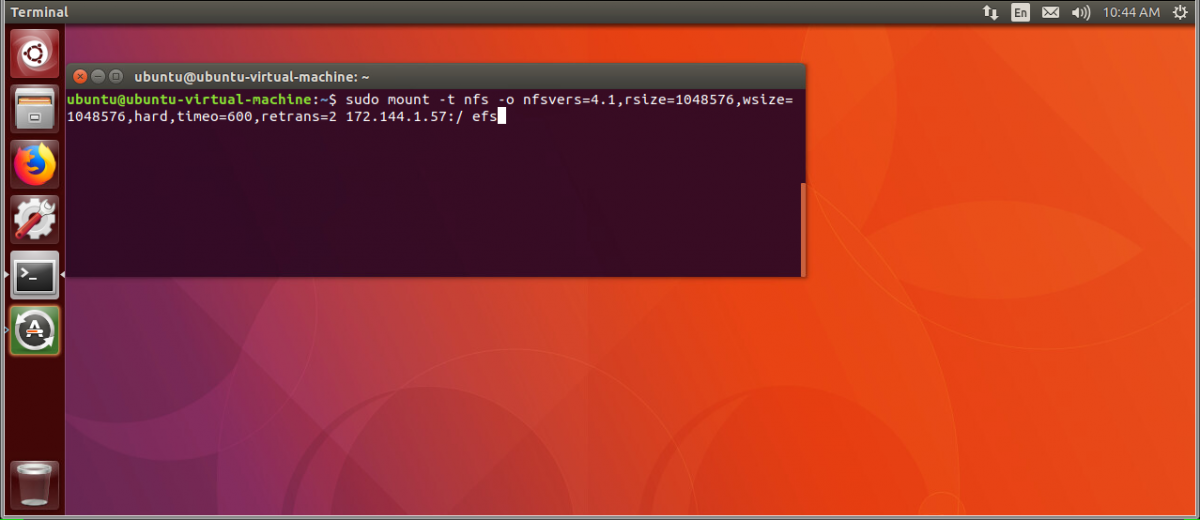
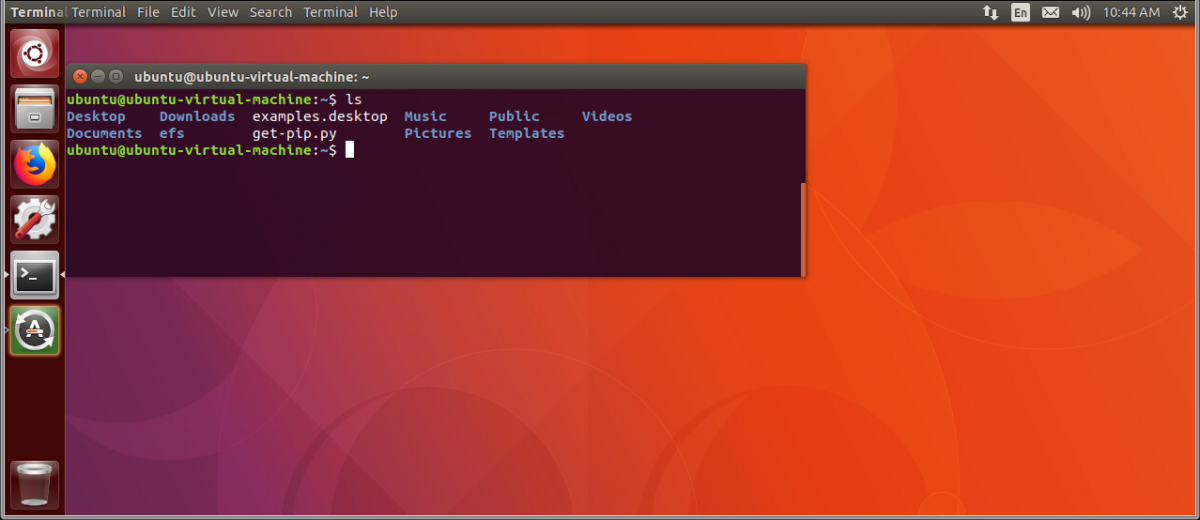
From that simple command, you now have the Elastic File System mounted to your Virtual Machine and can give this as much capacity as you require.
Conclusion
The two key takeaways here are:
A) You don’t need to use your Tier 1 vSAN storage for all of your VM data, especially items that you would not normally classify as Tier 1.
B) It is extremely simple to leverage Elastic File Systems from within your VMware SDDC.