


Create a virtual service with the Unified Access Gateway server's VIP. The client devices connect to this VIP.
Procedure
- In the New Virtual Service window, configure the virtual service.
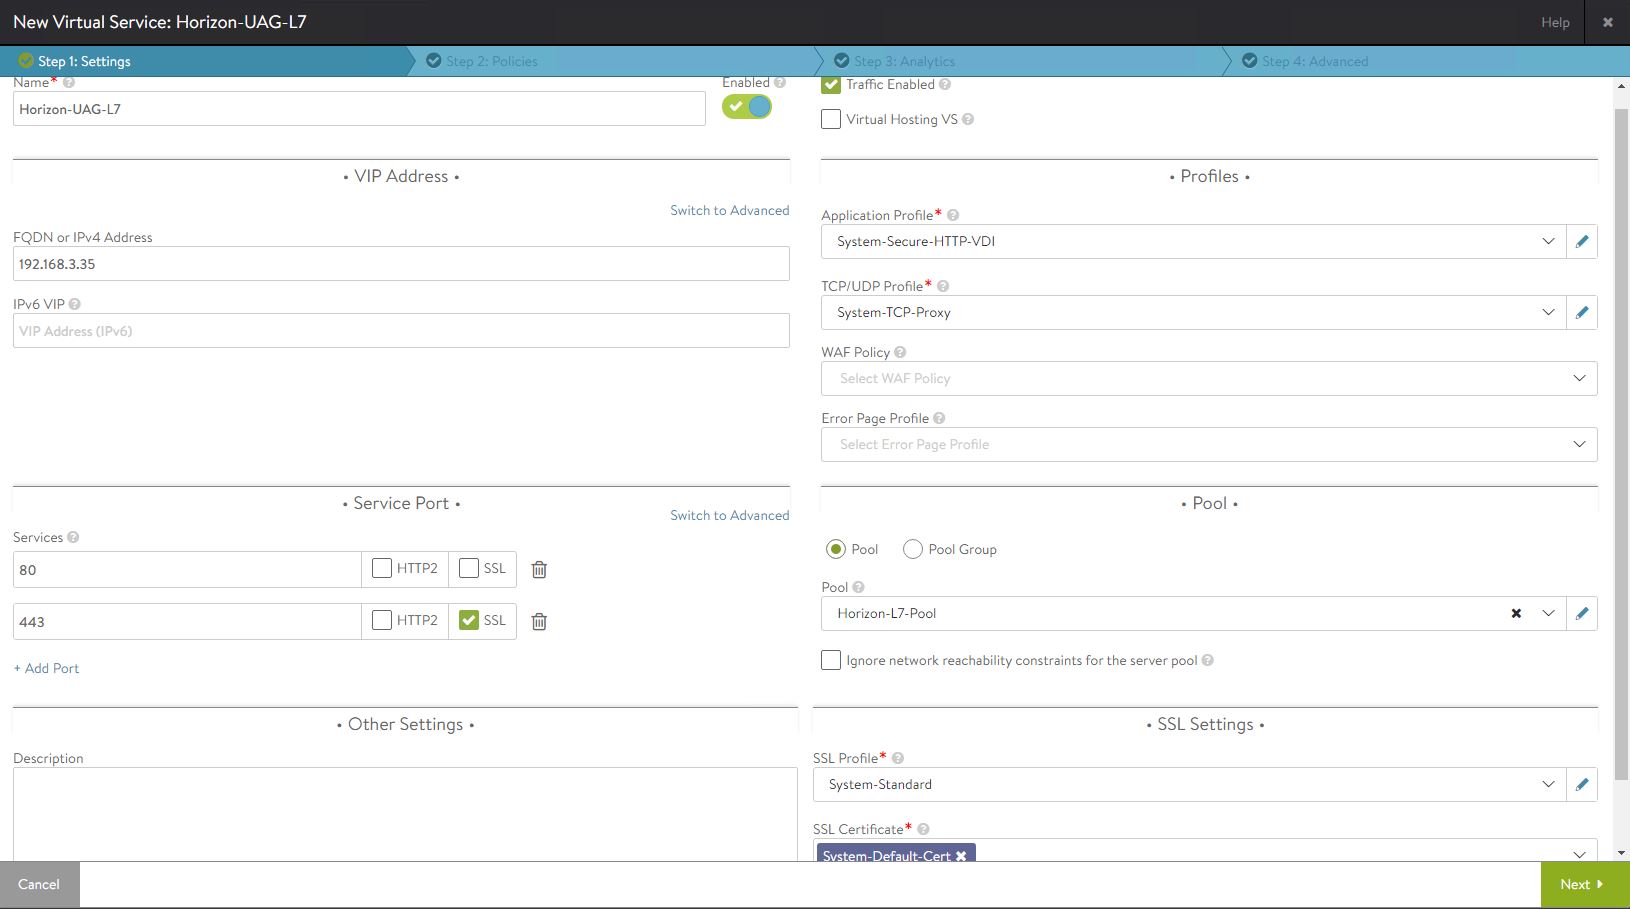
- Name: Enter the virtual service name.
- FQDN or IPv4 Address: Enter the load balancer virtual IP address.
- Services: Enter the port number as
443. - SSL: Select the check box for the port number
443to enable SSL. - Application Profile: Select
System-Secure-HTTP-VDI. - Select the Pool that you previously created.
- SSL Profile: Select
System-Standard. - Select the SSL certificate that you previously installed.
