To deploy Crawler VM on Edge Compute Stack, follow these steps:
Step 1: Download Crawler Image and Authentication Token
Log in to the Edge Intelligence portal at https://my-domain-name.nyansa.com.
From the Main Menu select 'Settings'.
Under 'Admin Setting' select 'Feeds'.
Under 'Feeds', select 'Crawlers' and click 'Add Crawler' button.
From the 'Add a Crawler' pop-up window, select 'Image crawler on your hardware' option.
Figure 1. Image Crawler on ESXI 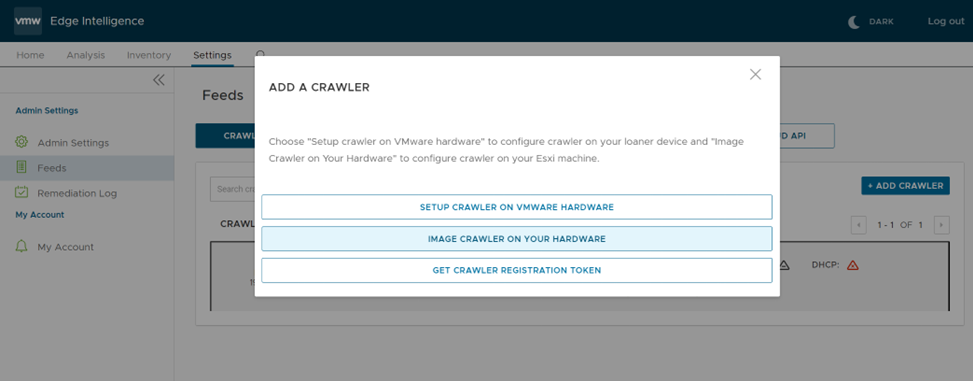
From the 'Installing a Virtual Crawler' pop-up window click on 'Virtual Image Link' to download crawler VM.
Figure 2. Download Virtual Crawler Image 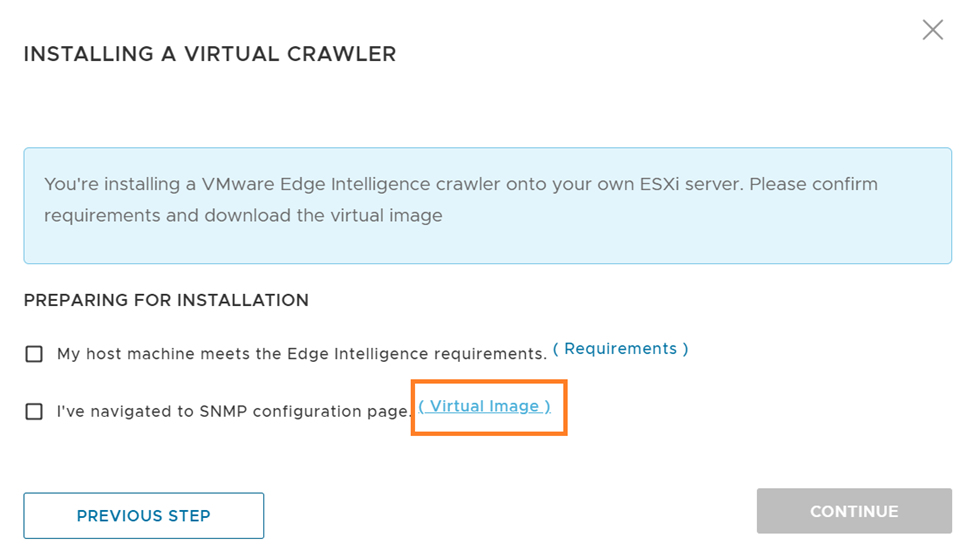
Once the Crawler image is downloaded, click the 'Previous Step' button to go back to 'Add A Crawler' pop-up menu.
From the 'Add A Crawler' pop-up window, click on 'Get Crawler Registration Token' to generate an authentication token that would be used to register crawler with backend service.
Figure 3. Get Crawler Token 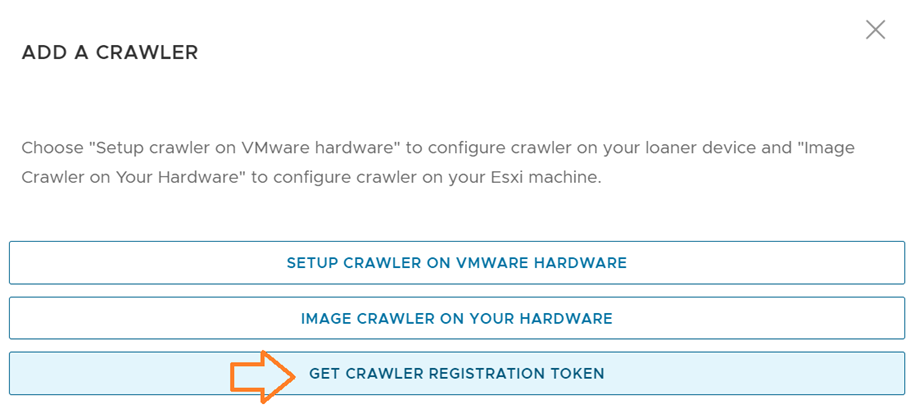
From the 'Register A Crawler With Company' pop-up window, click on 'Click to generate a token' to have the token generated. Save the token for future use during crawler activation procedure.
Figure 4. Generate New Activation Token 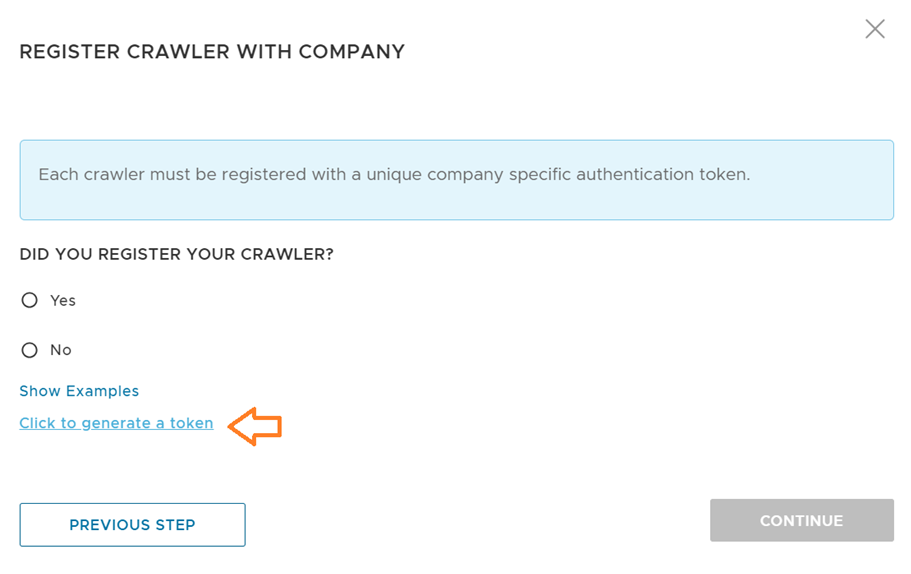
Step 2: Deploy Crawler OVA
To deploy Virtual Crawler OVA Template (nyansa-virtual-appliance-X.X.X.ova) in vCenter, please follow standard VMware procedures for the deployment of the OVA Template described in the link below.
VMware vSphere - Deploy an OVF or OVA Template
OVA template default settings should be used for CPU, Memory and Storage Reservations.
After completing the installation and before the initial power-on of the Virtual Crawler VM, it is necessary to add two (2) network adapters to the VM.
To add network adapters to the VM, follow these steps:
Right click on the Virtual Crawler VM in the Inventory and select 'Edit Settings'.
Figure 5. Edit Crawler VM Settings 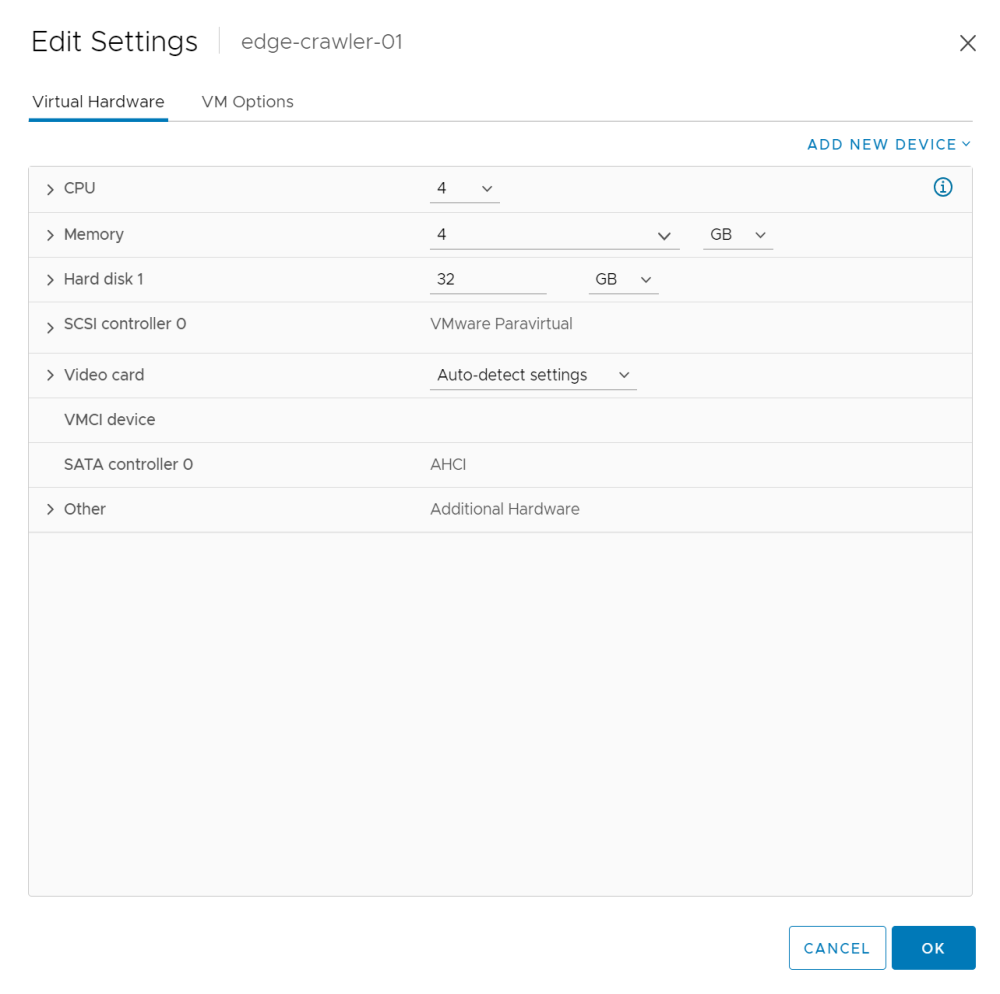
Click on 'Add New Device' at the top right corner of the 'Edit Settings' window and select 'Network Adapter'. Perform this step twice to add (2) two network interfaces with adapter type 'VMXNET 3' by default.
Figure 6. Add Network Adapter 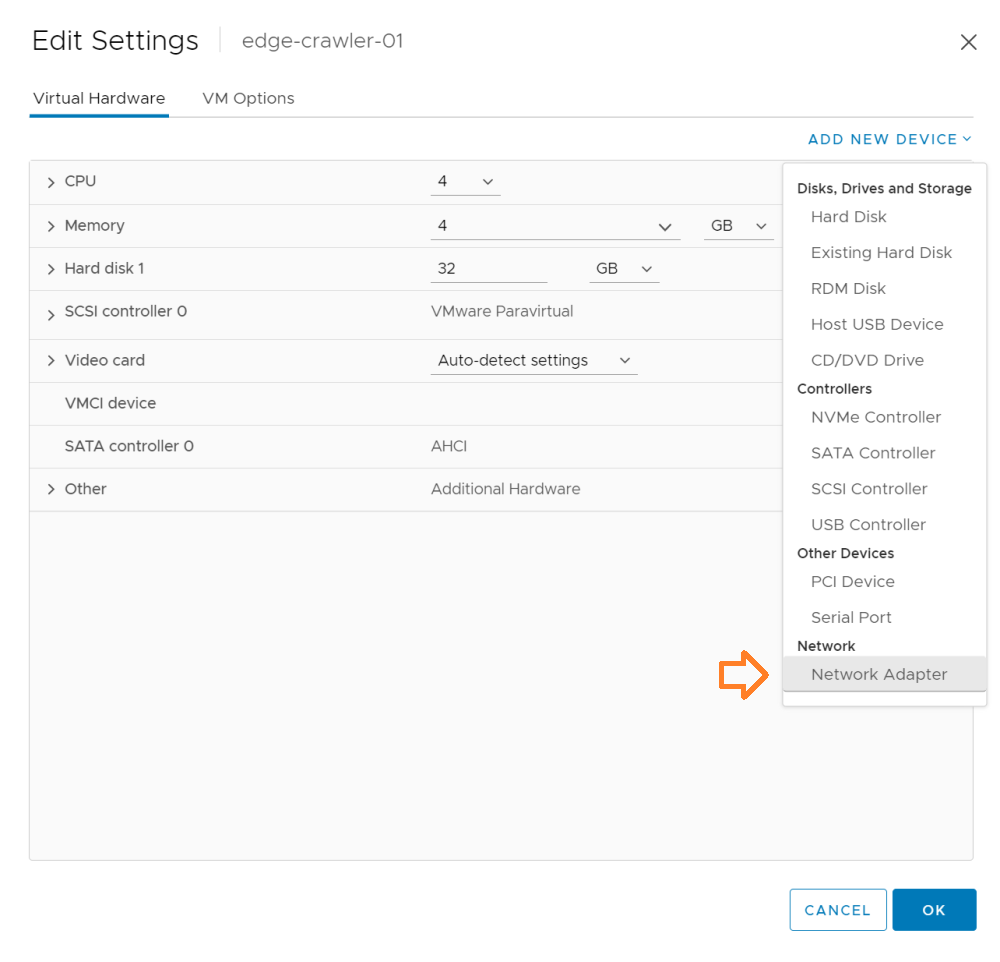
Assign first network interface to the Management DVS Portgroup described in the Requirements-> DVS Portgroups section. To do that:
Expand drop-down box next to the first network adapter and select 'Browse'.
Figure 7. Browse Portgoups 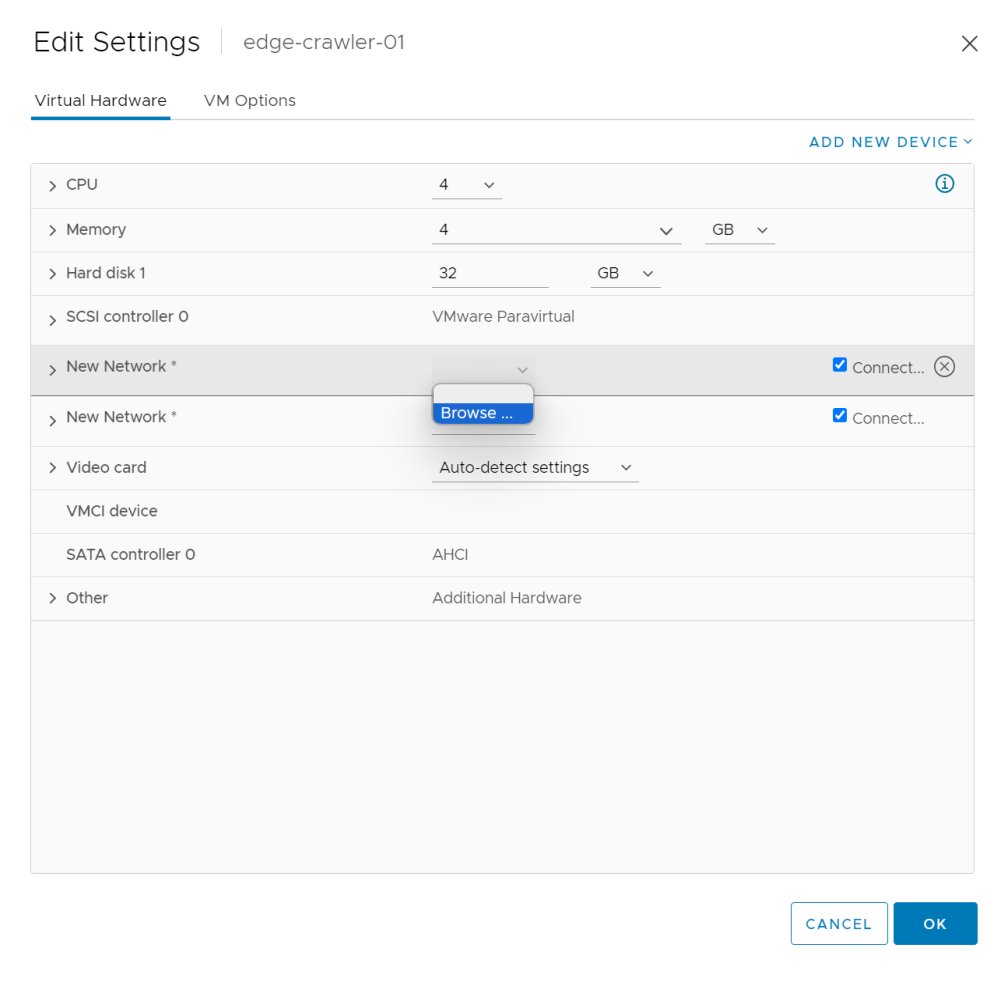
From the 'Select Network' window, find Management network portgroup, select it and click OK.
Figure 8. eth0 Management Portgroup 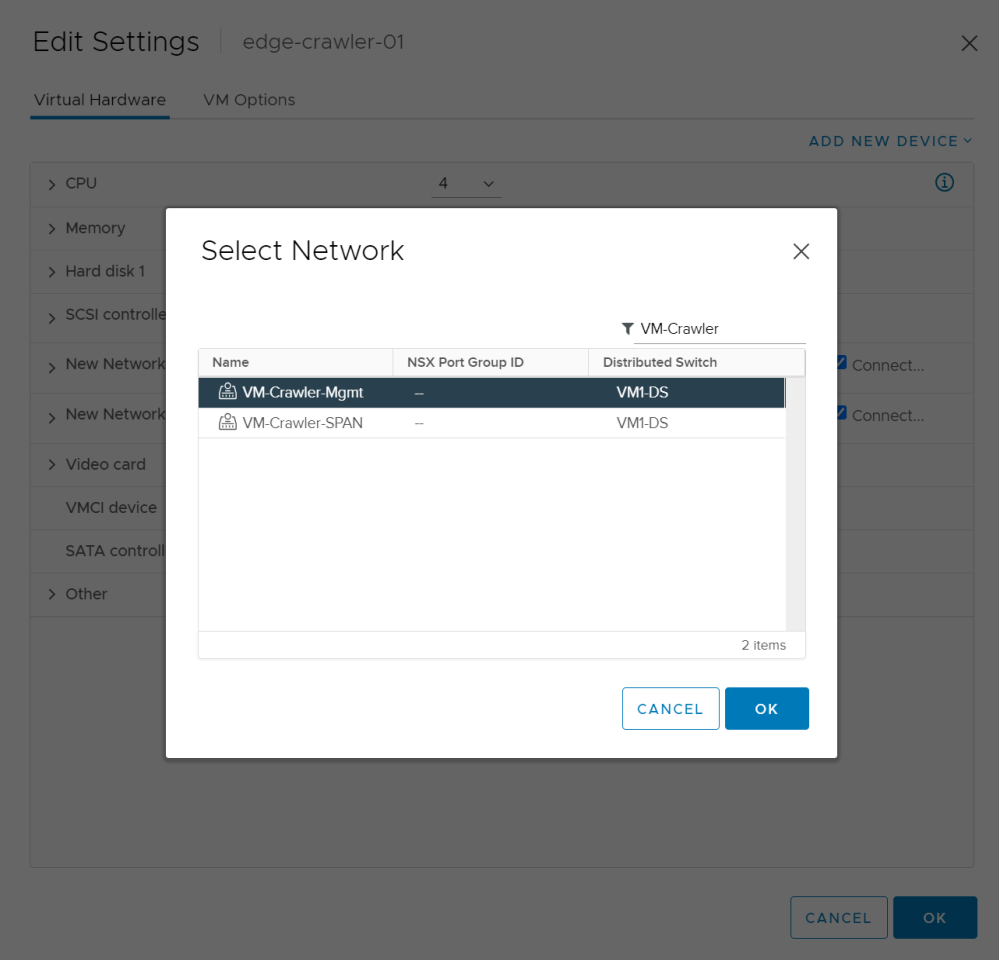
Assign second network interface to the SPAN DVS Portgroup described in the Requirements-> DVS Portgroups section. To do that:
Expand drop-down box next to the first network adapter and select 'Browse'.
Figure 9. Browse Portgroups 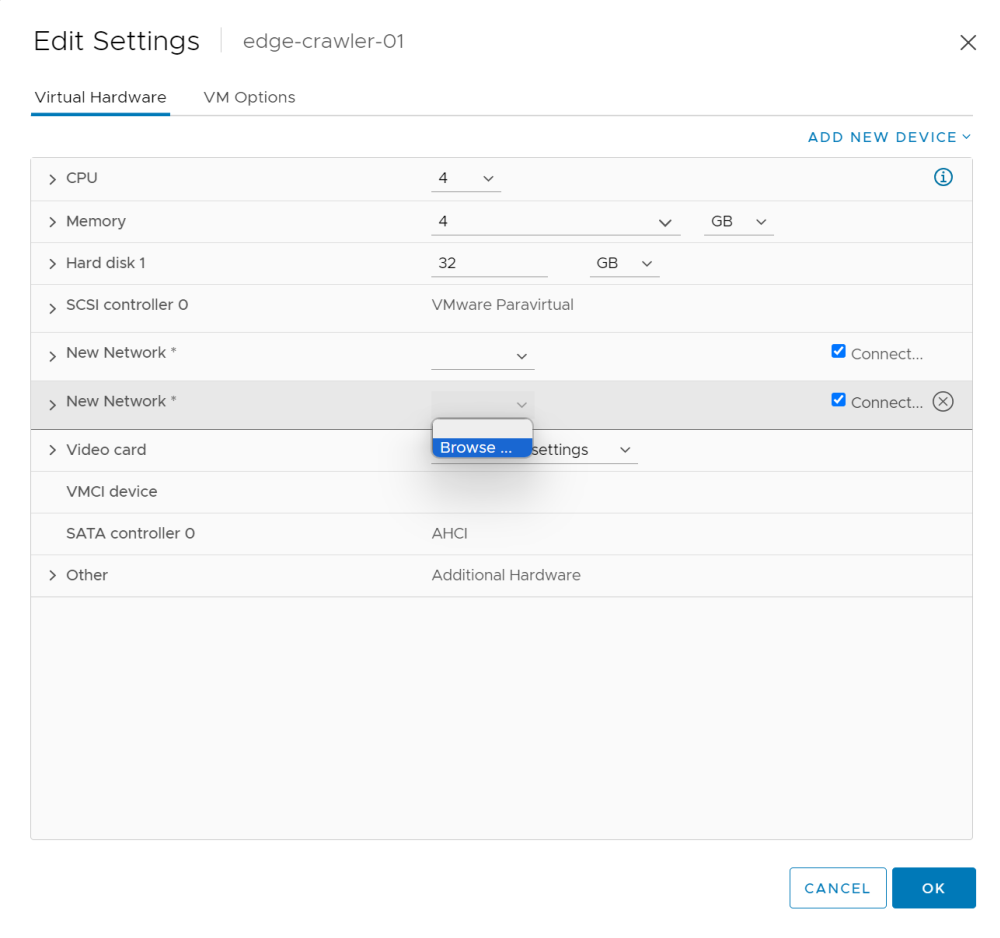
From the 'Select Network' window, find Management network portgroup, select it and click OK.
Figure 10. eth1 SPAN Portgroup 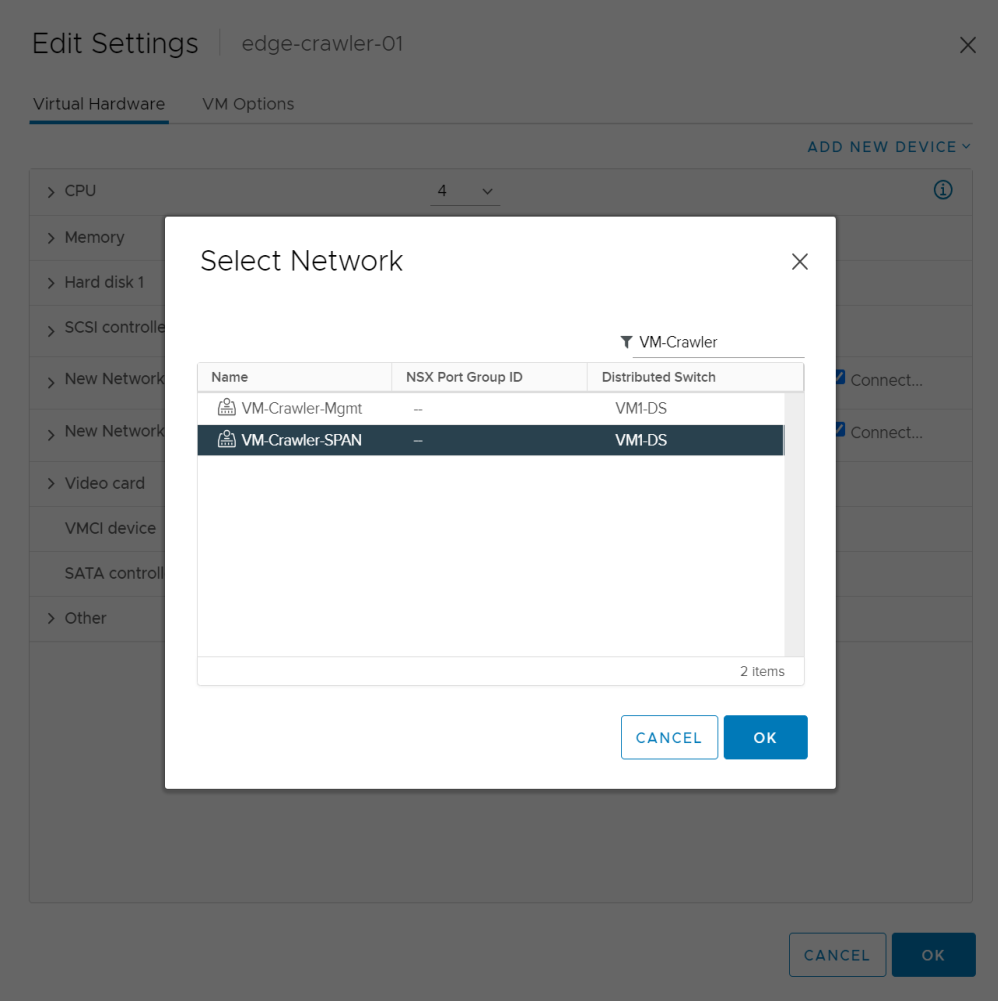
Click OK to save.
Network Adapter configuration is now complete.
Step 3: Crawler Configuration
Configuration of the Crawler is conducted through the VM's console session. This process involves two required steps:
Configure static IP and DNS on the management interface (eth0).
Activate Crawler with Backend using Token generated in the previous step.
To configure management interface (eth0) static IP and DNS:
From vCenter Web Client, select Crawler VM and lunch Remote or Web console.
Login using the default username 'nyansa' and password 'logmein'.
Figure 11. Login to Crawler's shell 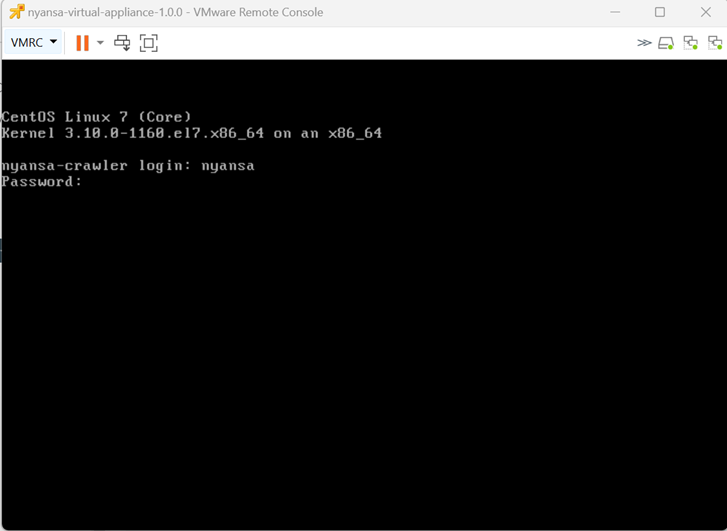
Once inside the shell, type 'sudo nmtui' to start the network configuration (NetworkManager TUI) utility.
Figure 12. Start NMTUI utility 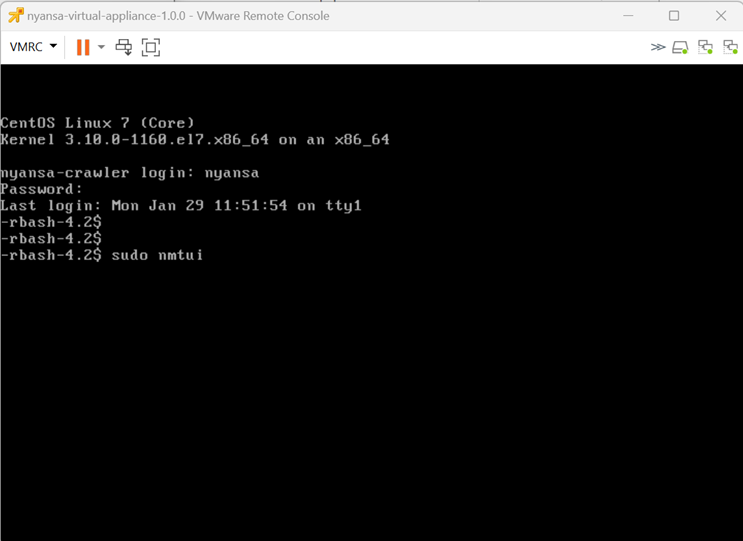
From the NetworkManager TUI screen, select 'Edit a connection' to configure network parameters for the management interface eth0.
Figure 13. Edit network connection 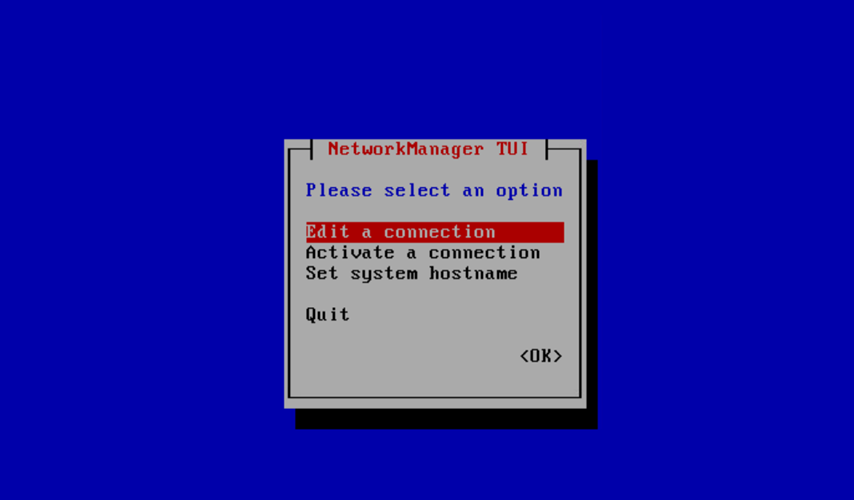
From the list of interfaces select eth0 and press Enter key.
Figure 14. Edit management interface eth0 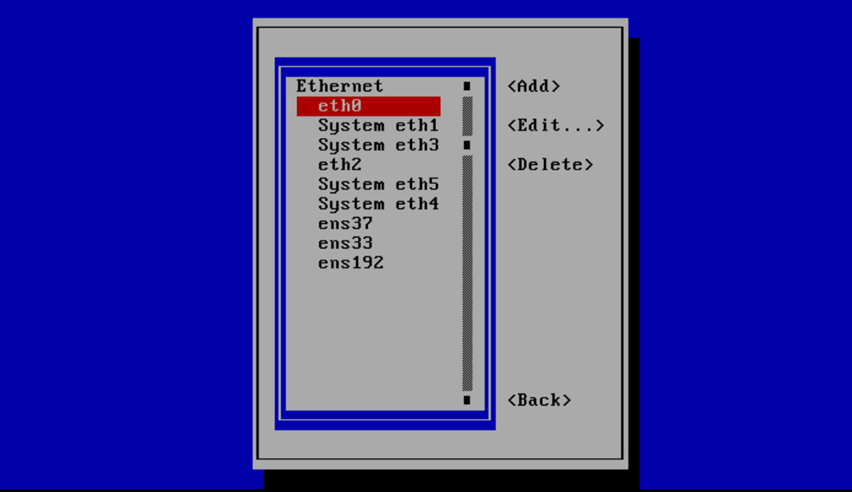
Using the Tab key, navigate to the row 'IPv4 Configuration' and change it to <Manual>. Configure crawler’s Static IP address, Netmask, Default Gateway, and DNS accordingly and then scroll down and click <OK>.
Figure 15. Configure network parameters 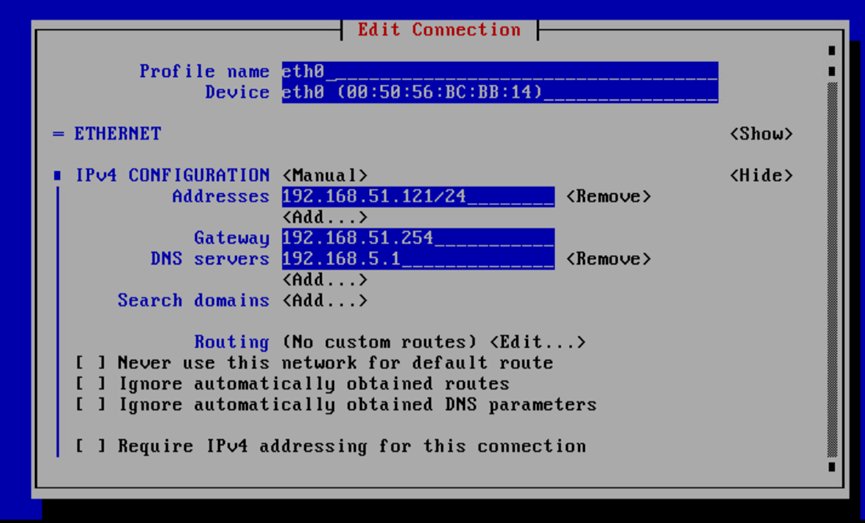
Exit Network Manager TUI and restart network services with the following command in the shell.
sudo restart_network.shFigure 16. Restart Network 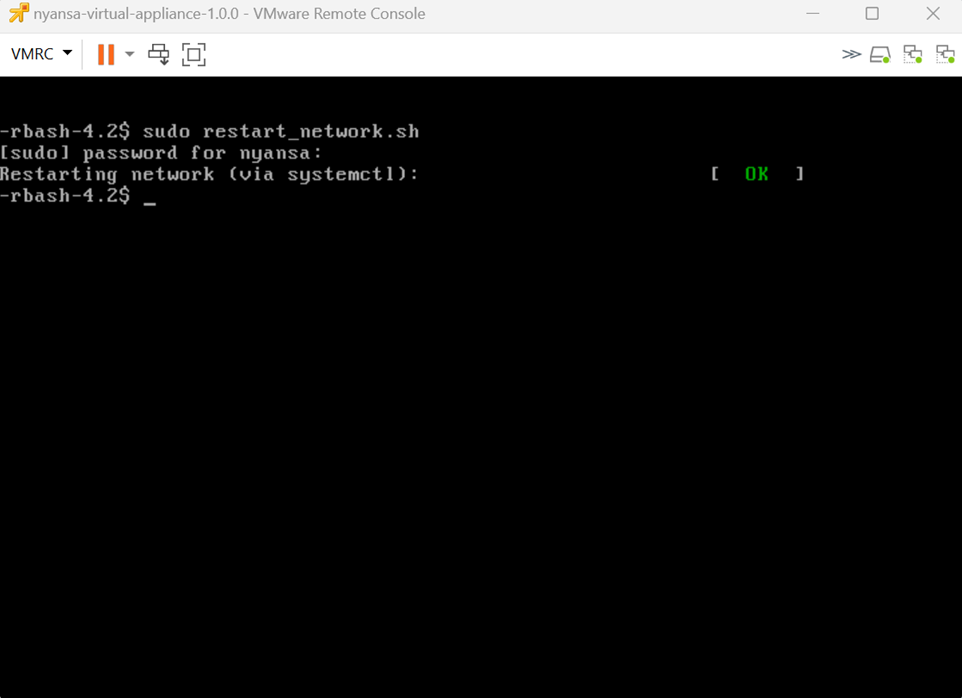
Step 4: Activate Crawler
To activate Virtual Crawler with Backend using token, run the following command from the shell:
sudo register_crawler.py <activation key>where activation key is the token generated during 'Download Crawler Image and Authentication Token' step 6, as mentioned earlier in the document.Figure 17. Activate Crawler with Backend 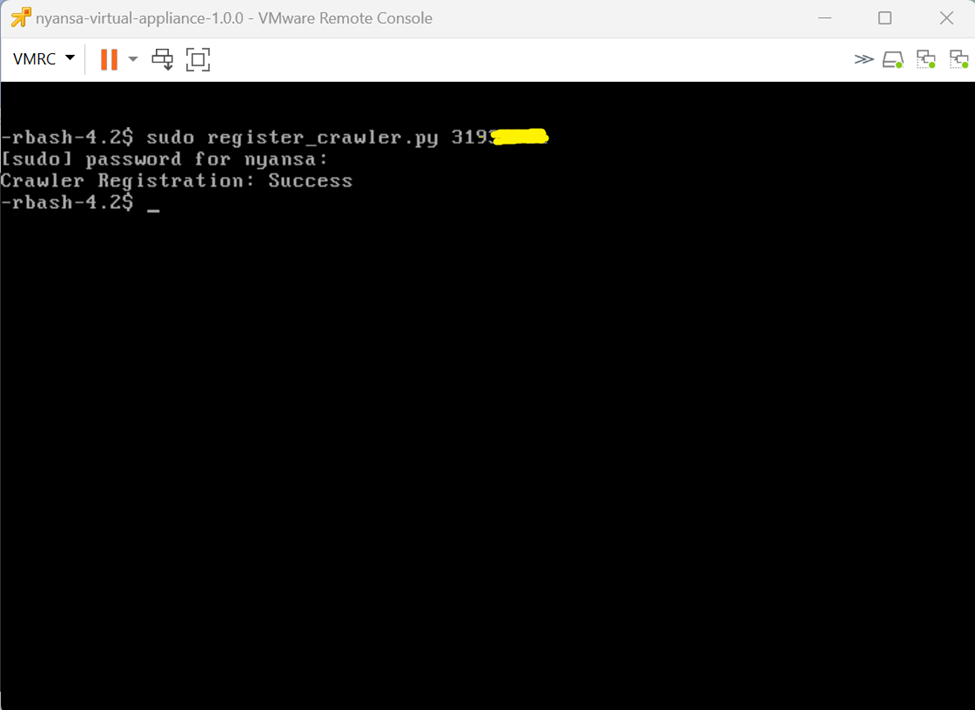
To confirm the successful deployment of the crawler in the UI, log into the Edge Intelligence portal and navigate to 'Settings -> Feeds -> Crawlers'. Check if the new ‘UNNAMED NYANSA CENTOS7 CRAWLER’, configured with a static IP in the previous step, appears in the list.
Figure 18. Verify Crawler activation in GUI 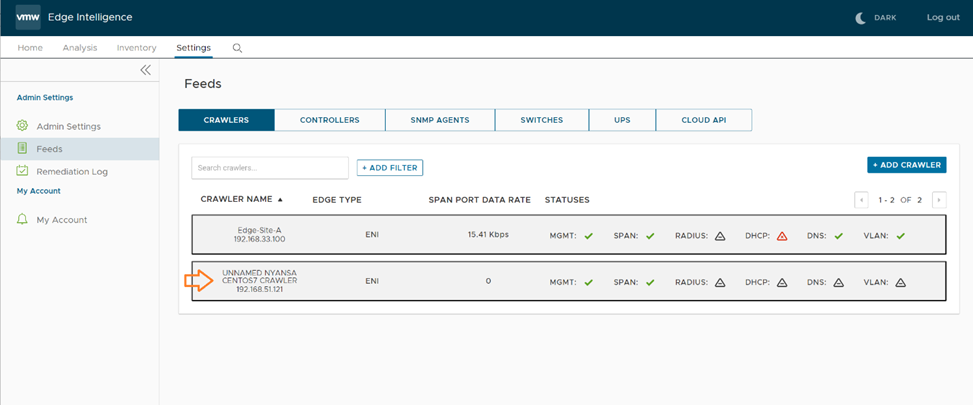
It takes approximately 5 min for the Virtual Crawler to become operational (Status OK) from the time of the initial registration (Status: INIT). To check, expand the crawler statistics and check the 'Status' state.
Rename the crawler to a meaningful name by clicking 'edit' button next to 'Name' in the expanded Details view.
Figure 19. Rename Crawler 