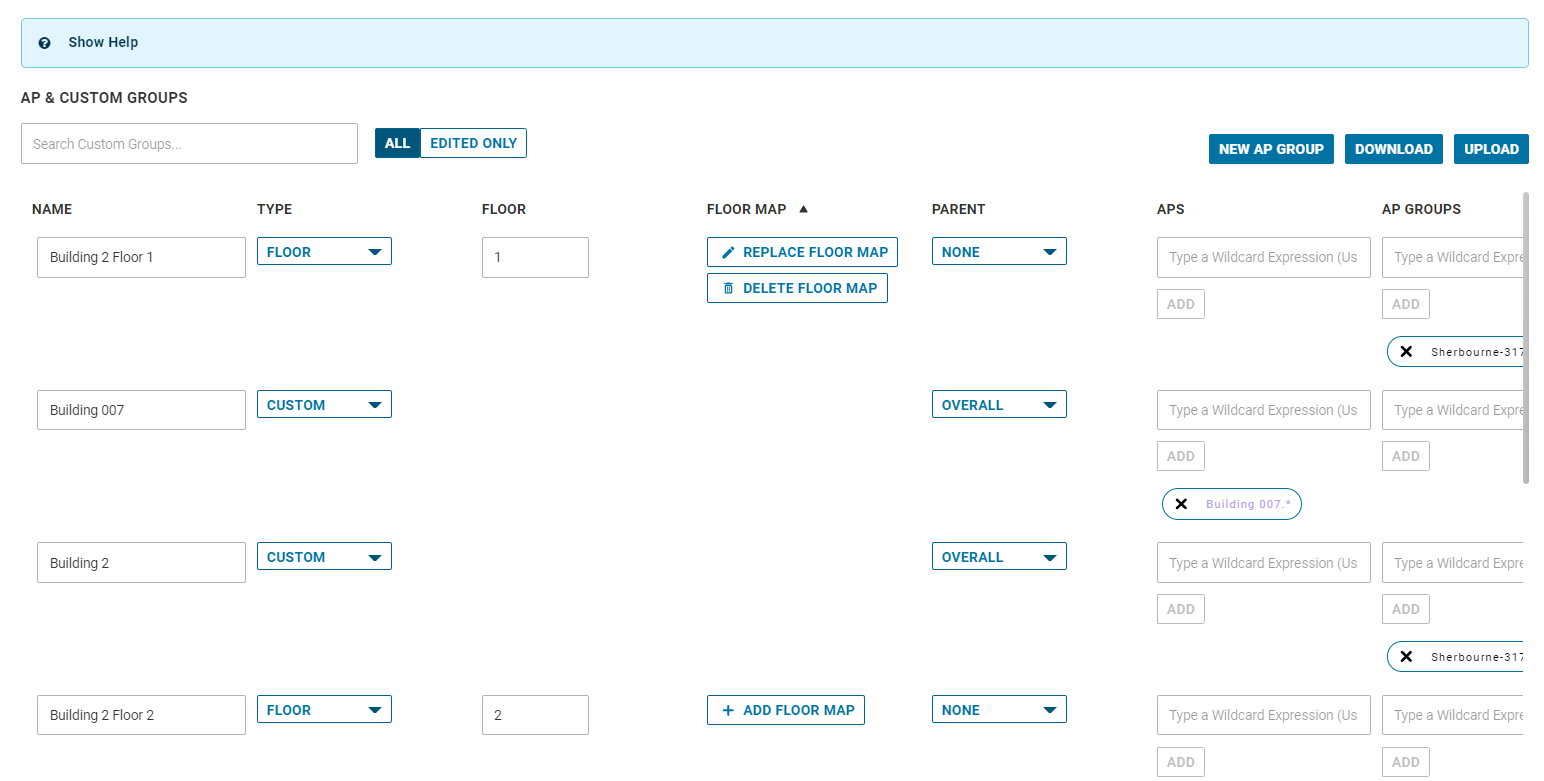
VMware Edge Network Intelligence supports bulk edit and upload of Custom AP groups. For bulk edit and upload of custom groups, perform the following steps.
Procedure
- Log into the VMware Edge Network Intelligence portal.
- Go to My Account > Admin Settings > AP & Custom Groups.
The AP & CUSTOM GROUPS page appears.
- Click EDIT TABLE to modify an existing custom group.
A table of all existing custom groups appears in the Edit mode.

- Click DOWNLOAD.
This will download the current list of custom groups and will save the downloaded content as a CSV file to your computer.
- Open the downloaded CSV file using a CSV editor (for example, Excel, Google sheets, etc.,) to update existing custom groups or create new custom groups.
When you do bulk editing using the CSV file, ensure the following guidelines are met:
- Main values should be comma separated
- Vertical line or Pipe operator “|” should be used to separate multiple APs or AP groups
- APs or AP groups are mandatory for the import to work
- You cannot remove custom groups using the CSV file. To remove custom groups, use the Delete icon on the Edit mode screen.
Note: For any new or modified entries, ensure that the last column labeled ' ignore' is left blank. If your edits are not working, then ensure that the ‘ ignore’ column is blank.
- Once editing is complete, save the CSV file or export the updated file in CSV format.
- In the AP & CUSTOM GROUPS settings page, click UPLOAD to upload the updated CSV file with new or updated custom groups.
- Before committing the changes, you can review the changes. To commit the changes, click SAVE.